90 degree V-twin engine

Home Model Engine Machinist Forum

Help Support Home Model Engine Machinist Forum:

This site may earn a commission from merchant affiliate links, including eBay, Amazon, and others.
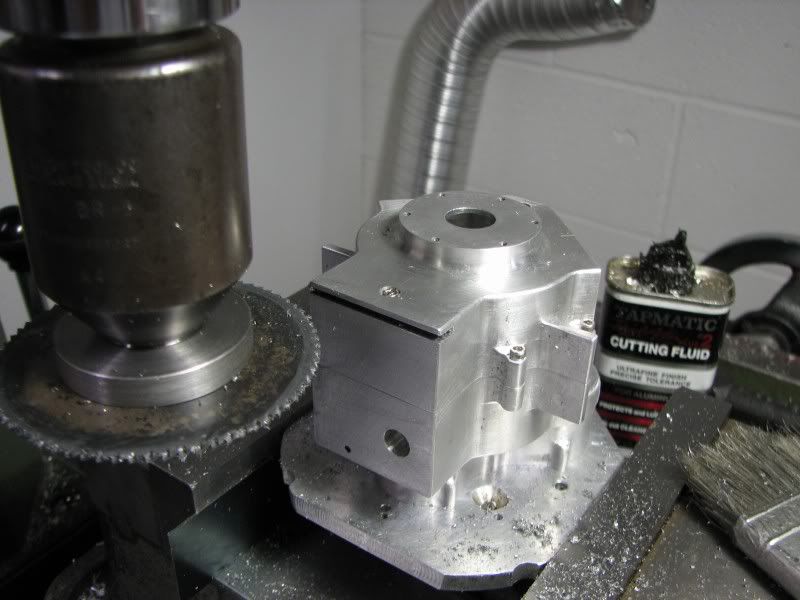
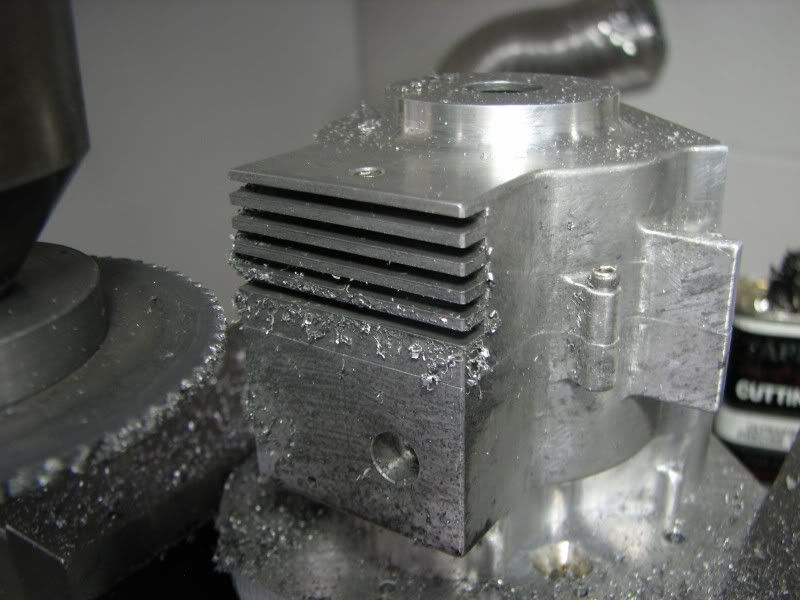
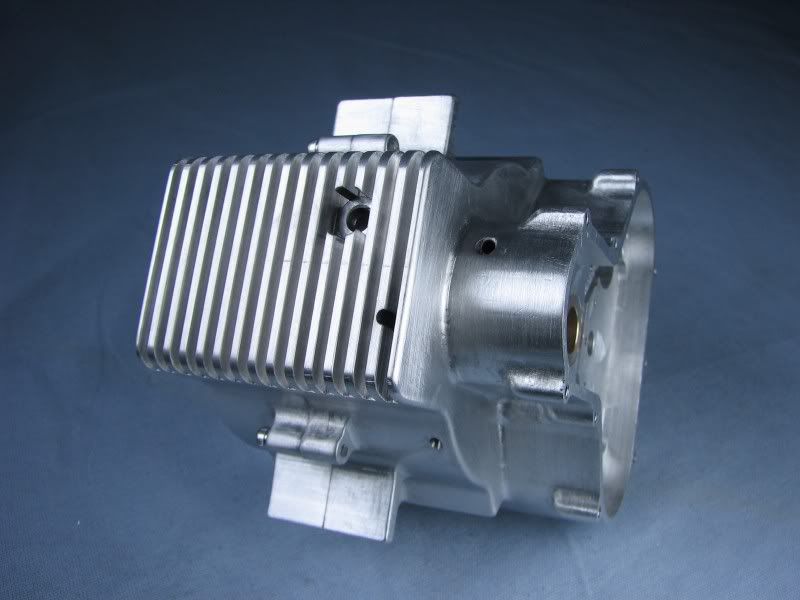
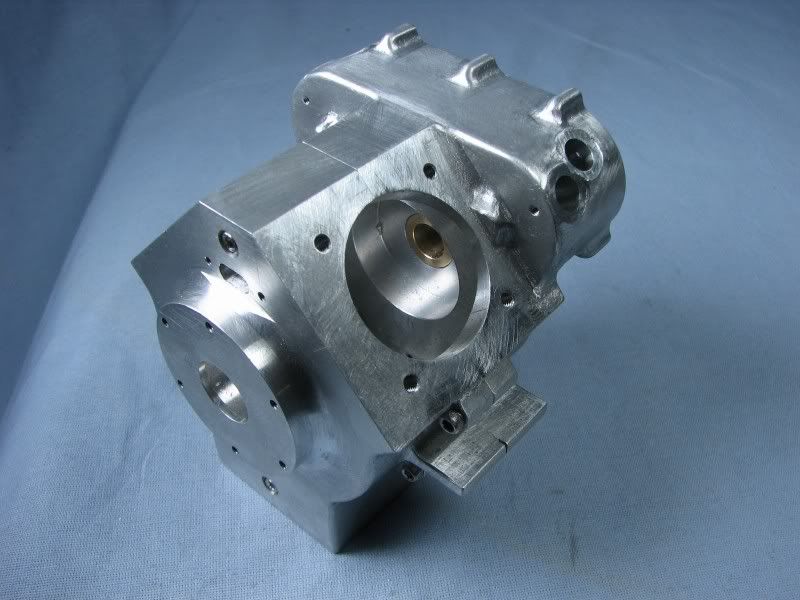
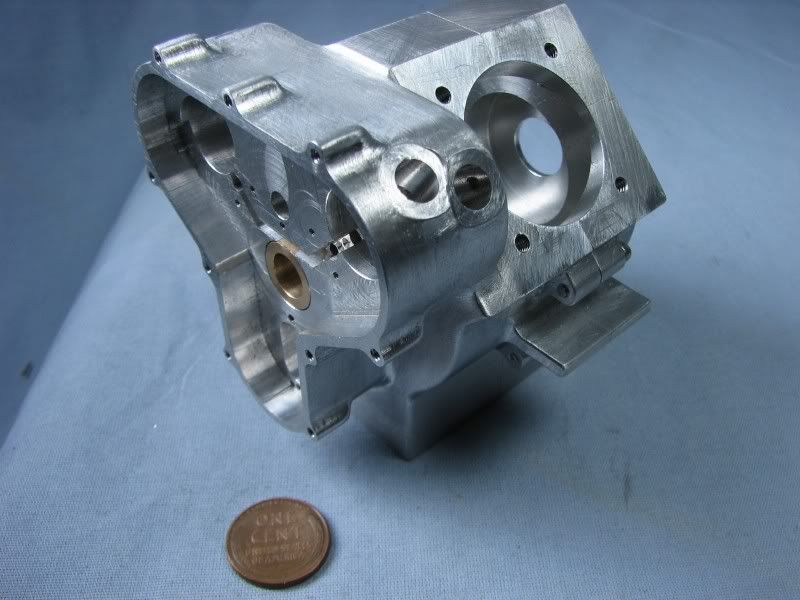
The last two pictures show the mounting holes tapped, everything cleaned up and one shot with a penny for comparison of size. Tomorrow the ribbing and the most time consuming part will be finished.
gbritnell
CX.jpg

CY.jpg
 
That's nothing short of amazing! Very, very nice work.

Chuck
 
George,
Man-O-Man what beautiful workmanship :bow: :bow: :bow:

Thanks for the show

Tony

Just noticed the penny.....that's worth a million :big:
 
Lovely work!

The engine looks small enough to be doable on Sherline equipment. What do you think?

M.
 
MatiR, I suppose it's possible with some creative setups but I don't think I'd want to tackle it. It's not so much the metal removal but being able to see around the piece when you're cutting into corners. People with small equipment say, "man I'd like to have something bigger like a mill/drill" and people with a mill/drill say " man I'd like to have a Bridgeport". I have done a lot of work over the years on small machines and the thing I find the most lacking is the rigidity and the special tooling required.
gbritnell
 
Very nice. :bow:

Lots of holes there, and I don't know what any of them are for. :eek: I guess all we become clear as we go along.
 
Gorgeous!....and a wheat penny too ;D

:bow: :bow: :bow: :bow: :bow:
 
George, it's simply a pleasure to watch this piece take form. The time you spent on what we don't see is still evident. Things like thinking through the numerous steps and setups before the cutter touches the work piece. You must be looking quite a ways ahead. There's a lesson in that.
Thanks.

Dean
 
George.. this is simply beautiful. No other words describe your efforts mate. Well done.

I particularly like the fact that you dont need to use the mill to do everything.... Ive seen a couple of jobs done on this site where I thought that a file would be simpler and less stressfull.

There is an old admirable skill to using a hand tool where suitable. I like it.

Good stuff!

Artie
 
Well gentlemen the crankcase is finished. I got some time this morning and cut the fins in the oil sump. I've used slitting saws in my career but I'm not a big fan of them. The best thing I've found is to run them quite slowly, sometimes a little lube depending on the material and keeping the chips blown out or brushed out. The first picture is the start of the fining, the second is about a third of the way through, and the last is with everything cleaned up, a little file work between the fins, the radius on the corners a touch of emery and posing for the portrait shot. I'll probably start on the outer covers next, one for the gear side and one with an 'O' ring groove for the off side. There's also a couple of small internal covers that I'll make while I'm at it. I have iron for the barrels so they'll get started after the covers.
gbritnell
CZ.jpg

DA.jpg

DB.jpg

 
I find myself lacking the vocabulary for the proper superlative....

How's this...

th_confused0052 :bow: :bow: :bow: :bow:


Dave
 
George,
Wow!
Dennis
 
Just goes to show,,, it doesn't have to be shiny to be a jaw dropper th_confused0052 woohoo1 th_confused0052

 
That hand finishing really gave it a nice look! Excellent!
 
I like the detail for the oil drain, along with everything else.

Kenny
 
steamer said:
I find myself lacking the vocabulary for the proper superlative....

How's this...

th_confused0052 :bow: :bow: :bow: :bow:


Dave


George,

Bloody Bewdy, Bonza machine, Ripper Rita, Очень Хорошо.

Best Regards
Bob
 
Bob and everyone else, your comments are well received. Bob what the heck is that last accolade on your list?
gbritnell
 
gbritnell said:
Bob and everyone else, your comments are well received. Bob what the heck is that last accolade on your list?
gbritnell

George,

Literally, very much good. ;D

Best Regards
Bob
 
With the crankcases finished it's time to move on to some of the covers. The first one will be the gear case cover. It will have a lot of drilling, counterboring, spotting, chopping, radiusing and hand work similar to the crankcases. The first picture is the block of aluminum. It was squared up and layed out. I use an edge finder in the mill but I like to have some scribe marks just for future reference. The next step was to center drill all the holes. After center drilling the appropriate machining was applied. The cam holes, the oil pump shaft hole and the idler gear hole will all have bronze bushings so they were drilled and jig milled to the proper depth. The mounting holes were drilled for a 2-56 tap to mount to the fixture plate. When everything is finished they will be opened up to .086 for the screw. The last operation on this side was to mill the slots for the oil feed. The oil that gets splashed around inside the case from the gears will run down into the slots and the bushings will have a drilled hole to supply oil to the shafts. I used a .062 end mill and took .04 cuts till I got to depth, .125. I then moved left and right .01 to open up the slots a little. My Enco mill will only spin at 1800 rpm so a gentle touch is needed for .062 end mills.
DC.jpg

DD.jpg

DF.jpg

DG.jpg


Latest posts

Back
Top