90 degree V-twin engine

Home Model Engine Machinist Forum

Help Support Home Model Engine Machinist Forum:

This site may earn a commission from merchant affiliate links, including eBay, Amazon, and others.
George;
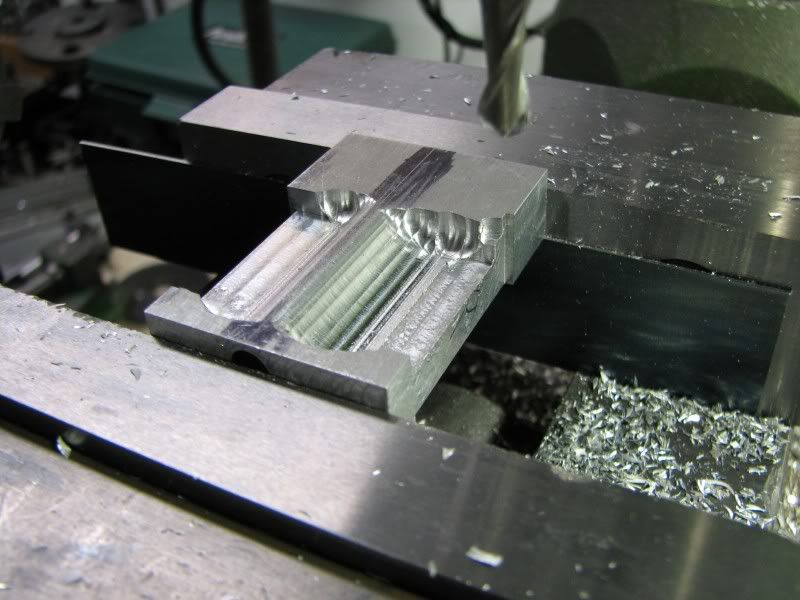
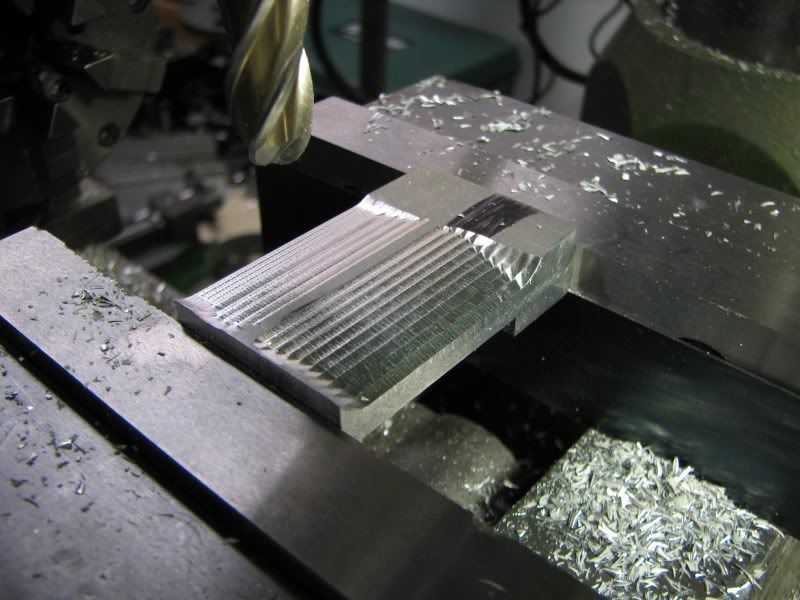
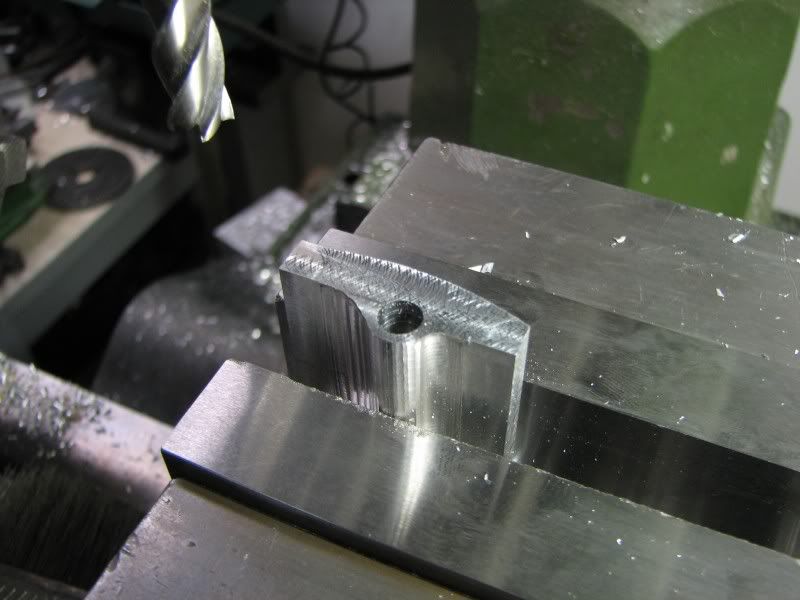
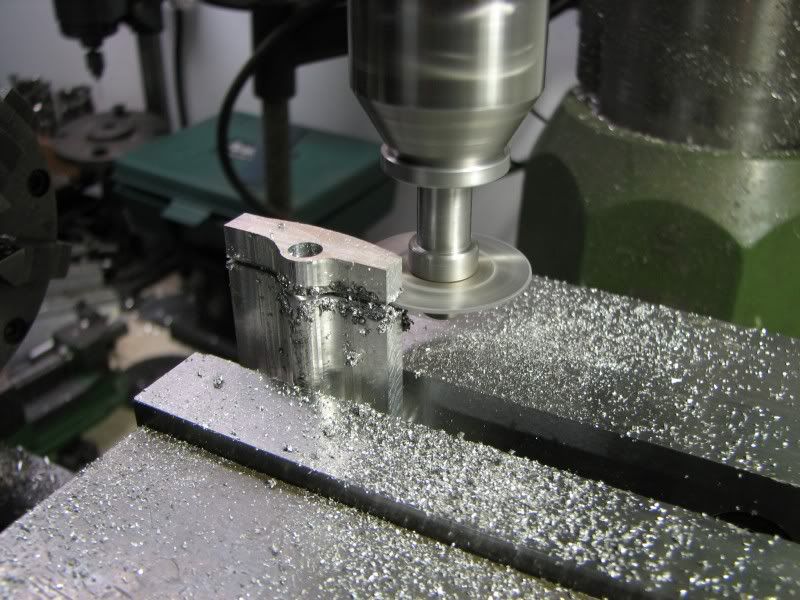
I've never cut gears so pardon the question; when cutting gears in this manner and with this size/material, how much would you cantilever the stock out of the chuck before you start encountering poorly cut gears (taking a single full depth cut)?

It's a backhanded way of asking if you could cut a "length" of gear stock in this way or would you soon need to use some sort of tailstock support? If I were to do this I'd just as soon generate a bar of gear stock - just cut gears to length from it as required.

Thanks
Garry
 
It just depends how rigid your tooling is. Actually the bigger the stock the more you could project it out of your holding device. A smaller diameter would need a tailstock support long before the gear that I cut. The gear that I cut was .067 deep and the cutter has multiple flutes so the tooth loading is minimal. If you needed alot of one size of gear you could cut a long length of stock and then just chop off what you needed.
gbritnell
 
George,
Thank you for the primer on gear cutting. :bow:

I've been interested in gear cutting but so far it appears to be a black art. I understand some of the nomenclature only in an academic way. I'm really befuddled by how this information is used to determine the diameter of the gear blank. I realize it's just geometry, but so far the light bulb hasn't come on.

I also don't understand the workings of the dividing head. How did you determine what hole circle to use? How did you determine you needed one full turn plus 21 holes per tooth?

I'm sure the more I learn the more questions I'll have. Could I impose upon you to give a tutorial about gear cutting at some point after you've finished this wonderful engine?

Thanks.
 
Kevin, there's a complicated answer and a simple answer. The simple answer is they have charts made out that tell you the right amount of turns and partial turns for a specific number of increments. The complicated answer it you could do it mathematically. The gears used on this side of the pond are generally calculated using diametral pitch. The gears on the other side are module. It's nothing more than the relationship of the specific number of teeth to a given diameter.
gbritnell
 
Most larger dividing heads are built with a 90:1 worm drive. So you have 4 degrees of table motion for 1 turn of the crank. Plates with various holes let you subdiivide the 4 degrees up into smaller pieces. So - you turn the cranks some number of turns - take the turn *4 to get those degrees, then you turn so many more holes of or a given ring of holes. To your degrees from turns you add Holes Moved/total holes *4 and you have the total number of degrees moved. Sounds real complicated when you try to describe it, but when you look at the setup with the plates full of holes and do it once or twice it makes perfect sense. And then you get comfortable and tehn you get careless and screw up that $4000.00 part. The you get REAL CAREFUL...

An example - a 5 hole flange - that 18 degrees = 4 turns for 16 degrees and 10 holes on a 20 hole circle (or half the holes on any even numbered circle)
a 6 hole flange is 15 turns.
8 holes is 11 .25 turns of the crank.

For some angles it is easiest to dig out the book and find the angle you want in the tables.
 
Kevin, My old LeBlond had some busted teeth when I got it. I was scared to attempt them. We took them apart and brazed them up and filed then to shape. That held for about 6 months. I had a machinist buddy make some new ones. He made them from the wrong material and they went out a couple months later. At this point, I'm thinking that I couldn't do worse. So I bought some 4340 and made all the gears. I had them sent off and heat treated. We put them back in and they have been running great sense. About 2 years now. Don't be afraid to try!!! Remember, If you think you can, or, you think you cant. Your probably right.


George, You've given me something to try out. We climb cut on the CNC's at work all the time. But I was always told to never climb cut on a manual mill. So I haven't. Your gears look Awesome!!!
 
ksouers said:
I'm really befuddled by how this information is used to determine the diameter of the gear blank. I realize it's just geometry, but so far the light bulb hasn't come on.

I've never cut gears before but I want to. When I do I plan to cheat a little. I've got a catalog from https://sdp-si.com/eStore/ that I can look at the size of gear I want to make and it will tell me the outside diameter. You can do the same thing on the website. Tell it what diametral pitch and number of teeth you want, click on any gear that it comes up with and look at the CAD drawing.
 
Kevin et al,

Download GEARSPUR from my website. It has all the calculations for everything you might ever want to know built into it. Below is an example output. Note that you need to know only two facts about your gear in order for the program to provide all the relevant information about that gear.

Code:
[I]mperial or (M)etric units?

Enter whatever data you know. Enter zero (0) for unknowns.
You must enter two data items to obtain an answer.

OD of gear [2.35 in] ?
Number of teeth [45] ?

Diametral Pitch = 20.0000
Module = 1.2700
Number of teeth = 45
Outside Diameter = 2.3500 in = 59.6900 mm
Pitch Diameter = 2.2500 in = 57.1500 mm
Addendum = 0.0500 in = 1.2700 mm
Dedendum = 0.0600 in = 1.5240 mm
Whole Depth = 0.1100 in = 2.7940 mm
Circular Pitch = 0.1571 in = 3.9898 mm
Tooth Thickness = 0.0754 in = 1.9151 mm

B & S cutter number used to cut this gear = 3

DIVHEAD is my dividing head program. Via a simple data file, it will handle any dividing head, regardless of the gear ratio or which hole plates are available. Example output below:

Code:
DIVIDING HEAD CALCULATIONS

Number of workpiece divisions [14] ?

DH Worm Gear Ratio = 40:1
Holes in rapid indexing plate on spindle = 24
Divisions of Workpiece = 14
Ratio/Divisions = 40/14 = 2.857142857
Turns required = 20/7 = 2 & 6/7

2 full turns of crank
and 18 holes on 21 hole plate
or 42 holes on 49 hole plate

Even if you intend to learn how to do all these calculations yourself, it's worth having both of these programs on hand to check your work.
 
Everyone, thank you very much for the help and the links to understanding this. :bow:
I appreciate it very much.

Marv,
I downloaded GEARSPUR. Yes, it gave me exactly what I was looking for. I also sneaked a peek at the source code and liberated the calculations (I can't believe you used goto :eek: )
Thanks for many great routines.

 
Kevin,

Only yuppie code theorists are afraid of gotos. Physicists and other folks who really know where they're going, use them with impunity to get there. :) :)

Seriously, I'm not now nor never have been a computer programmer. I write programs to get jobs done and, so doing, use every tool available - much as I do in the shop.

Now, do you want to hear about the string editor I wrote in Fortran? :) :)

Get the DIVHEAD program too. In addition to the program I described, the archive contains some other useful programs. For example, if you're into making your own hole plates, there's a program to tell you the hole circles you'll need for all the divisions up to some input maximum.
 
mklotz said:
Only yuppie code theorists are afraid of gotos. Physicists and other folks who really know where they're going, use them with impunity to get there. :) :)
I use them too for expediency in one-off programs. Our production code goes through a peer review process before moving to User Acceptance Testing. A goto in production code will get you an audience with the Grand Inquisitor to explain and defend your transgression.

Now, do you want to hear about the string editor I wrote in Fortran? :) :)
:eek:

Get the DIVHEAD program...

Got it.
Again, many thanks.


George, sorry for the detour...
 
This morning I got started on the valves. They are made from .50 diameter, 303 stainless steel. I finished them in about 1-1/2 hours and then started on the spring keepers and retainers. The retainers were a son-of -a-gun. They're only .03 thick and when I parted them off they ran about .002 over so they had to be filed and sanded to thickness. The notches were then filed down to meet the drilled hole, 047 diameter.
EL.jpg
 
I'm making parts in no particular order while I wait for steel for the crank and rods. I got the gears I ordered today so with the ones I made the other day I'll be able to start making shafts shortly. This evening I started on the rocker arms. I had called out bronze on the drawing but then thought they would fit the rest of the engine better if they were made out of aluminum. This required a change to the boss to allow for a thin bronze bushing. I started out by roughing a piece of aluminum long enough to get all four rockers plus enough to clamp in the vise for cutting off. After roughing to the size I needed I set it up and drilled the pivot hole. I just drilled it undersize and then finished it with a new drill. It came out as an odd size when I made it large enough to accept the bronze bushing so I'll make the bushing to fit.
EM.jpg

EN.jpg

 
How do you make the valve stems? Do you turn down to size a short section at a time then clean up with backed sandpaper, or do you use a follow rest? To me, this looks like the scariest part about building a four stoke. The sealing face looks like it might be ground?
 
The next step was to cut the bottom profile using a .25 ball mill. I first roughed some of the stock away and then with my step off chart I milled the contour. With this finished I turned it over to do the top. On this side I used a .50 ball mill which allowed me to have fewer steps and still get small cusps to file.
EO.jpg

EP.jpg

EQ.jpg
 
The next operation was to mill of the back up material from the short end. You can see the shape of the rocker appearing as I mill the stock away. I then set up one of my small milling saws and started cutting the individual rockers away from the stock. I took this picture with the spindle running as you can tell. Finally for today I have four rocker arms. I'll have to make up a fixture for the lathe to turn down the sides. The total width is .250 and the rail will be .188. They will then get the tapped hole for the adjusting screw and the pocket for the pushrod.
gbritnell
ER.jpg

ES.jpg

ET.jpg
 
Hi Greg, first of all the stems are .078 diameter so I start by cutting about .25 down to about plus .0005. I then cut the notch for the retainer, .030 wide. I now cut about another .25 of stock down to the same dimension. With about .50 cut I can now put a new mill file lightly on the stem just to clean up the two cuts. I then work my way back toward the head of the valve doing the same procedure. Once I get to the head I leave a piece of stock in the corner so that I can take a cutter with a radius on it and cut out the root fillet. Now I take a piece of crocus cloth lapped over the end of my file and polish the stem. As I'm laying it on the stem I also put a finger under the stem to help support it. It's not removing any stock, just polishing it up. I now take my cutoff tool and make a small witness about .005 longer than my finished length so that I will have something to clean up when it's cut off. This also gives me a witness to cut the 45 degree seat to. I turn my compound to 45 degrees and just cut the seat leaving about .015 of turned stock. This will go down to about .01 when I face the valve off. The seat has that grayish color to it because it was just cut and you're comparing it to the stem which has been polished
gbritnell
 
Hi George, That's a neat way to make multiple rocker arms.

Almost looks easy from were I sit. Hopefully I'll remember how its done and use the technique some time in the future.

Thanks.

-MB
 
Very nice work gbritnel, some great techniques there that will be useful.

Nick
 
Back
Top