Topsy Turvy Hit & Miss Engine Build

Home Model Engine Machinist Forum

Help Support Home Model Engine Machinist Forum:

This site may earn a commission from merchant affiliate links, including eBay, Amazon, and others.

Harold Lee

Well-Known Member
Joined
Apr 23, 2008
Messages
236
Reaction score
2
On March 20th 2010 in a comment on Captain Jerry's Steam Donkey build blog I mentioned that I wanted to complete my Steam Tractor and a Topsy Turvy before I tackled building a steam donkey (page one comment number eight)... Well that was eighteen months ago and like many others this past year has been a year of dealing with unanticipated issues and challenges which has sidetracked any progress on these projects in my machine shop...

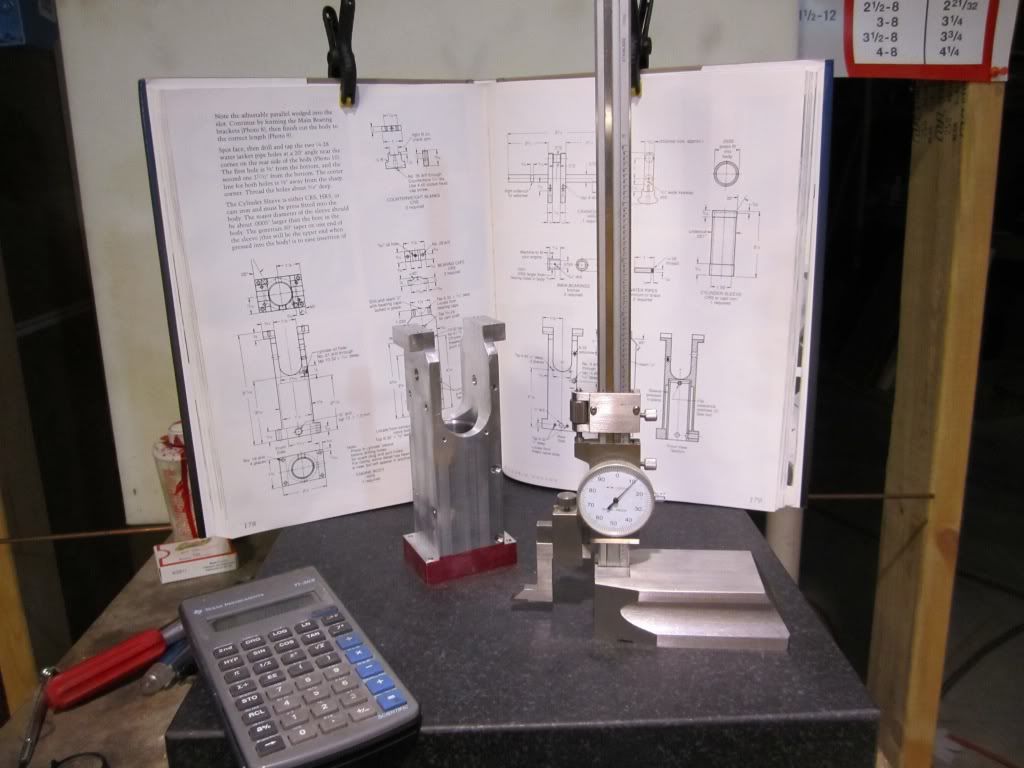
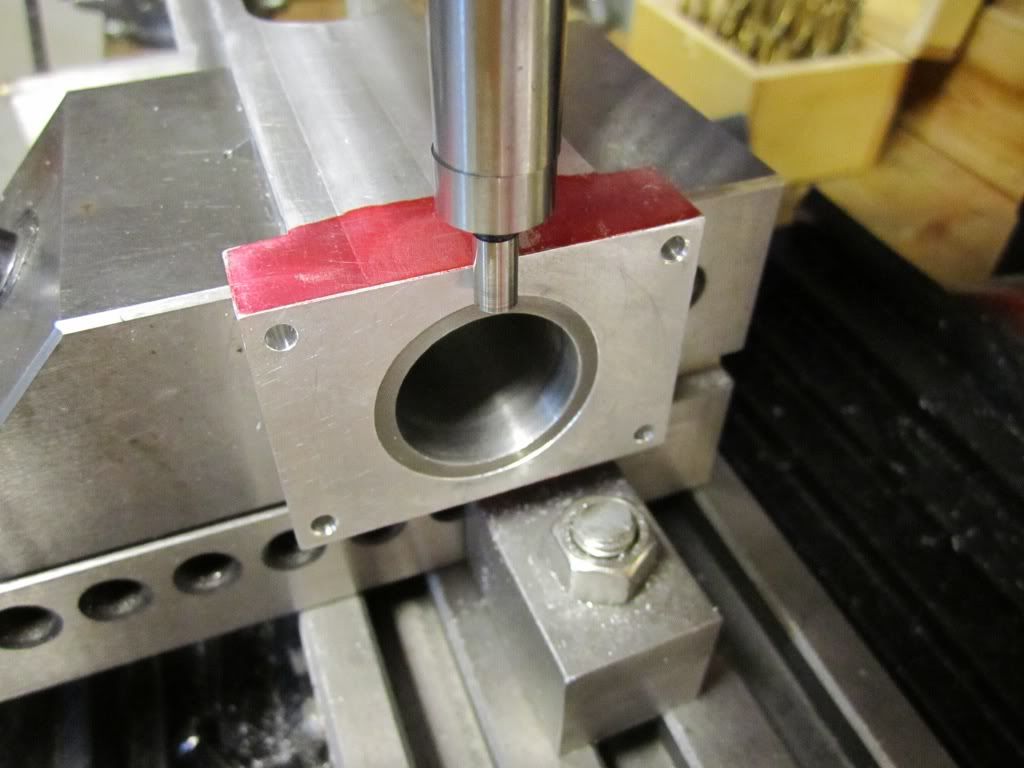
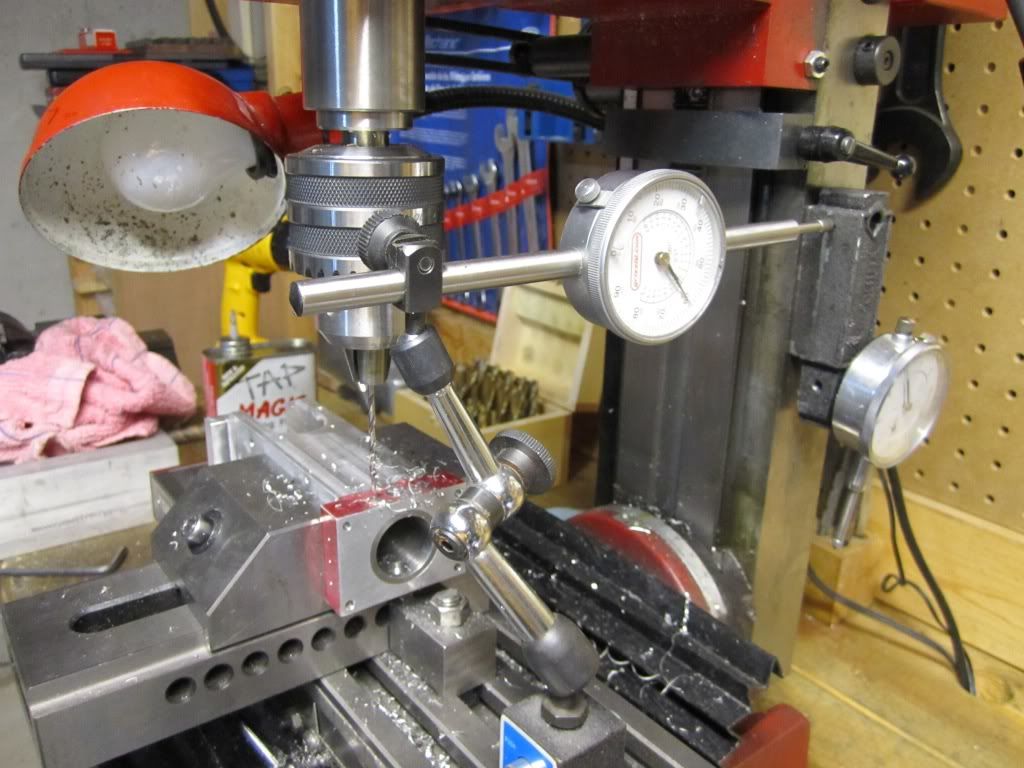
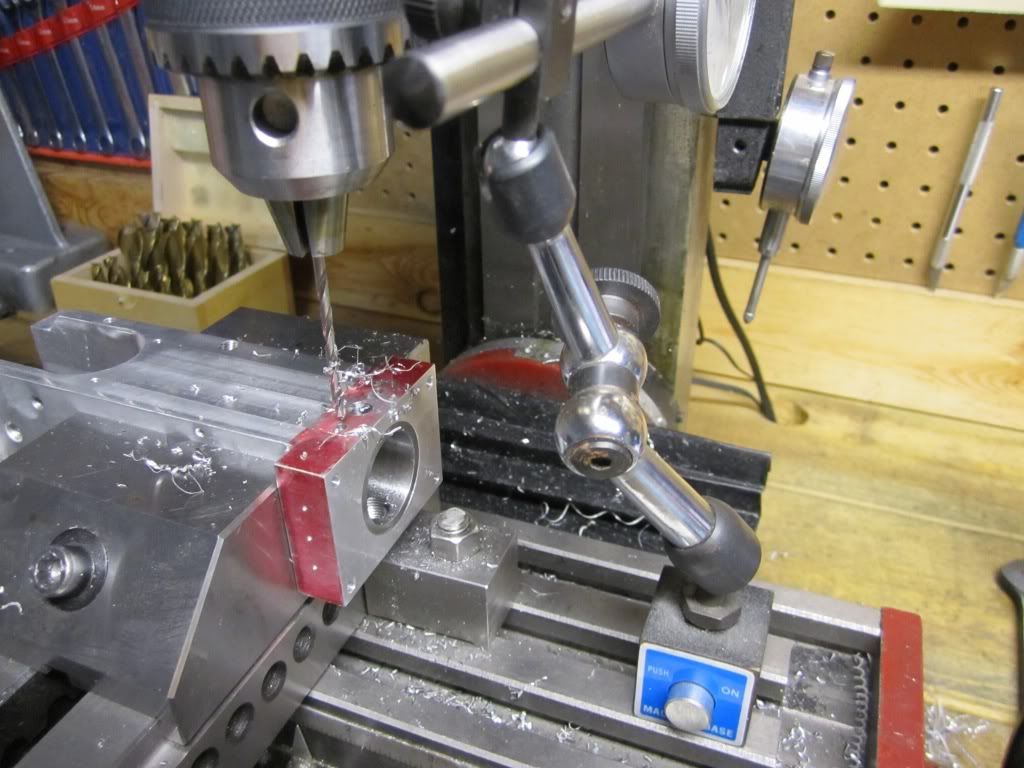
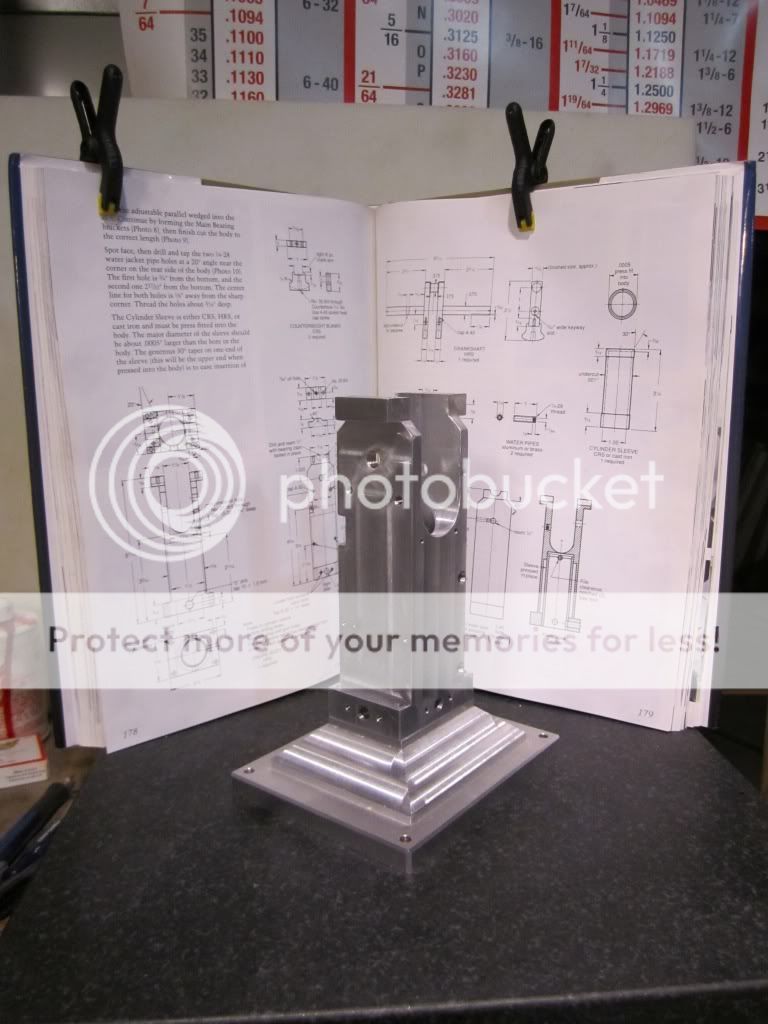
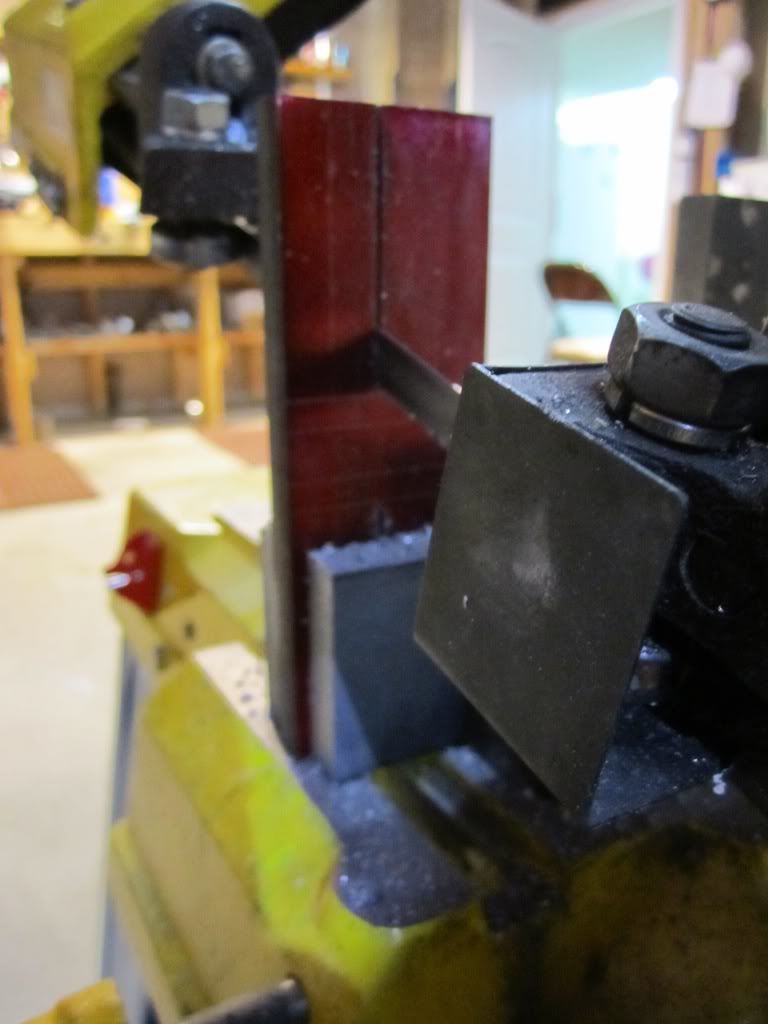
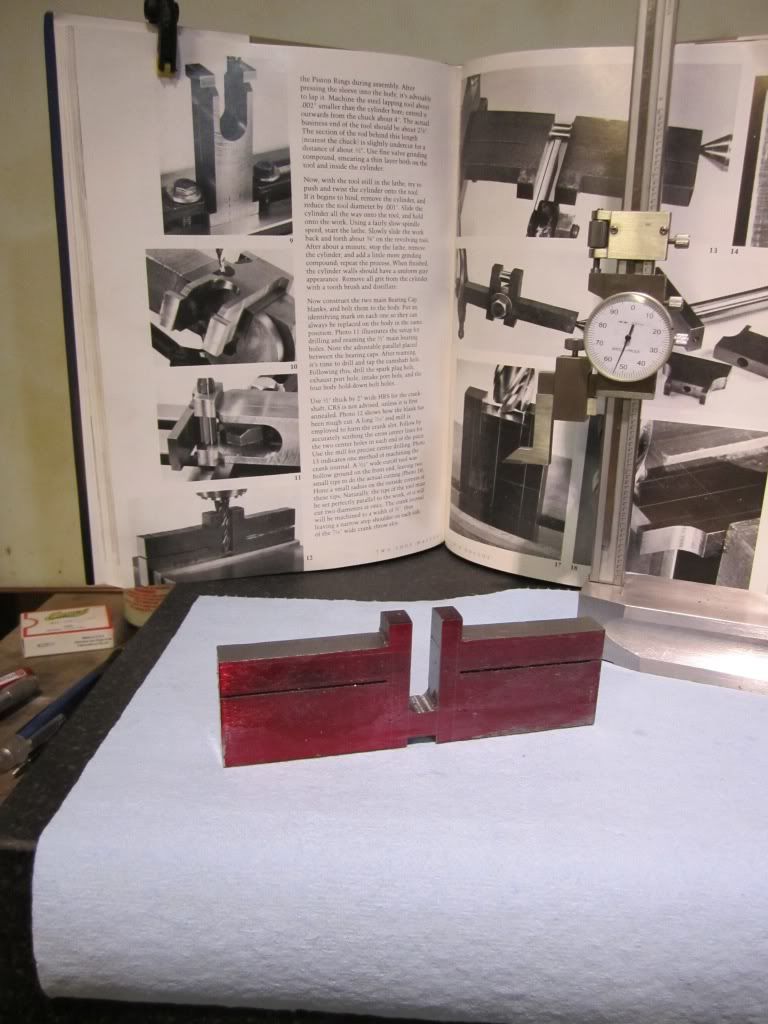
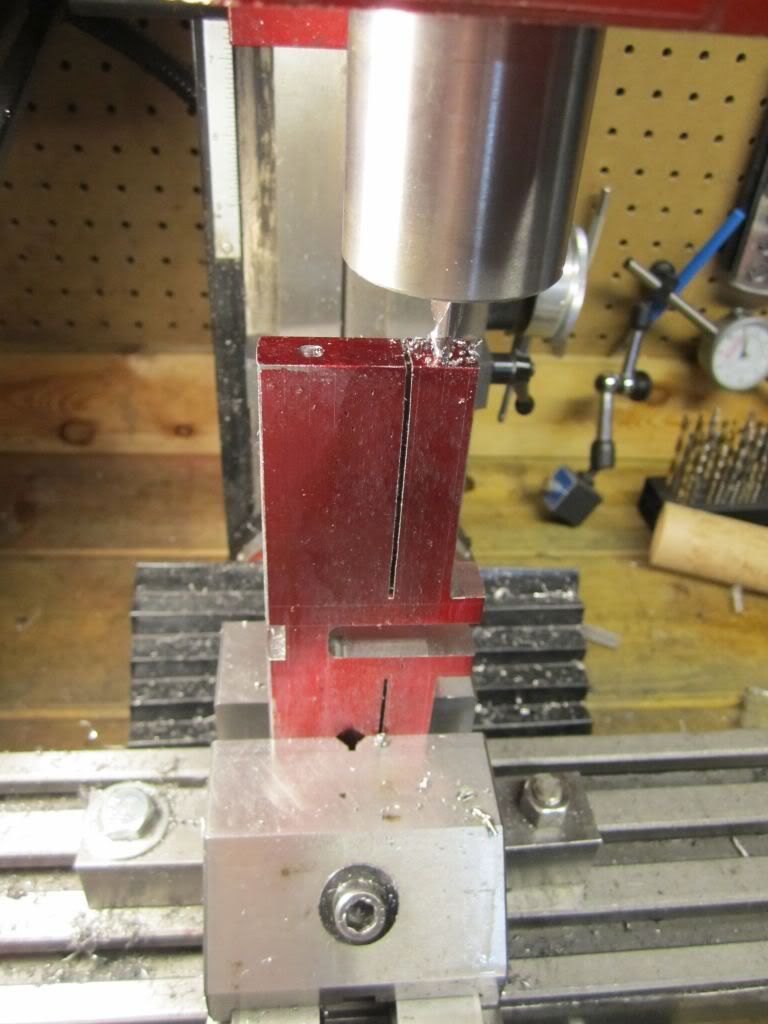
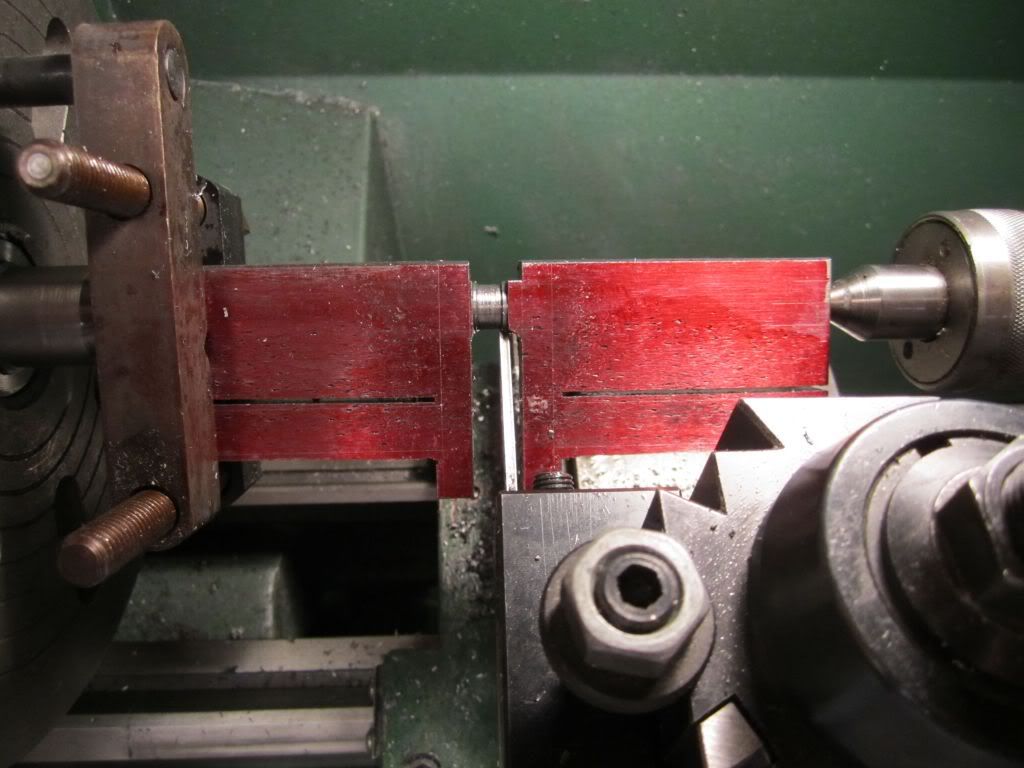
I am also in the process of building a Steam Tractor and have obtained a tremendous amount of instruction from Dennis' build of his steam tractor. On the one hand while I so much appreciated the astounding craftsmanship of his build i was very intimidated by his level of skill and workmanship to the point that I was reluctant to post any of my projects. I am a retired electrical engineer and not a machinist by trade and it has been a hobby for me over a number of years and while I clearly lack the skill of so many on this board, perhaps, like dennis and others, I can provide some encouragement to others. That being said, I have decided to post my build progress of my Topsy Turvy Hit & Miss. I have already completed the base and the body of the engine. The departure I have made from Philip Duclos' plans is using 6061 T6 aluminum instead of CRS. I have built three of his Odds & Ends engines and used 6061 on them as well. They all work very well. I am also considering making this one with two flywheels like another engine displayed on this board. I have not decided if I will construct the flywheels from scratch or use cast iron flywheels from Martin Models. All of the flywheels I used on the other hit and miss engines have been scratch built from 12L14 with very good results.

I will post pictures in my next entry and would really appreciate any tips or comments that will help...

OK Harold... Deep Breath... Here goes... Deep end of the pool...Jump!!!
 
Ya' know Harold, I think that the intimidation factor is just a part of the human mechanism we all have to a certain degree. Though it is true that the level of craftsmanship that some members here possess far surpasses many of us (and yes that model that Dennis built IS something to be envious of), I truly believe and have witnessed just as high marks in admiration given to the builder that has even the most rudimentary of skills. *THAT* in itself I think sets HMEM off from many other sites, the appreciation given for the efforts that one puts into a project. By all means post up progress of your engines, please. I guarantee you will not be disappointed in doing so. That TT engine sounds like a real nice project, although I must admit, I have always been a bit partial to the P. Duclos designs. :eek:

BC1
Jim
 
looking forward to seeing your build of this engine.
don't be shy just jump in head first at the deep end..............if you get into trouble there is lot's of guys here to help.

chuck
 
Here are a couple of pictures of my progress to date. I have built the base and the body of the engine. I cut the stock to size on my 7 inch Logan shaper and all of the milling on my mini mill. It seems that in Phil's designs he dimensions his holes on one part and then on the mating part he says "locate from part such and such". I believe this is a very good way to make sure parts match up but I like to indicate both parts and drill and tap on my mill. If in the future I need to make a replacement part I have a better chance of them fitting together.

One departure I made is the OD of the the cast iron sleeve that serves as the cylinder, Phil says to make the sleeve .0005 larger than the bore on the body and then press fit them together. I have always had better luck with shrink fitting using the following technique. I made the sleeve .0015 larger than the bore. I placed the body in the oven at 350 and the sleeve in the deep freeze and let them soak for about an hour. after that I wrapped the body in a towel and brought it to my shop. I took the cast iron sleeve and it literally dropped into the body with a sizzle. After it cooled I pressure tested the water jacket space and it sealed with no problems. I hope this will work out ok.

IMG_0009.jpg


IMG_0012.jpg
 
looking good so far, and i think .0015" fit is nice and tight, you should have no problems with that.

so you use a shaper??
i had a shaper but i traded it for something i thought i needed and now i wish i had the shaper :(
they are great little machines.

keep up the good work :bow:

chuck
 
Looking forward to following your build, Harold. Looks like a good start.

Rudy
 
Thanks to all for the encouragement... Regarding the shaper Chuck, I took a high school machine shop class in the early sixties. The shaper was one of those machines that I fell in love with. The simplicity and the almost hypnotic rhythm made it a favorite of mine. When I set up my machine shop I made sure it included a shaper which I purchased from a retired school teacher from Hillsboro, Illinois who had bought it and completely restored it. My second favorite machine is my 1942 Burke #4 horizontal mill which I drove from Illinois to Alabama and bought from an eBay listing. it took me almost 8 months to completely tear it down and rebuild it but I really enjoy it as well. These heavy machines are a stark contrast to the light machines we purchase today and while I have a number of them that are made offshore, If I have a project the first thing I consider is how do I do this on my shaper or my horizontal mill. To date I have made all of my gears for my Hit & miss machines and while Phil Duclos recommends purchasing the gears for the Topsy Turvy, I plan on making them myself as I have collected most of the 32 and 48 pitch involute gear cutters.

Today I plan on drilling the holes for the Spark Plug, the intake and exhaust valve assemblies on the main body. I'll post some pictures when I complete the work.
 
Any one looking in my scrapbox will probably disagree with the following comment but I tend to be a measure twice and cut one kind of a guy. Since I am retired and have more time than money, I tend to work more slowly and in many cases in a redundant fashion. When I drill holes I tend to do the measurements twice. First I lay them out on the part using a height guage and a surface plate. I then use an optical punch to locate the hole and make a light punch mark on the part...

IMG_0003-2.jpg


IMG_0004-2.jpg


IMG_0006.jpg


After I set the part in the mill I use an indicater to locate the center of the hole and hopefully the center drill will exactly match the layout lines and punch mark.

IMG_0011-2.jpg


Once I find one I try to use a dial indicator to locate the subsequent holes...

IMG_0015.jpg


On the following picture you can see where the layout lines and center punch marks are...

IMG_0016.jpg


OK... The base is complete except for the machining the crank bearing caps and drilling and reaming for the bushings.

IMG_0019.jpg


The next task I will attempt is the crankshaft. It is probably one of the most difficult parts on this project... I'll report on that in the future...
 
Slow and steady wins the race!

I agree with your methods!
I like to do things once as i hate remaking parts.
The reason i make parts twice is because i get excited and want to rush through it...

Looks great so far!!!
Keep up the good work!

Andrew
 
excellent work!!

i use to rush into projects and make parts as fast as i could only to find that the parts were wrong and i had to make them again.
now like you i take my time and measure twice and the parts usually turn out right.

as for the crank, are you going to make a one piece crank or a multi-piece crank???

any who nice work and please keep the progress reports coming. ;D

chuck
 
Chuck - I am going to try to make a one piece crank. I am somewhat concerned because of the overhang of the parting tool used in turning the connecting rod journal. On the Odds & Ends cranks I made them one piece but they it was only a one inch stroke. This one is a two inch stroke.

I am using a 1/2 X 2 inch hot rolled steel bar. I am using a 9X20 grizzly import lathe and I am a bit worried about the rigidity of it. Got my fingers crossed...

IMG_0020.jpg
 

Beautiful work Harold.

Is that from "Two Shop Masters"?

 
Kevin & Dale - Yes... The plans for this engine is in the "Two Shop Masters" book. I ordered mine from Village Press but it is available from a number of places. The first part of the book is about Frank McLean's designs which are mainly shop related tools. The last half of the book contains the final designs of Philip Duclos and include the Topsy Turvy as well as the Victorian Engine that Steve (cedge) built in a blog on this forum. He made a number of enhancements to the design and made a beautiful engine. In my opinion Philip's barstock IC engines are at the top of my list and his photography and step-by-step narration make it possible for the less experienced machinist to build a well running engine. Here is a link to one source for the book if you are interested.

http://www.amazon.com/dp/0941653609/?tag=skimlinks_replacement-20
 
Last edited by a moderator:
Harold, that's one of my favorite engines by Duclos, or anyone for that matter. Looks like you got a good start on it.

I've found that using a 3/16" wide cuttoff blade works really well to reduce chatter. I drill and saw out the slot first then use the 3/16" cutoff blades to clean up the edges and the journal. I use 3 blades... one with a flat nose to work on the journal, and one each of a left mitered and right mitered for the two sides. You only need about a 5 degree bevel to clear the journal while working on the sides.

Here's a series of pictures that shows the process and tools I've used. Look at the beginning of this thread...

http://www.homemodelenginemachinist.com/index.php?topic=10746.15

Chuck
 
Chuck - Interesting that you mentioned the tools you used. I used a parting tool and and a left and right tool for the shoulders on each side. I have only completed the rod journal but in my estimation, that is the most difficult part. Here are a sequence of pictures from my work last evening and today. First I did a layout of the part ( see previous picture) and then took it to my bandsaw and did the rough cuts.

IMG_0023.jpg


IMG_0024.jpg


After the sawing, I took a 3/8 end mill and cleaned up the saw marks inside of the journal since I felt it would be more difficult to do on the lathe.

IMG_0025.jpg


After this I did a layout of the holes on the surface plate and then put it in the mill where I used an indicator to locate the positions.

LastImport-01.jpg


At this point I put it on the lathe and on the slowest speed and with the parting tool set a few thousandths below center using with plenty of cutting oil I started to take 1/2 blade wide at a time until I was deep enough that I was no longer getting an interrupted cut. I went very slowly and while there was some chatter it was minimal.

LastImport-09.jpg


LastImport-12.jpg


I then turned the journal down to .377 and then used the two tools on the sides to clean them up and form the spacers.

LastImport-13.jpg


After this I polished with a LOOOOOONGGGG narrow strip of 360 grit then 400 and finished with 600. I sped up the lathe and it was downright frightening since I was having to move the cloth and my fingers closer to the part than I would have preferred. The other thing is I used an 8 inch long strip and could only use about 2 inches in the middle of it.

LastImport-16.jpg


I was very pleased with the results. Since the connecting rod will be reamed to .375 , I want to take it about .0005 under. I was very pleased that it was dead nuts on.

LastImport-17.jpg


I am not done by a long shot since I have to turn the rest of the crank but I believe it is going to be fairly straight forward. Think I take a tranquilizer and unwind the rest of the day.

BTW Chuck- I see you live in Round Rock. In 2006 I retired from that big company that is just South of you on Burnet road. Spent a lot of time there in the Labs.


One detail I forgot to mention in my post was in regards to the rigidity of the lathe. I used my Grizzly G4000 9X20 lathe and the only change that I have made to improve the stiffness is what is known as a "John Pitkin donut clamp" I am using the AXA 100 series toolholders and found for this particular job there were no problems with my equipment for this task.
;D
 
That is looking good so far Harold. One thing that jumped out at me that obviously was not a problem, was the drilling of the centers for the main shaft without any support between the journals. I would have thought you would have used a couple of large washers and a bolt to act as a clamp across the opening to prevent any sort of flexing during the C drilling operation.
And yes, tranqs' do wonders after a job such as this. Looks good, keep the faith.

BC1
Jim
 
Jim,

I think you are correct. If I did it again I would put a bolt in it to stiffen it up. I also thought about putting a parallel wedge in it. I don't think it ended up being a problem but it was certainly a potential problem and I would not take a chance in the future. You will se by my next post that I did use a bolt when I turned the shafts...

THank you so much for your comment.

Harold
 
Harold,
Your doing a hell of a great job on that engine. I've always thought that was a very good looking design by Philip. Both He and Rudy are still missed as writers for Village Press at least by myself. About the only thing I see with your techniques is if your locating by using the coordinate system there's no real need for center punching and doing so could throw your locations off slightly. I do everything the same way you do other than the center punching. I just use a center drill once I'm at my coordinates so I have a positive location for the normal drill to start.

Pete
 

Latest posts

Back
Top