TB4 Build

Home Model Engine Machinist Forum

Help Support Home Model Engine Machinist Forum:

This site may earn a commission from merchant affiliate links, including eBay, Amazon, and others.
the holes were drilled with a #25 drill which is .149 in after drilled there .150

 
Hey guys, on these cylinders, do we want a brushed finish or a polished mirror finish?

I am also considering engraving "HMEM TB4 2011" on the top of the cylinder block about .150 high letters. What do you guys think?
 
I like the Brush look ... :)

Engraving ... absolutely, you may start a trend! :big:


Pat H.
 
engraving would be good and brushed or plished it dosnt matter itll look good either way
 
The cylinder blocks are complete. The blocks still have some dings and dents in them but they look pretty good. If you want them perfect you can mill a few thou off and repolish when you get them. I will keep the worst one for myself and send the best one for the engine for charity.

DSCN1014s.jpg


I started to make pistons but realized I need a saw to cut the slot in the bottom. KBC is closed until after the holidays so i'm dead in the water until the 3rd.

DSCN1017s.jpg


How is everybody else coming along?
 
stevehuckss396 said:
What's a great Idea?

Useing the drill chuck as a press.

"sorry I must of earsed the whole quote when trying to just get the pic to come up"

Matt
 
I just need to clead up the rocker arms and their done,also have to wait until the local supply guy is open on the 3rd to get some material for the bearing block.
chris
 
Steve,

Those are a really nice set of Blocks. :)

I making some drawings to see that the Valve, Rocker Arm and Block, etc line up.
Of course I'm having a little trouble, but should be able to work it out soon. ???
Then I will be able to make the Rocker Arm Shafts.

The Valve Push Rod and Connecting Rod are a big question for me on how to make them. ???

I also noted your request to change the hole size for the Connecting Rod from .031" to a #66 drill (.033").

Pat H.

 
Path said:
The Valve Push Rod and Connecting Rod are a big question for me on how to make them. ???

If it were me, I think i would make a jig from a piece of plate or hard wood and 2 pegs of the correct dimention to bend the rod around. Also the jig could help in getting the hole in the correct spot in the connecting rod. Nothing fancy, it only has to last for 6 pieces.

The drawings do not help much so perhaps Tin can get you the CtoC dimention for the connecting rod and valve rod dimentions from his engine so a proper fixture can be made. This way you will have the best chance of getting 6 identical parts of each.
 
Hi all!

Steve, great work on the block! And quick too... :eek:

Pat H, I'm planning on making some cheese-head stripper bolts for the crank throws (see attached). They should work with the wire loop rods as per plan, or rod ends ala Tin's Claire. A little classier than SHCS's at any rate. ;D Let me know if this causes a problem.

Brush/sanded finish for flywheels?

Cheers

Jeff

cpin.png
 
Good to see things moving forward and good communications. Pat H the rods pictured are straight forward but crude. my first runner I made the valve push rod from a piece of coat hangar. and the valve from brass. turned then bent.
Like I said the second one Clair I used bicycle spokes for the valve and valve push rod . This makes for a nice clean look.
also the bearing carrier I used aluminum square tube for the part with and aluminum plug for build one build two has a solid plexi bearing block. I did use bronze hat bushing on both . I do not have a drawing other than the original but can do an or a pair of as built. I have been out of town a bit for work but have some time to breath now .
Tin
 
Steve,

Yes, I also think a fixture/jig would work ... once the correct dimensions are found.
I'm still working on that aspect. The Connecting Rod is probably okay, it's the Valve Push Rod that needs work.
I do like the way Tin did his Clair using thread ends.

Jeff ...

I really like the cheese-head stripper bolts ... that will add some real class to the engine.
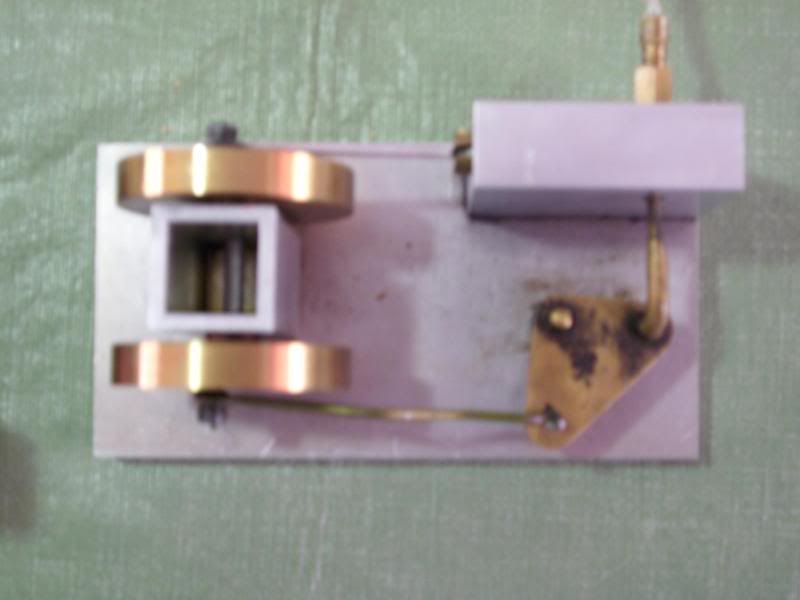
My only concern is the .130" dimension. That would require that outside edge of the fly wheels to be very
precise in their location with respect to the center lines of the piston and the Valve Push Rod to the Rocker Arm hole.
Certainly doable but more difficult. Of course the Valve Push Rod could be bent a bit to allow for any misalignment.
So if the .130" is too tight what would a good number be?
I'm looking into this also ... but I see that the drawing is incorrect. The Bearing Carrier and the note on the length of the
dowel pin (1") versus the 1.2" for the Bearing Carrier are in conflict. I plan on reverse engineering to see what is the desirable dimension.

My guess would be that .130" be increased to say ... .180 - .200". I think I could provide a better guess after I do the drawings.

I also like the Brush look.


Tin...

Really like the looks of your Clair ... nice job.

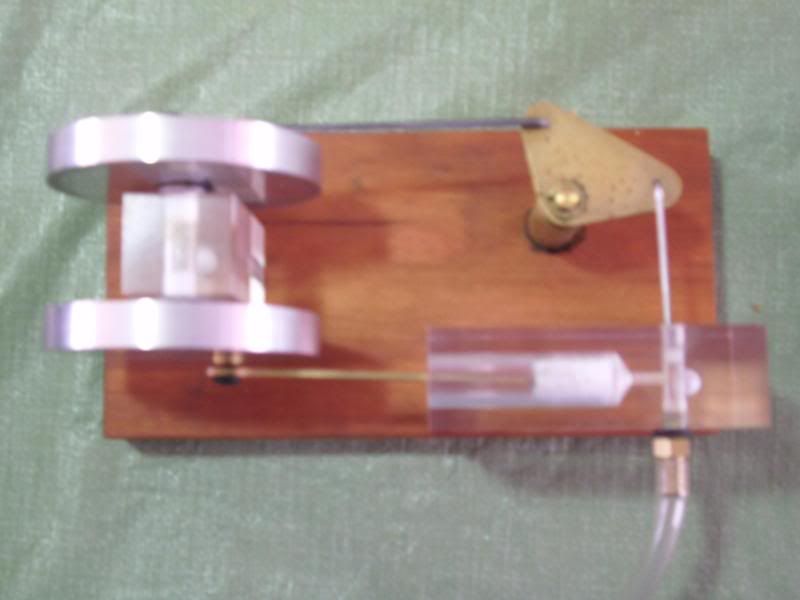
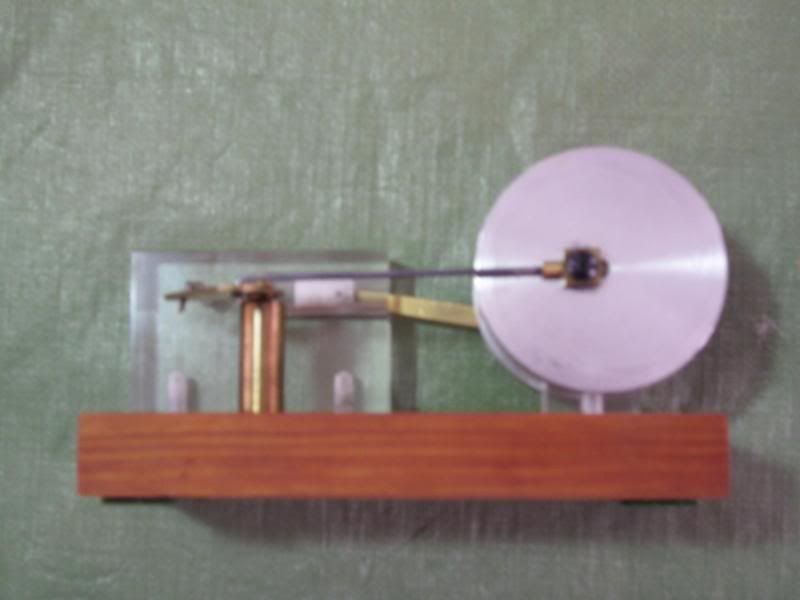
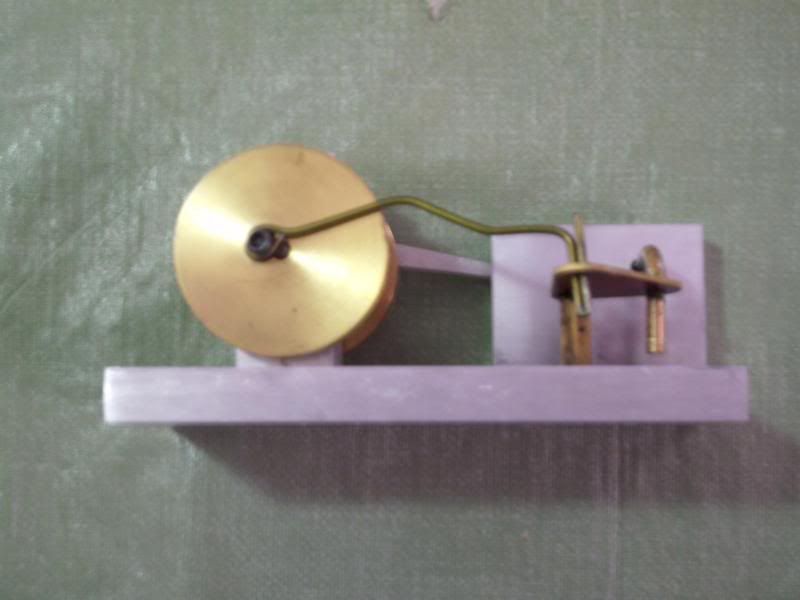
As you probably know the Rocker Arms are done ... however, the thickness was increased to .125" from .060".
Not a problem at all. I decided to see what height adjustment might be needed. That's where my problems began ...

The Valve hole center line and the Rocker Arm hole do not line up when the valve is in the mid position. It's off to
the side about .067". So in short I'm trying to work that issue and the above mentioned one.

Hope to have some answers in the next couple of days. I can post drawings if you wish.
Can you provide additional details on your Clair (pictures and maybe a few dimensions on the above mentioned issues)? That would be very helpful.


Lastly ... I'm wondering if I'm overdoing this ... maybe it's easier than I'm making it. But on other hand I can't provide usable parts if
I don't know what I'm making.


Later,

Pat H.


Pat I will pullout my two runners and the print and take a look .

Ok I pulled out my runner and Clair these are my interpretations of this design. I have a habit of not totally following prints or plans.
The runner design has quite a bit of play in the valve linkage. And I feel there is quite a bit of room for interpretation and creativity.

here are more pics

the valve rod is a piece of bicycle spoke bent with a dog leg think throttle linkage on a lawn mower engine. then a piece of Teflon pressed on the valve is a little rounded on the sides almost like a ball with parts cut off.
from to view the valve is pretty centered in the hole from the end the valve rod sags a good 1//6 of an inch maybe more.
Claire runs like a champ though I can run it on breath power.

1Clairetop.jpg


1claireside.jpg


1RunnersideB.jpg


1Runnertop.jpg

Tin
 

Latest posts

Back
Top