Rudys Radial 5

Home Model Engine Machinist Forum

Help Support Home Model Engine Machinist Forum:

This site may earn a commission from merchant affiliate links, including eBay, Amazon, and others.
Looking good! I struggle to make 1 cyl and piston match up. Can't imagine doing 10 of them.
 
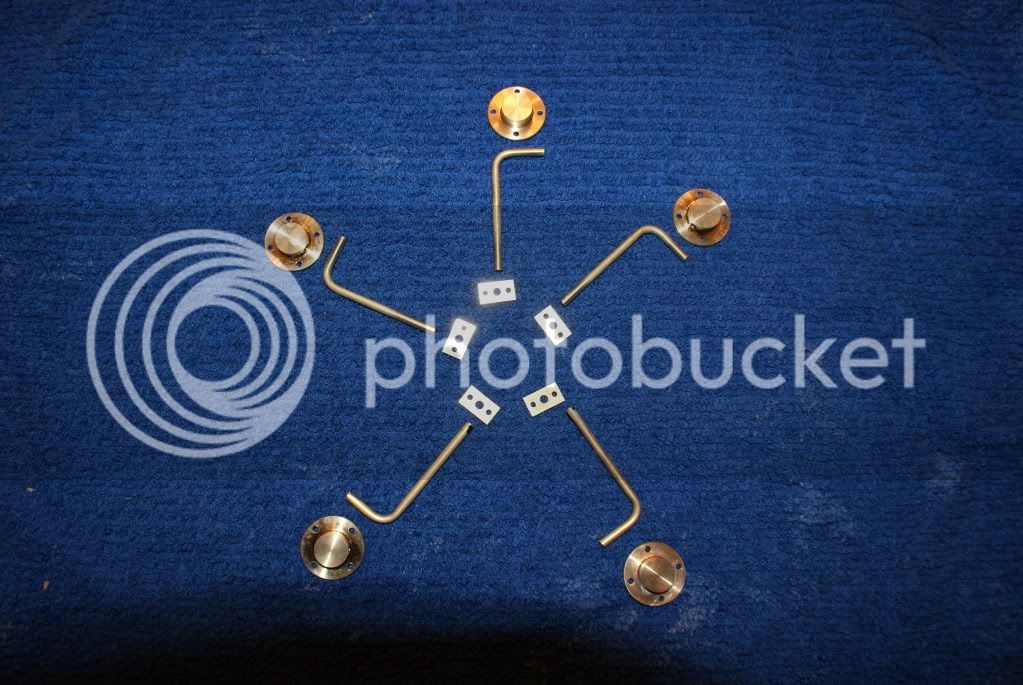
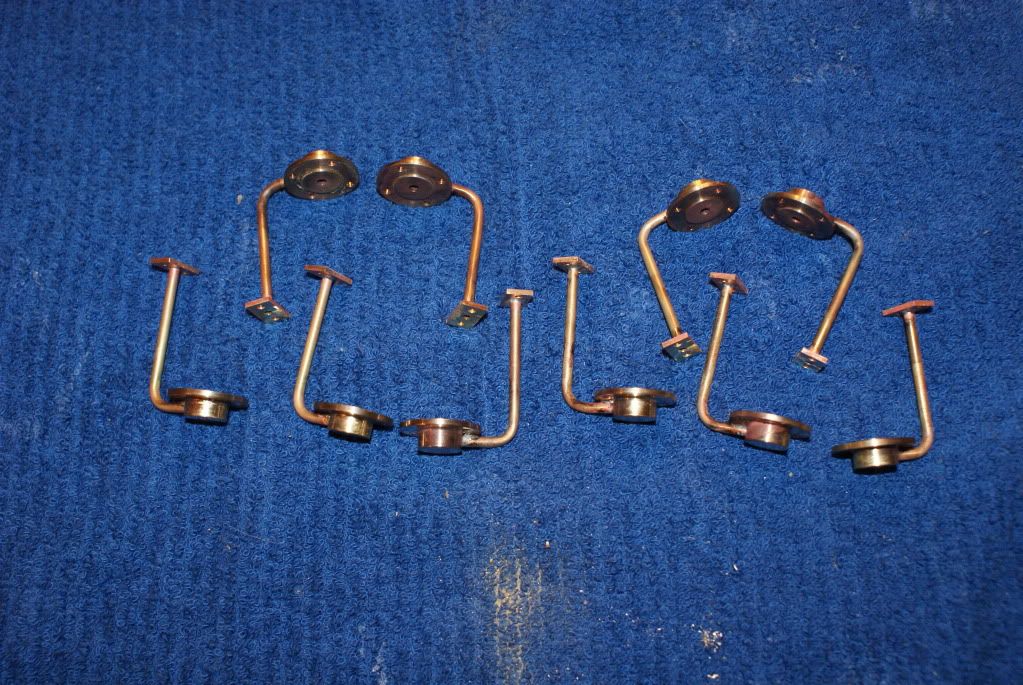
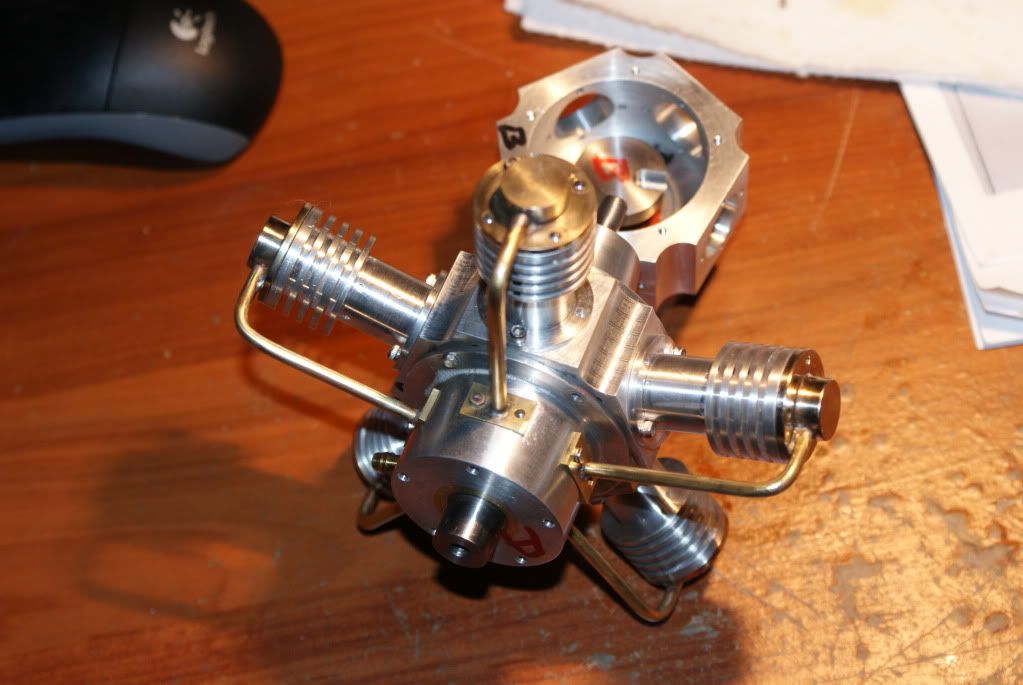
Got somemore done on the Radial 5 engines im making. I got some .125 brass tube from the hobby store to make the transfer tubes. I bent them with a 90 degree on one end then cut them to length. I had a fixture to hold the tubes for soldering. I used that to mark for length. After I got all 10 tubes bent it was time to solder them. Did I mention I hate soldering.

Here is what I started out with
DSC01680.jpg


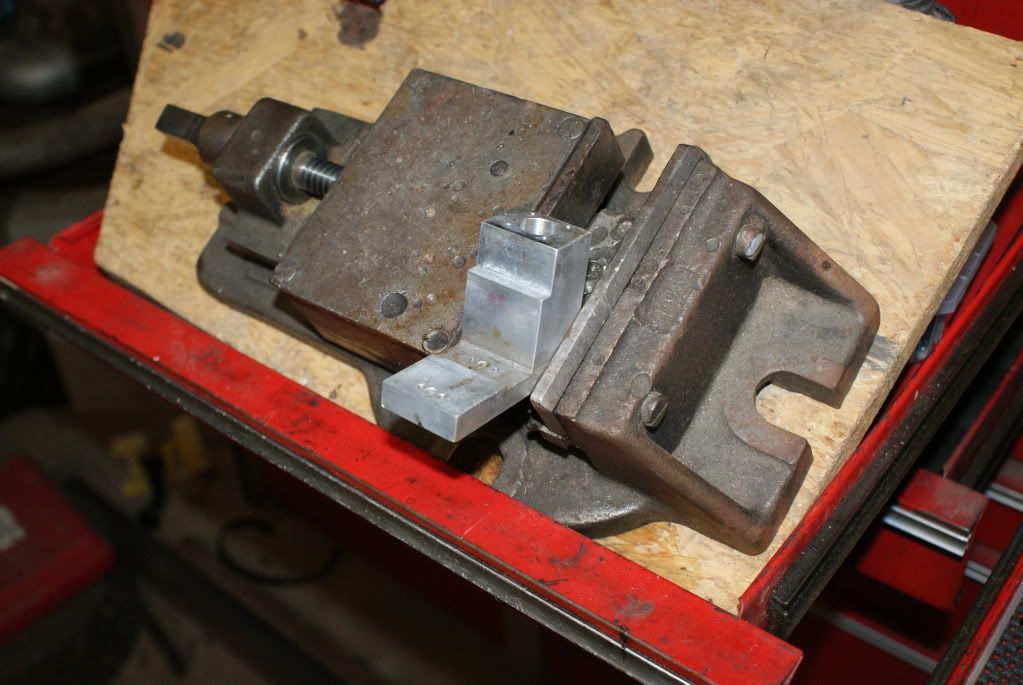
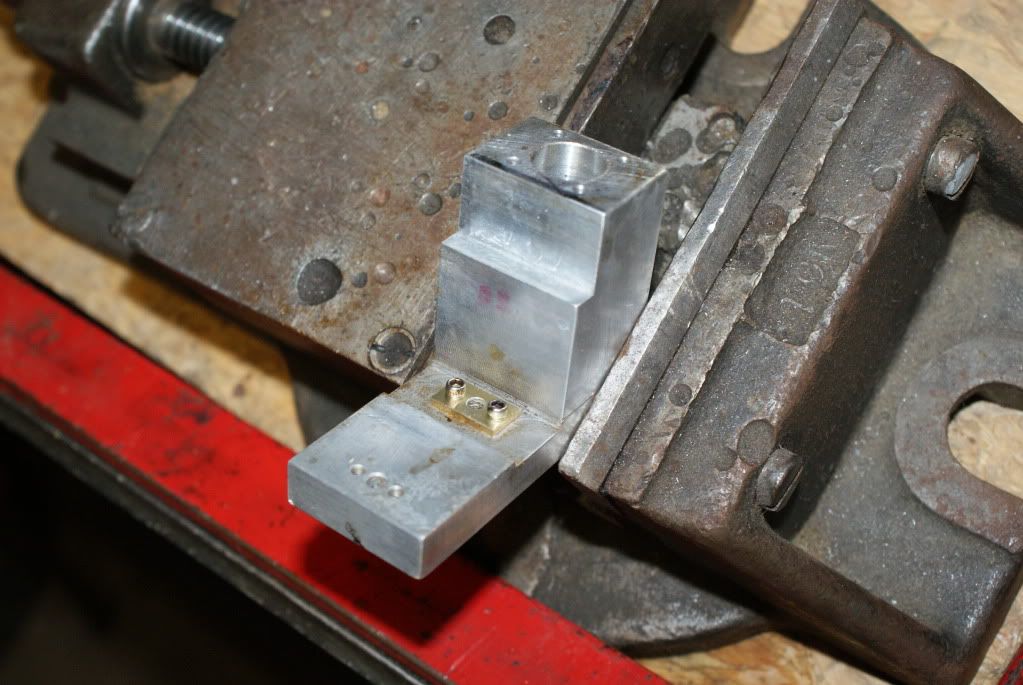
I put the fixture in a small vise and held it at an angle to be able the get the torch on the bottom of the fixture
DSC01683.jpg


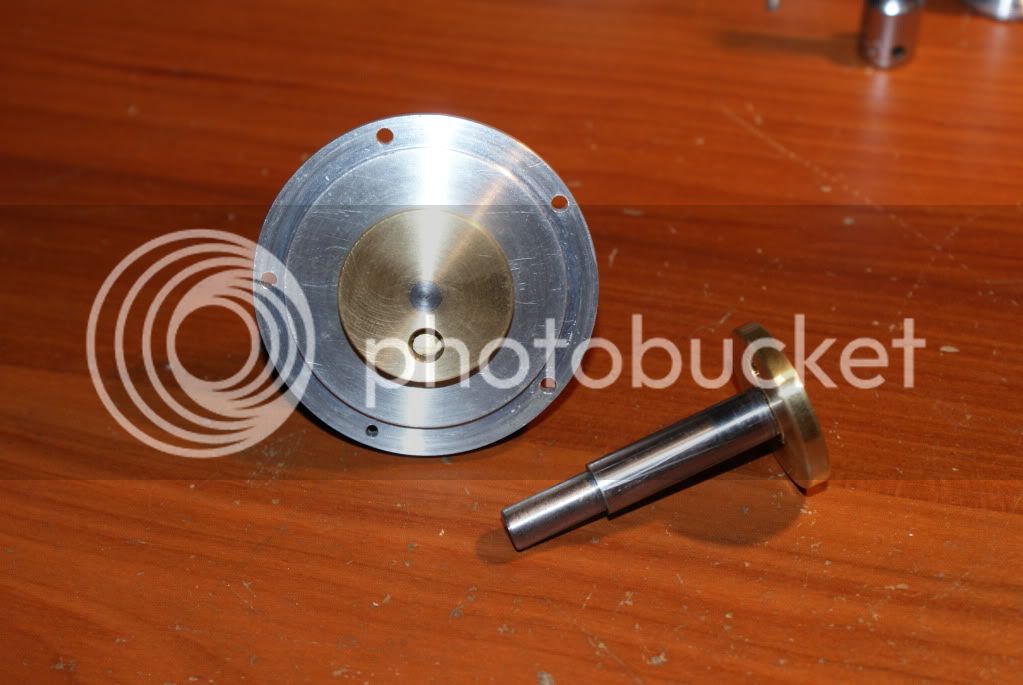
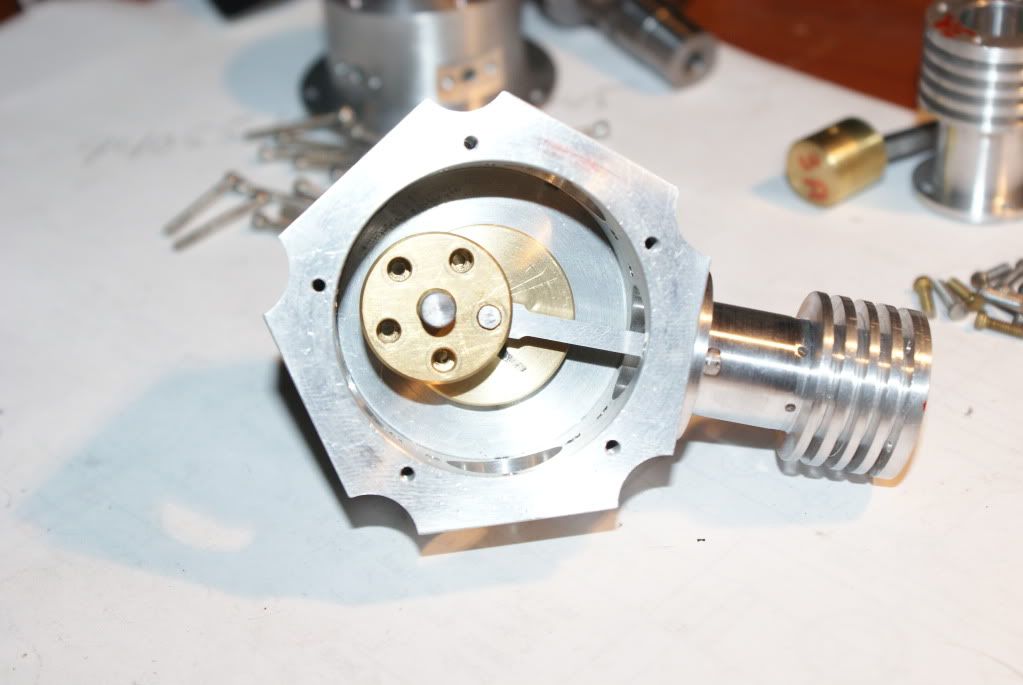
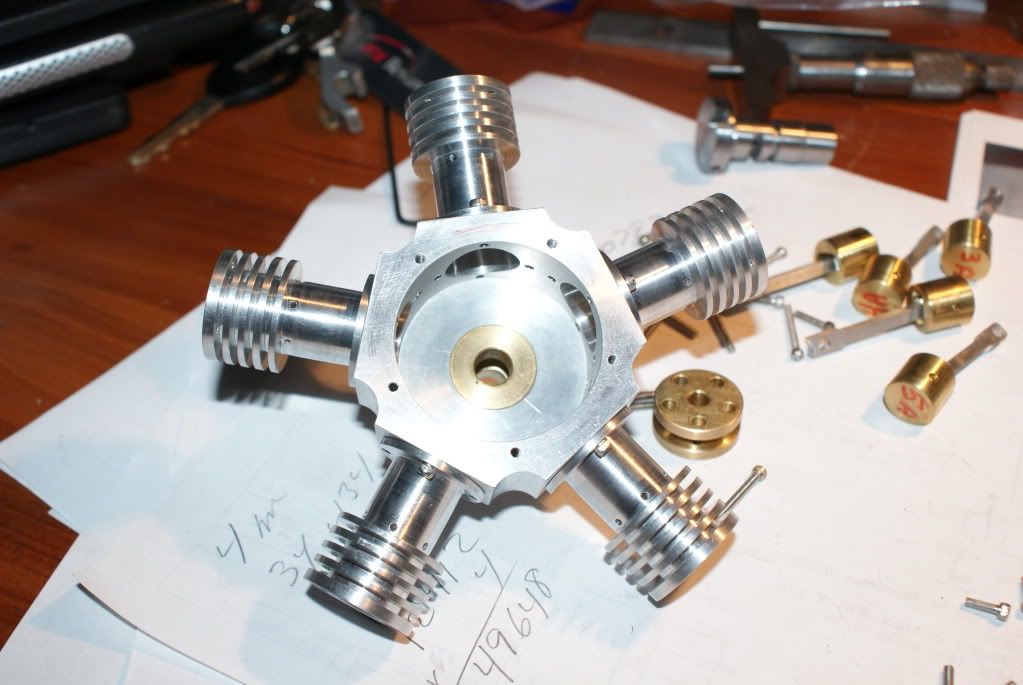
I then mounted the small brass foot that will attach to the valve body. Its held with 2 2-52 SHCS.
DSC01684.jpg


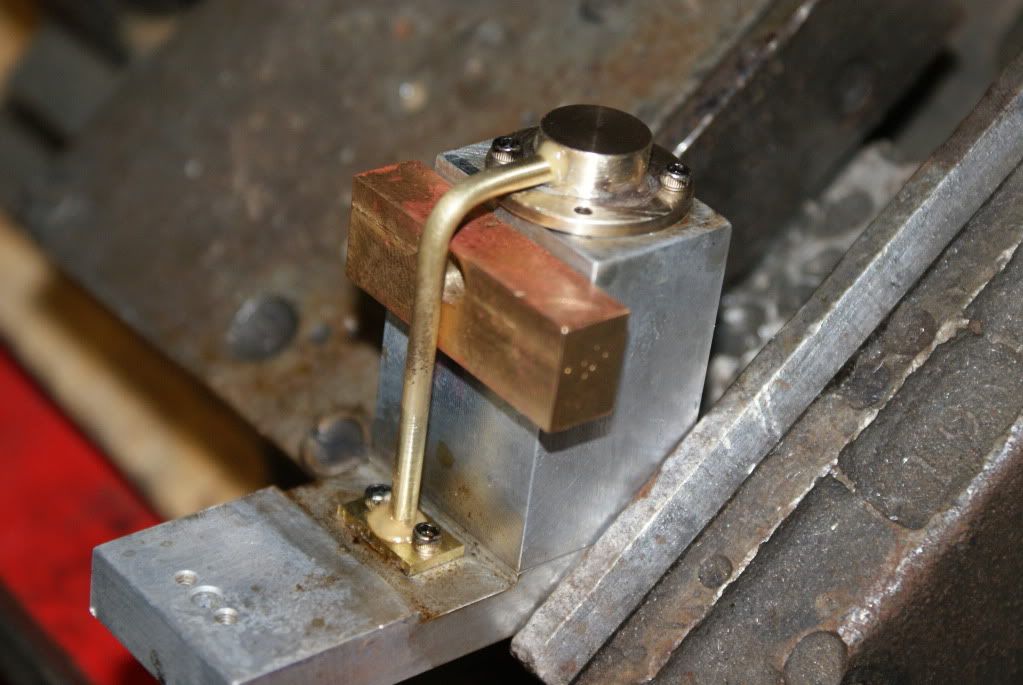
I Then put the transfer tube and head on the fixture after applying flux on both. The brass block on the fixture is to make sure the tube is straight during soldering
DSC01686.jpg


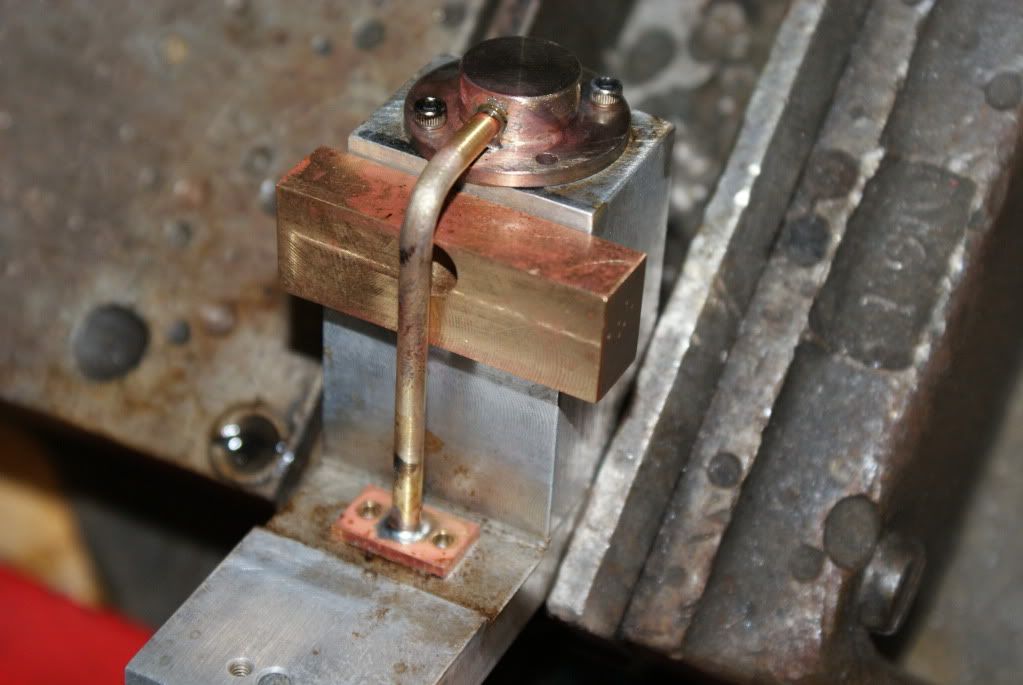
Here is a picture after soldering
DSC01687.jpg


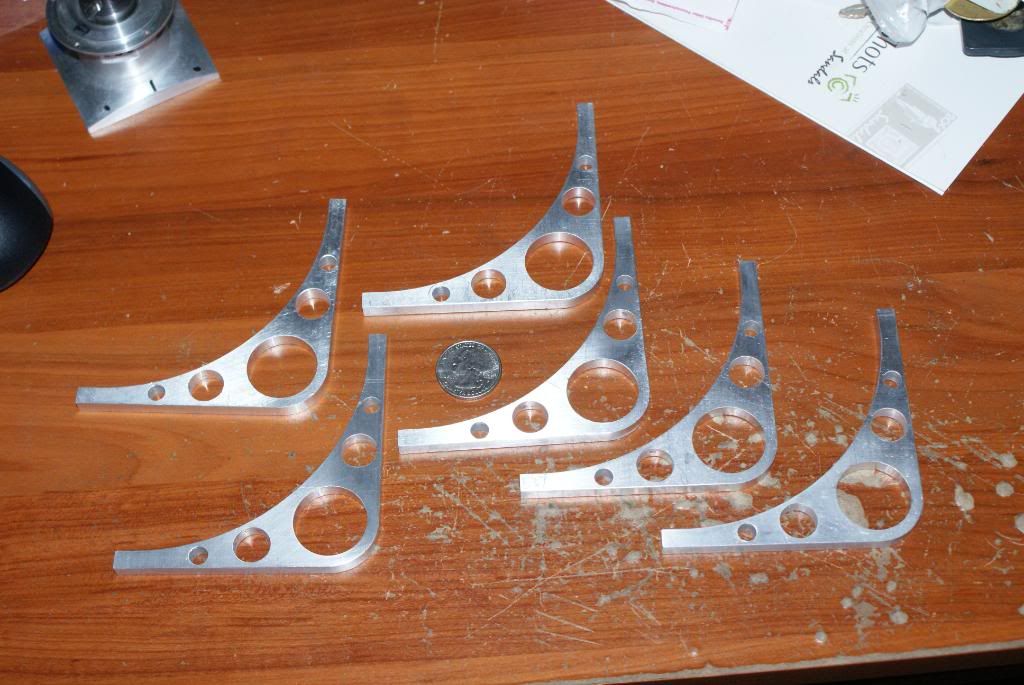
And the final picture is of the 30 pieces made into 10
DSC01688.jpg
 
dreeves said:
Did I mention I hate soldering.

Well, for a guy who hates it, you've done a nice neat job... I like the jig, clever work :bow:

Cheers, Joe
 
Rudy did a great job when he drew the plans for this engine he includes all the fixtures to build the engine.
 
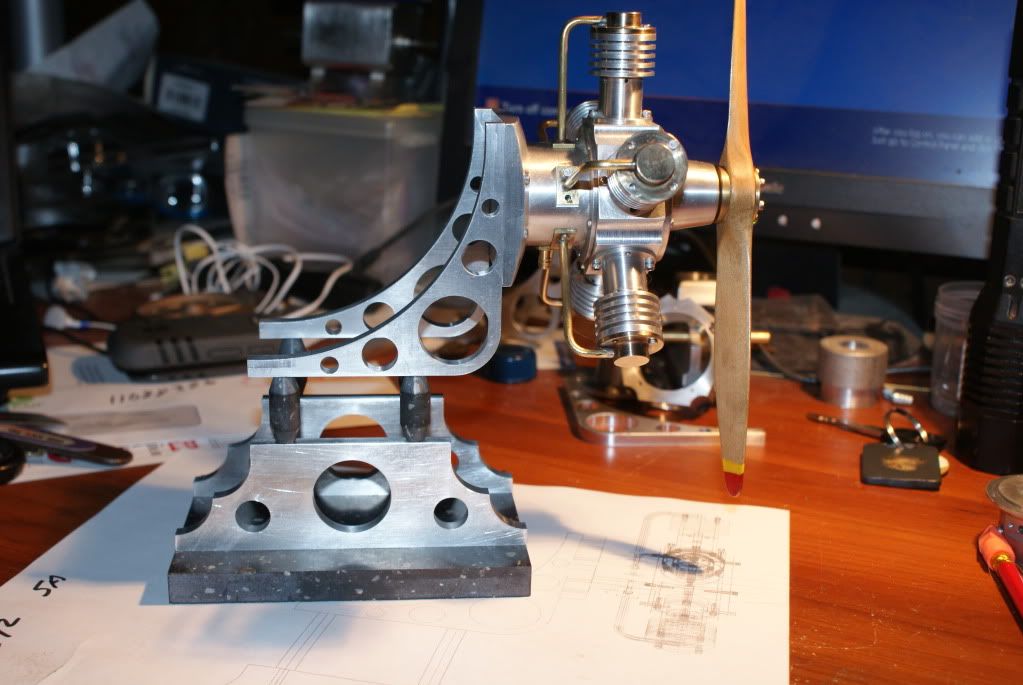
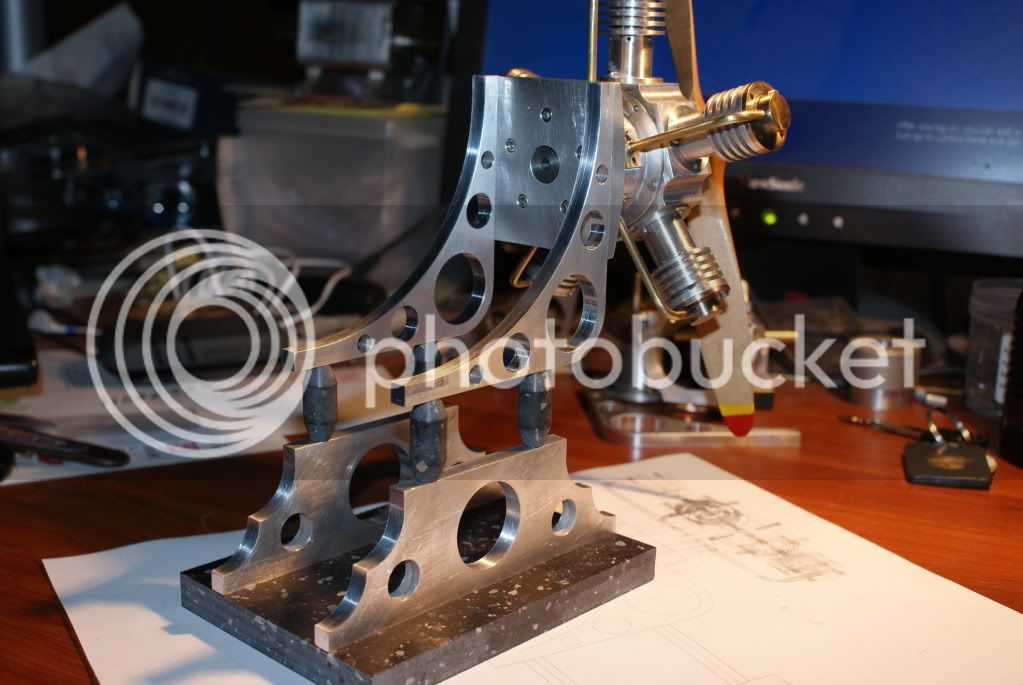
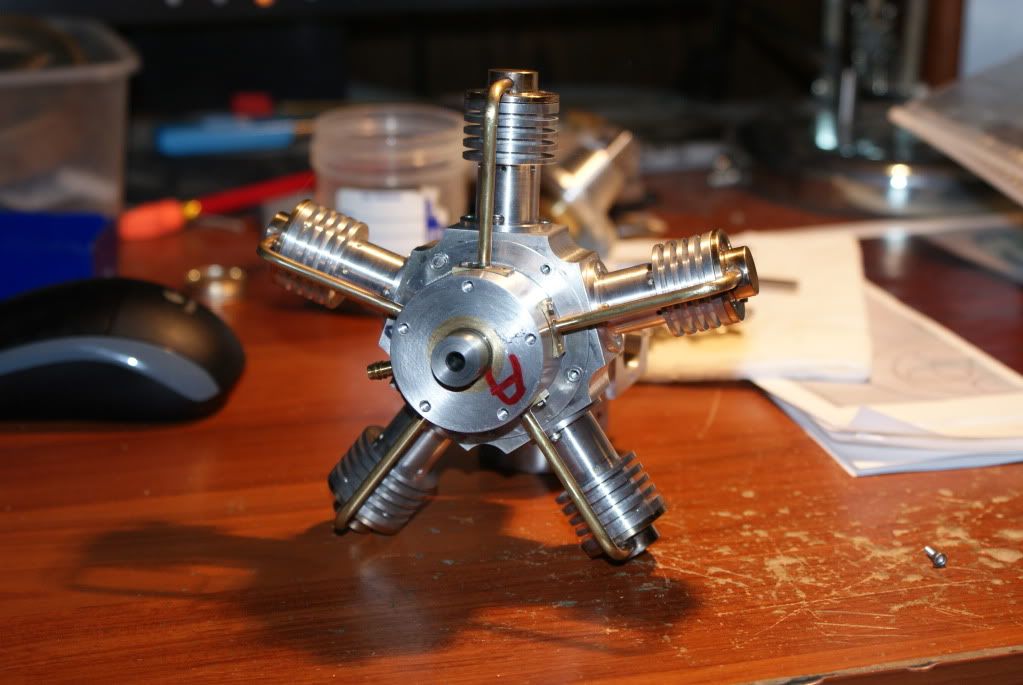
Well Its been 1 year since I started this Thread. I have been building the two engines for friends as time allows. I have then at about 90 percent done.

I spent some time in the shop today and got the cranks done.
DSC01716.jpg


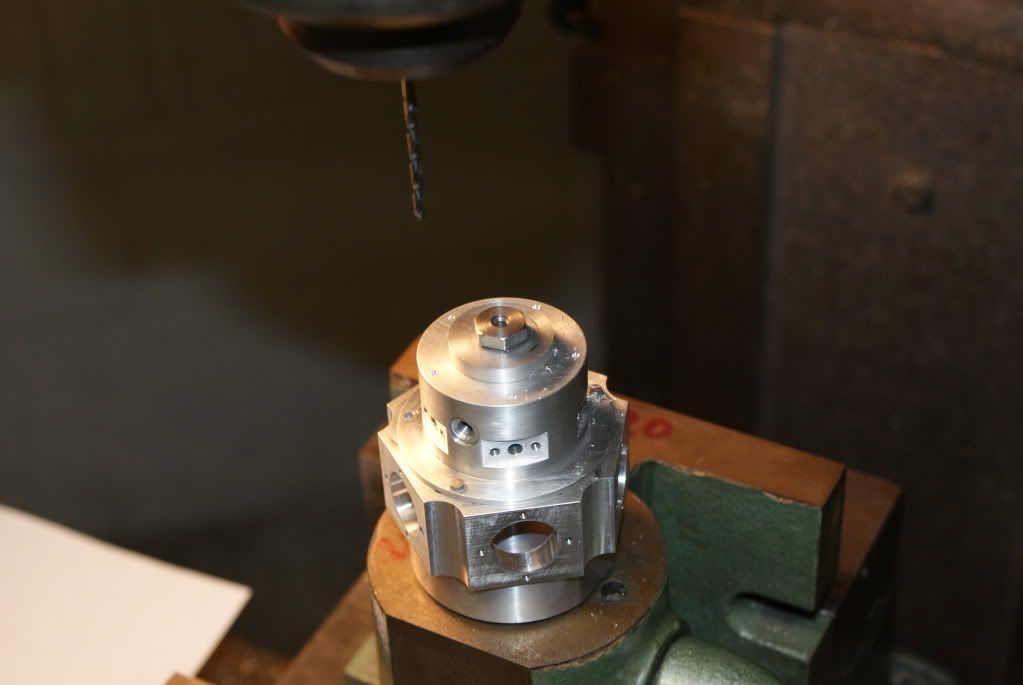
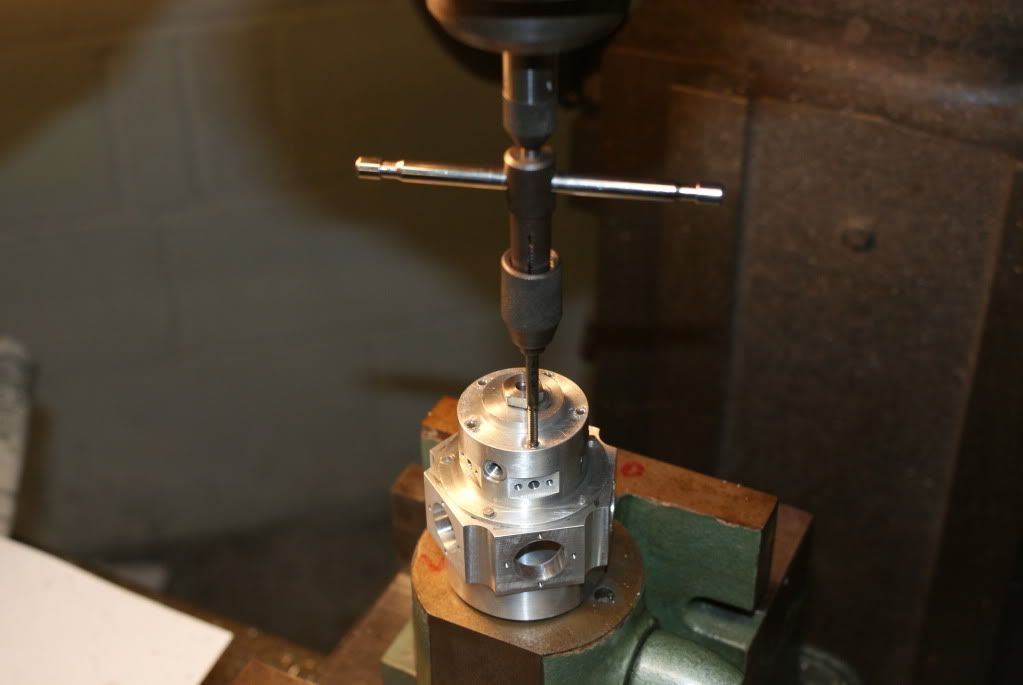
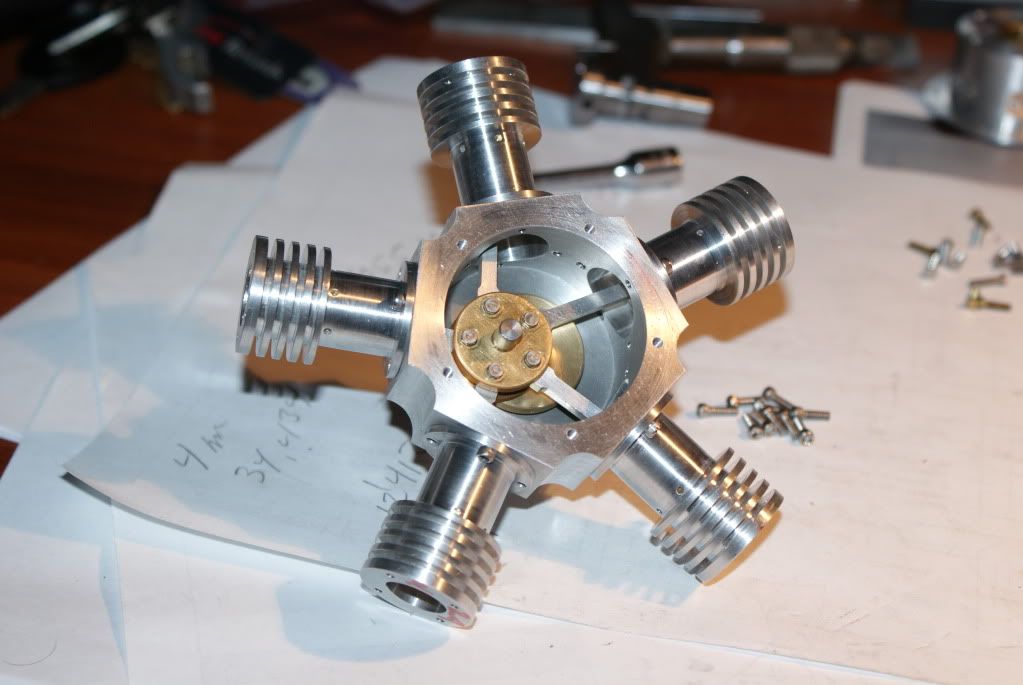
I then drilled and taped the holes in the rear of the valve body to hold it to the stand.
DSC01712-1.jpg

DSC01715.jpg


Im still waiting on the base parts which are being cut at a local school. I also need to cut the valve's which are a real pain to do. I need to order some .875 Dia steel rod to make them.
 
Its Alive well engine A is. :big: I finished the crank pins and put everything together the first time without oil and thats when there was a problem :wall:. I took everthing back apart and this time put oil on everthing. The next set of pictures are the second time back together.
DSC01725.jpg

DSC01726.jpg

DSC01730.jpg

DSC01732.jpg

DSC01731.jpg


Well everything spins smooth so down the stairs I went. So here is Engine A which is going to my friend BOB W.
I Hope to get both complete within the few weeks. I will post more pictures of the parts when I break it down to clean the 2 engines to clean them.

<object width="480" height="385"><param name="movie" value="http://www.youtube.com/v/uqOeLkgKlo0?fs=1&amp;hl=en_US"></param><param name="allowFullScreen" value="true"></param><param name="allowscriptaccess" value="always"></param><embed src="always" allowfullscreen="true" width="480" height="385"></embed></object>
 
Looks good, and sounds great! Thm: Thm:

Looking forward to seeing them both at once.

Cheers, Joe
 
That has better sound than some of the others I've heard. Did you do anything different?

Chuck
 
I have seen (and heard) his other radials in person. They run nice. Sound amazing too. dreeves does some fantastic work.

Looks nice!

Eric
 
Outstanding looks and performance. Thm: Thm:
Gail in NM
 
Very nice Dreeves :bow: :bow: :bow: Any plans for a prop? If so will you make or buy it?

Steve
 
Thanks for the positive comments. I need them after a long build.

Chuck, I did not do anything diffrent but I agree the engine does sound better that the first one I built.

Swilliams, I will be using A 3 bladed plastic prop on both engines.

Thanks Eric its been awhile.
 
Real nice finish on those heads. How did you get them cleaned up so nice? Cleaning up soldered brass is not one of my strong suits.

Chuck
 
Chuck, I used a dremal tool with a soft cloth and polish. They still need some work.

Dave
 
Very nice Dave! I've always liked this engine and maybe someday...... ;D

Cheers

Jeff
 
Got some more work done. I made a visit to the Williamson Free School where I was having some parts made for the engine.


Here are the parts I picked up
DSC01760.jpg


Here are the new toys the school just got 2 haas mill centers
DSC01755.jpg

DSC01756.jpg


Here is a shot of the rest of the shop
DSC01753.jpg


DSC01752.jpg

Sure wish I had that shop as my own :)

And here are 2 of the parts on the base
DSC01761.jpg


I hope to get more done on Saturday Till than

 
Got some more work done today on the Radial 5 engine. I made some parts for the base. Im not sure if I like it you what do you think?


Dave
DSC01769.jpg

DSC01770.jpg
 
Hi,
The parts looks very nice, they mate very well with the engine.
The legs had rubber in the middle or are they painted black?

Norberto
 
Back
Top