Philip Duclos "Odds N Ends" hit and miss engine

Home Model Engine Machinist Forum

Help Support Home Model Engine Machinist Forum:

This site may earn a commission from merchant affiliate links, including eBay, Amazon, and others.
Are you sure the timing is right I remember building this and recall I had to retard the timing quite a bit at first and after running awhile it has become a good little running engine.
http://youtu.be/a1-gSRgTfZs
 
Last edited:
This engine, like the Webster, has only one "port" at the top of the cylinder. That single port connects to a valve body, which incorporates the intake valve and guide, the exhaust valve and guide, the muffler, and the carburetor. By swapping out the whole sub assembly that connects to that port, you swap out all of the items just mentioned. Since my Webster runs very well, I know that all of those items are in excellent working order. That would address any question of compression leaking past either valve, and the issue of carburation. Its just sheer good luck that while the Odds and Ends engine has the tapped holes offset in a vertical plane from the port, the Webster has the tapped holes in line horizontally with the port. This allows me, by simply tapping two more holes, to run either sub assembly untill I isolate the problem. The build itself is finished, and the engine looks great. The cylinder to water jacket seal appears to be a success, as I have had the water jacket filled with water all day, and there are no bubbles escaping from the combustion chamber into the water, and no water leaking out around the cylinder nor into the combustion chamber. If the engine still has rather questionable compression with the carb/valve body/sub assembly swapped out, then it has to be the cast iron rings. Most of what is left now is detective work.-----Onemarine---By all means, build a Webster. They are simply a wonderful "starter" i.c. engine, the plans are a free download from the internet, and about a zillion people have built them. If I were to build another Webster, the only change I might make is to build a water jacket around the cylinder instead of depending on the air cooling, which limits the run time to about 15 minutes.
CARBURETOR-SUBASSEMBLY-X_zps5d7fae03.jpg

CARBURETOR-SUBASSEMBLY-REARSIDE_zps467f1cda.jpg
 
Last edited:
Thanks for the tip on the water jacket Brian.
I have down loaded the plans all ready and have been thinking about building it. Checked materials and im good there. Just need a good kick in the rear to get started...

A number of years ago I had bore out a set of chilled iron cylinder sleeves, honed them, then reinstalled into the aluminum block. After reinstallation I double checked the bores. I found that the block actually compressed in the sleeve a consiberable amount to where I had to re hone the cylinders... Take a couple of minutes and reinspect you bore and check the ring for a wear pattern... sound like evrything else has been ruled out.....
 
Thinking--thinking---I don't have an M10 x 1 die---but if I did---Then I could make up a hollow adapter to screw into the sparkplug hole, hook an airline to it, and determine what is leaking and where and how much---
 
JUST PULL THE DANG PISTON AND INSPECT THE BORE AND RING!!! sorry, just had to express myself....
 
Thinking--thinking---I don't have an M10 x 1 die---but if I did---Then I could make up a hollow adapter to screw into the sparkplug hole, hook an airline to it, and determine what is leaking and where and how much---

You could make a hollow adapter out of a M10 x 1 bolt. That's what I've done in the past.

If it turns out to be the rings not sealing, I've used plain old O-ring on my version of the Odds n End engine for over 6 years now and have never had to replace it. I'm a big believer.

Chuck
 
Better, cheaper idea,--just slip a rubber hose over the carb air horn, leave the sparkplug in, depress the intake valve with my thumb on the stem, then check for air leaks around the piston and exhaust valve. Then repeat with the air hose over a screw in exhaust stub and try again, Should show up leaks at either valve or at piston.
 
Better, cheaper idea,--just slip a rubber hose over the carb air horn, leave the sparkplug in, depress the intake valve with my thumb

maybe cheaper but building aleak down tester like I mentioned is about 20.00 max and both of your hand are free
to move your projec around looking for a leak.
Ive urchasse one of those maney years ago to check engine at the race track and love it you can use that with many other app after
 
Just got home from an all day trip up north to see my ancient mother (92). She's feeling good and looking healthier than I do. I have decided that the quickest, cheapest, nastiest thing I can do to see if my cast iron rings are leaking compression is to put some compressed air on the cylinder and see if I can hear or feel air escaping out the open end of the cylinder with 25 pounds pressure on the cylinder. Normally I would have made an adapter to screw into the sparkplug hole, but I lack the required die to make a screw in spigot. However, I have dozens of short pieces of steel and brass laying around, so when I got home I quickly turned two spigots and glued them into the exhaust valve body and the intake valve body with "seal all". They can be quickly removed by applying a bit of heat to the outboard ends to soften the glue when I am finished with them. They both have a .100 hole thru the center, which will let me slip some silicone tubing over the ends and blow pressurized air through them via a regulator supplied from my air compressor. I'll let things set up for an hor and give it a try to see if I can find out what exactly is happening. I can very quickly make another piston with a Viton o-ring if the c.i. rings are leaking compression. I know that a Viton ring won't leak.
SPIGOTS001_zps5f058a9c.jpg
 
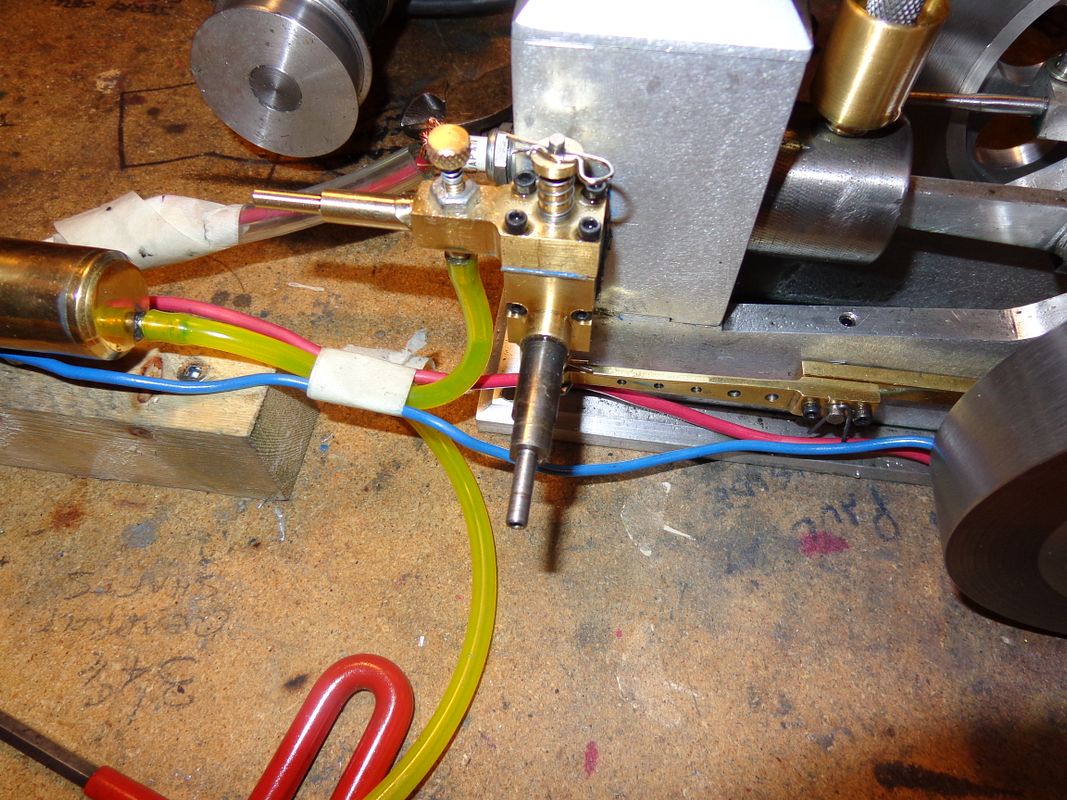
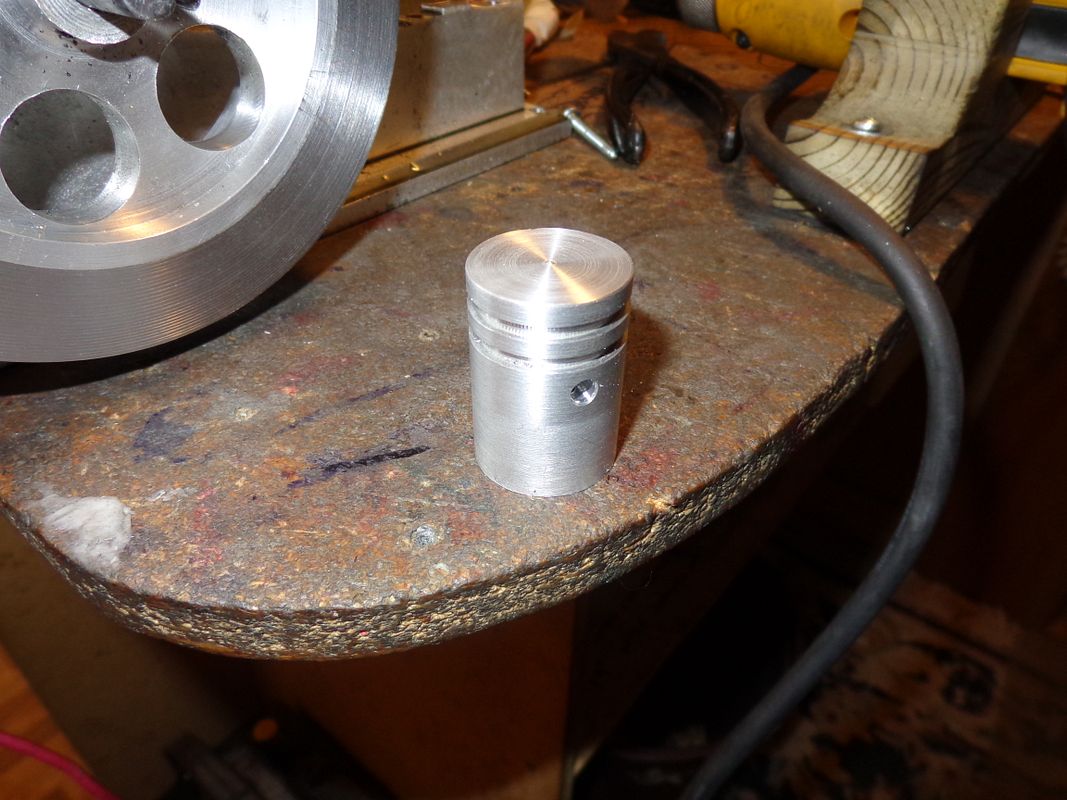
Okay---The results are in. At 25 to 40 psi applied thru the exhaust port, and the engine rotated by hand untill the lifter opens the exhaust valve, allowing pressurized air to enter the combustion chamber, there is no air escaping from the intake side of the carb, but I can hear a definite hiss of air escaping around the piston at the open end of the cylinder. With the air line hooked to the intake side of the valve body, and the intake valve depressed by hand so that air can enter the combustion chamber, no air is escaping from the exhaust valve side, but again I hear air hissing at the open end of the cylinder, and when the piston is at bottom dead center I can see see bubbles appear in the oil cup for the cylinder which is always "downstream" from the rings on the piston. This tells me 3 things--The intake valve is sealing properly when there is pressure in the combustion chamber. The exhaust valve is sealing properly when there is pressure in the combustion chamber, and the rings are not sealing regardless of where the piston is in the cylinder, as established by rotating the crankshaft through 360 degrees with the cylinder pressurized. Its not a real loud hiss, but its definitly a hiss. Now on a 4" diameter piston with a 4 or 5" stroke, a little hiss like I'm hearing wouldn't rattle me to much.---But, on a 1" dia. piston with a 1 3/8" stroke, any little hiss at all is bad news. Tomorrow I will build a new piston with a Viton o-ring. I may have to wait until Monday to get the o-ring.
 
Chuck---Did you use a Viton o-ring or just a plain black butyl rubber one? I prepared my cast iron cylinder with a brake hone (the cheap ones with the 3 spring loaded expanding stones) and a lap made from 1" diameter aluminum. The finish on the inside of my cylinder was as good or better than any other engines I have built. I am still learning, and I learn more with every engine I build. Today I'm making a new piston and fitting it with a Viton o-ring. If the engine runs succesfully after that, I will have learned not to use cast iron rings again on my home hobby projects.-----And probably exactly because of what you said. I don't have the equipment (or perhaps the machining expertise) to get the finish required to run cast iron rings. As a point of interest, with the cylinder dismounted and the carb/valve bodies still in place, I blew into the cylinder by mouth untill I just about ripped a lung loose, and there is no air escaping from the valves nor from around the sparkplug.---
 
Brian, on my Odds n Ends engine I just used a black o-ring I bought at the hardware store. It has held up well. I think they are more than adequate for engines that don't get real hot.

Another thing I've learned about o-rings is not to fit them too tight. I like to make the groove at least .006" wider than the o-ring with the depth being at or just under the o-ring thickness. I also use a file to put ever so slight a chamfer on the groove edges, just to reduce the risk of cutting the o-ring.

Chuck
 
Last edited:
There we have it---a new aluminum piston configured for Viton o-rings. Started a t 10:00--finished at 12:00!!! I may not be getting better, but By God, I am getting faster!!!:p:p
newpistonforo-ring001_zpsa319db15.jpg
 
Thanks Chuck. I can't get a Viton ring until Monday, so I may steal the ring out of the Atkinson to try things with. As far as the size of groove, i have a chart that shows a gap .95" wide for a 0.070" cross section o-ring x .055 to .057" deep. I use those figures as starting points anyways, and yes, I do chamfer the edges of the grooves slightly with a flat file while the piston is still in the lathe. Since my parting off tool is .093 wide thats what I use to cut the grooves, just a straight on plunge cut.
 
No Luc, I don't. The two rings I have were shipped from Texas. I have the piston and rings removed now, and to be honest, the wear pattern on the rings looks very good. I'm done with cast iron rings.

Hey Brian ,
you might want to try this.
put your ring on your piston close it like if it would be in your cylinder
and make a pigot that would take the gap off and press tyte it in your your
or top of your ring grove. this is a common practice on a 2 stroke

pin location.JPG
 
Okay---We got joy!!! We got so much compression now that the flat belt won't drive it---it just slips. I have went back to the adapter that drives right on the end of the crankshaft, and the engine is starting and running for short periods of time. Office is full of blue smoke. Twiddling ignition timing and fuel needle valve, trying to find the "happy" combination.
 
"I may not be getting better, but By God, I am getting faster!!!"

Brilliant Brian!

As always a joy to look at your posts, video's, narratives, your build's and the above!

Ron.
 
Last edited:

Latest posts

Back
Top