ET Westbury Side Paddle Engine

Home Model Engine Machinist Forum

Help Support Home Model Engine Machinist Forum:

This site may earn a commission from merchant affiliate links, including eBay, Amazon, and others.
I have just decided to make this engine but the first drawing I studied and tried to draw the more confused I became.
Looking at the inner main frame drawing there is an error somewhere between the 3.5/8" crankshaft centre height, the dimensions along the 20 degree line to the cylinder and its height at the cylinder.
Does anyone have an autocad drawing or explanation???
Graham
 
Thanks for the information :)
The drawing looks a lot better now.
Graham
 
Now I am starting to find which parts I need to remake. :mad:

I discovered that the threads on one of the crossheads were crooked, so that part was remade tonight. I will also need to redo both steam chests as a result of various faults. At least this time I have a good idea on how to do them better.
 
Hi again guys.Great build on a distinctly unique engine kvom and sorry for this interuption but I have been looking all over hecks half acre for some plans for this engine or something similar.Don't find anything in H.M.E.M archives.Found Paddleducks site and tried to register there but that site doesn't seem to want to acknowledge my activation code prompt I got in my email.(sigh).A similar engine was found at J.R.baileys site modelengine.info but my computer doesn't seem to want to let me access that site anymore(sigh).Can anyone help me circumvent the snakespit of links or have I simply missed the boat (pun intended) on the info for this engine????????
 
Hey kvom,another thanks for the plans and just wonderin'when you might be starting back up on your build.I seem to recall a lot of travel/vacation plans here at the tailend of summer.Hope all goes well there.Holding my breath for next installment and starting to turn a little purple,,,,,,,,I'll be keeping an eye out
 
Well, at this moment I'm sitting in a coffee shop in Kathmandu, Nepal with a good Wifi connection. I am leaving tomorrow morning for a longish trek in the Himalayas, although I should reach a town with internet in 10-14 days. I plan to be back home on November 3, with engine restart shortly after,

Thanks for thinking of me. :)
 
kvom - please keep up the great work & pictures Thm:

I'm very much enjoying the build process !!

Mike
 
Hi Kirk,

hope you enjoy the journey :)
(have seen Nepal 21 years ago - don't forget to take a look to earth from its roof :) )

i've sent you a PM because your demand ...

here's a small fragment to see of my last E.T. Paddleduck:

ET_diagonal_02.jpg


ET_diagonal_06.jpg


Frank
 
A-MA-ZING! :bow: :bow: :bow: :bow: :bow:
If this is not inspiration to keep trying i will sell my lathe!
Impressive work.
Now i`m afraid to start my build thread... :p (sorry folks, i`ll start it in a couple of minutes anyway!)

Cheers,
Norberto

PD: i loved this thread, maybe you noticed it ;)
 
Beautiful!
I think i`ll just need about 10 more years of practice to build my own version...
I have plenty of time :big:
Thanks for sharing those videos!
Now i need a towel to clean my keyboard and some help to close my jaws :p

Norberto
 
Yup, its absolutely gorgeous isnt it?

Its the engine Ive used for inspiration and critical dimensions for my build.

Love it..... :bow: :bow: :bow:
 
I got back from Nepal a week ago, but a combination of jetlag and a chest cold have kept me out of the shop until this weekend. Today's goal was to rough out the two lifting links, pieces that connect the lift arms to the expansion links. These are somewhat "delicate" as ET says, so it took me some thought as to how to make them.

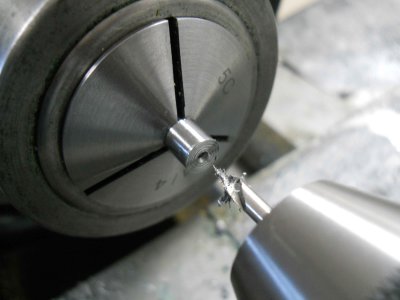
Material is 1/4" diameter drill rod. First a length is chucked in the lathe collet, and i faced the end and center drilled it.

medium.jpg


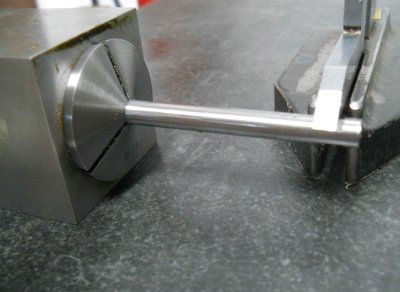
The rod and collet were then transferred to a square collet block and secured in the mill vise. A vise stop was used to ensure repeatability. A 1/4" carbide endmill then milled a flat .055" deep 1/8" from the end of the rod. Leaving the spindle locked, I turned the block over, positioned against the vise stop, and milled a matching flat on the opposite side of the rod. Next a 1/8" hole is drilled through the rod.centered on the flat.

Next the collet block is moved to the surface plate, and the drill rod is pulled out ~ 2". The height gauge is used to set the milled flat parallel to the plate.

medium.jpg


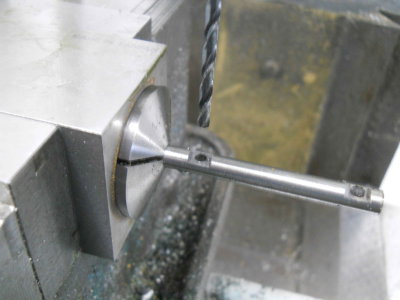
Back to the mill vise. I used the 1/8" drill bit in the existing hole to zero the DRO, then moved the X-axis 1.625" to establish the location of the flat/hole on the other end.

medium.jpg


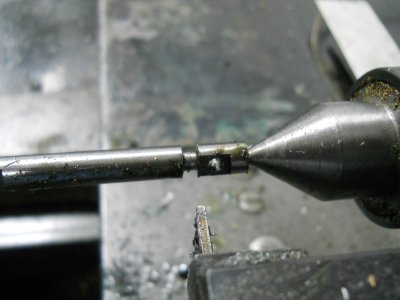
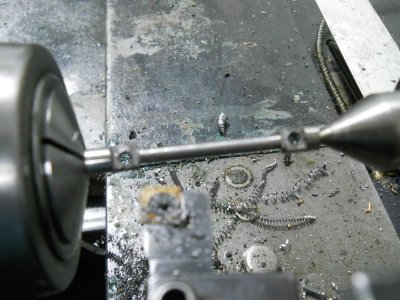
The collet and rod are then placed back on the lathe to turn down the shaft between the flats. The non-chucked end is supported by a live center. First I used a parting tool to turn down the right end of the shaft to provide space for a turning tool.

medium.jpg


Then the rest of the shaft was turned.

medium.jpg


After some polishing of the shaft with emery cloth and scotchbrite, I parted off the link. After the first one, it took only about 15 minutes to make the second.

medium.jpg


In my next shop session I will grind off the center-drilled portion and do some cleanup filing on the ends.


A bit more progress this afternoon, although nothing picture-worthy. The first job was to mill the sides of the main bearings to plan, and test fit the crank and outer staybolt for spacing between the frame. By measurement it looks good, but the true test will be when the entire drivetrain is in place.

After that, I found a piece of 12L14 in the material drawer and used that to mill the webs for the second crank. Afterwards, I used 3/8" drill rod as before for the crankshaft and pin, setting them in place with loctite and using a .500 gauge block to set the spacing between the webs. The assembly will cure overnight, and then will be fastened permanently with roll pins. Essentially the same construction as the first crank.
 
Hi all
I am making good progress on the machining of the parts for the
ET Westbury Side Paddle Engine but have come to a stop because I cannot find the drawing for the expansion link.
Does anyone have the dimensions/drawing they can email to me???Graham
 
Hi All
It always pays to read everything, which I did not do obviously.
Thanks Kvom
 
Back
Top