Another Jan Ridder Flame Engine build

Home Model Engine Machinist Forum

Help Support Home Model Engine Machinist Forum:

This site may earn a commission from merchant affiliate links, including eBay, Amazon, and others.
Well I managed to remake the valve and here are the results. Click on picture!


:mad:

Video is taking its time to load here - well done :bow:

Getting my flame gulper running was the best moment of my Model Engineering life so far ...

Nick
 
Congratulations Matt, glad you got a good runner! What do you think the problem was in the end, piston fit or bad fuel?

Vic.
 
Wooo Hoooo--another running Flame Eater. I love the way they sound just putt-putting along. Nice job!!! woohoo1
 
Good one Matt :bow: :bow:

Best Regards
Bob
 
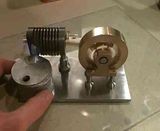
Thanks all, it was a great feeling to finally get it running. I have the itch now to start another engine, any suggestions for a good second build after I finish the "bling" on this one?

I found a couple of things that might be helpful to anyone new to this hobby like myself and looking to build this engine. The issues appear to be simply the piston and valve clearance. It truly does need to be as small as possible while still allowing a somewhat smooth movement in the cylinder. Clearance was about 2.5 thousands when I wasn't able to get it to run. After re-making the piston and valve the clearance is now 1/2 thousandths or 5 ten thousandths (I think they are one in the same?) and started up the first time I tried it, heated first with a blow torch for 30 seconds. The Alcohol used was the same for all trials so I do not think that was a factor in getting it to run.

Process for getting them to fit:
-Turned down valve and piston very carefully to 2 tenthousands oversized of the cylinder
-with them still on the lathe I used 1500 grit sand paper and removed the remaining material until it was a very tight fit in the cylinder, basically needing quite a bit of force to "wedge" it in. I then used Maas polishing compound and very slowly worked the piston and valve back and forth in the cylinder until it was a little tighter than a sliding fit. Then cleaned everything off and basically spent about 1 hour working them back and forth. Maybe not the best or most efficient way to do it but it worked for me.

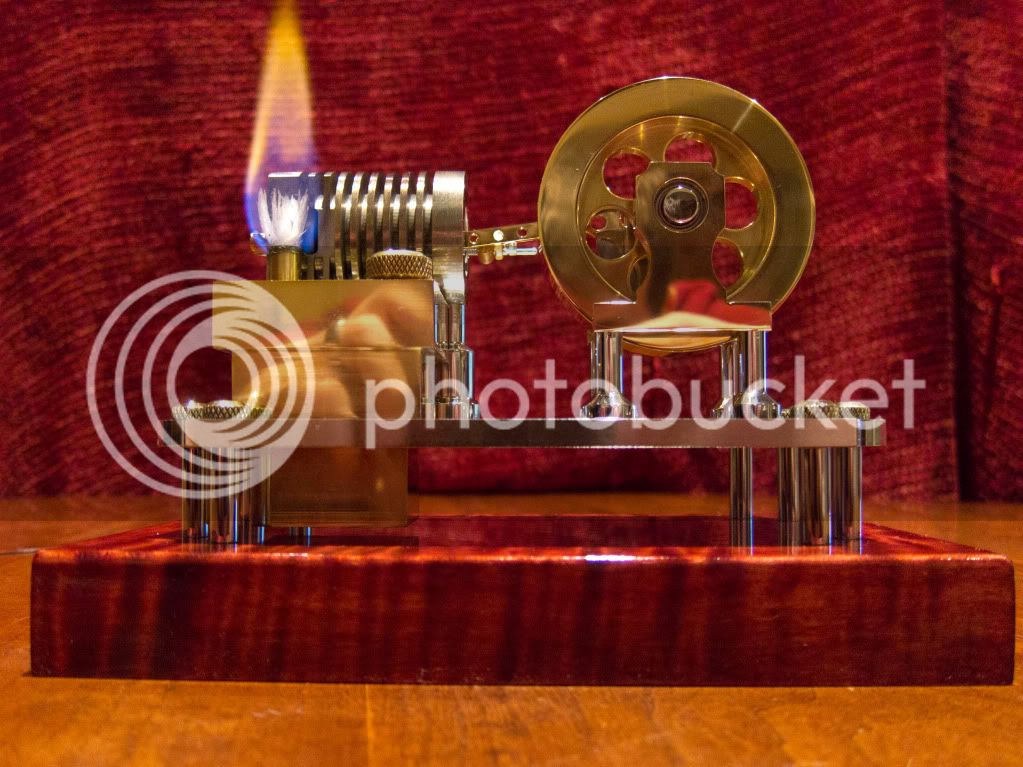
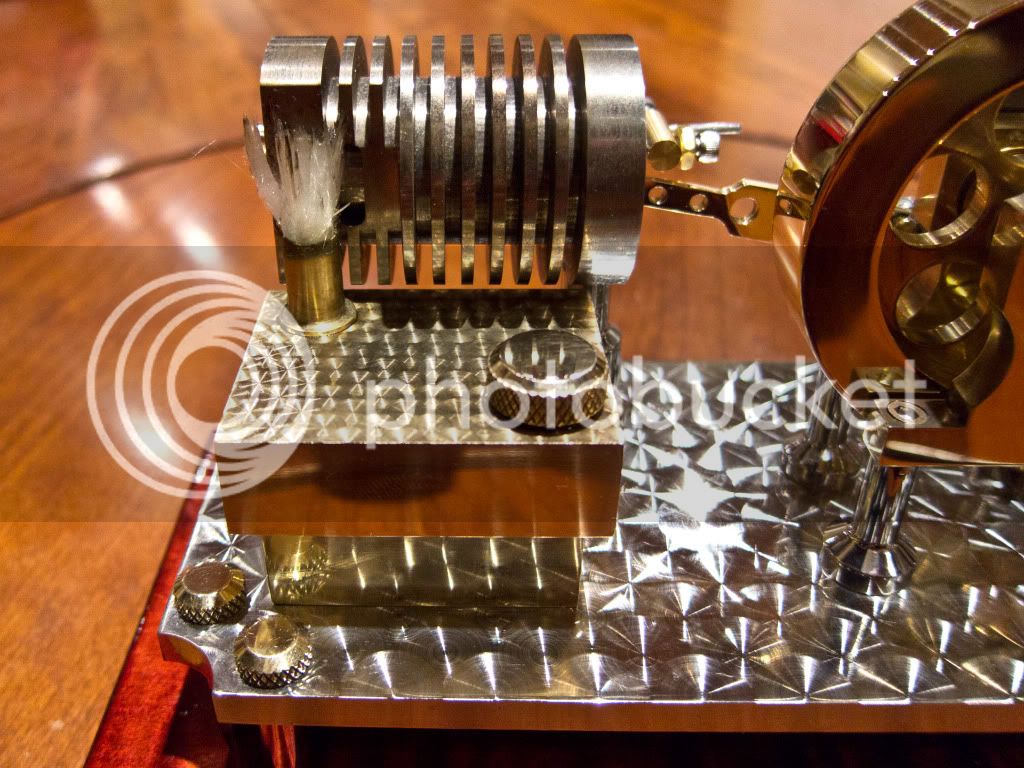
The flame position as all on here have stated is also important and a little movement in any direction does affect performance. Both Bogs recommendations and the wick postions on the plans work great, any other postion and the engine simply stops as can be seen on the video.

A couple of questions/issues that still need worked out, any suggestions?
1. My valve push rod is made out of 1/16 stainless welding rod, I think it is too thin and bends pretty easily and I can feel some resistance because of the bends, I will move up a size to 3/32nds, hopefully that shouldn't affect much.
2. I still do not understand how to make it so the valve does not get sucked to deep, right now the push rod is long and hits the cylinder wall. Seems to work OK for me but others do not have to keep the valve push rod longer. What gives?
3. After about 10 minutes of constant running the engine seizes up and the valve is very tight, is it getting too hot and expanding at a different rate than the cylinder? Is that possible as they are made out of the same material.


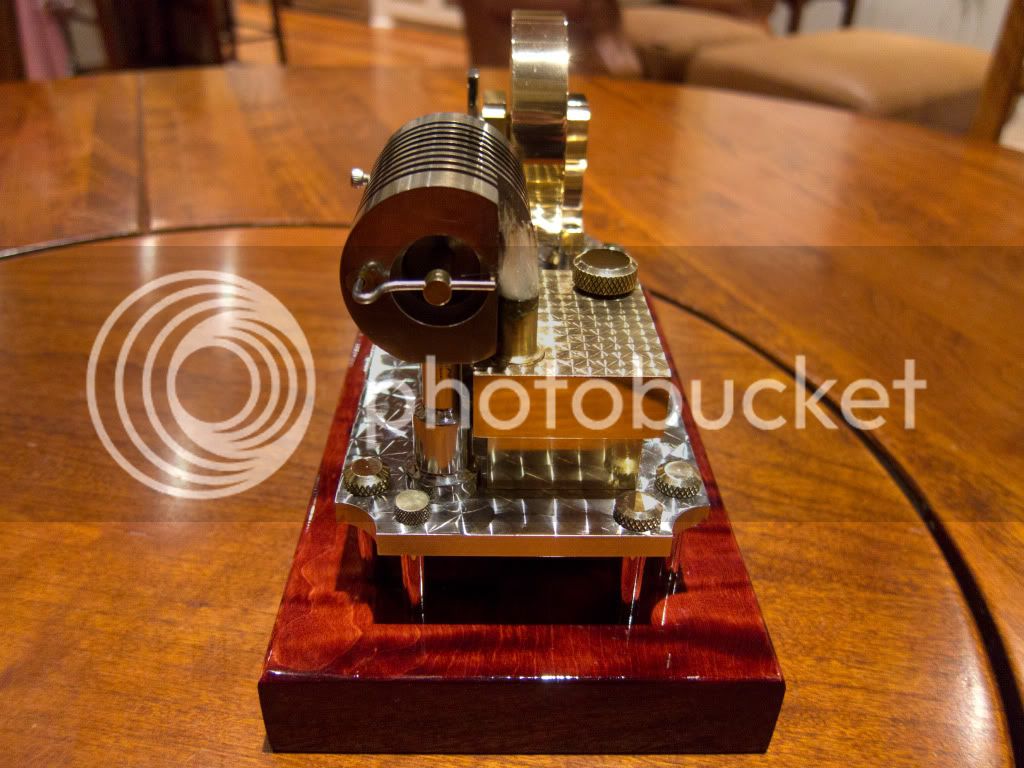
Thanks again for all the help and words of encouragement, once I get it polished up and build a proper base and burner I will re-post a video and pic, I was thinking a high polish on everything with a custom brass burner and an engine turned base raised up on some pillars.


Matt,

well done again. That is what I found with the piston / valve fit. I just reamed the bore with an adjustable reamer to ensure roundness and parallelism then turned the piston to suit but I think the clearance in mine is marginally too big still, as I said, it runs better with oil on mine.

With regards to the valve push rod, mine was 3/32".

I had to make a little brass locking collar with a grub screw to stop mine being sucked in but with hind sight, just leaving it longer and letting it hit the cylinder is a neater solution in my opinion! Although I think I've got a proper grub screw which could let mine look a little better now.

http://www.homemodelenginemachinist.com/index.php?topic=6803.120

It's strange that the valve should expand and tighten up if it's the same material. Could it be the brown residue you get gunging it up? I need to put an oil cup on front and back of my cylinder, that is the only way it will keep running. It keeps it clean and reduces friction once the oil is up to temperature.

If you read my posts from the link above you'll see that there are 2 schools of thought but a few people agree - Mike RC and Marv are the guys that suggested it from their experience with the 'Poppin' flame licker.

Cheers

Nick


Thought I should post a video of my finished engine. I put some polish and the proverbial "bling" on it and it runs great. It gums up and runs rougher after about 20 minutes of continuous running but I am fine with that as the noise drives people crazy long before then. Doesn't bother me any though :)!!

[ame]http://www.youtube.com/watch?v=3ae27g4Y5dc[/ame]


Nice Matt.
I like the bling and the base is beautiful too.
The sound is good too. Those other people must not be into engines.
 
Nice engine!
I agree those other people must not be into engines I can listen to them run all day ;D.
 
Very well done indeed Matt :bow: :bow:
Lovely runner !
And a very neat job on the engine turning as well Thm:

Kind regards, Arnold
 
Thanks for the nice comments and I agree with you all that they are obviously not engine lovers!

I think the engine turning worked great and it was easier to do than I thought, just took some patience and concentration is all.

 
Very well done Matt. Beautiful finish too. I hadn't realized it but without a cam and with the valve actuating system it will indeed run eitiher direction as your video shows.

Nice job!!

Bill
 
Thanks Bill,

I am amazed at how simple these engines are yet when I try to explain it to people they have a tough time grasping the concept. They think there is some combustion and pushing action involved and when I explain the vacuum principle they don't quite get it.

Here are a couple of finished still shots. Now to try and figure out what engine to build next. I want to try and stay away from an IC, steam or air engine and am looking at a sterling, LTD or Jan Ridders pulse Mobile although that one seems to be very hard to get running correctly.

IMG_0080.jpg


IMG_0070.jpg


IMG_0067.jpg


IMG_0072.jpg
 
Wow, amazing finish and runs brilliantly matt, :bow:

Even my wife likes it, just had to explain machine turning (well, the way I know it) - she'll be expecting that on my next engine now, will see if I can do it!

Nice video too.

Can't wait to see your next project.

Nick
 
Thanks Nick I appreciate it!

The "Machine" or "Engine" turning is a piece of cake and I am sure you will do just fine with it. Relatively speaking it didn't take that much time to do and I think it really added the finishing touch to the engine. Plus, it covered up all of the little scratches I couldn't get out of the stainless. :)

I basically copied Bog's post on how to do it and the DRO made the job simple, found centerline, used 1/2" cratex with 1/4" offsets alternating either side of the centerline.


Good stuff, cheers Matt, I seem to remember bogs doing a post on it now, I was taught to use a wooden dowel with valve grinding paste. What's cratex? Will give your method a whirl.
 
www.cratex.com

Just rubberized abrasive sticks.

I am sure a dowel with sandpaper or grinding paste will work just as well. However I did find another use for the cratex sticks when trying to sand and polish the inside of the flywheel. It worked very well for getting the tooling marks out of the brass.
 

Latest posts

Back
Top