Vertical 4 cycle engine from recycled parts

Home Model Engine Machinist Forum

Help Support Home Model Engine Machinist Forum:

This site may earn a commission from merchant affiliate links, including eBay, Amazon, and others.
Ha ha. Unfortunately it takes me ages to make a nameplate and I have too many other pressures on my time. I don't mind doing the odd favour though.😉
I get that completely. I am happy to do favors for friends, within reason, as it gives me an excuse to be in the shop, but I refuse to charge for what I do, because I want this to remain a hobby, not become a business.
 
So, I'm all set up and ready to go. Yesterday when the engine wouldn't fire, I remembered that there was a hole in the side of this repurposed cylinder that was bleeding off all of my compression. It was hidden under that ring that supports the rocker arm posts. --So, I took things apart and fortunately the hole was tapped, so I covered a set screw of the appropriate thread size in J.B. Weld and screwed it into place, which plugged the hole, then left things to set overnight. This morning I discovered that I didn't have quite enough adjustment in my timing handle to get the ignition spark to occur when it was supposed to, so a bit of work with the vertical mill opened up a clearance and allowed me to adjust things so the spark came at exactly top dead center of the piston.--Still no joy, so I removed the sparkplug, brought the piston up to top dead center on the compression stroke, and screwed in one of my "Blow your guts out" adapters in the sparkplug hole. A good strong lung powered blow showed me that the exhaust valve is leaking, but the intake valve isn't. Next thing on the agenda will be to regrind the exhaust valve, then we'll try this again.
UPDChg.jpg
 
The engine is very close to running---but--since it is relatively "brand new" it has stiff spots in the rotation. I build my engines to almost no free running tolerance, and generally run them in as shown in the video. I coat everything liberally with lubricating oil, remove the sparkplug from the cylinder head and squirt some oil down into the cylinder, and then generally let them run like this for about half an hour. After half an hour running like this, the engine turns much more freely, and it gives me an opportunity to check the engine for compression leaks, etcetera before actually trying to start it. In this particular case, I discovered that if I blocked both the exhaust pipe and the sparkplug hole with my fingers, the engine started "blowing bubbles" around the underside of the cylinder head---a sure sign that my head gasket is leaking.
 
I might have to break down and buy a compression tester. (I had one but sold it when I got rid of all my hot rod building stuff). I've fixed my head gasket problem, reset my ignition timing, checked the valve timing, checked my fuel ---The carb is a "known quality"--I've used it on other engines. I've checked two different sparkplugs and they both fire like crazy when unscrewed and laid on the block while I crank the engine over. I can't get the engine to fire---even when spraying "quick-start" ether down the carburetor while cranking the engine over. The carb is pulling fuel up to the carb while I'm cranking it over. I'm running a Viton o-ring on the piston and I can feel suction at the carb throat while cranking the engine over. I'm at a loss right now, and won't post anymore until I figure out what the heck is going on.
 
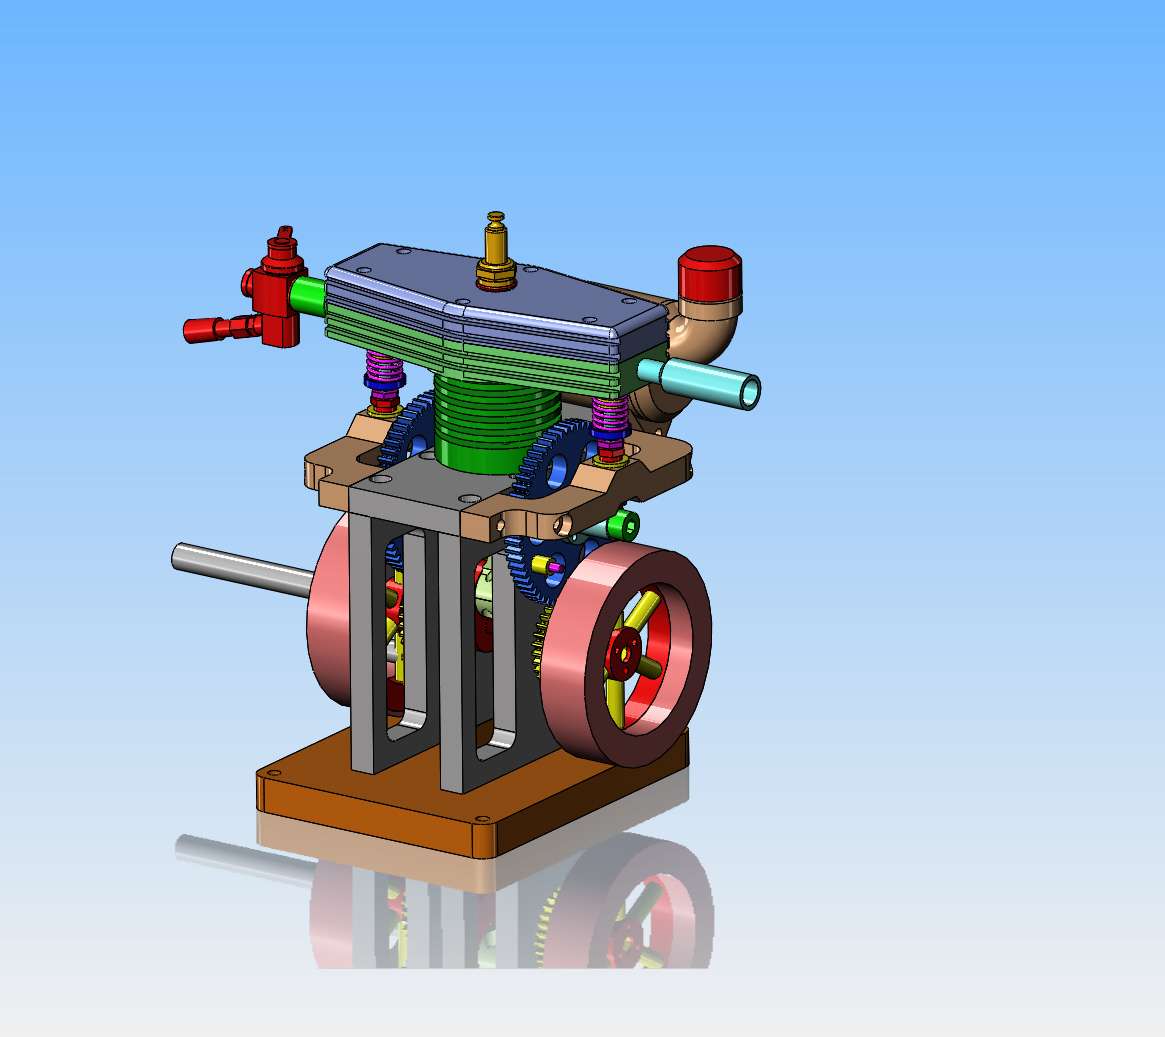
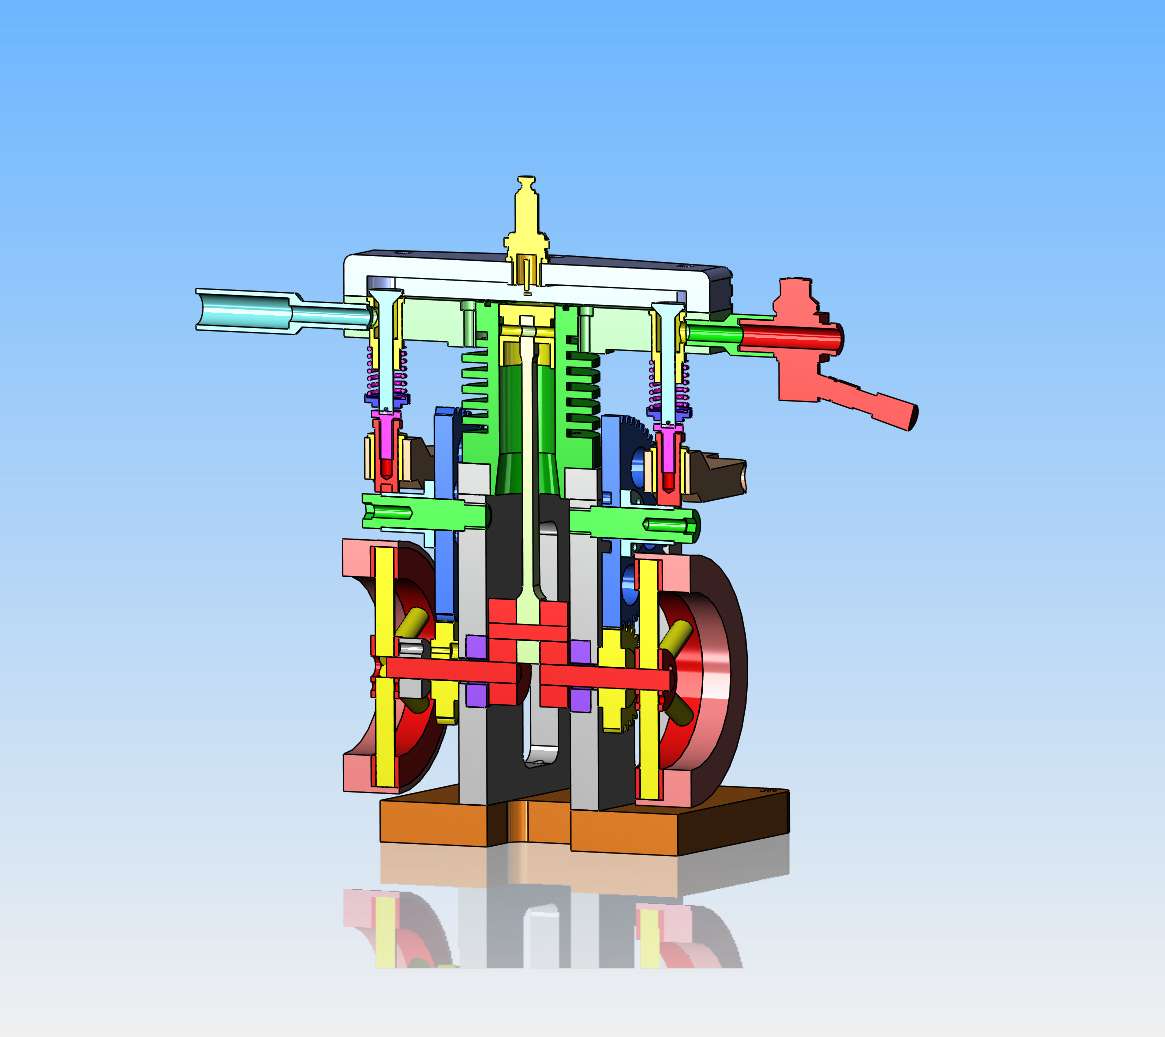
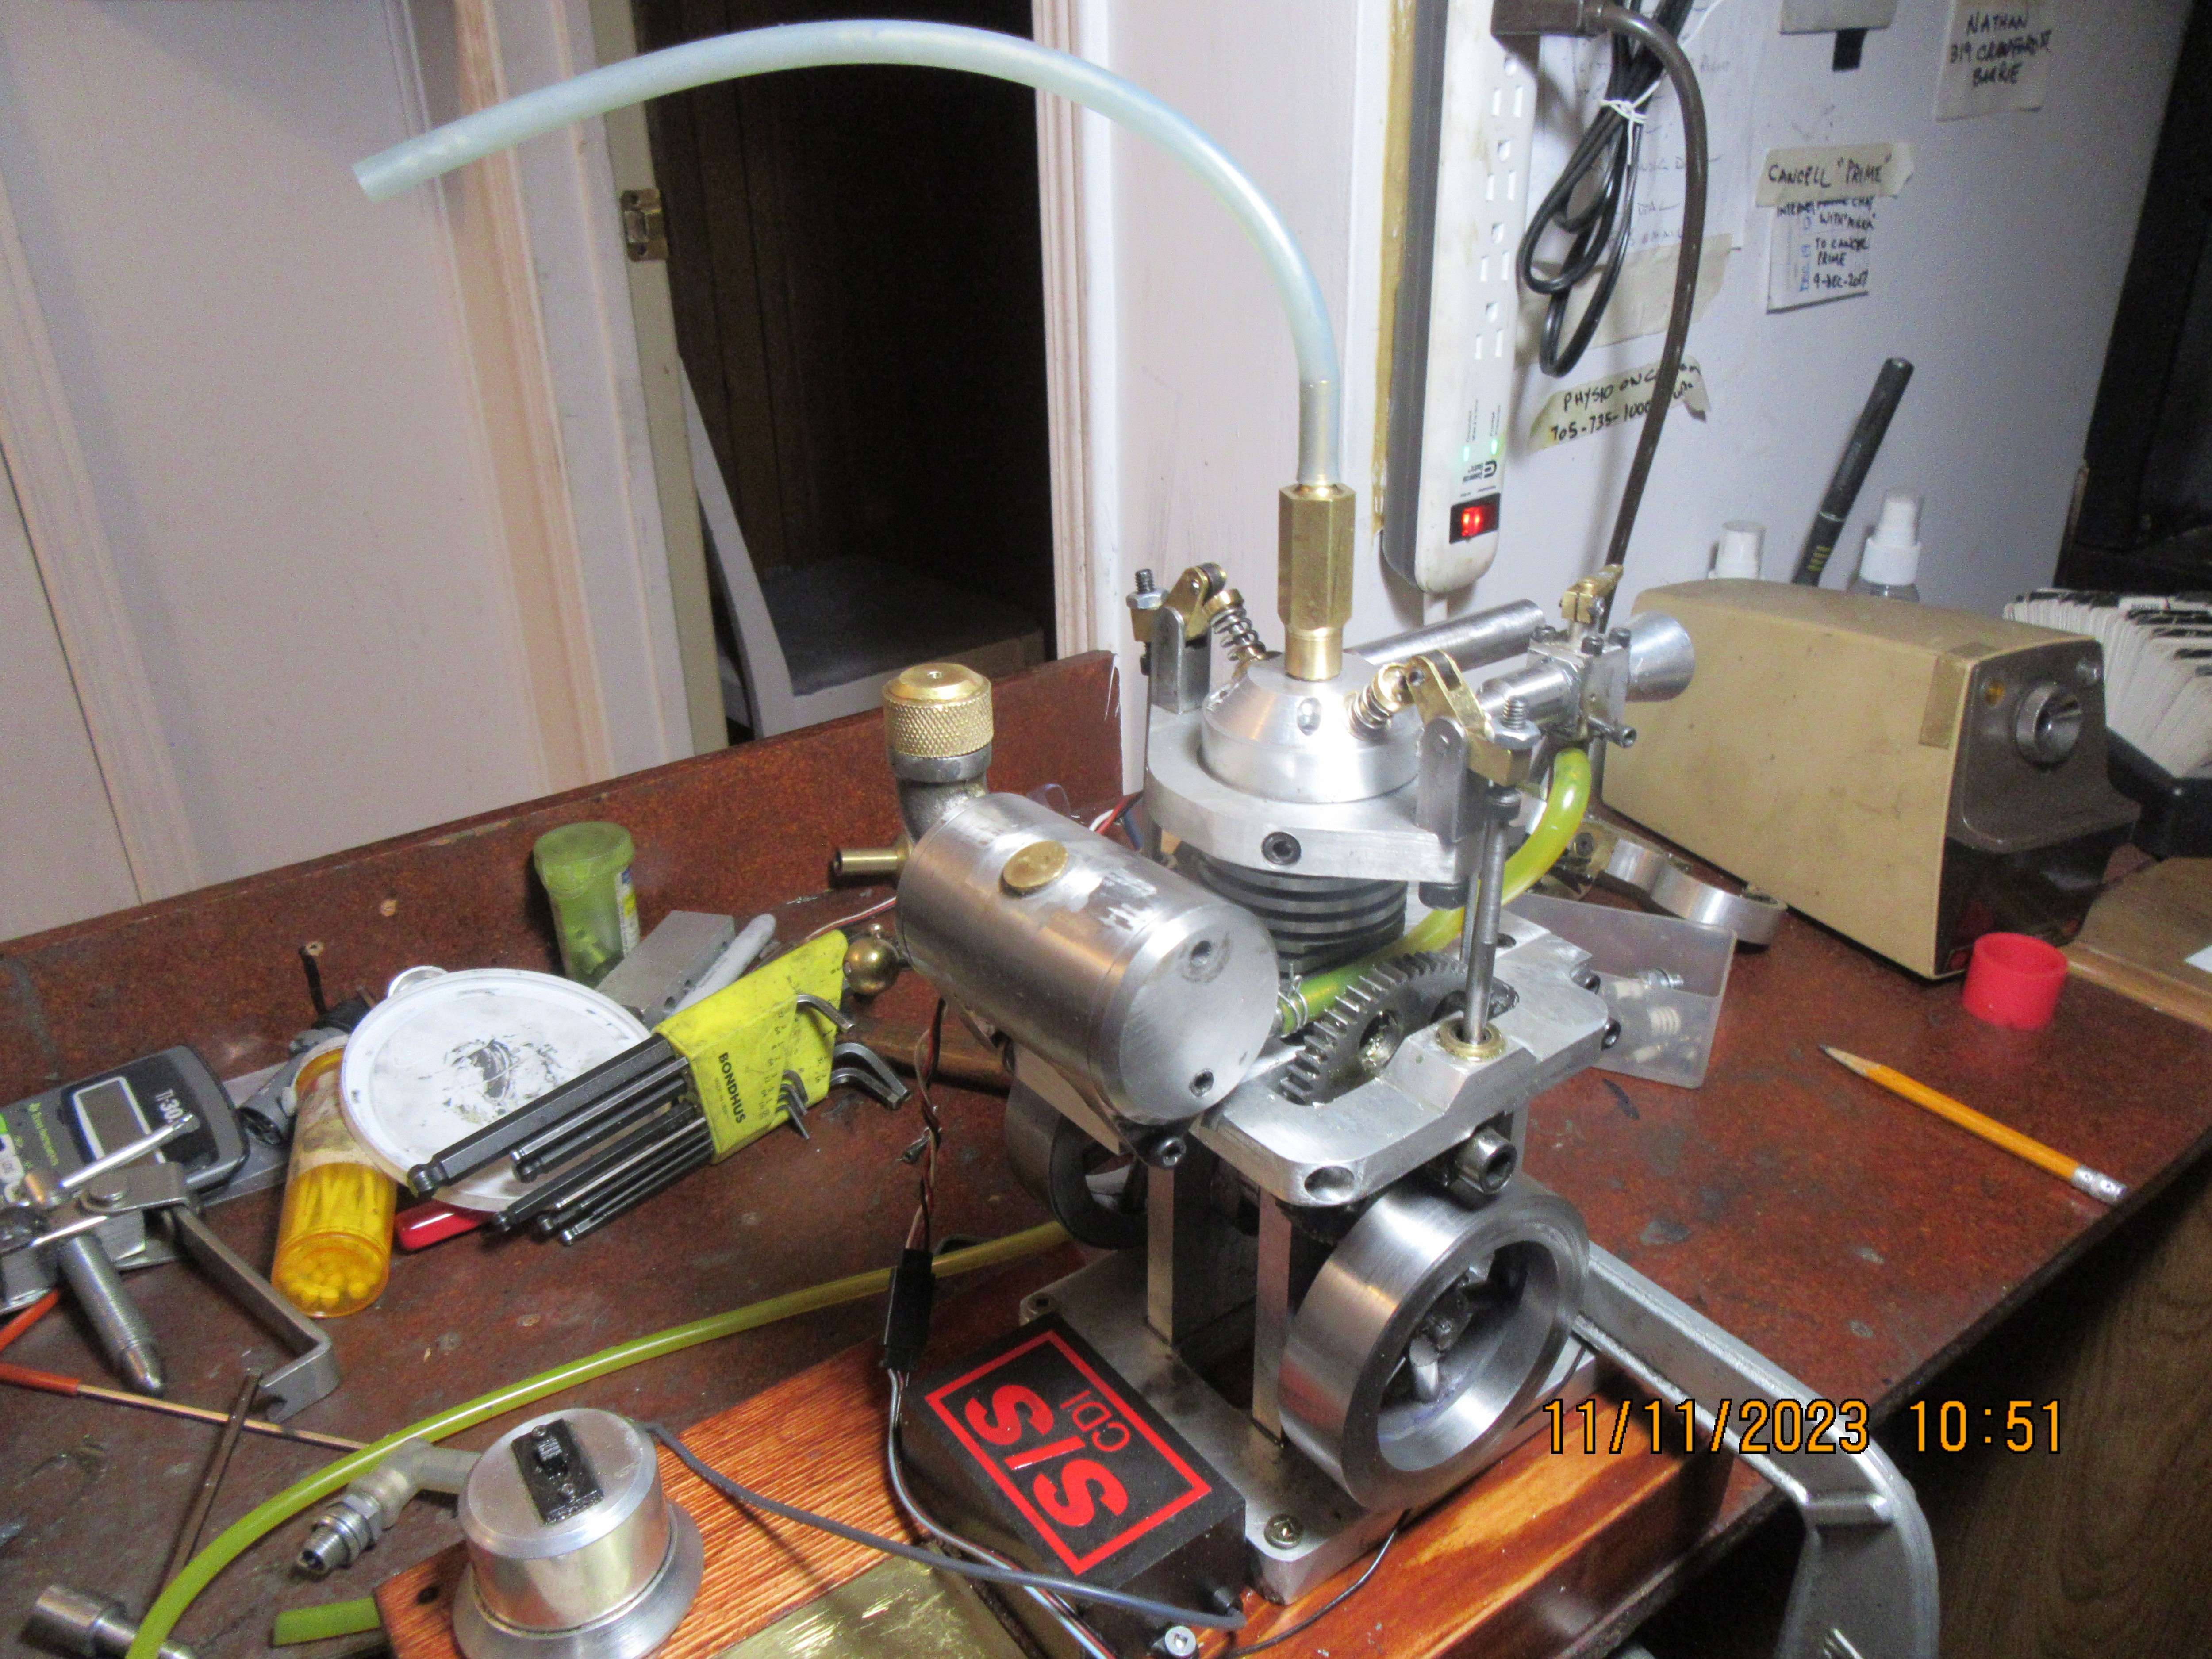
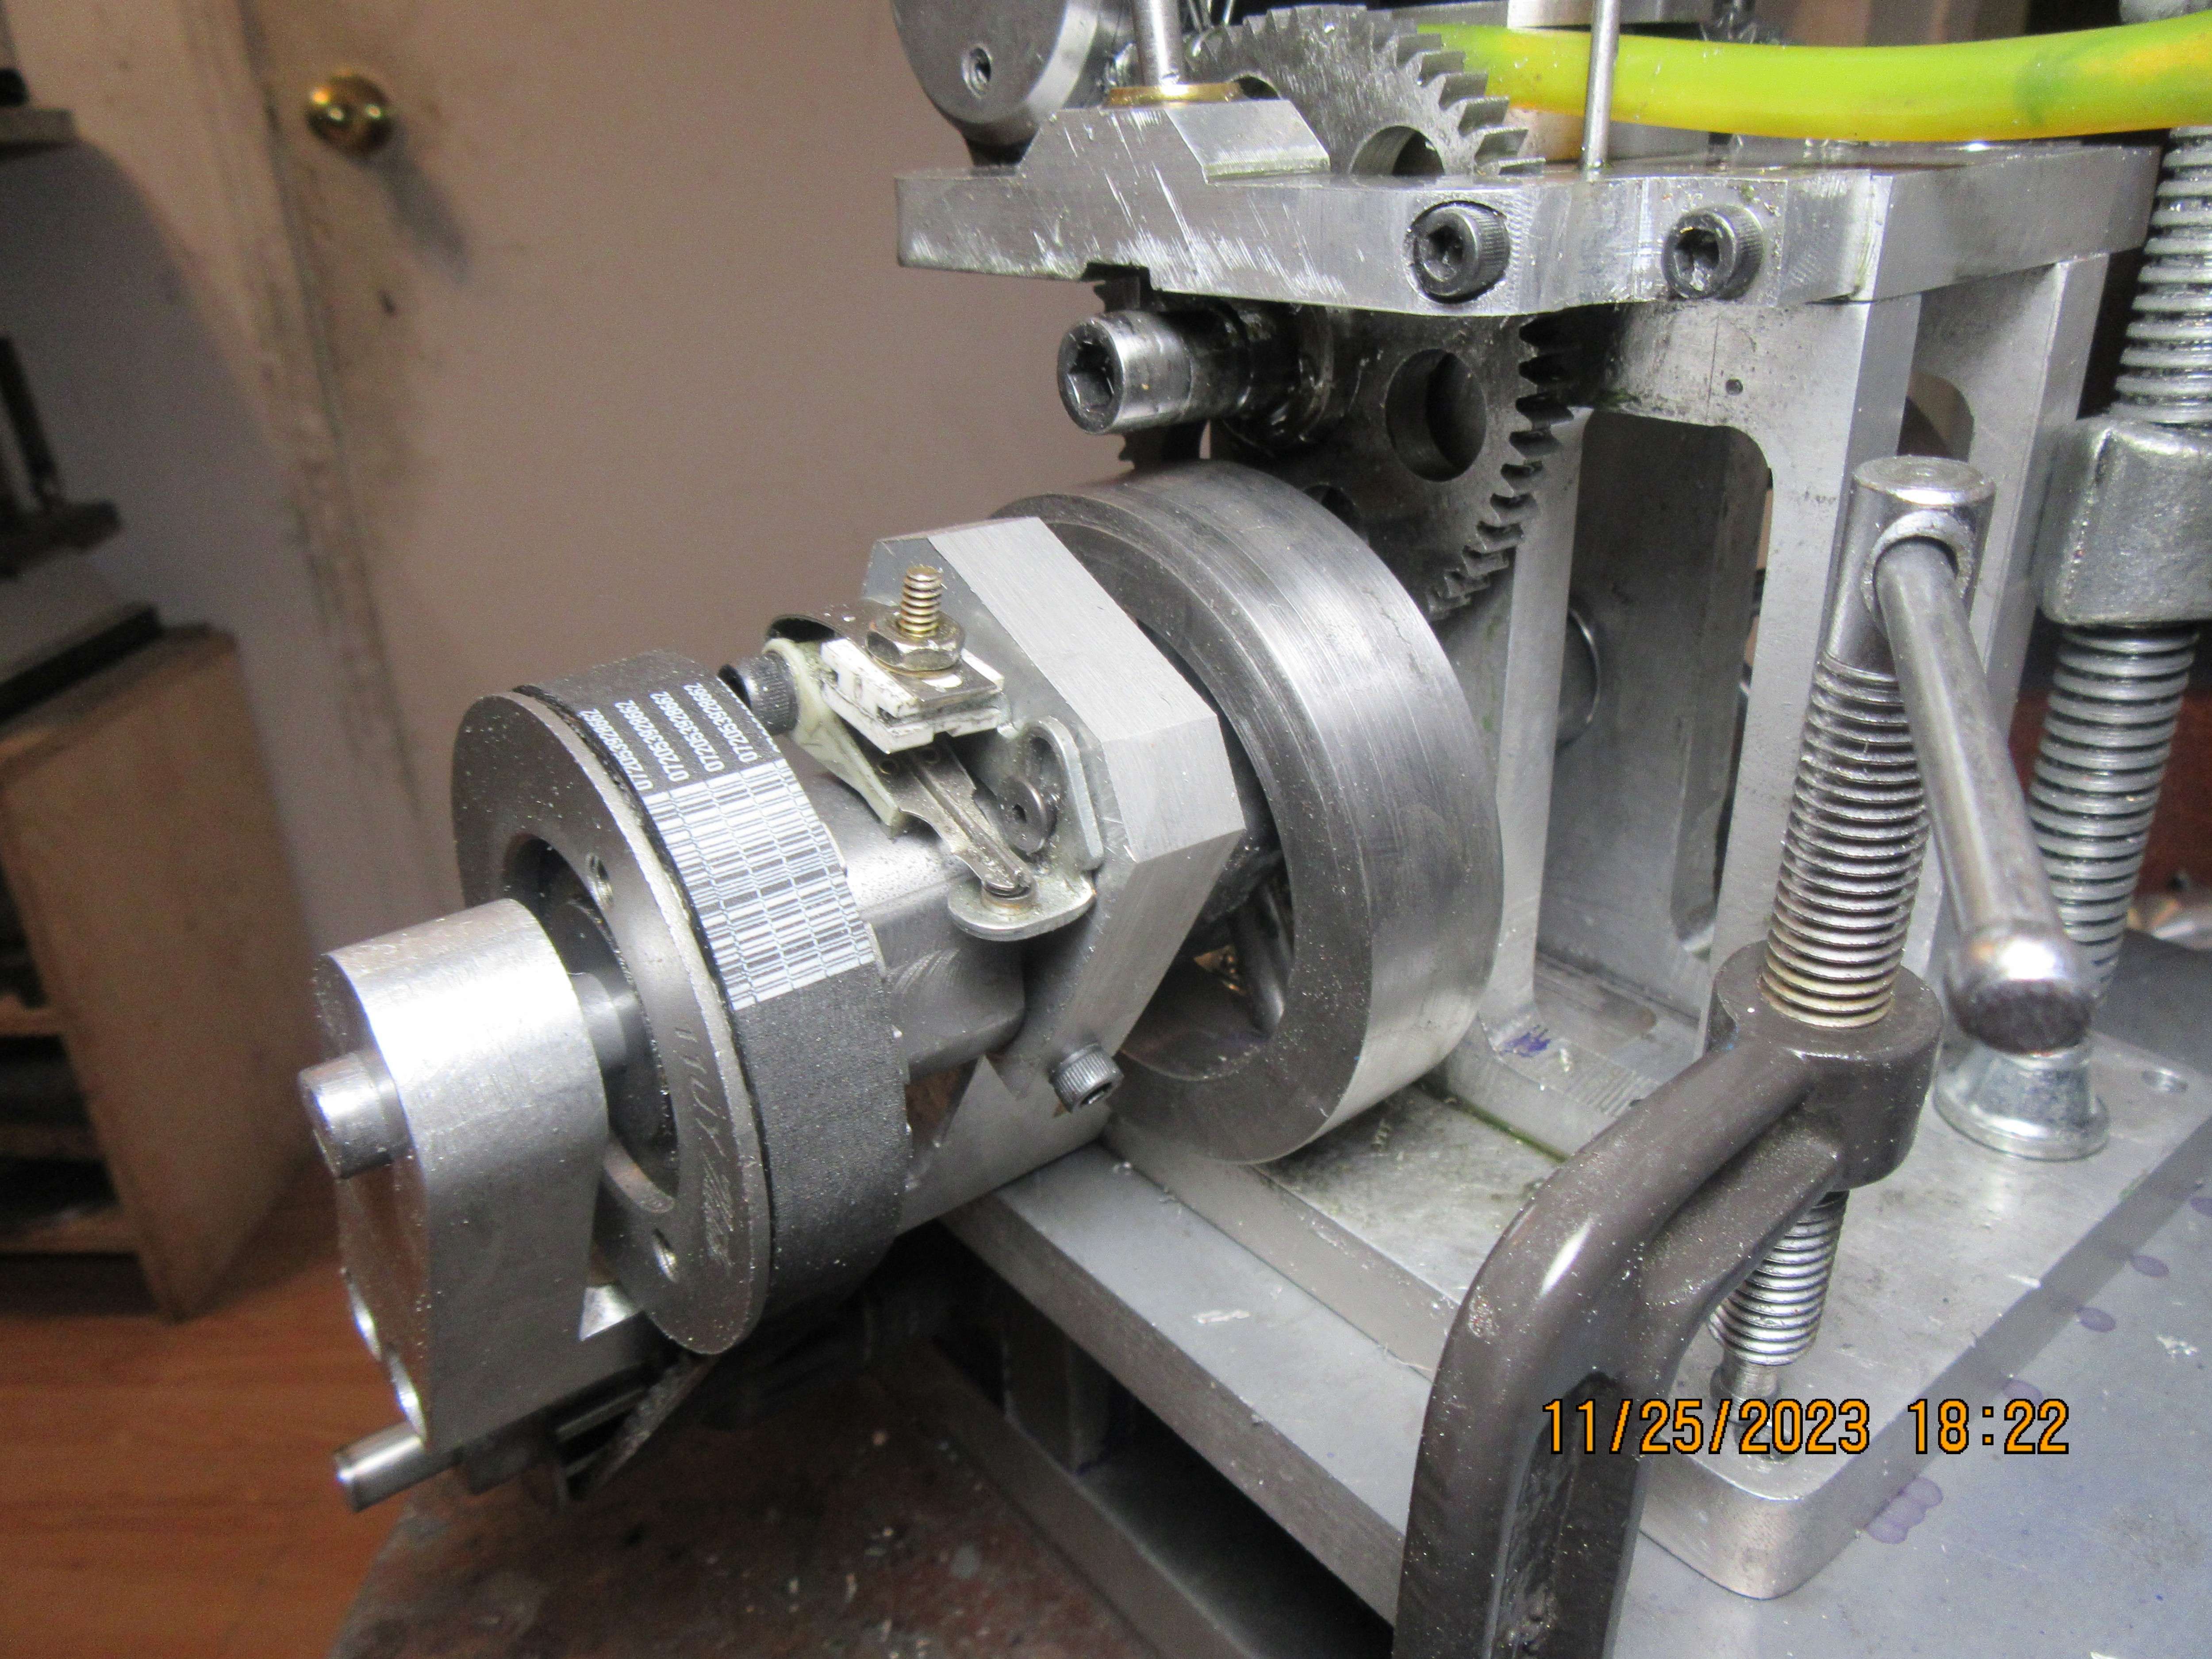
Something is not right, and right now I don't know what. I can not get this beast to fire. The valve timing is good, the ignition timing is good, and the head gasket is good. This morning I even resorted to a bit of fuel poured down the sparkplug hole, and it still wouldn't fire. The valves are sealing like they are supposed to. About the only thing left to check is the Viton ring on the piston, and I don't think it is damaged, but it's worth checking. The electronic ignition from Roy Sholl is giving a good spark at the right time. (this electronic ignition was used before about 10 years ago one one of my horizontal engines). I used the electronic ignition on this engine because there really is no good place to set up a pair of ignition points for my old school points ignition. Of course, since the engine is my design, I can always modify it to make room for a cam and a set of points if I have to. I have been looking at YouTube today, and I like the trembler coil set-up as used on model T Fords. It appears that very little is required to convert a conventional 12 volt coil, and the continuous spark is just awesome. Thinking---Thinking---
 
I have used Roy's ignitions for years with no problems so I doubt it's the ignition. Putting gas I the spark plug hole in a small engine will just flood it. If all 3 elements are present, compression, fuel and spark then it should at least fire. Sounds like something is missing.
 
One of the things which has bit me in the past is that one of the valves does not slide smoothly in the valve guide. When it is activated slowly the valve seats but when it is turning over at running speed the valve hangs up and does not seal in time.
 
Brian !
I think...after completing this engine and getting it running, you should standardize everything before assembling the engine.,compression, airtight , tolerance....that will helps you save time, effort...that makes your hobby interesting..
 
Brian,
Just a thought of mine, things look a bit tight in your cylinder head, could the plug be shorting out to one of the valve heads
Mike1
 
Mike--No, the sparkplug isn't shorting out inside the cylinder head. I have the head off right now, and I very well may try and machine some more material out of the combustion chamber, just to free up a bit of room for the fuel vapour to reach the sparkplug a little easier..
 
This project has been on temporary hold. There is a tie in to my thread about trembler coils. I can't get this engine to fire as it is right now, using an electronic ignition kit from S & S Engineering. The ignition system does work, I've seen the sparkplug sparking when it was unscrewed from the engine and laid on the cylinder head. Nice big fat spark, coming at the correct time in the engine firing sequence. Tried it with two different sparkplugs and it works very well with both of them. So, the failure to run may be from a poor design of the cylinder head, or it may be that the single spark just isn't sufficient to light off the mixture in the cylinder. This leaves me with two options---#1--Get a longer lasting spark or--#2 Redesign the cylinder head. It only costs me about $30 Canadian to buy the necessary 5 pin relay, pigtail, and condenser to make a "trembler coil" which has a longer lasting spark. As far as redesigning the cylinder head goes, that won't really cost me anything. Tomorrow I will be finished with the "trembler coil' and will try it on this engine. If that doesn't make any difference, then I will modify the design of the existing cylinder head.
 
In the past, when I suspected the ignition - it could be bad, or I was testing the ignition circuit - I turn the engine at about a few hundred rpm, if it could ignite at about 8 , 9 mm in air, it will be fine for engines with compression ratios of about 4 to 7-1. If the ignition circuit ensures a spark at a rotation speed of a few hundred or a few thousand rpm with a gap of about 8, 9 mm in air then I would focus on other issues, and set the spark plug gap to 0.3 - 0.4 mm. I also made a simple part that runs with an electric motor to check the ignition. I did the same with 1, 2 and 4 cylinder engines.
 
Okay, I'm back in the swing of things. I have a compression tester for small engines on order but it won't be here until the end of next week. I have mentioned before that there may be a problem with the design of the cylinder head--that will be relatively easy to change by milling away material to unshroud the tip of the sparkplug. I've spent this morning seeing what changes would be necessary to mount this engine on my new engine starter assembly, and to revert back to a point style ignition instead of the electronic ignition I an currently using. I've actually designed this new points style ignition so that it can be used with a model T style "constant spark" system or a conventional points ignition by simply changing out the cam.
LKyLhv.jpg
 
Today I machine the weird cam for use with my trembler coil, and machined the block which mounts the ignition points. This cam is designed to hold the points open thru most of the cycle, but lets them close momentarily to initiate a flow of sparks at the sparkplug when the points are closed. It doesn't look like a lot, but I've managed to use up an entire Saturday doing it.
2fnsiY.jpg
 
Brian, in an earlier posting you said the S&S ignition worked fine so why are you going to all this trouble making a whole new setup for the ignition?
 
Yes, the S & S ignition does work fine. It makes a fine spark when it is supposed to. However, due to poor design of the cylinder head (maybe), the mixture is not igniting. I've always been curious about the trembler coils and a bit amazed by the sparks they gave, so I thought that this might be the ideal time to try a trembler coil and see how the engine reacted to that. The electric engine starter really has nothing to do with this particular engine.--It just happened to fall into the same time frame that the engine did. I know that I've stacked up three different things to all be happening in the same time frame, and that is not how I usually do things.---Brian
 
Today I stole a page from Andrew Whale's book, and made up a separate machined container with the cylinders top bolt pattern and a closed end. The closed end was drilled and tapped for a M10-1 thread and a brass fitting to fit the pressurized air hose from my compressor was attached to it. The cylinder head was bolted to it, and my new compression tester was screwed into the sparkplug hole. Air pressure was applied thru the hose, and at a very low pressure, there was air escaping out the exhaust pipe. I manually pressed the end of the exhaust valve a few times, thinking that perhaps a particle of dirt had found it's way under the valve. No luck!! I disassembled everything and relapped the exhaust valve, but it still leaked. A closer look showed that something didn't look right about the valve cage. I pressed the valve cage out of the head, and found that side port that was drilled thru after the valve cage had been pressed into place had actually removed part of the valve cages sealing face. It looks like I require a redesign of the cylinder head. I spent a couple of hours on a redesign this afternoon, but haven't got it fully sorted yet. I guess that is what tomorrow is for.
8AF1NQ.jpg
 
Last edited:
As Wes would say - "Well there's your problem!" :)

(For those who don't catch the reference, I'm referring to the YouTube channel called Watch Wes Work - both a superb mechanic and an entertaining content provider.)
 
After having a real close look at this engine, and figuring how to best utilize what I already have, it has morphed into a Tee head engine. This does away with the current head, rocker arms, rocker arm posts and pushrods. The existing cylinder gets a bit of lathe rework at the top end, and six new #4 tapped holes in the top fin. Doing it this way gives me more clearance around the valve cages and the intake/exhaust ports. Last year I built a Tee head engine very similar to this one, and it performs very well.
l0OCyJ.jpg

n0bVSE.jpg
 
Last edited:

Latest posts

Back
Top