1886 Benz

Home Model Engine Machinist Forum

Help Support Home Model Engine Machinist Forum:

This site may earn a commission from merchant affiliate links, including eBay, Amazon, and others.
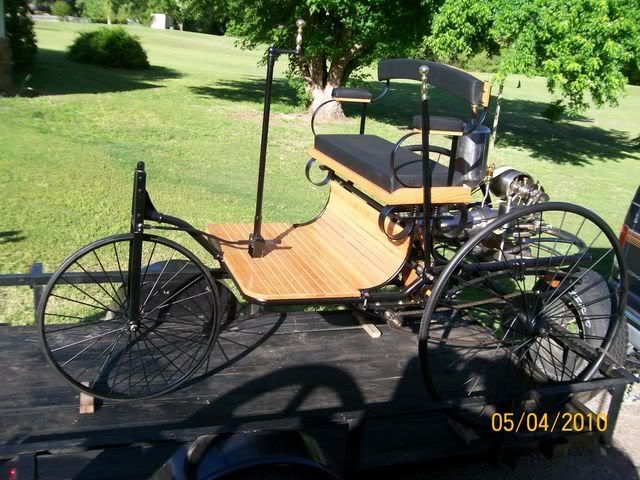
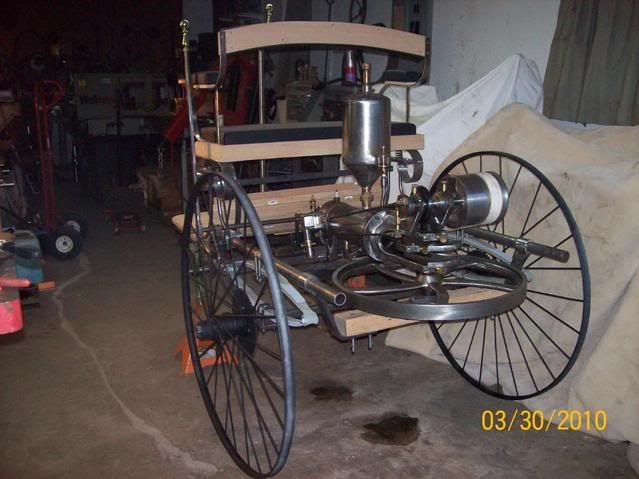
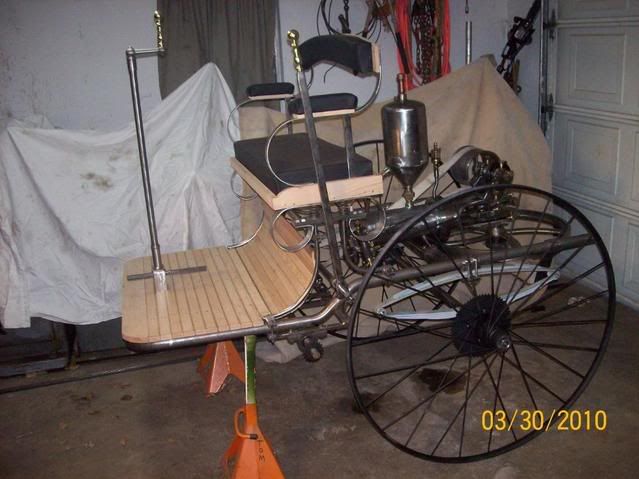
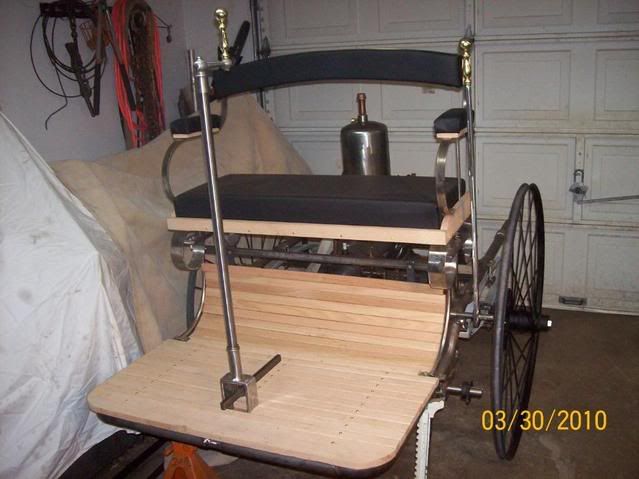
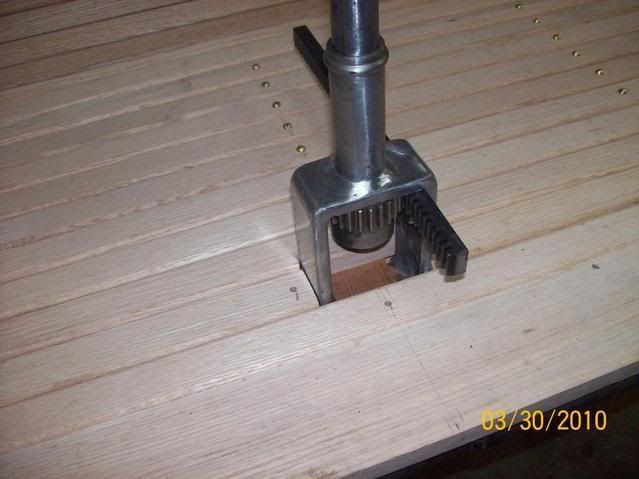
Rustranch you are right about the lever. I am working on the rack and pinion steering and will post on that soon.

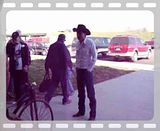
I went to a swap meet at Chickasha OK yesterday to look for more engines and stuff they powered and found a 1886 Benz on display.
The car belong to Mcpherson College in KS they were recruiting for students for their auto restoration course.The caretaker said I could take all the measurements and pictures I needed and I did but its a little to late :shrug: Here are a couple of videos I took. Tom

 
Great videos. The engine by itself would be a remarkable project. Building the whole thing leaves me speachless.

Alan :bow:
 
Thanks Alan
Made some more progress.Here is a few more pictures. Tom
100_2336.jpg

100_2334.jpg

100_2333.jpg

100_2332.jpg
 
Very Nice Tom,
But aren't you suppose to wear goggles and one of these backwards? ;D


1_266013_TH.jpg
 
Cobra the proper hat would be a Derby and I have one for the special occasion. I don't know about the goggles but I may wish I had some when i get hit in the eye by a bug at the blistering speed of 8mph ;D
 
Well, Tom, your level of progress on this project is just staggering. My hat is certainly off to you!

Chuck
 

I love the twin exhaust pipes in the first photo,
but are they really needed for a single cylinder engine? ;D

Or are those really rocket boosters for the steep hills? ;)

Seriously, great project. I'm enjoying it immensely and
would love to see you driving it in the holiday parades.

Thanks for taking the time to share with us.

earl...
 
I’ve greatly enjoyed following this evolving project. So away back in the story you might have stated where you got the beveled gears you used in the timing and I missed it. So were they purchased, adapted from something else or built in the shop. So when you get time I’m sure everyone is wondering about the construction of the wheels. So what are you going to use for the tire.
 
Thanks guys
Chuck I picked a big winter project thinking work would be slow and it would give me something to do but I worked all winter and on top of that I decided I needed more room so I poured concrete for a bigger shop. so I have been busy.
Earl dual exhaust thats funny.
Rustranch The gears are from Boston Gear. The rear wheels I was lucky to find my brother was using them for yard art.I just could not figure out how i was going to build them. After i got these wheels I saw the Benz at Chickasaw and could see how they where built so I may go back and build them. The wheels do not run true and I see no way to fix them.The info.on the tire will be in the next post, lets build a front wheel first.

The first step was to build a ring roller and drill some spoke holes in a piece of 1 inch chanel iron and try it out.
100_2346.jpg

100_2349.jpg

100_2352.jpg

100_2356.jpg
 
Tom T said:
Cobra the proper hat would be a Derby and I have one for the special occasion. I don't know about the goggles but I may wish I had some when i get hit in the eye by a bug at the blistering speed of 8mph ;D

Tom this is simply fantastic. :bow: :bow: :bow: I take my hat off to you, (Ratting Cap backwards with goggles, Derby with muffler and not forgetting the Deerstalker).

Best Regards
Bob
 
"The first step was to build a ring roller and drill some spoke holes in a piece of 1 inch chanel iron and try it out."

not only you're building an extremely difficult engine in real scale, but in the same easy way you build everything that is needed along the way

incredible :bow:

 
I'm still amazed at all this, Tom. I thought you'd done a life's work when you got the engine done.
Great stuff!

Dean
 
Thanks Ariz , Deanofid . It took less time to build the ring roller then it would have taken to have the ring rolled by a shop in town.
Here is a picture of spoke holes being drilled and taped. The mill head is tramed at 7* the rim holes were also drilled a 7*
100_2344.jpg

The spokes were threaded on one end and a head was formed on the other by placing them in a die, heated and forged to the shape of the die. The die was made so that when put in a vice it held the spoke tight . sorry about the bad pictures. The hole in the die and rim were drilled with a center drill to get the bevel.
100_2362.jpg

100_2363.jpg

Here is a picture of the wheel assembled and the tire.
100_2370.jpg

Here is a close up of the end of the tire .The tire is held on to the rim with two wires ran through the two holes in the tire pulled tight and welded this requires a special tool.

100_2372.jpg
 
Tom T said:
The first step was to build a ring roller and drill some spoke holes in a piece of 1 inch chanel iron and try it out.
100_2346.jpg

Oh please, oh please. Tell us that you haven't built all this and achieved these results in a mere 3 days? :eek:


I'm amazed at the amount of work you do, and the massive amount of work not even shown.

:bow: :bow: :bow: :bow: :bow:
Kermit
 
Kermit I think it took 3.5 days :big:
I have made some more progress got the front end done then I took it all apart and painted it an resembled.
000_0012.jpg

000_0014.jpg

000_0015.jpg
 
Man, that thing is gorgeous!!!!!
gbritnell
 
You are building a very sought after replica there Tom.

Everybody knows I am an auction geek.

Give THIS a look.
The pre-auction estimate was $50,000 to $70,000 USD.
With the economy being what it is, that replica sold for a rather
disappointing $46,200 USD. Still not a bad price!

The average auction price for a replica as detailed as your own
can be seen HERE.
Pretty impressive numbers there.

I believe your build is at the high end there.
Beautiful work!!! :bow: :bow: :bow:

Rick


Thanks Rick your post gave me that little push I needed to go ahead finish this up. :big:
It's still needs a little work but it is show time and the show won't wait.
Here is a picture of it in the sun for the first time loaded up and ready to go. Headed to Pawnee OK show may 7.8.9. Tom
000_0019.jpg
 
It's fabulous, Tom. I loved the first half when you built the engine, and thought that was the completed project in the first months of your build. Then you go on to build the complete full scale automobile! It's so beautiful. I love just looking at it.

About six months for one man to build a whole car.. What a builder you are!

Dean
 
Deanofid said:
It's fabulous, Tom. I loved the first half when you built the engine, and thought that was the completed project in the first months of your build. Then you go on to build the complete full scale automobile! It's so beautiful. I love just looking at it.

About six months for one man to build a whole car.. What a builder you are!

Dean

I'm with Dean. :bow: :bow:

Best Regards
Bob
 

Latest posts

Back
Top