Potty Popcorn Engine

Home Model Engine Machinist Forum

Help Support Home Model Engine Machinist Forum:

This site may earn a commission from merchant affiliate links, including eBay, Amazon, and others.
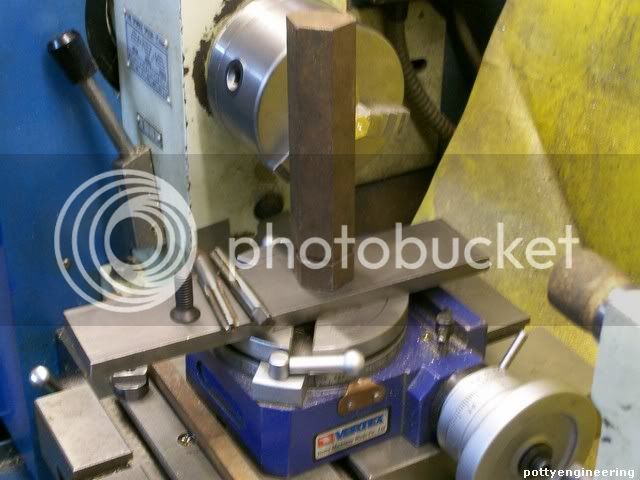
The valve rod support, I drew it up fancy and didn't think to much on how to make it, but when it came to it, I realized it was quite an awkward shape, I could have redesigned it, but I kind of liked it as is was. The important part is for the hole to be on the same centre height at the valve rod, so decided it would be easier to make it in two bits and bring it to the correct height by adjusting the base thickness.

With a bit of 10mm brass bar first turned a little 4mm dia chucking piece on the end, then over on the mill drill the hole for the valve stem and mill the flats.

131_0842.jpg


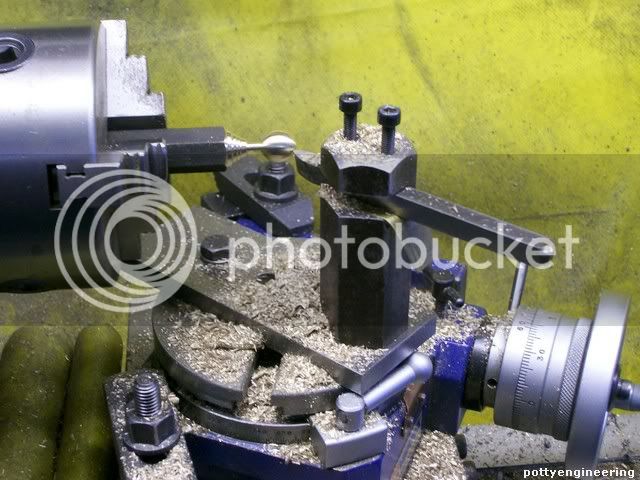
Cut it off to length and centre drill and tap the other end M3, then gripping on the chucking piece, turn the tapered bit.

131_0846.jpg


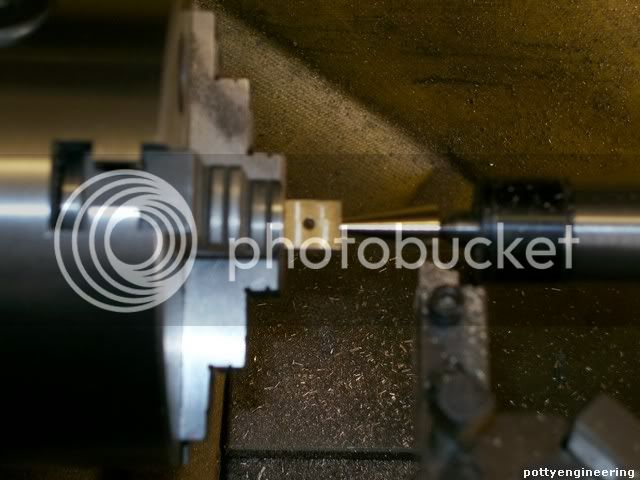
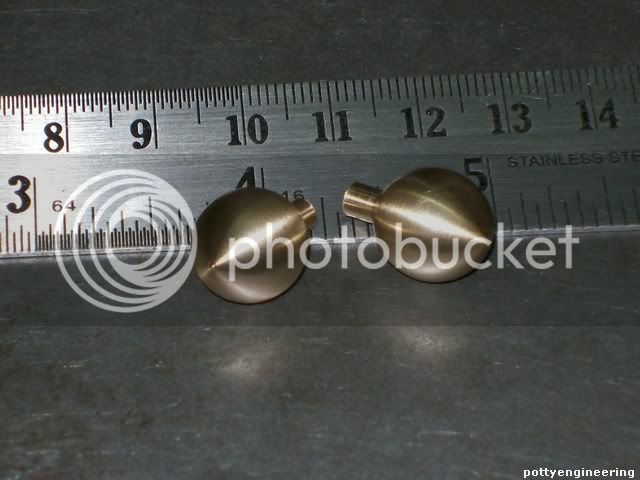
Sorry pic not very good.

Cut the chucking bit off, and make the base adjusting its thickness to get the correct centre height for the hole.

These are the bits.

131_0850.jpg


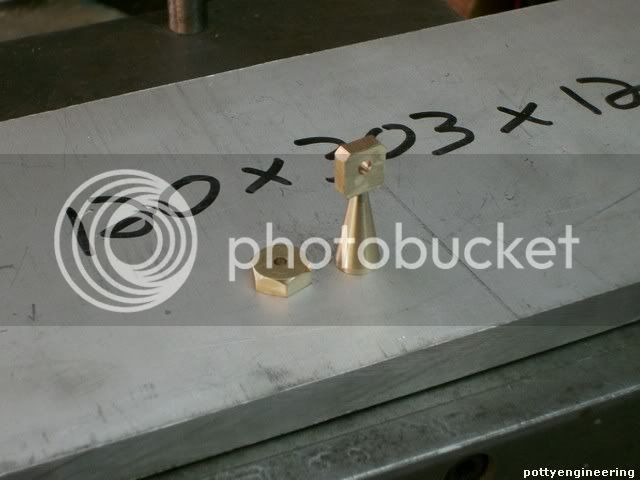
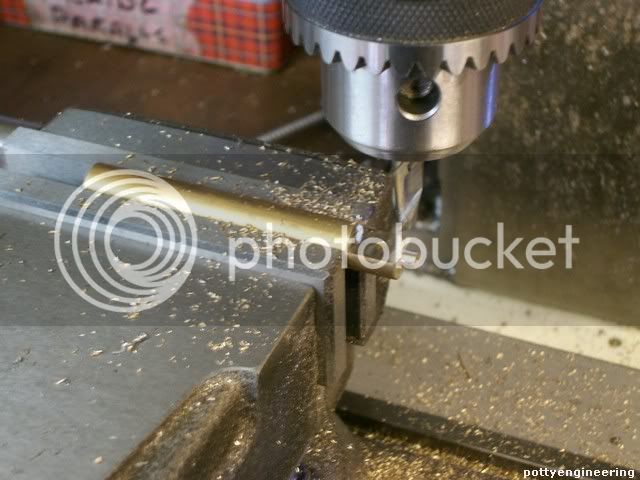
I'll whittle that square end sticking up into a round later.
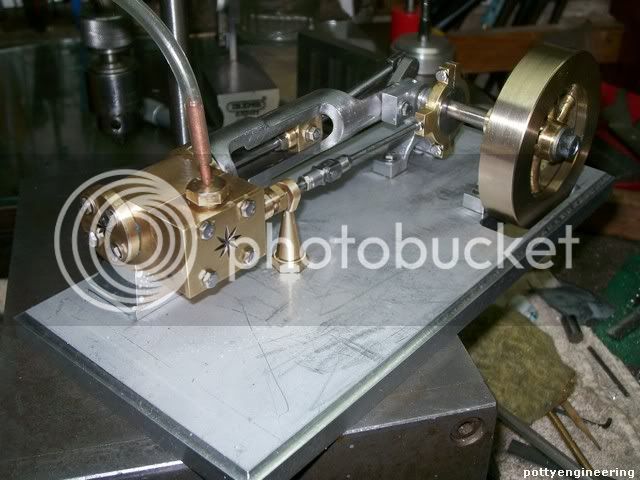
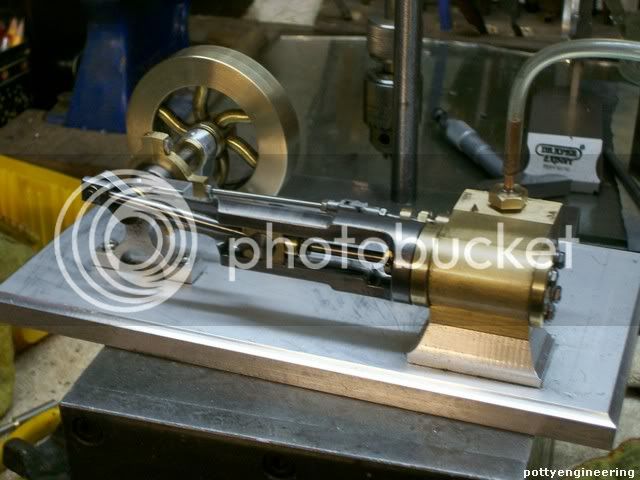
And how its looks.

131_0851.jpg


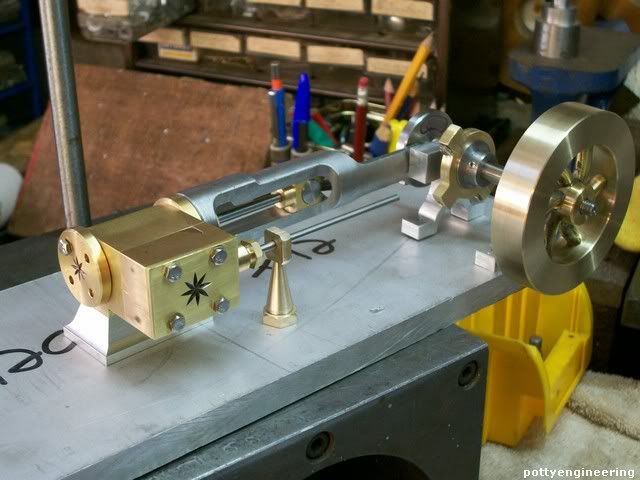
Just got the base to machine up, but before I'll do that I want to get all the bit loosely fitting together so I can get the positioning correct.

Stew
 
This is looking like another winner Stew, nice work.

Les
 
Thanks Les

Though it nearly wone the record for the longest distance an engine as ever been thrown.

After three days of trying I've eventually got it running, some of the problems were down to my hamfistedness, I distorted the bore in the cylinder because I was clamping it to the base with over long screws, took me a while to work out why it was getting tighter and tighter, had to run the reamer done the bore to get rid of the tight spots.

The as Brian had pointed out the cylinders were on the short side, I had sussed this out and increase the length by 2 mm, but that was hardly enough, so any of you guys who had the drawings off me make a note to increase the cylinder length by at least 3mm.

The I went and seized the main bearings up twice running it in with a Black and Decker.

You never truly understand an engine until you come to put it together and this was no exception, it doesn't like any tight spots as all.

But it is a runner.

I'll post a video later today.

 
Nice work Stew a real pretty engine. Looking forward to the vid.
Brock
 
Looking great Stew!

I really like the proportions....can't wait to see what the "surprises" are!

;D

Dave
 
Thanks Dave Brock

131_0868.jpg


131_0871.jpg


And the video

[ame]http://youtu.be/1QaTBWvG5bs[/ame]

Stew
 
Great Video Stew....I love the sound of the engine.......and the builder! ;D

Dave
 
Stew--Thats a sweet engine, no matter which side of the Atlantic it was built on. You have done a marvelous job there, and I commend you!!! I thought that I was incredibly fortunate when mine started right up with no trouble after a two hour "run-in". By the way, since this is the first engine I have built with "glands" on the piston and valve rods where they exit the cylinder and valve body, what do I use for packing?----Brian
 
Thanks Guys

Brian I use graphite yarn just a couple turns around the valve/piston stem. You also have to get the nut bore and the thread as concentric as you can so I make them at the same time. You don't have to over pack the gland I just tighten down on the packing until I feel it starting to hold the rod.

You can also use an O ring or PTFE tape the sort of stuff you use on pipe joint just twist it to form a string, you can use it on pistons as well.

Stew
 
Stew

Congratulations on having another runner. Nice looking as well. Thanks for taking us along for the ride. :bow:

Cheers :)

Don

 
Stew - Nicely done. A great looking engine as well as an interesting tutorial. I'm sure that there are lots of popcorn engines that will be built because of your inspiration.

I'm not leaving my seat. I know there is more to come.

Jerry
 
nice job stew,and a nice runner.just in the process of making my curved spoke flywheel.hope mine turns out as good as yours and thanks again for the plans. jonesie
 
Something on this engine just screams to me....old time multi pole generator between the bearing pedistals........anybody thinking what I'm thinking?

Dave
 
Thanks for all your kind comments Guys its bin an ejoyable and interesting build, still a bit more to go before its finished.

jonesie said:
nice job stew,and a nice runner.just in the process of making my curved spoke flywheel.hope mine turns out as good as yours and thanks again for the plans. jonesie

Hi Jonesie good to her you're making progress I'd be interested in a few pics if you can.

Stew
 
In order to make the body for the governor I need a ball turning attachment, being a bit of a tight wad I didn't want to go out and buy one and I wanted something that would be quick and cheep to build, and I tough of my RT, I hunted around my stash and came up with this lot.

131_0874.jpg


A couple of mornings work and I had got myself a ball turner.

131_0875.jpg


Here's a picture of my balls

131_0888.jpg


:big: :big: :big: :big: :big: :big: :big: :big: :big: :big:

Their fly balls for the governor I could have bought some 1/2" brass balls but I wanted to give it a try.

Stew
 
Hi Stew,
Another very nice engine for your collection. I know how much it takes to scratch build and you did a great job.
gbritnell
 
Great engine! Fun to watch running. Thanks for sharing!
 
I think Marv would point out that you have turned "Ogives". I never heard that term before, but on one thread last year somebody was turning egg shaped balls with pointy ends, and thats what Marv said they were. :D :D
 
sbwhart said:
In order to make the body for the governor I need a ball turning attachment, being a bit of a tight wad I didn't want to go out and
Here's a picture of my balls
Stew

Do you know where the rest of the monkey is ;D ???

Best Regards
Bob
 

Latest posts

Back
Top