- Joined
- Jan 17, 2009
- Messages
- 887
- Reaction score
- 81
Well I had a desaster on my Loco work I chipped a chunk out of the wheel flange its totaly US, this realy pissed me off I've consigned the loco under the bench whilst i get over my sulk, I'll just have to buy a new wheel.
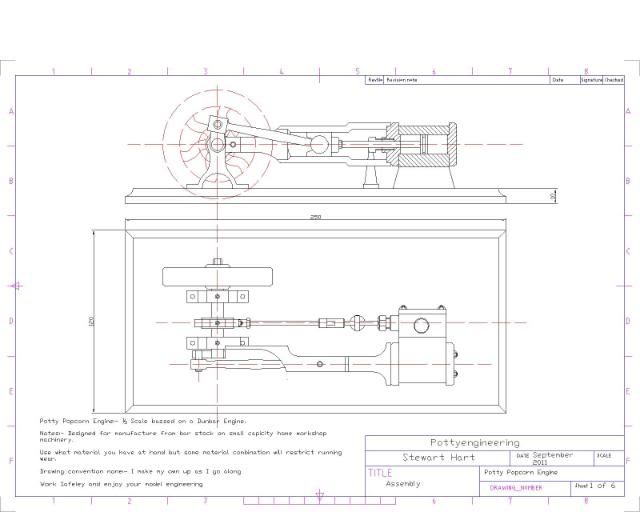
In the mean time I decided to get on and do a bit on this.
Her's the assy drg
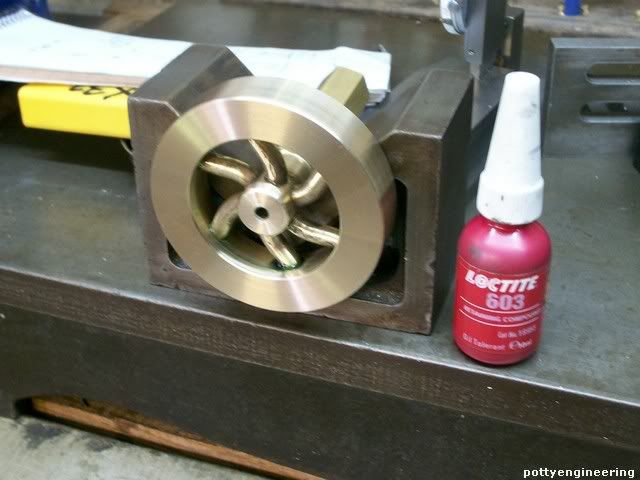
I showed the fly wheel build on another thread her's a pic of it
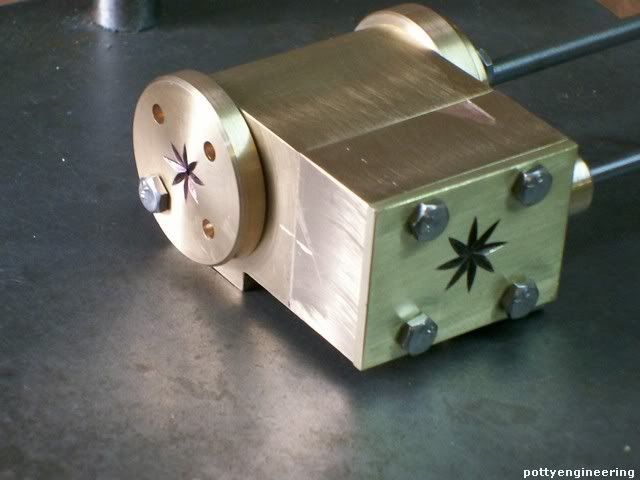
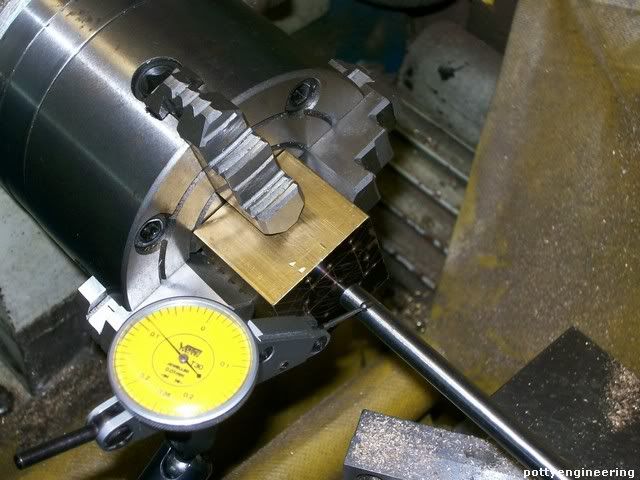
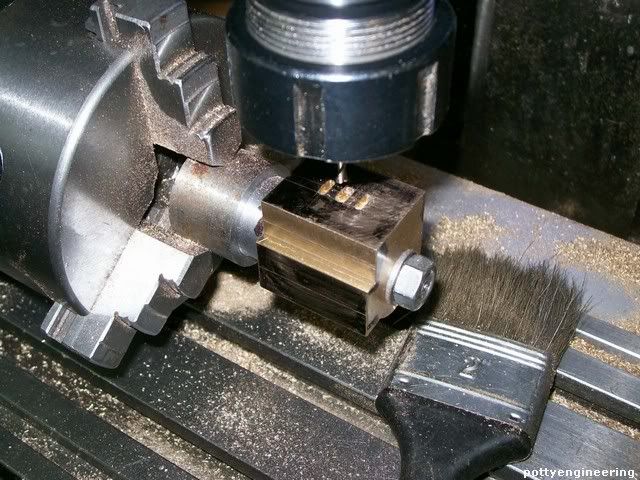
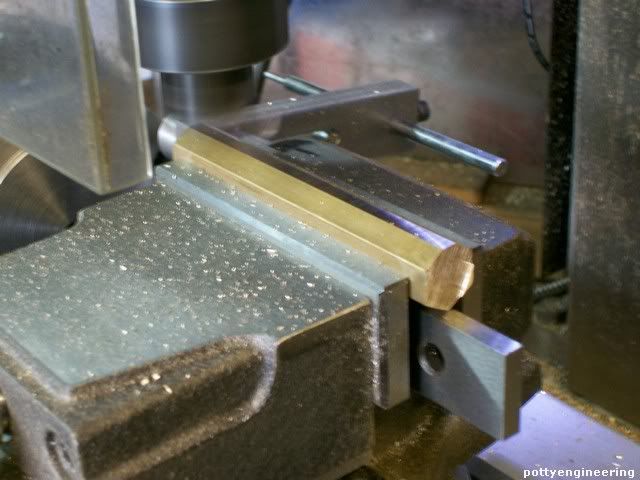
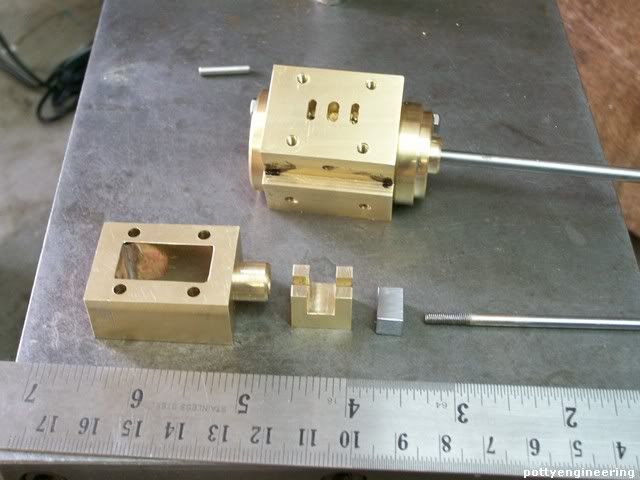
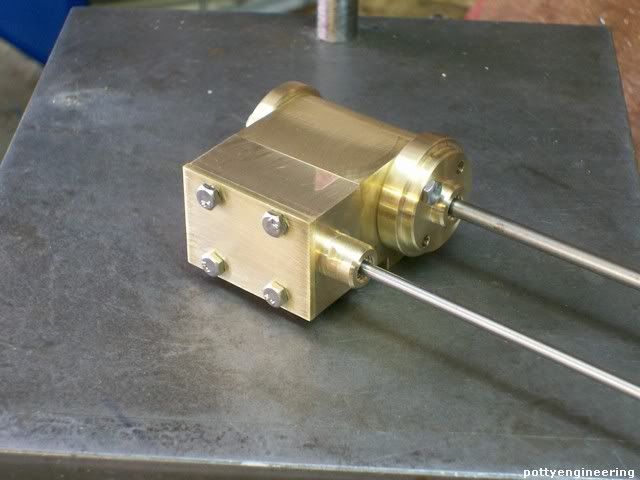
I was planning to fabiricate the cylinder in three parts but then I found I chunk of 1 1/2" square brass left over from the loc chimney, I realised that I could make the cylinder in one peice from this.
So marked it out and set it up in the four jaw.
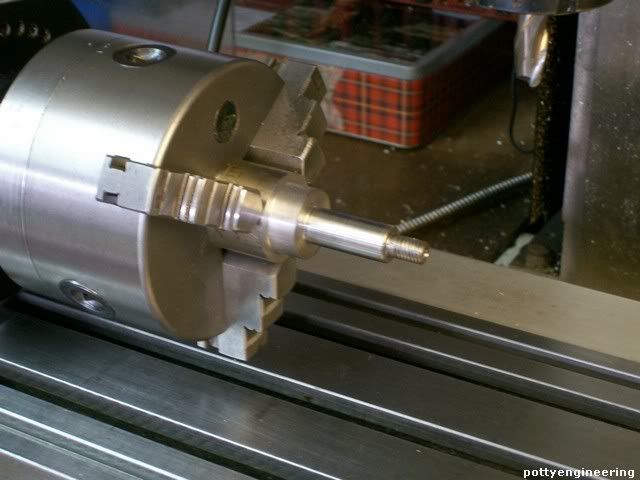
Drilled and reamed the bore out 1/2" then turned a mandrell up for it to fit on.
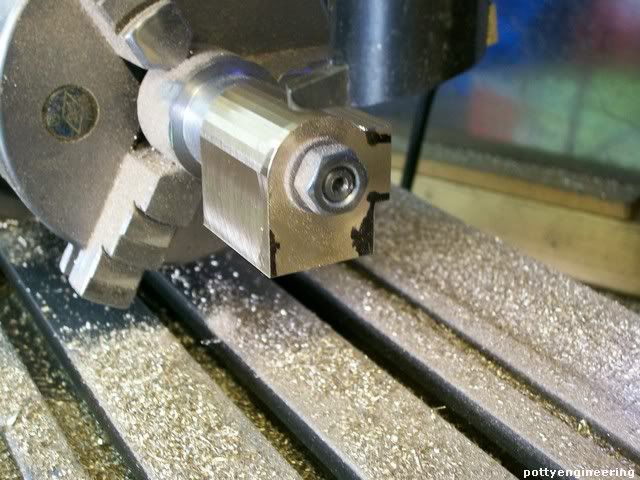
With this in the spin-indexer milled the cylinder to shape.
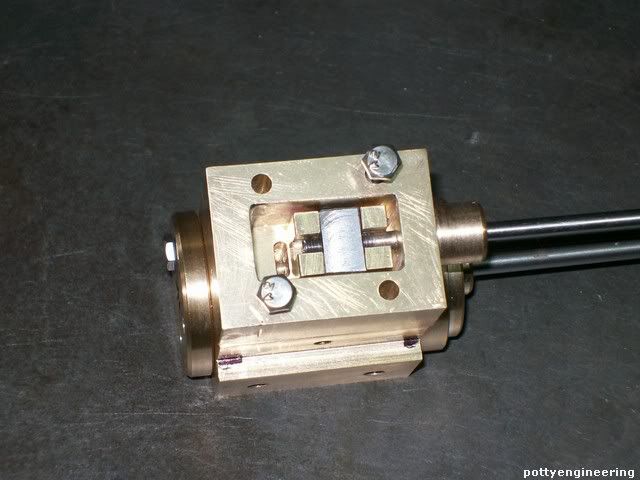
Then milled the steam ports
So that I ended up with this

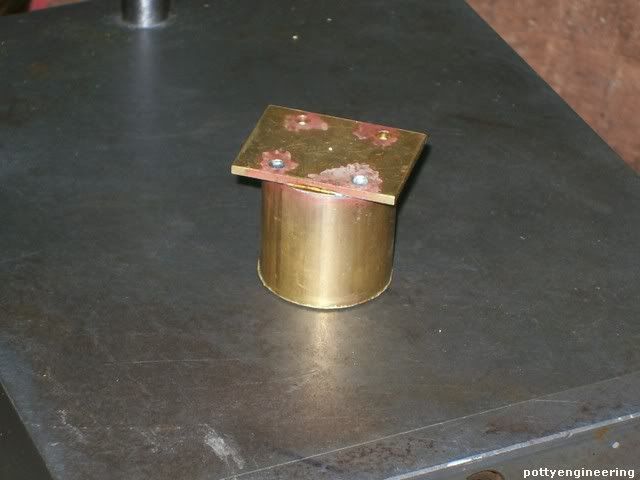
Cylinder covers
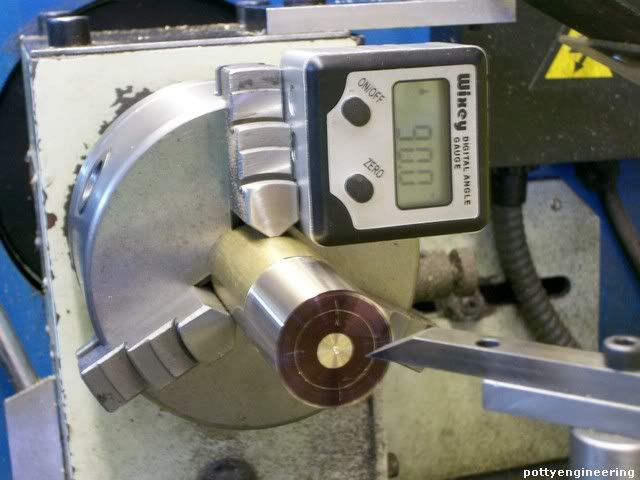
One thing a beginner struggles with is lack of kit for drilling holes on a pitch circle.
Well if you have one of those digital protractors you can use it to acuratly mark out the holes.
With the bar in the lathe
First put a small centre into the bar then using a pair of deviders mark the circle in the end of the bar.
Then zero the protractor up on the bed of the lathe, put the protractor on the chuck jaw, rotate to get it zero, then mark across the bar with a scribbing block, rotate the chuck until the protractor is showing 90 deg mark across again, job done.
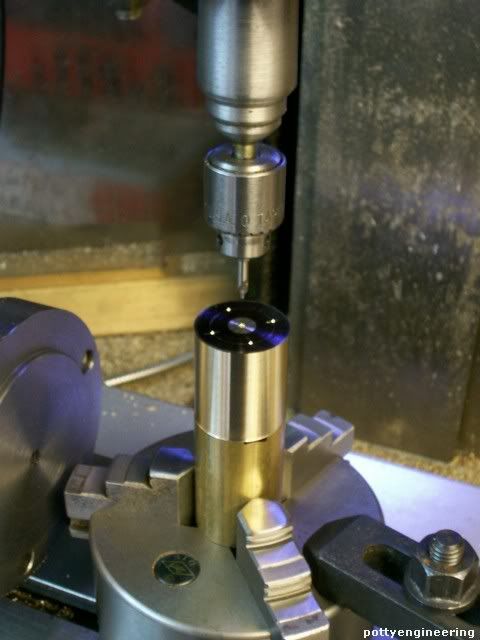
Centre pop and drill holes
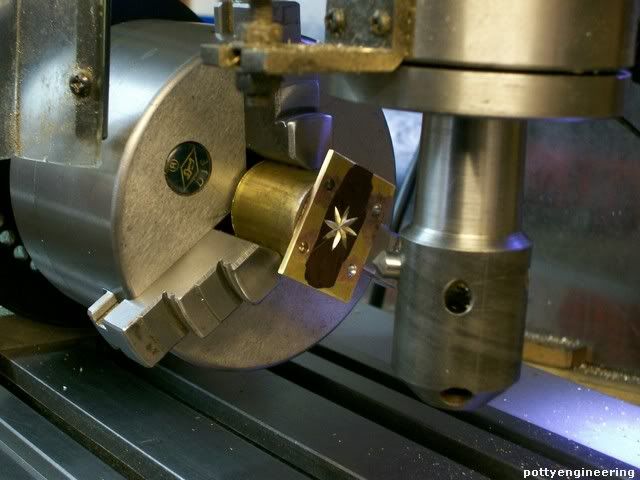
I decided that I would like something fancy on the cover, so with the chuck mounted on the spin indexer and with a vee shape fly cutter form a star in the end.
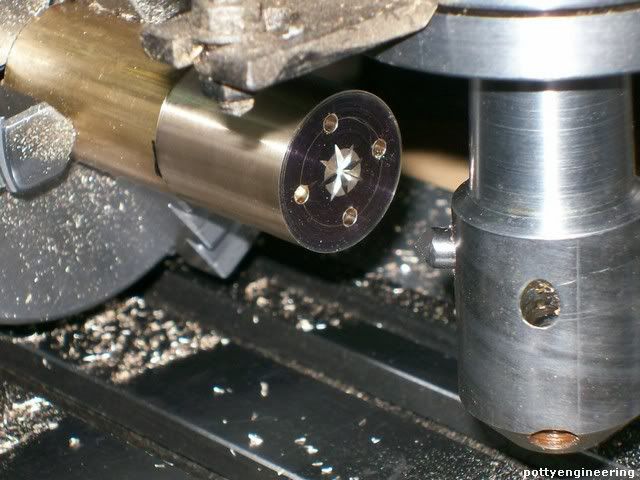
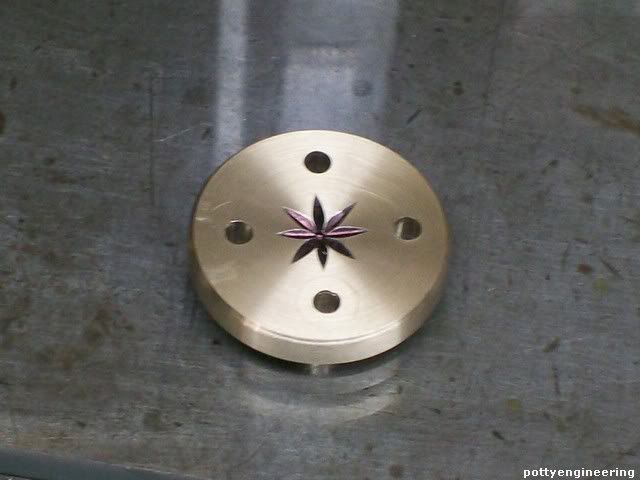
That doesn't look bad.
Stew
In the mean time I decided to get on and do a bit on this.
Her's the assy drg
I showed the fly wheel build on another thread her's a pic of it
I was planning to fabiricate the cylinder in three parts but then I found I chunk of 1 1/2" square brass left over from the loc chimney, I realised that I could make the cylinder in one peice from this.
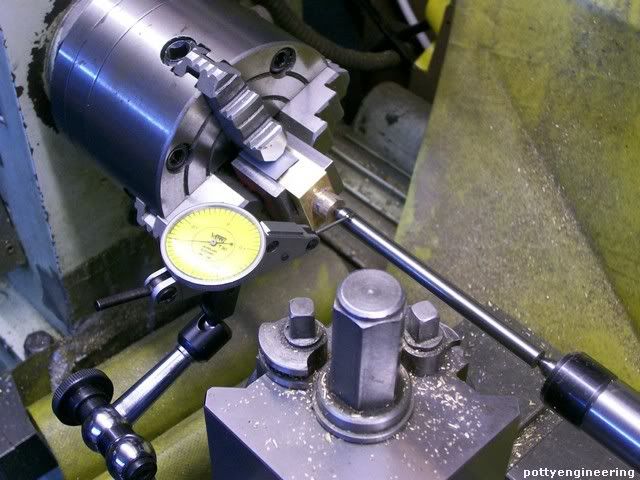
So marked it out and set it up in the four jaw.
Drilled and reamed the bore out 1/2" then turned a mandrell up for it to fit on.
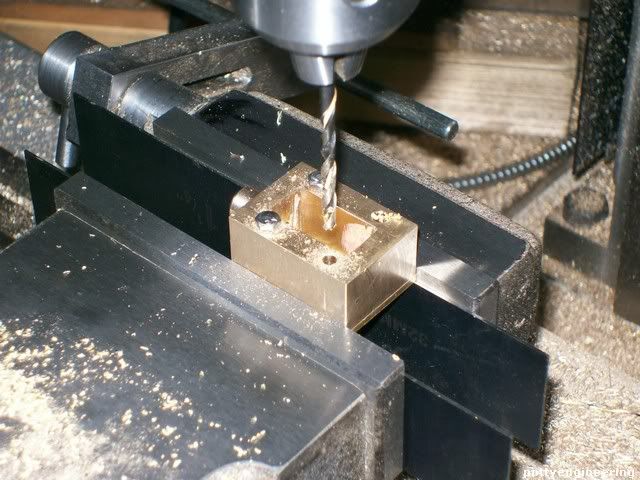
With this in the spin-indexer milled the cylinder to shape.
Then milled the steam ports
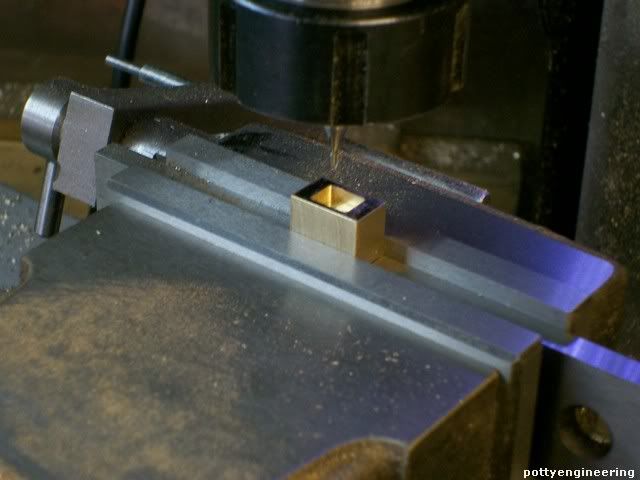
So that I ended up with this
Cylinder covers
One thing a beginner struggles with is lack of kit for drilling holes on a pitch circle.
Well if you have one of those digital protractors you can use it to acuratly mark out the holes.
With the bar in the lathe
First put a small centre into the bar then using a pair of deviders mark the circle in the end of the bar.
Then zero the protractor up on the bed of the lathe, put the protractor on the chuck jaw, rotate to get it zero, then mark across the bar with a scribbing block, rotate the chuck until the protractor is showing 90 deg mark across again, job done.
Centre pop and drill holes
I decided that I would like something fancy on the cover, so with the chuck mounted on the spin indexer and with a vee shape fly cutter form a star in the end.
That doesn't look bad.
Stew

 .
.