Potty Popcorn Engine

Home Model Engine Machinist Forum

Help Support Home Model Engine Machinist Forum:

This site may earn a commission from merchant affiliate links, including eBay, Amazon, and others.
Truly spectacular attention to the finer details Stew. My jaw just drops when I see some of your ideas and work in progress. It's always such a treat to see. That steady follower is going into my brain trust (that is if I can still get the rusty door open :big:)

BC1
Jim
 
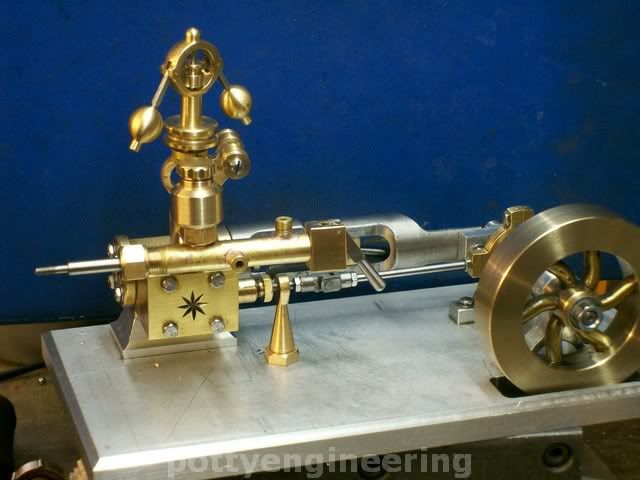
Thanks for all your kind comments guys. that little steady I saw some ware and though that's a good idea, so when the need arose I made one, and glad I did.

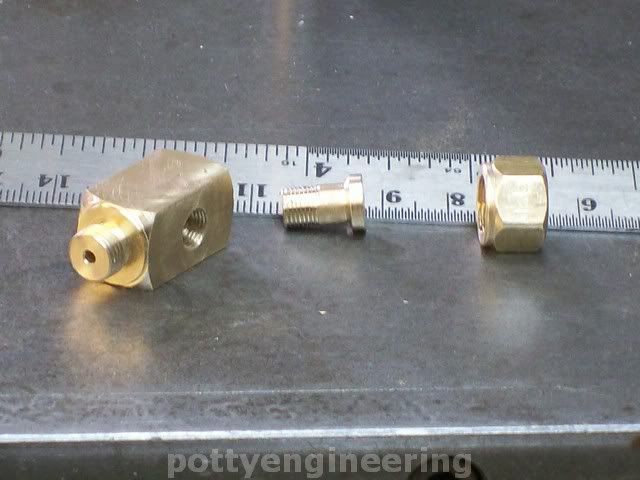
Next bit up is the union coupling of the manifold to the steam chest, this had to be a naval type coupling otherwise the darn thing wouldn't screw together. The bits were just straight forward machining.

Her they are the little round mushroom bit screws into the square body through the nut its fixed in place with stud lock, tightening the nut onto the union on the manifold tightens onto it an make the seal, hope that made sense ::)

131_1049.jpg


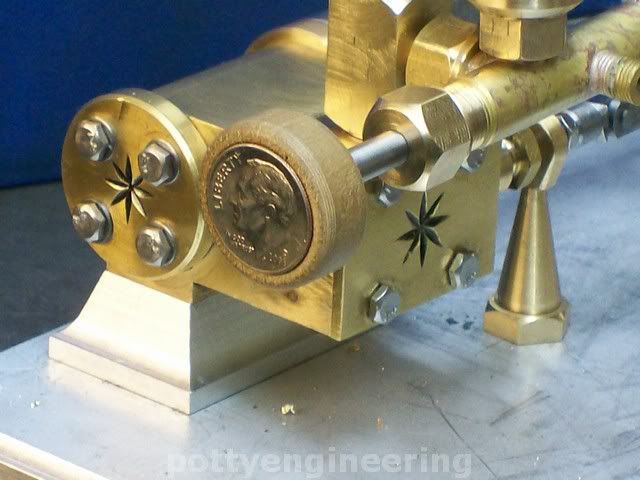
Also made the oiler as I won't be running on steam its not a proper displacement oiler just a look a like, to use just unscrew the cap put a few drops of oil in screw the cap on tight, turn the air on and it will flush the oil into the cylinders.

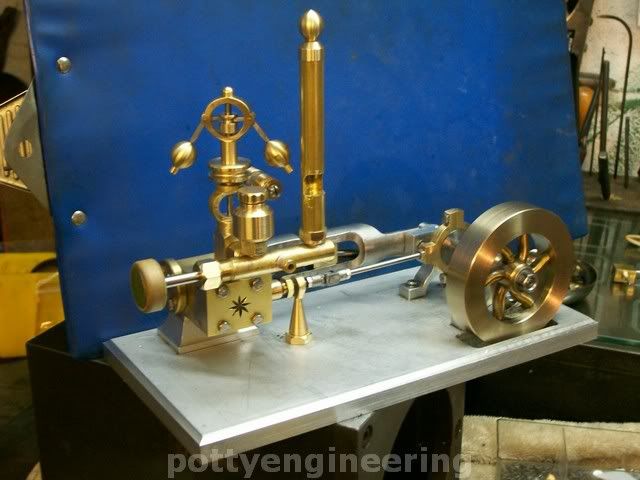
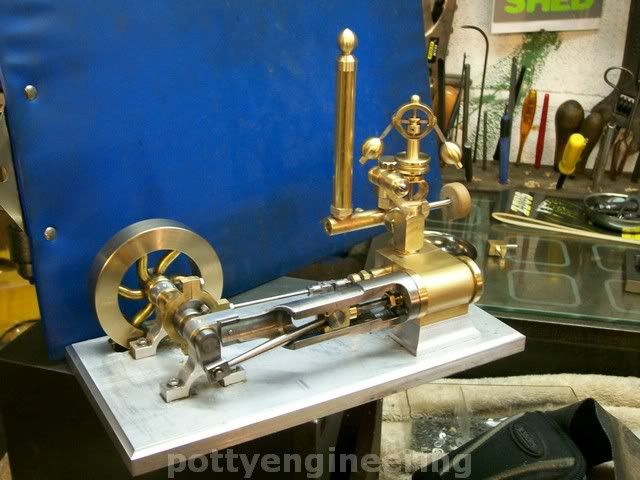
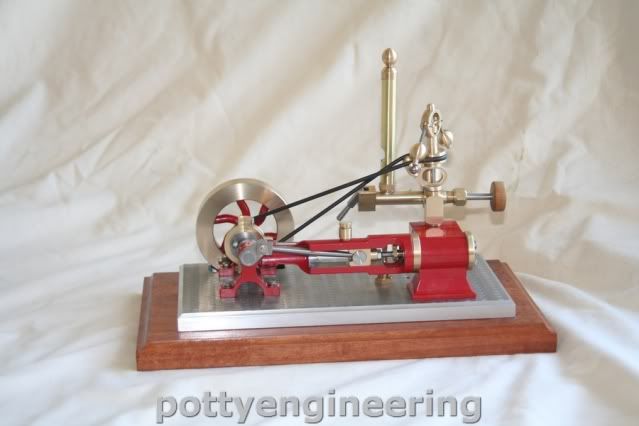
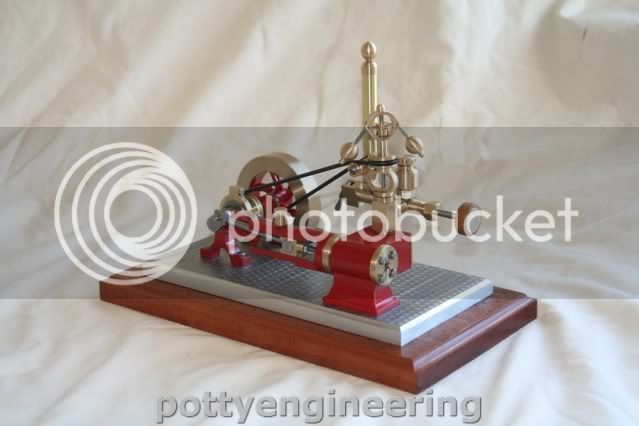
Her's a pic of it all assembled onto the engine.

131_1053.jpg


Starting to look a bit tasty.

Waiting for some 12mm dia thin wall brass tube to be delivered for the wistle, that will be the next bit.

Stew
 
Thanks for your interest and support chaps.

Got a little done yesterday, I'm rapidly getting to the point with the build when its all about bling.

Made the stop valve handle out of a bit of broom handle, I just hope the boss doesn't notice.

Turned it up in the lathe and recessed it to take dime, I'll glue it in at final assembly.

This us what it look like.

131_1062.jpg


Stew
 
That's awesome Stew. Best use of a dime I've seen in some time.

Dave
 
nice one Stew :bow:
Pete
 

That's looking really nice Stew. Great attention to the details.
 
Thanks for your comments guys.

On the home streach


Our daughter brought the dime back from her resent visit to the west coast, I asked her to bring back some us change just for this just job, taking a closer look at it I realized that each state has a different design on the tail side of the coin, some of them a very nice indeed.

Well I've more or less done all the machining work now, its just down to assembling the pulley for the governor and giving it a trial, then it down to some serious bling work.

Last job making the whistle, not much to show in terms of machine set ups most of it was basic stuff and file work, I followed LBSC instruction for making a loco whistle he was very insistent about getting the shape of the throat correct and the disc slot, it came out fine I get a nice sharp note, that set the dogs howling in the area, I was a bit concerned that it would come with a D flatulent note

:big: :big: :big: :big:

131_1071.jpg


131_1072.jpg


Her's a few pics of the whistle fitted, I won't post any more pics of the engine now until its all blinged up.

Stew


That looks the biz even without the bling, you certainly turn out some very inspiring work Stew. Will you be taking this one to Sandown next month, it certainly would be nice to see it in the flesh, alongside your lovely over-crank engine. I have ambitions to have a go at the latter when I complete my present project, which has been somewhat delayed by various things, like summer, mod’s to the mill capability and the installation of a new lathe from Warco, following one of those impulse buys at the Warwick exhibition. Must remember to leave the plastic at home when I visit Sandown.
 
Thansk Guys

Will you be taking this one to Sandown next month,

Depends if I can get it finished in time Les:- I've a few domestics building up.

I hope to submit an article to ME next year.

I've had it running with the governor, and its now stripped down getting the bling treatment.

Stew
 
You've done an inspiring job of it Stew - ME should welcome a comprehensive article with open arms! Heck! I'll even go back to buying it when it comes out!
 
stew it is looking real good, i like the new parts the gov. and whistle. i have all the large and tough parts done now working on all the little parts. i will post a pic. when i get some more done. waiting to see it run with all the bling. jonesie
 
Really nice looking engine, Stew. Typical of all your great work!

Chuck
 
Thanks for your interst and positive comments Guys

Things bin a bit slow this week, but I did manage to get the bits that are to be painted painted.


I used a acid etch primer for the non ferouse bits and an ordinary car primer for the ferous bit, I'm using a red metalic paint.

131_1080.jpg


Also made a hard wood base her are the bits

131_1087.jpg


And made a start on engine turning the ally base I'm using some cretex points that John gave me he olso explained the best way to do it :thumbup:

This is as far as i got i was getting a bit boseyed, and didn't want to mess it up and have to start again so I'll come back to it tomorrow and finish off.

131_1090.jpg


Stew
 
Looking great Stew ... can't wait to see the paint job. :)


Pat
 
Well as you may have seen elsewhere this engine is now complete so just to finish off this thread hers the completed engine

IMG_2254.jpg


IMG_2256-1.jpg


IMG_2258-2.jpg


And the video

[ame]http://youtu.be/YeJjQCjNys4[/ame]


I've just spent the last couple of days checking over the drawings and completing the drawing for the Governor bits

I've emailed the final drawing to every one who had the early drawings, if I've missed any one my apologies just give me :poke: via a PM.

And if anyone else wants a copy just send me a PM.

Stew
 
A credit to you Stew - it really captures the spirit of the original!
th_wav
 

Latest posts

Back
Top