Well NUTS!!! I thought I was going to be smart and show it cutting some wood. I managed to carbide a hole thru a brand new 18 TPI hacksaw blade, then put it into the vice to shorten it up---and as soon as I tightened the vice the blade broke in half. Not at the new hole, but about an inch away from it on the wrong side. Thats it!! I'm done for the day.
There has to be something wrong with your computer settings. Everybody else in the world can see them. Maybe someone with more computer savvy than I can chime in and help you.----Brian
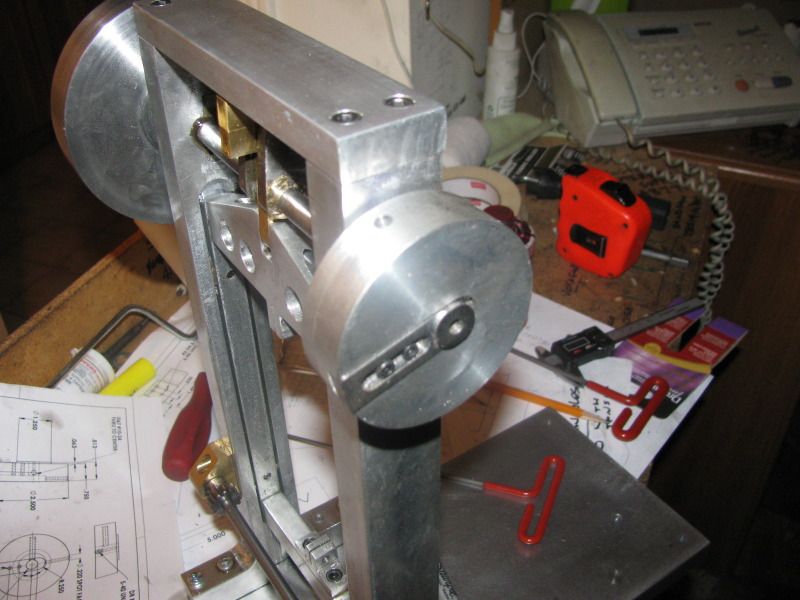
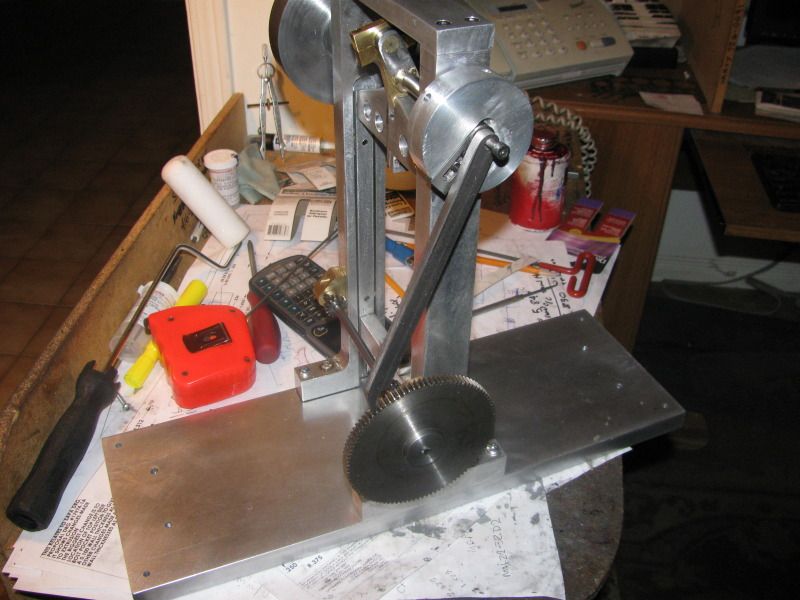
I got up this morning and machined the adjustable eccentric wheel and the steel insert that bolts into it. I have to check stock and see if I have any material to make the pawl from. This is getting exciting. The saw carriage is totally free now from being "ran in" on the lathe. I may have to add a counterbalance to the flywheel to offset the weight of the saw carriage, as I notice quite a difference in the torque required when lifting the saw frame as opposed to when it is going down with gravity assisting it.
This carriage advance system works unbelieveably slick!!! By adjusting the offset of the eccentric from the center of the mainshaft, I can make the pawl engage anywhere from 1 to 5 teeth on the ratchet wheel each time the mainshaft revolves once. I have to buy a shoulder bolt tomorrow for the connection at the top, but it works very good (but a bit wobbly) with just a standard #10 bolt in it. I may have to add a second pawl to keep the log from backing away from the saw when the primary pawl is not engaged, but I have to "try it and see" first.
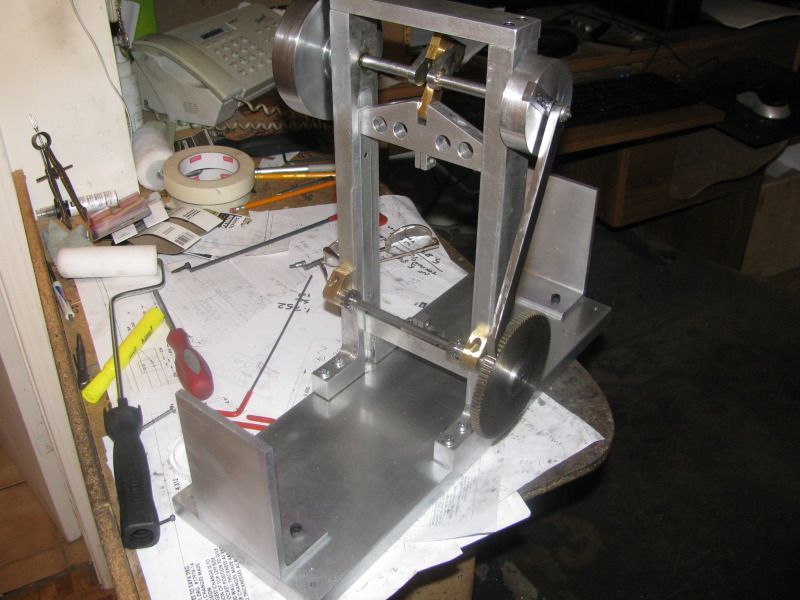
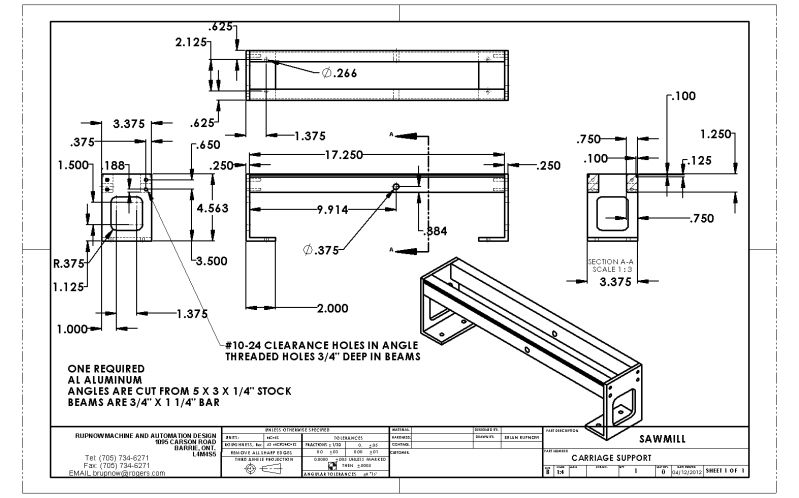
Tonight I made the end stands which will support the carriage mechanism. I haven't trimmed the angles to the finished height yet, because when I created the 3D model I didn't yet have the racks, so consequently didn't know the backing dimension on the racks. This backing dimension will determine the actual height of the carriage support beams and these end support angles. I have to do a bit of experimentation tomorrow, so that I will know at what distance between the drive pinions and the back of the rack things run the smoothest. Then I can establish the finished height of everything. I am going to be at the point where I have to start working with wood VERY SOON!!!!
I am closing in on the completed carriage support frame. I have made a few simple changes this morning to make fabrication a bit easier, but nothing I have posted so far will change.
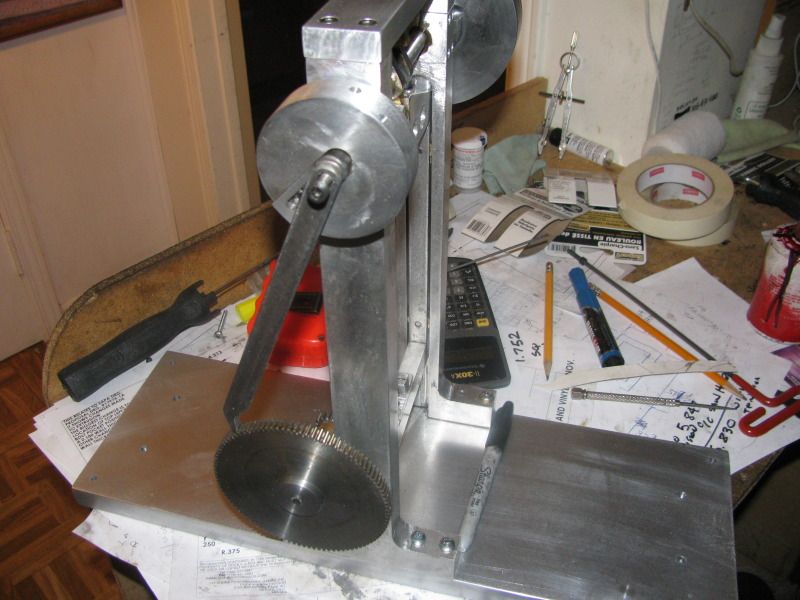
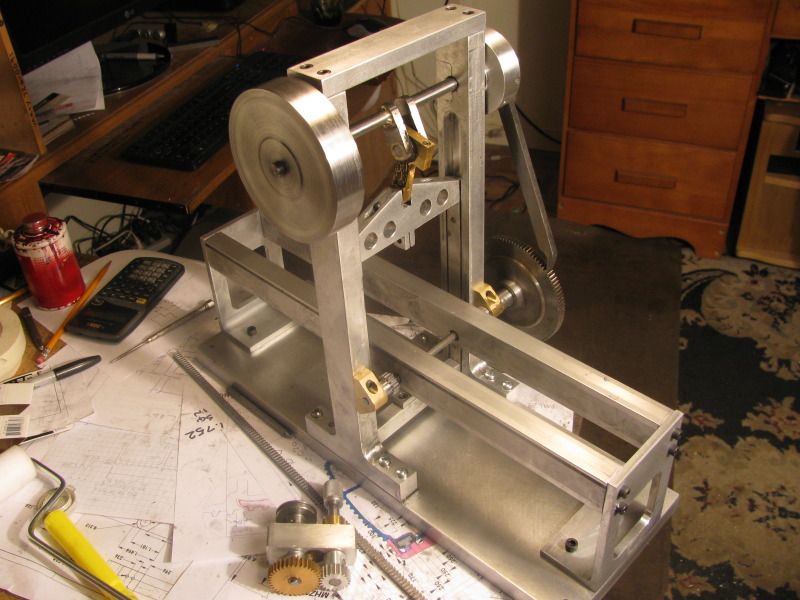
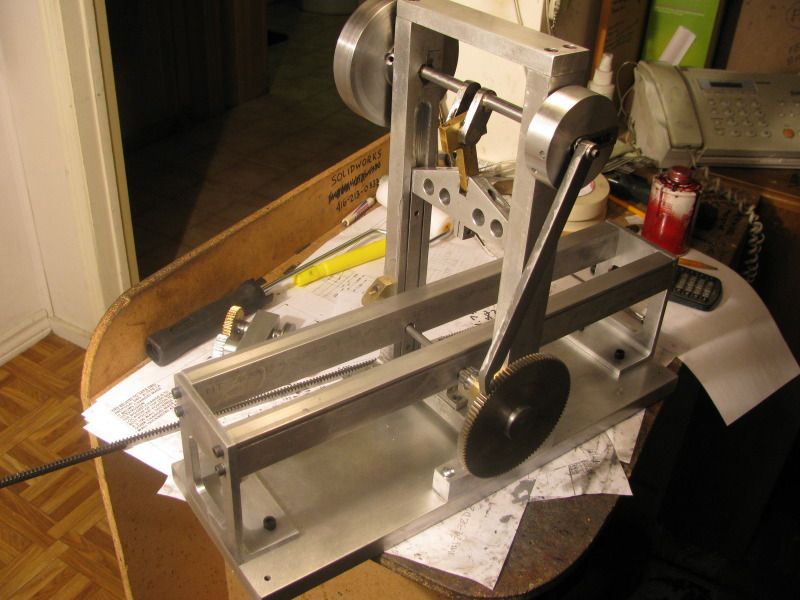
Well Dang!!!~ I'm impressed. The carriage support structure is all finished and assembled. In one of the pictures you can see the pinion gears that are going to engage with the rack which attaches to the underside of the carriage. The two long horizontal beams have .125 wide x 0.100 deep slots milled full length on the outsides. The carriage will ride on top of these beams, and 1/8" diameter brass pins thru the wooden structure of the carriage will ride in these slots and prevent the carriage from lifting up away from the support beams. You can see the rack laying beside the "sawmill". and what MIGHT become a set of reversing gears for the carriage. Its been a long day!!!
When photo bucket opens up there is an options button, press this and choose download. It will open a new page and you should have the video. I was having problems for a while, not being able to see videos, but pictures were ok.
When photo bucket opens up there is an options button, press this and choose download. It will open a new page and you should have the video. I was having problems for a while, not being able to see videos, but pictures were ok.
Thanks Bret4!!! Yes, I do work fast, especially on something that interests me. Its not so much a matter of working fast as it is puting in a LOT of hours. I am "semi-retired" which means that there are days where I don't have any 'paying' engineering work. Those days, its not unusual for me to put in a solid 8 or 9 hours in my machine shop. As someone else pointed out "I must be some kinda maniac!!!". After days like today, I have to agree with them.-----Brian
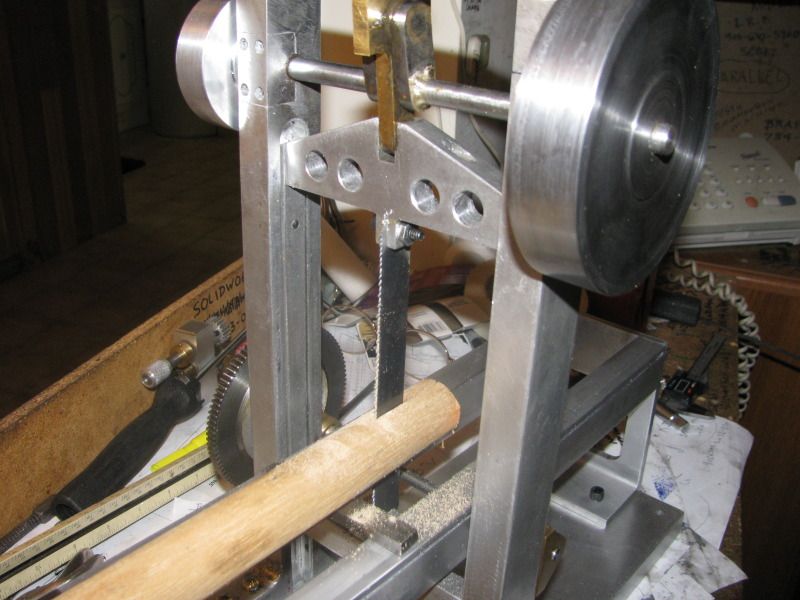
Well, we have a blade, and it does cut!!! I went to Home Depot this morning and bought a 10/14 sawzall blade. I had to cut it to the correct length and carbide a couple of new holes in it. I looked at a 10TPI blade which was labeled for wood only, but it just looked too aggresive. This blade was marked for wood or metal. It seems to cut just fine. I didn't post a video of me making the cut, because all the Safety Natzi's would have had a field day roasting me. Suffice it to say that it does cut, and cuts very well, under hand pressure pushing the log into the reciprocating blade. Now the exciting part will be to see what happens with my carriage feed.
Are you setting the blade at an angle so it pulls back from the cut on the up stroke or is it just strait up and down?
It is so cool to see this project come to life. This is something that will be fun to demonstrate for family and friends. I'd like to run one of these on a steam engine. Wonder how big the engine will have to be?
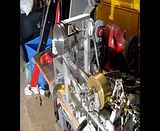
Here is a picture of the sawmill being driven by the Atkinson engine. Look quick---I can't get any of my engines to run the way I want them to this afternoon!!!
And here we have the sawmill driven by my Webster. Of course, my dilemna is that both the Webster and the Atkinson are air cooled, and consequently I don't want to run them too long, because they will overheat. On the other hand, my Kerzel hit and miss (Which I can't get started right now) is watercooled, and could conceivably set there and "chuff" away all day without overheating. These small engines should be taken off the shelf and ran at least once every three months. If you don't, they become like recalcitrant children, and don't want to perform on demand. They get gummed up with dust and crud that sticks in the oil and it doesn't take much to throw these little guys off. Anyway, enough foolioshness for now. My supper is calling me!!!