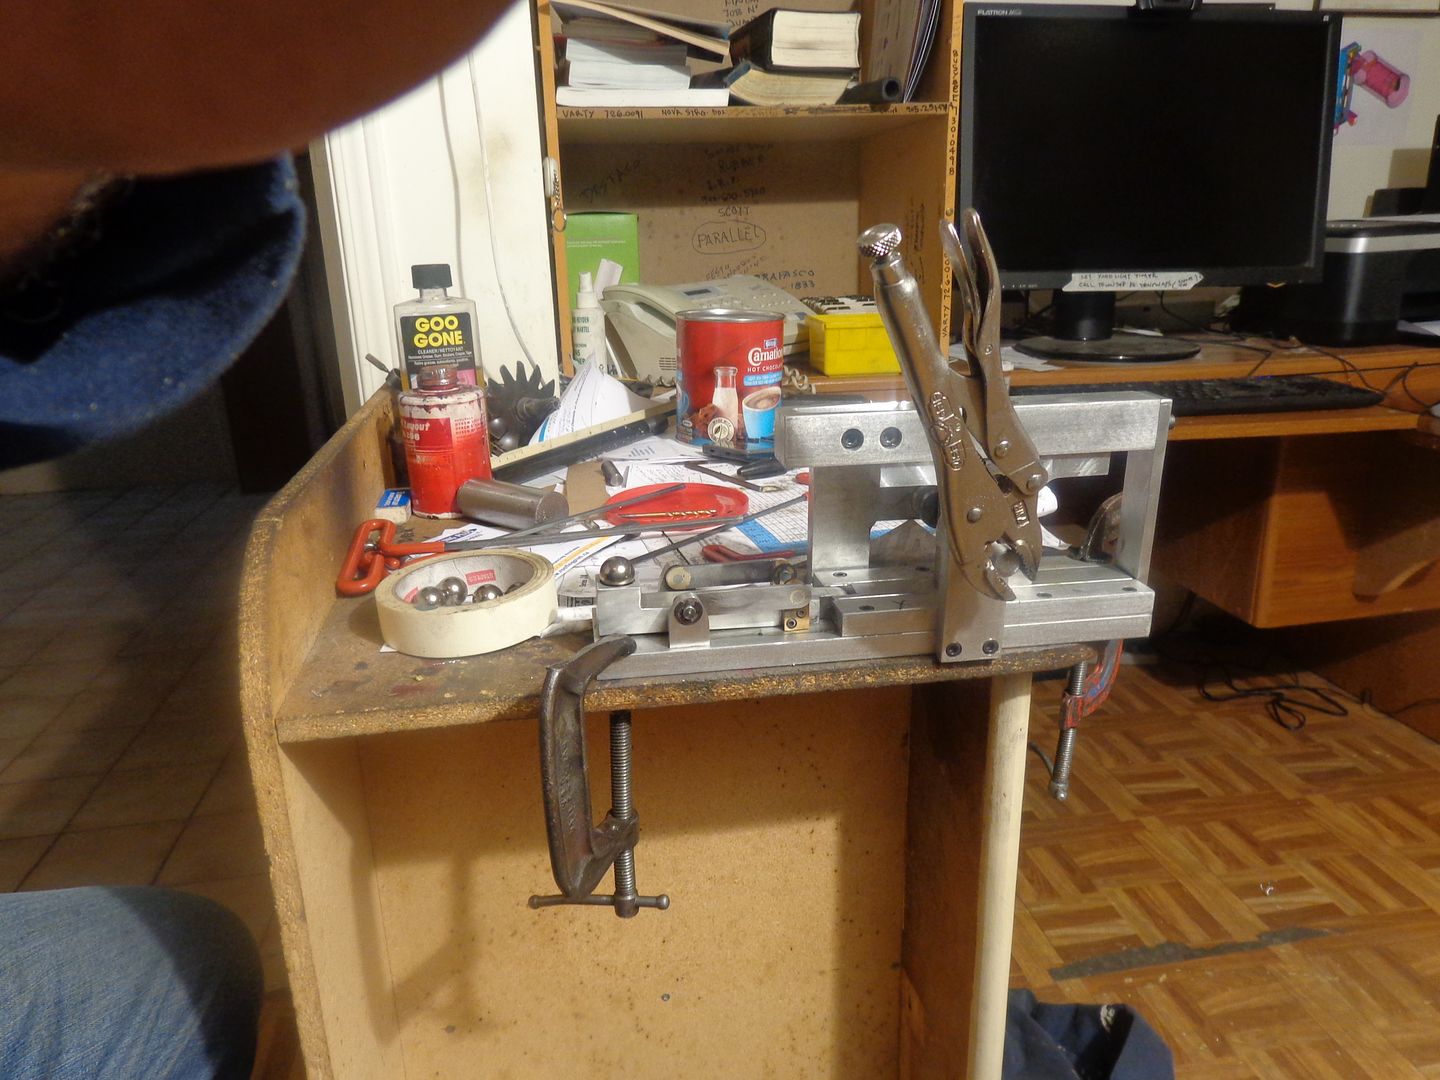
IT WORKS!!! --ITS AWESOME!!! I have to go now and do husbandly things for the rest of the day, but I just put a fist-full of 11/16" diameter ball bearings thru the mechanism while turning the crankshaft slowly with a pair of vice grips, and it worked perfectly.
You are using an out of date browser. It may not display this or other websites correctly.
You should upgrade or use an alternative browser.
You should upgrade or use an alternative browser.
Marble lifting automation
- Thread starter Brian Rupnow
- Start date

Help Support Home Model Engine Machinist Forum:
This site may earn a commission from merchant affiliate
links, including eBay, Amazon, and others.
AussieJimG
Well-Known Member
- Joined
- Oct 17, 2010
- Messages
- 890
- Reaction score
- 118
Woopee! Congratulations Brian, another triumph.
Jim
Jim
vascon2196
Well-Known Member
- Joined
- Oct 2, 2009
- Messages
- 1,026
- Reaction score
- 312
Awesome...looking forward to seeing it in action!
Chris
Chris
Okay---A bit more about my successful test run. As I said in an earlier post, there are some things that no matter how well they are modelled in 3D, you still can't tell if they are going to work until you make the real part and "try it and see". I had no worries about the marble (actually an 11/16" diameter ball bearing) on the entering side of the escapement. All the marble had to do was fall down the hole. Gravity has seldom failed me!! It was on the other side, where the marble is pushed up thru the hole that had me worried. There isn't a lot of clearance on something like this, and I was worried that the marble would jam between the orbiting block on the crankshaft and the edge of the hole on the underside. The theoretical "intersection point" between the centerline of the escape hole on the underside of the top piece with the holes in it and the center of the orbiting block looked to me like it was going to be too tight and cause a jam, so I took my best guess and offset the intersection point .040" when I drilled the escape hole through the top piece. After finishing the top piece and bolting it in place, I dropped a marble into the entry side, and slowly rotated the crankshaft with the vice grips. Of course, the first thing that happened was that the "marble" fell out the open side of the twin angles and landed on my foot!!! (That is what the yellow side pieces in the latest 3D model are intended to prevent.) I tried again, only this time I held my thumb and finger over the open sides so the marble couldn't escape, and kept rotating the handle---and out popped the marble on the discharge side, slick as a whistle. I was so pleased that I fed 5 or 6 more marbles through, and nothing jammed up. I hunted around this evening and found some .045" stainless that I've been saving for years, and tomorrow morning I will make the side shields and bolt them in place. Once I get everything operating smoothly, I will post a video of the hand cranked version, before I get real serious about gears to make a reduction unit so the device can be driven be one of my i.c. engines.
We have good news to report on the marble moving front. The side shields do work to keep the marbles from falling out thru the sides, and with just the right combination of magnets glued into the back side of the pitching arm, the marble doesn't drop out before its supposed to. Nothing seems to jam or bind, and the speed you see things running at in this video is far more representative of the speed the machine will run at when powered by one of my i.c engines.


Last edited:
Errr ... Brian ... did you count how many marbles went on the floor? Beee Careful where you are walking!
Excellent job so far. I can see your gadget is going to be subject to all sorts of add ons in the future.
Cheers,
Tom
Excellent job so far. I can see your gadget is going to be subject to all sorts of add ons in the future.
Cheers,
Tom
It seems that PhotoBucket is once again screwing around with their website. It used to be when you posted a video, that the first "frame" of each video had "sprocket drive" holes along each side like old 8mm movie film. That way you knew it was a video when somebody posted it. Then they made the first frame look like an ordinary picture and nobody knew if it actually was a video or not. Now it seems, you only get the link to post, with no picture at all. Damn, I wish they would leave things alone!!! EDIT--EDIT--It seems they have fixed the problem now!!!
Last edited:
AussieJimG
Well-Known Member
- Joined
- Oct 17, 2010
- Messages
- 890
- Reaction score
- 118
I am not a big fan of Photobucket, it takes so looong to load complared with YouTube.
Jim
Jim
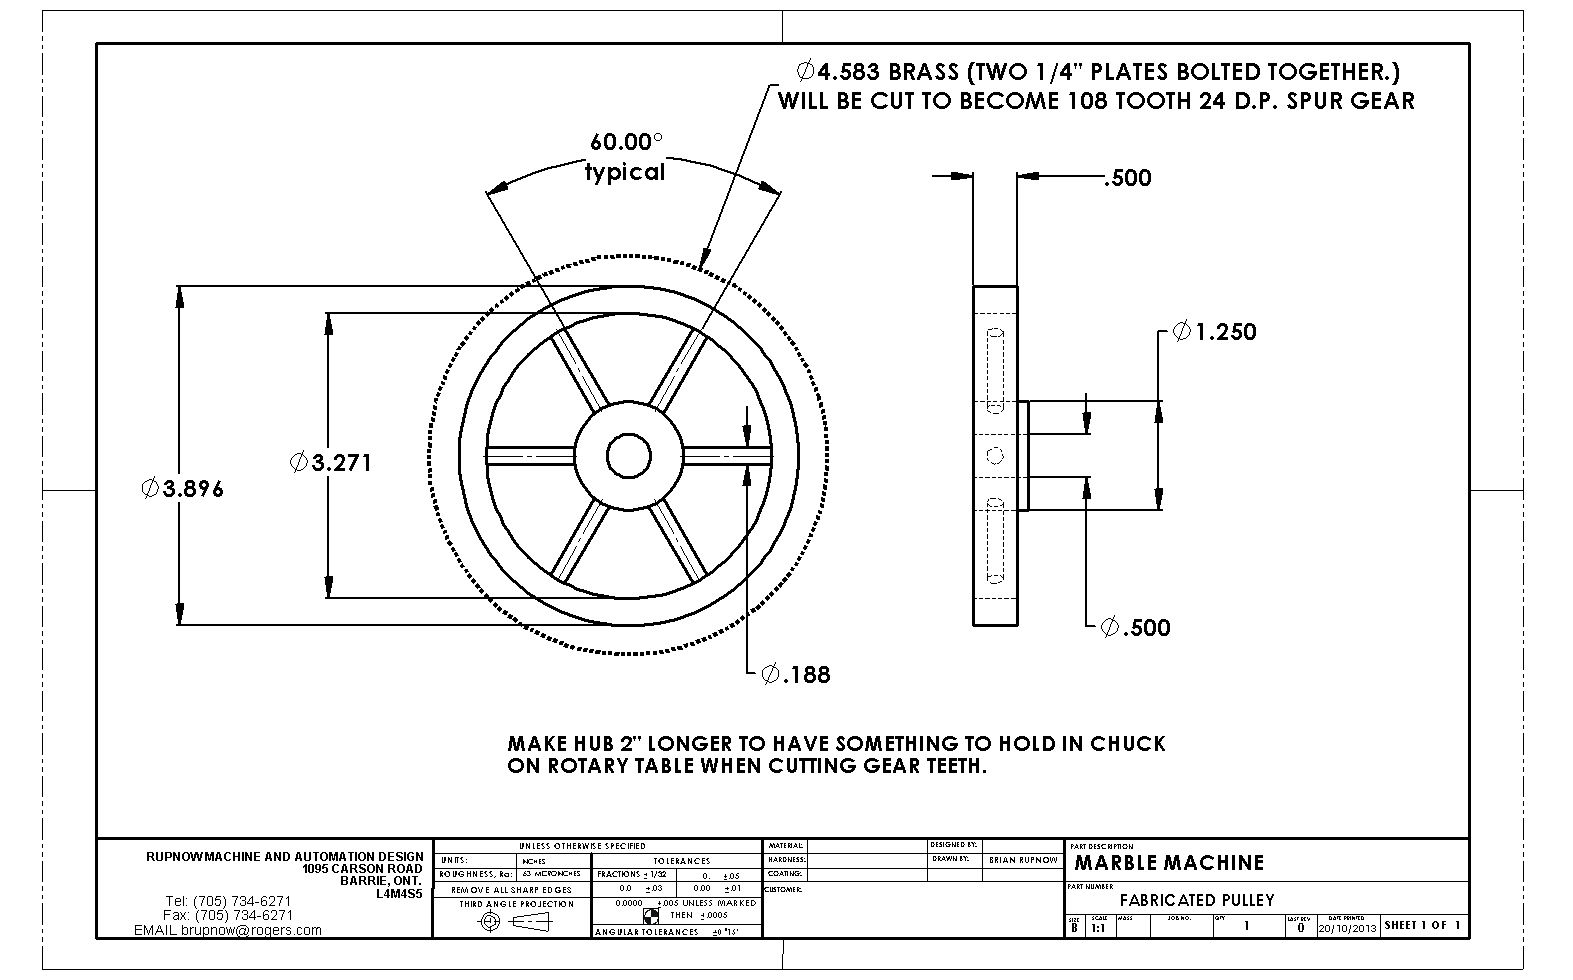
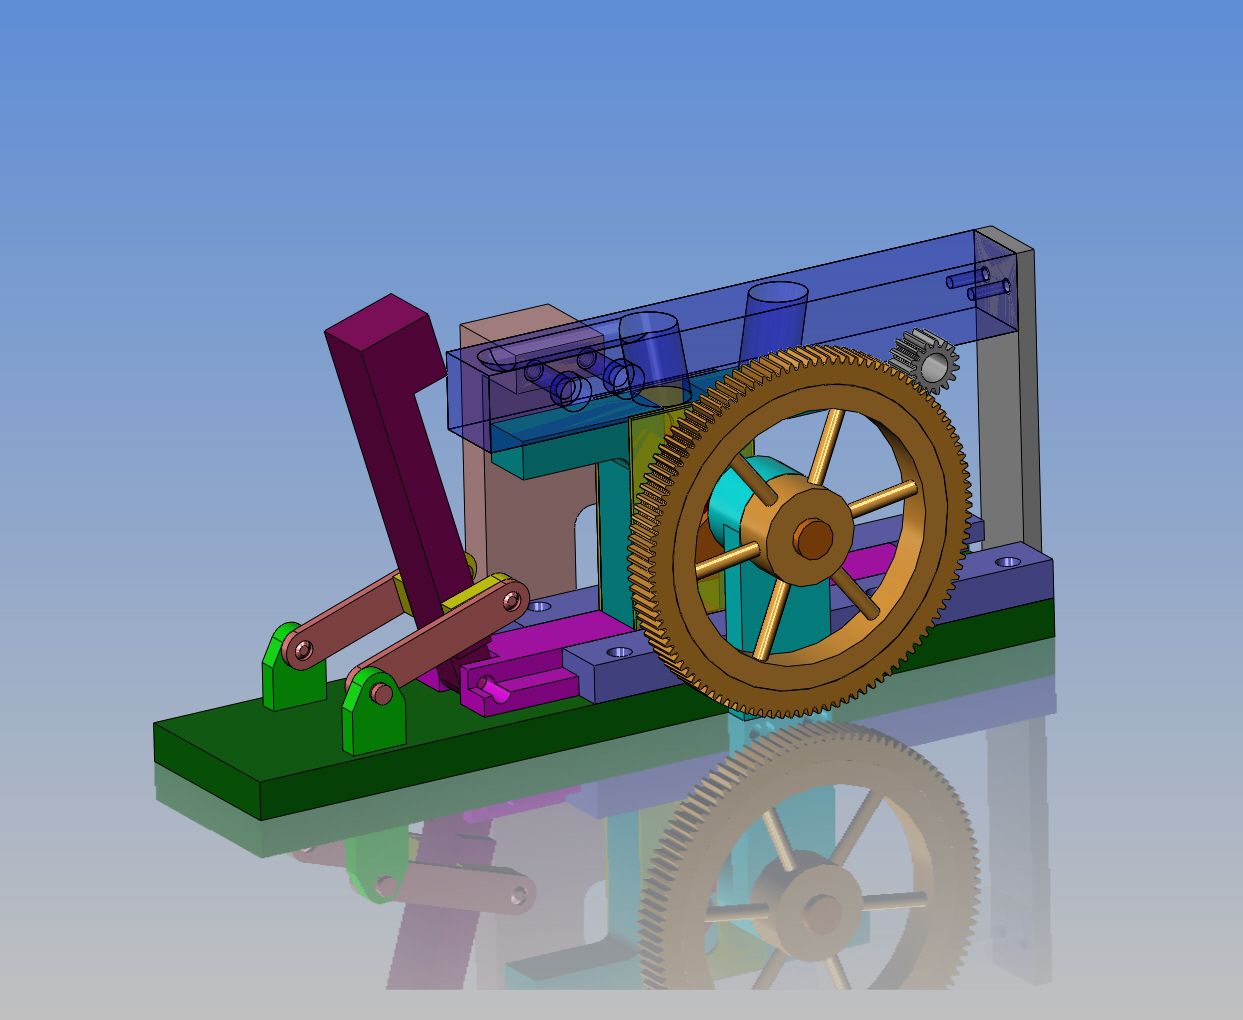
Since I have been unable to find a satisfactory "ready made" gear to suit me, my next step may be to create the orange colored 108 tooth gear. The gear is a 24DP spur gear which I can make with the cutters I have. It is 4.5" pitch diameter, and with the rotary table and divider plates I have, it will require me to use 15 holes on an 18 tooth divider plate.--Yes, there is less than 3.33 degrees between the teeth and my rotary table is a 90:1 ratio.--That's going to make for a LOT of cranking. I like the look of the gear which I have modelled.--Rather than a solid plate hub, which is the easiest way to go, I think I will make the center section a built up weldment from steel and shrink the brass gear to the outside of it. Not because it will work any better, but because it will look better and presents a bit of a challenge.

I am not a big fan of Photobucket, it takes so looong to load complared with YouTube.
Jim
I don't mind putting my finished videos up on Youtube, but I always do a few "in process" videos and would rather have them up on Photobucket. I have a paid subscription to Photobucket. Someday when I get old and poor and no longer wish to pay the subscription, thousand of videos and pictures are going to disappear off my posts.
It seems that the winds of change (or maybe members opinions) are blowing through the forum that told me two weeks ago that my marble machine build was not welcome there. Today they have posted a new policy about what gets displayed on their website, and my build is now welcome there. I am happy about that, because the site in question is one of the premier model engine building sites in the world, and it makes me very happy to now be accepted there, warts and all.---Brian
I am glad to hear they have changed their minds Brian.
Have you ever thought that if the marbles final destination was at the top of a tower and then they fell into a large water wheel affair with some very low gearing, your machine might be able to be self propelled and perpetual once you started it.
Cheers
Tom
Have you ever thought that if the marbles final destination was at the top of a tower and then they fell into a large water wheel affair with some very low gearing, your machine might be able to be self propelled and perpetual once you started it.
Cheers
Tom
Tom--I've thought about selling the Brooklyn Bridge and Beach Front Property in Arizona too----
I may not do any machining tonight. I meant to go down to my steel supplier today and pick up some cold rolled to start the hub for my built up gear, but after working 9 hours on my current design contract, I don't have much energy left and the steel supplier is closed now anyways. That's okay. I just downloaded Stephen King's latest novel onto my e-reader. Maybe tonight I'll just set in my big chair and let old Steve horrify me!!
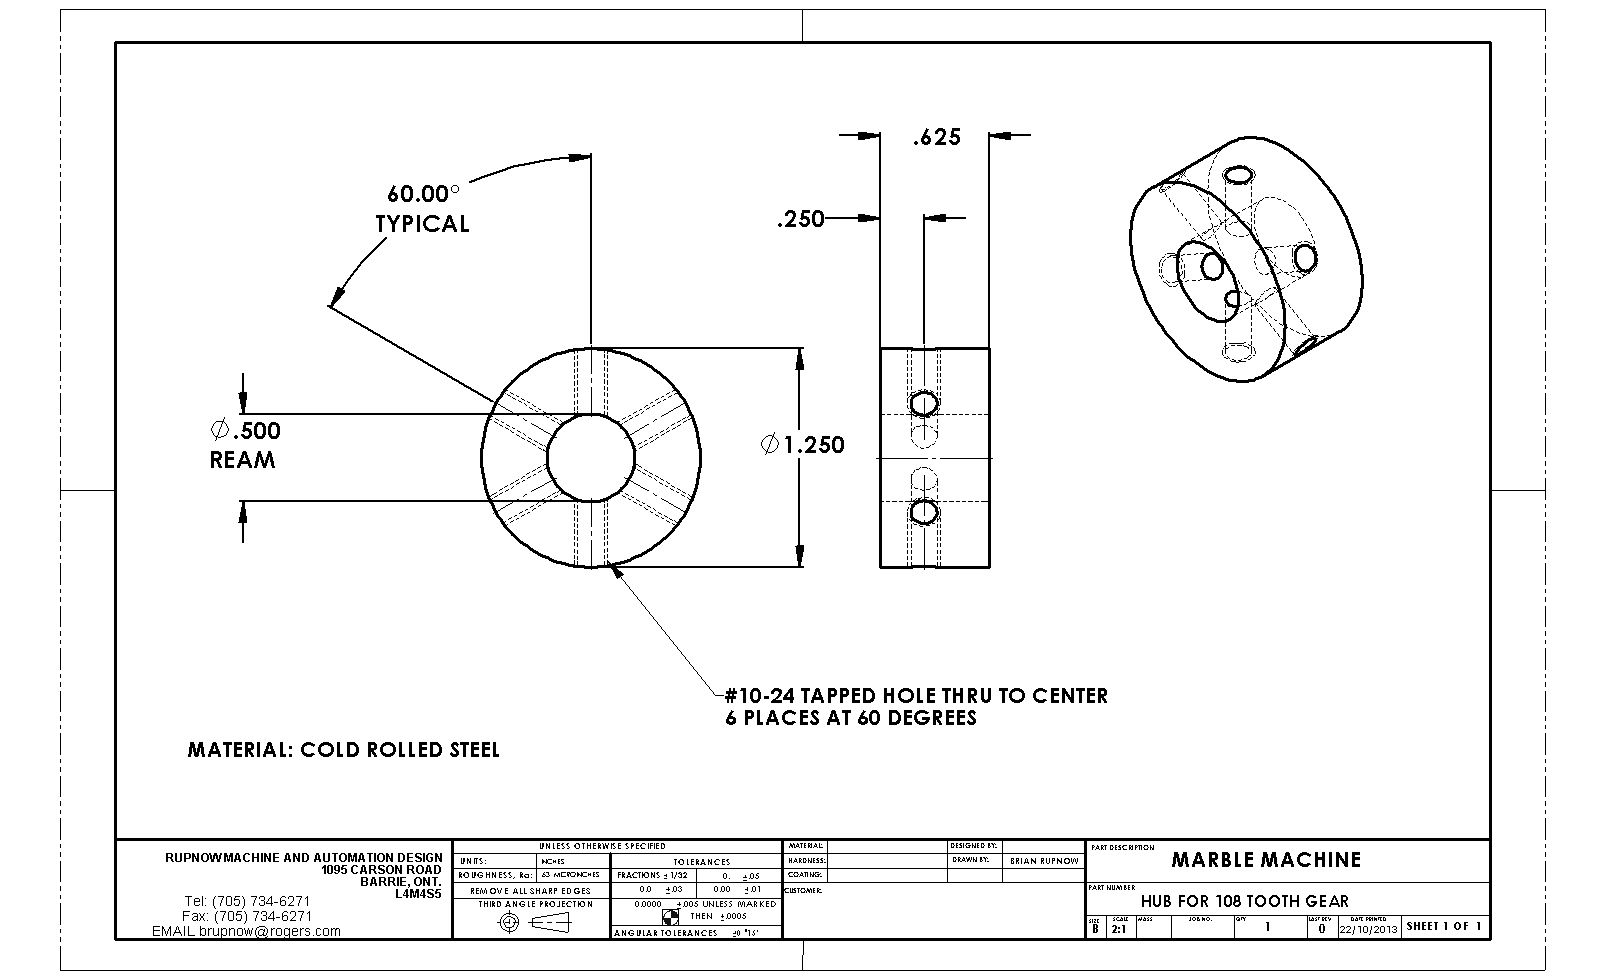
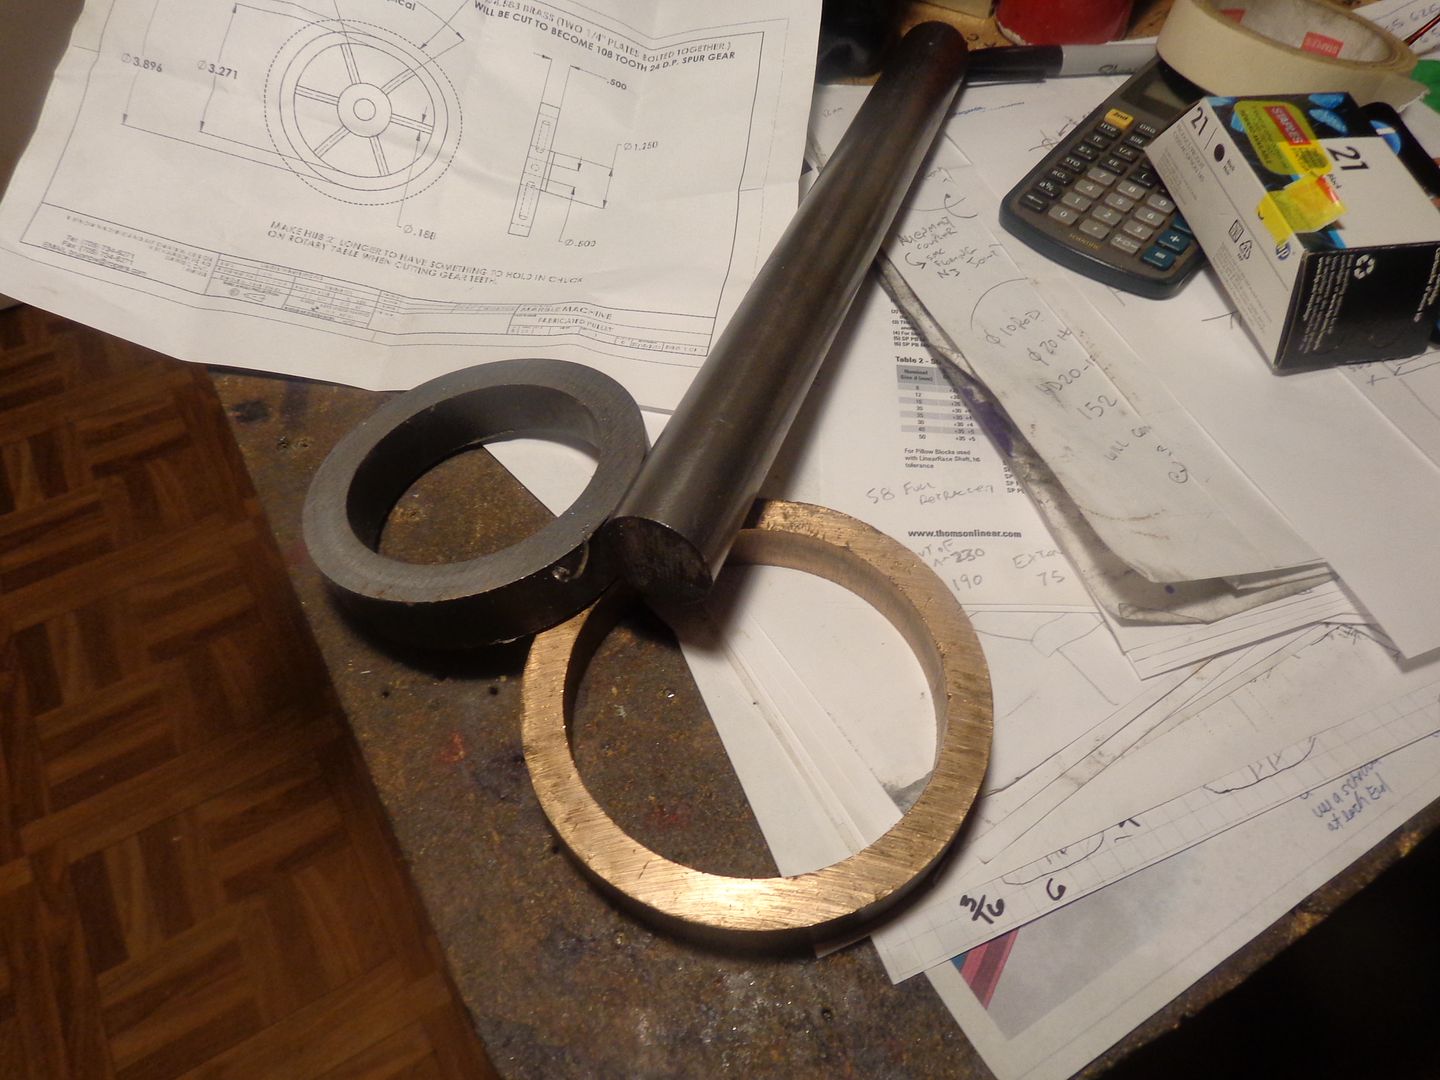
So---Here is the beginning to my 108 tooth gear. I only need a couple of inches of the 1 1/4" cold rolled but I bought a foot, because it will always get used. The 660 bronze which will become the actual gear was a "short" that was laying in the "shorts rack" and the steel pipe which will become the outer rim that the bronze gear attaches to is a piece of 4130 that just happened to be the right size.

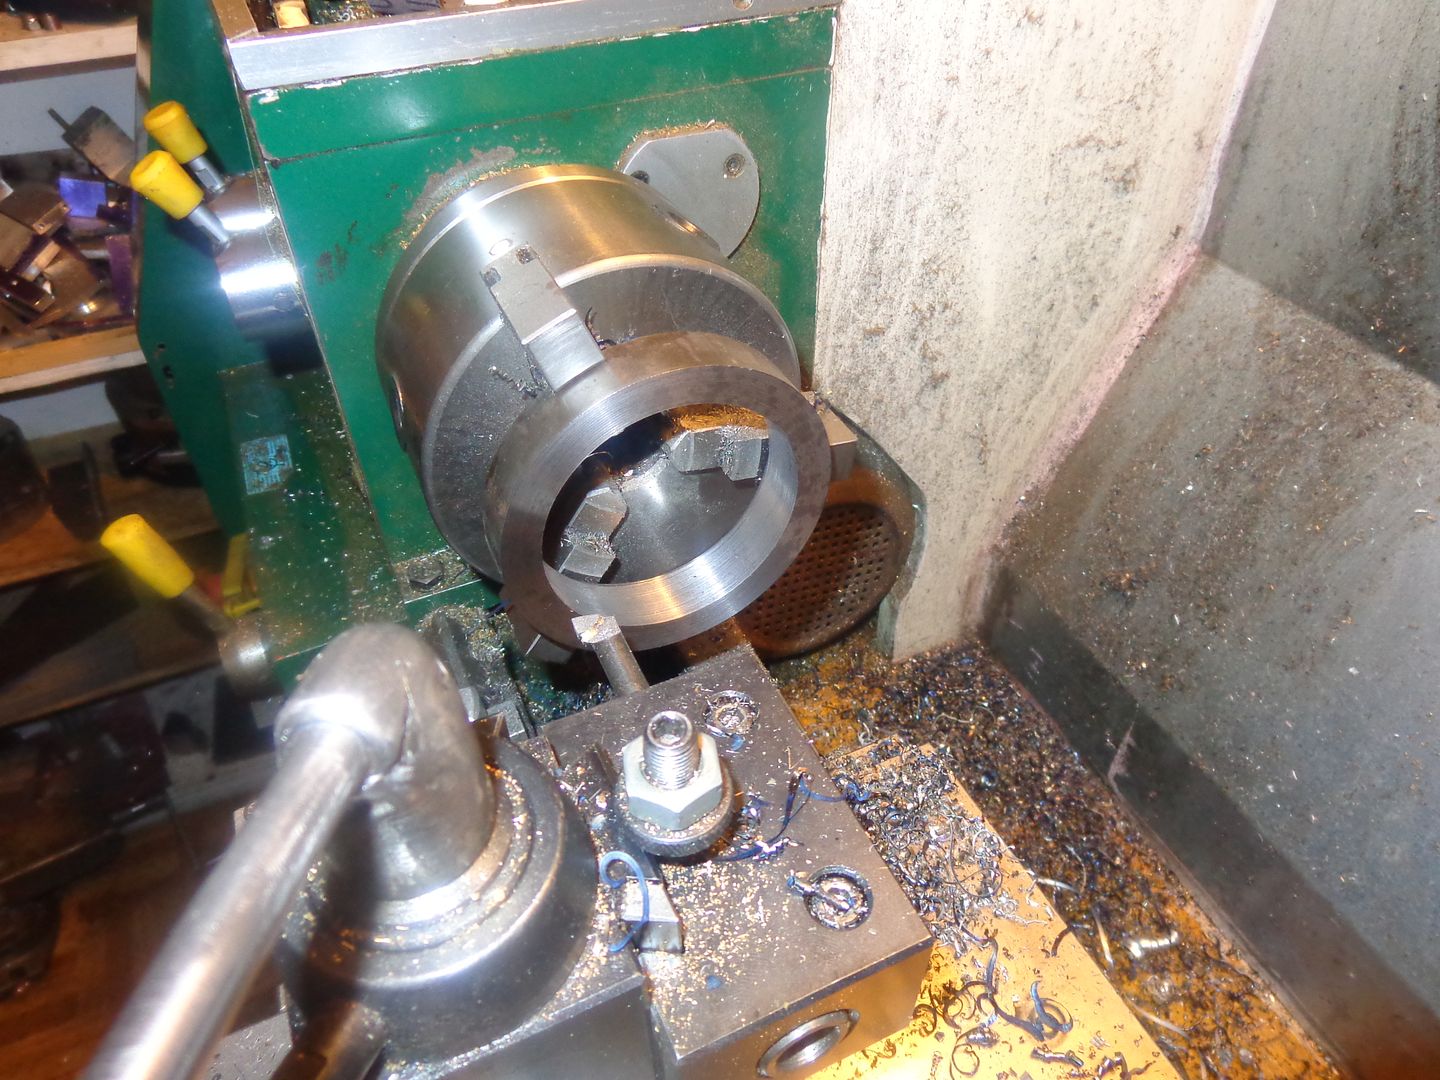
This project is going to involve some rather "intense" machining (for me anyways). The diameters involved are right on the ragged edge of what my lathe chuck can open to and hold. This is the first step, boring and facing the 4130 steel "rim". I am using the "reverse jaws" in the chuck. When I locked the work up in the 3 jaw chuck, I used a 1/8" parallel between the back side of the work and each chuck jaw, so that I could run the boring bar in far enough for a complete "clean up" of the bore without my boring tool hitting the chuck jaws. The parallels were, of course, removed before I fired up the lathe. Now I have a "witness face" which is perfectly square to the bore.

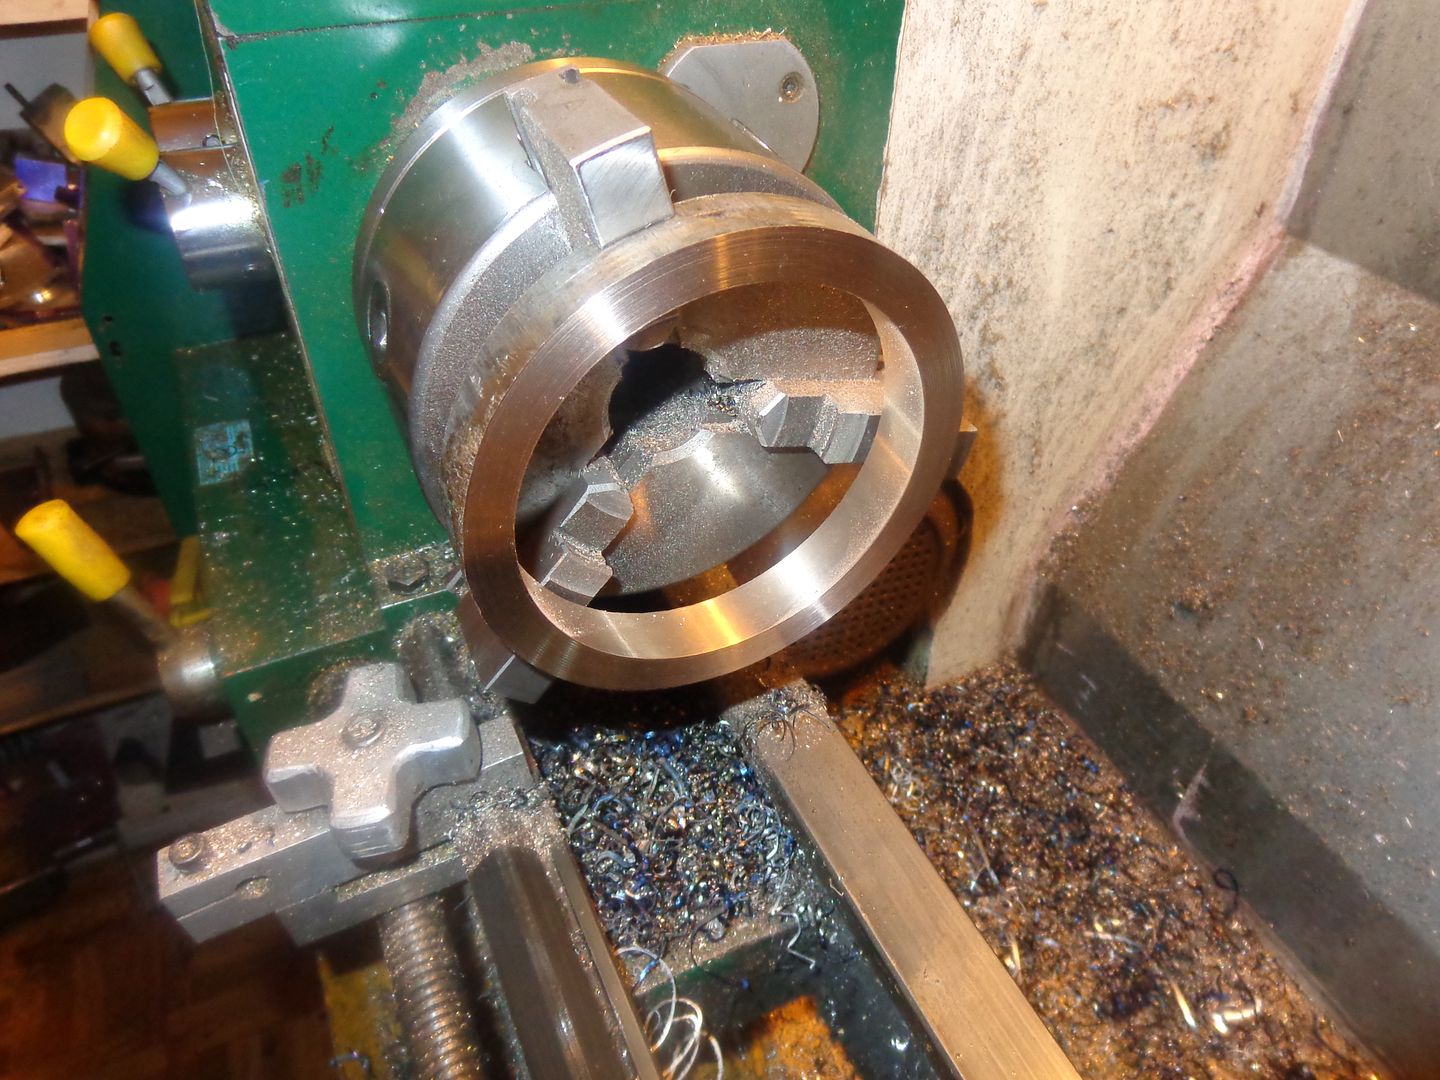
Same-o Same-o, only this time with the 660 bronze. The o.d of that bronze as it sets is 4.820". I have a note written on the wall over the lathe that says "Largest diameter I can hold with the reverse jaws is 5.25", so I am approaching the envelope. That's all the turning that I have to do until after the steel hub, rim, and spokes are welded together. Next thing I have to do is set up the rotary table to drill holes in the rim and hub every 60 degrees.

Similar threads
- Replies
- 26
- Views
- 8K
- Replies
- 0
- Views
- 733


