Vertical 4 cycle engine from recycled parts

Home Model Engine Machinist Forum

Help Support Home Model Engine Machinist Forum:

This site may earn a commission from merchant affiliate links, including eBay, Amazon, and others.
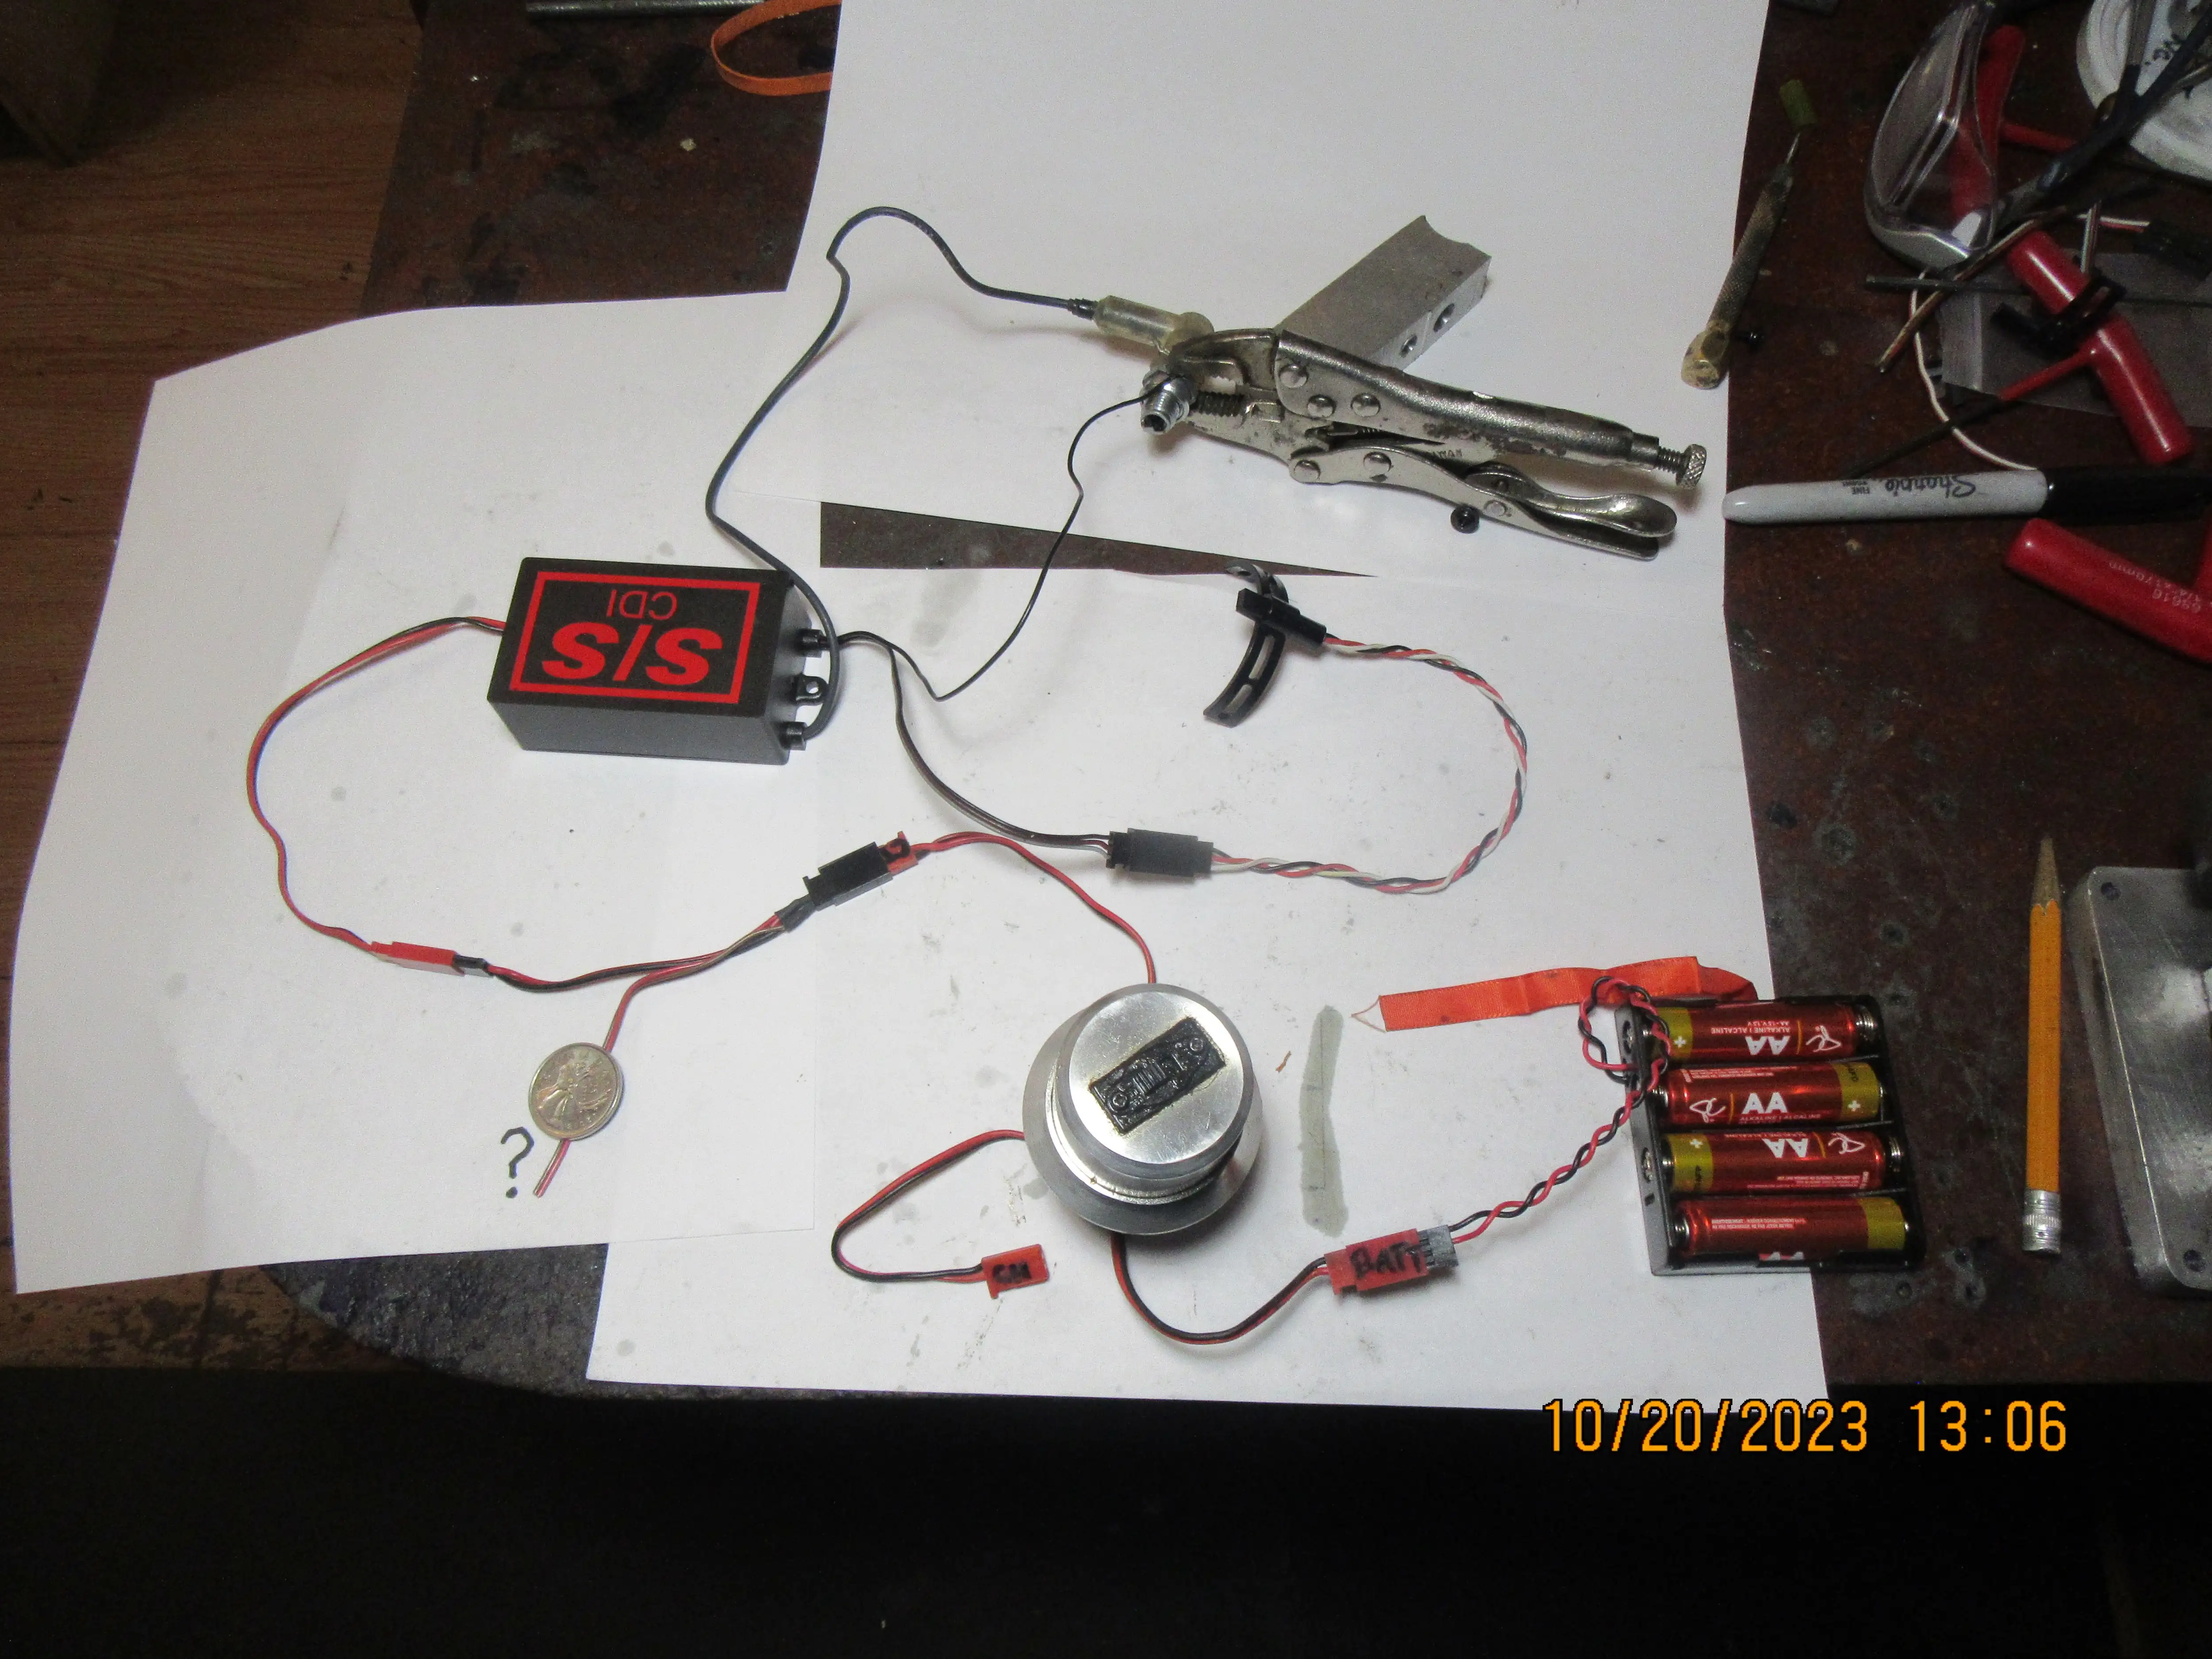
Roy---You were right. I passed the magnet in front of the sensor, and the arc is jumping from one end of the coil to the other end of the coil. I just seen it do that.---Brian
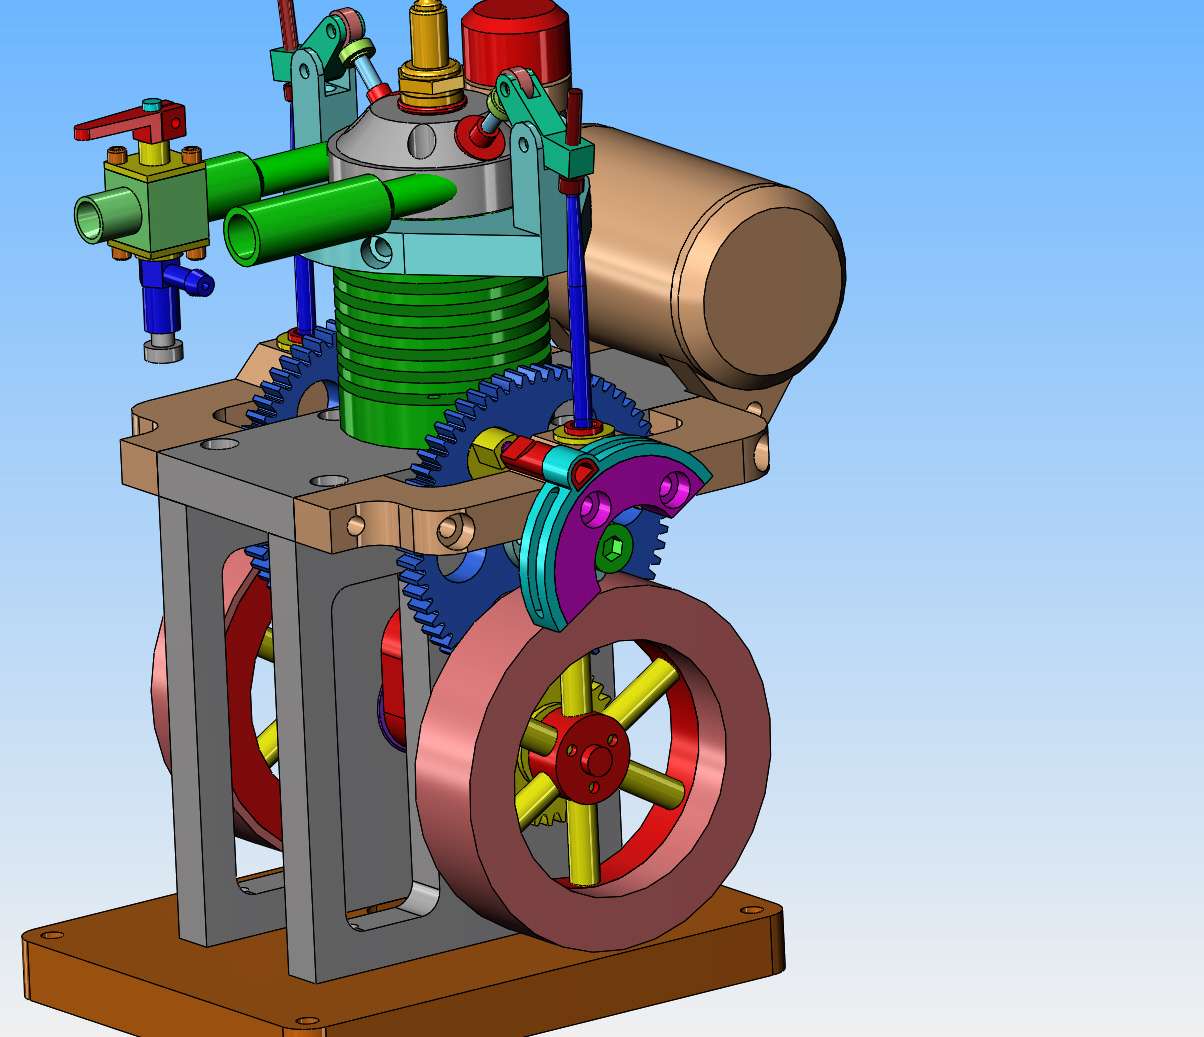
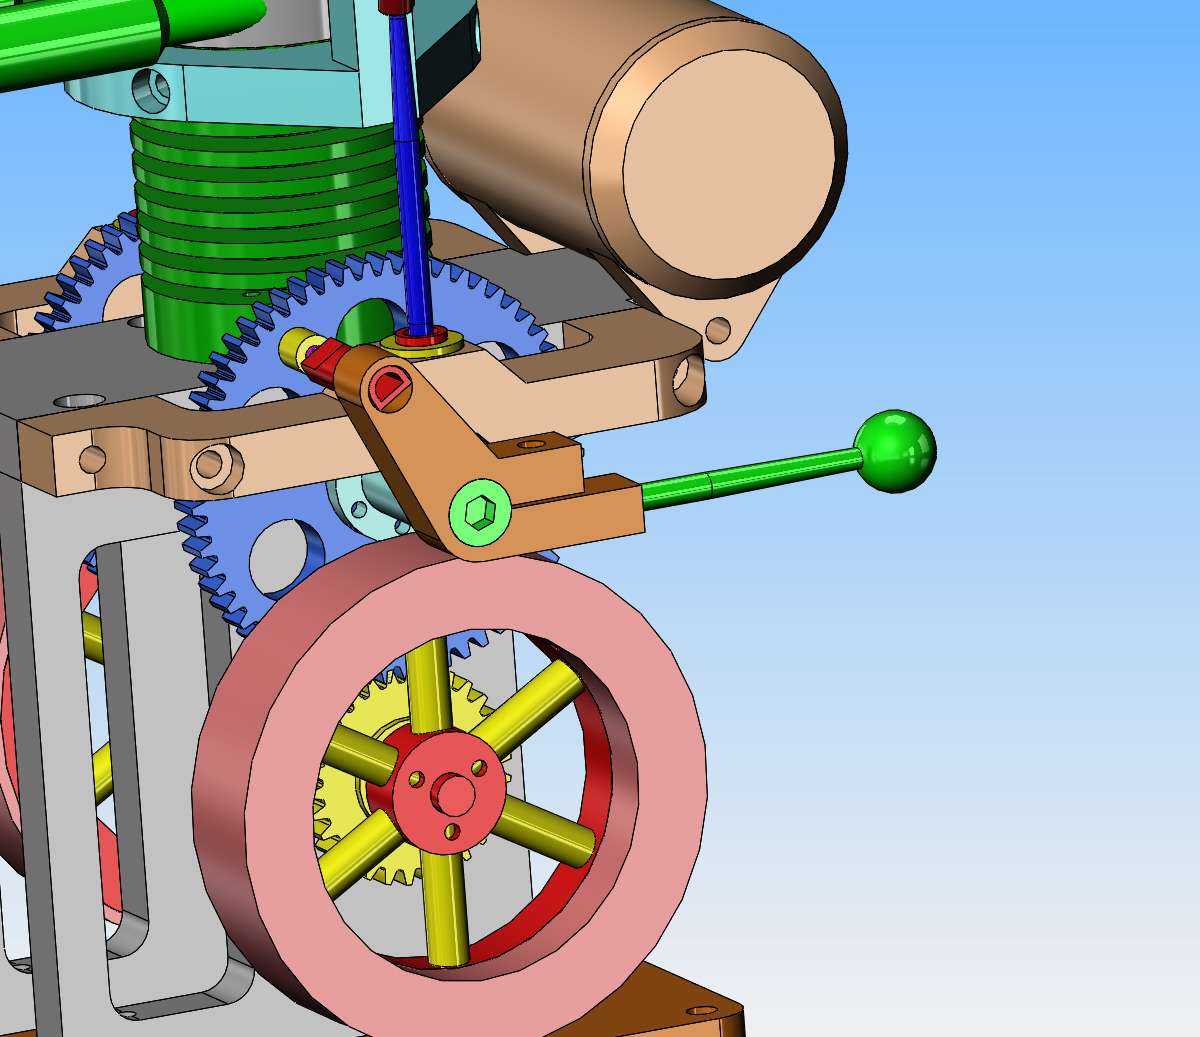
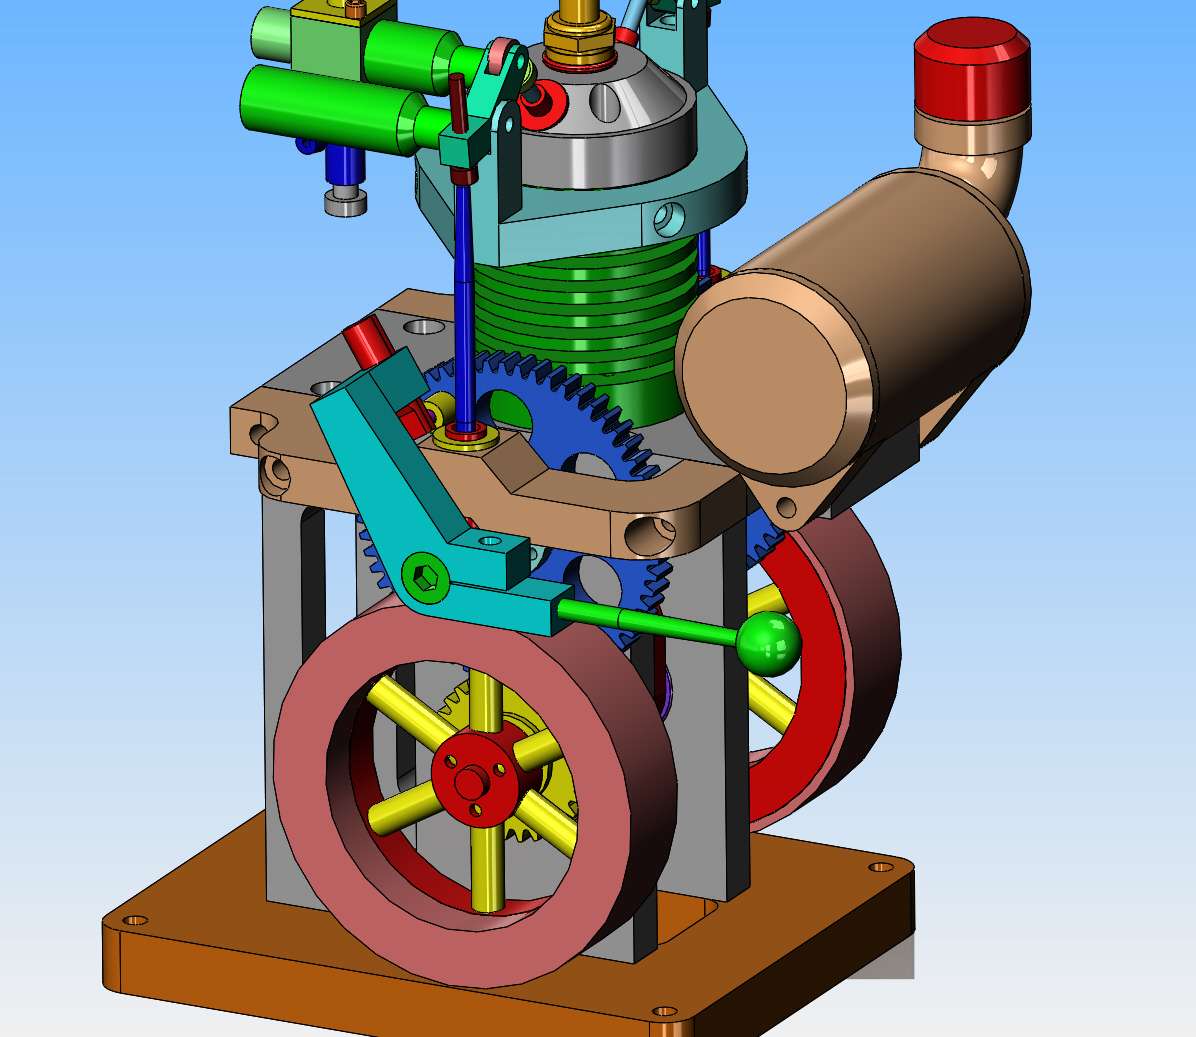
 
I'm just spinning my wheels at the moment.--Did some modeling of how I would mount the magnet and sensor for the electronic ignition. Haven't made anything yet, as I'm waiting on some feedback from Roy Sholl. Wife has gone out to take oldest granddaughter somewhere, and I just love setting here playing on my computer.
QrVciO.jpg
 
Of course Roy will comment
But You might wonder why it chooses to jump so far INSIDE the module when it only has to jump the small gap of the spark plug.
Check your connections to the spark plug. With an ohmmeter. The HV cable or the black return likely has a bad connection.
 
Roy has suggested using silicone sealant as a "Potting compound" around the coil to prevent this arcing over thing. I haven't actually done this before, so I'm just waiting to hear a bit more about it from him. Dsage, I'm not discounting your advice, but I have dealt with Roy for a long time and I know he will give me good information. My high tension wire and sparkplug boot appear to be in good condition and I have tried a couple of different sparkplugs with this set up.
 
dsage is spot on. I would also put a jumper wire across the resistor A-C. I'm sure the spark is from A-B on the coil. I would also take the spark plug out of the equation and put the ground wire end to end with the spark plug wire with about 3/16" of gap and see if it is still arching at the coil. If it does you need to cover the exposed wires with Silicone and let it cure good.Brian.jpg
 
This morning I got up and smeared a big glob of silicone all over the high tension coil in the CDI box. This is supposed to stop any internal arcing on the high tension coil. I then went back to the model I created yesterday that showed the purchased plastic sensor holder in place.--Surely I can make something that looks better than that----So---I redesigned it using fabricated aluminum and steel and brass.---Looks much better in my opinion.
u4BXbL.jpg
You have the sensor facing the wrong direction. It triggers off from the face, not the end.
 
Okay---We're good to go!!! dsage, you were right--the high tension lead wire was broken off inside the outer insulation (which wasn't broken) just where the wire entered the sparkplug boot. Fixing that AND potting the coil restored my spark to the end of the sparkplug the way it should be. Hooray!!!--Gordon--I looked up a video of the Rupnow Engine from ten years ago and it was as you say, so I have modified my model of how my sensor is going to pick up a signal from the magnet. Roy Sholl---Thank you for your help.---Brian
QXizMR.jpg
 
Okay, I've had enough fun for one day. Timing handle assembly is 3/4 finished, and I'm going to go set on the couch and read my book!!!
Sg8JsJ.jpg
 
Good to hear. I've been around the block many times. Had you checked it with an ohm meter as I suggested you would have detected that open HV lead connection. Hopefully the HV coil is not damaged. Because when the spark has nowhere to go it can jump inside the coil itself damaging the coil. This is one of the reasons you should NEVER check the ability of any ignition system by making the spark jump large gaps. At some point the spark won't jump the gap any more and will arc inside the ignition coil damaging the coil. Most times not to the point of not working but to the point of having a reduced spark output because of some shorted windings.
As for the blob of silicon - yes it will stop the spark outside the coil but this is what saved you. Now, next time you have an open spark plug lead the spark may find it easier to jump inside the coil.
Roy may disagree but personally I would remove the silicon so that you can be saved again by this sparking in the future. In fact I would set up an even narrower gap maybe 250thou across those two points as a safety net. It will have no effect if everything is working properly with your HV circuit. Roy may have this safety gap set up somewhere on the board already in his potted versions.
 
Last edited:
Dave, I've not had a spark coil fail yet (knock on wood) but it is a definite possibility, they are well epoxy encapsulated. From past experience it seams the hall sensor gets the worst end of the deal. Brian, the .250" gap won't hurt and if you have that experience again you could fill it in. I do not have any internal spark gap in my last system but I did add 2 Zener diodes to the hall sensor circuitry. The other thing that helped a lot with the hall sensor is the use of the little plastic D-tube. It insulates the hall sensor and wires from the engine so less likely to get zapped with a bad ground or leaving the spark plug wire off and firing the CDI. Dave is also correct on the magnet/sensor alignment. I do know the sensor can fire from the end but the magnetic field must be strong and rotate in the right direction. It is not a given choice to fire the sensor so best to stay with the face like you have in the last photo. I like that set up very much and it should give you lots of adjustment. You also won't need much air gap from the end of the magnet to the D-Tube as the wall thickness of the tube is at least .040". I run my magnet as close to the tube as possible without striking it. I do think you have the electrical well in hand now so will be waiting to hear it run. Looking good.
 
I was away today, in another city, watching an 8 year old grandson play hockey---but---I also managed to finish all the machining required for my ignition. Tomorrow I will reassemble it all and check to see that my sparkplug actually sparks with all the new (and old) components in place.
 
Today I put a coat of urethane onto the previously stained wooden base, and made a starter spud to fit into my electric drill. My God, my welding has gotten bad. I used to be able to lay down a bead of mig weld that would make the birdies sing. Now I can weld good enough to get the job done, but it's really, really ugly. In this particular case, it won't matter much, because nobody but me will see that starter spud.
nS7hD2.jpg
 
My God, my welding has gotten bad. I used to be able to lay down a bead of mig weld that would make the birdies sing. Now I can weld good enough to get the job done
Brian,
That is what happens when you don't do enough, mine has gone the same, would be lucky if I lay down 12" of weld a year now. Keep up the good work, I have been following.
Cheers
Andrew
 
This morning I mounted the engine on the new wooden base, along with an on/off switch, a battery pack (under the brass plate) and a CDI box. it all fits. --Couple of things here----I milled a notch in the cylinder fins to provide a path for the gas line, and I still have to install some kind of restraint to keep the gas line tucked into the notch and not rub against the teeth of the large cam gear. Right at the moment, that brass plate which hides the battery pack is just setting there---I still have to figure out how I'm going to keep it in place. The next major hurdle here is going to be setting up the engine to run.
hD6FJ2.jpg
 

Latest posts

Back
Top