'Poppin' Flame Licker Engine

Home Model Engine Machinist Forum

Help Support Home Model Engine Machinist Forum:

This site may earn a commission from merchant affiliate links, including eBay, Amazon, and others.
Where can I get a set of plans for the poppin engine?

Dave
 
Hi Dave, the plans are by Dr. J.R. Senft and were published in Live Steam Nov. 1980.

It's also fairly high on my to-build-list.... ;D

Nick, great work! Add me to the list of can't wait... Thm:

Cheers

Jeff
 
Coming on well Nick. There seem to be quite a few more parts to this than the last Flame eater we both built so I think I'll give this one a miss. :D Can't wait to see it running though!

Vic.
 
Dave, plans are here about half way down:
http://www.john-tom.com/html/SteamPlans3.html

Thanks Jeff, really want to get out tonight and keep going but I've agreed to go to pub for a few cokes, quiz and Leeds vs Arsenal game (come on Leeds!)

Vic, there seem to be a lot more parts and fiddly ones at that but if it runs, it will have been enjoyable! The main reason I did it was to compare the two.

Thanks Frazer, hope so!

Nick
 
Nick

Thanks for the explanation, much clearer now.

Might as well stay home and get some work done in the shop, since
The Gunners are goings to win...... ;D

Cheers, Joe
 
Wow Nick, somehow I got busy with this and that and missed all this great progress you're making. Great explanation about how the atmospheric engine works too.

I'll be sure to tune in when you get this up and running any minute now ;)

Cheers
Steve
 
:mad: Booooooo!!! Good game though!

Not far off Steve, hopefully tomorrow night is the night. Really I want to finish the base and burner then try running it! Will try to resist temptation to try it out as soon as the con rod is on!

Nick
 
Anxioiusly awaiting news of a successful run Thm:

Bill
 
Hi all, I've made progress tonight but it's been a long night, sometimes things just seem to take a lot longer than you'd think.

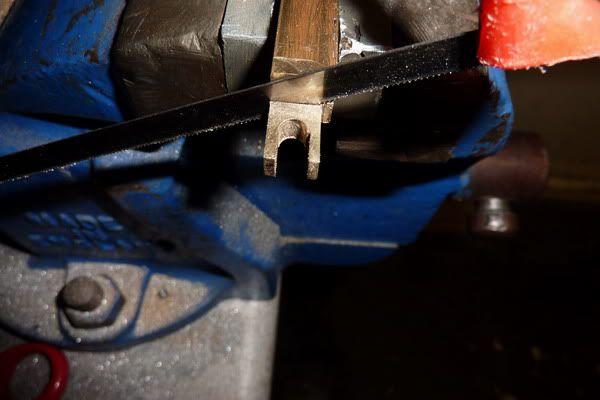
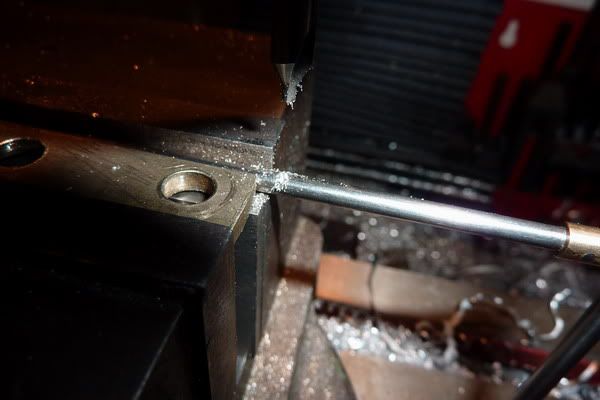
First job was to put the conrod assembly in the vice and drill the hole in the big end for the crank journal.

I picked up the middle pretty much by eye and centre drilled lightly as didn't want to force the two bits apart. (I don't think it would have though as the vice had quite a tight grip squeezing it all together)

2011-01-2021-46-16_0001.jpg


2011-01-2021-47-33_0002.jpg


I opened it up to suit the journal. I didn't have a 5/32" reamer so just used a number drill the next size bigger which happened to be no.21. You need a nice loose fit anyway, don't want excessive friction.

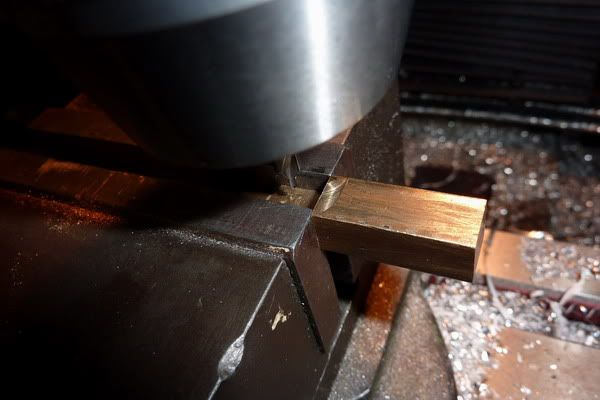
Then I cut the big end strap from parent stock:

2011-01-2021-55-15_0003.jpg


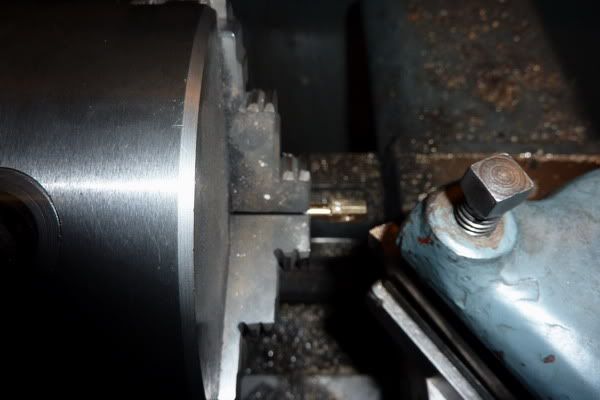
and tried to face it to length in the lathe. Luckily I took a very light cut as it moved:

2011-01-2021-59-21_0004.jpg


So back across to mill to length instead!

2011-01-2022-07-30_0005.jpg


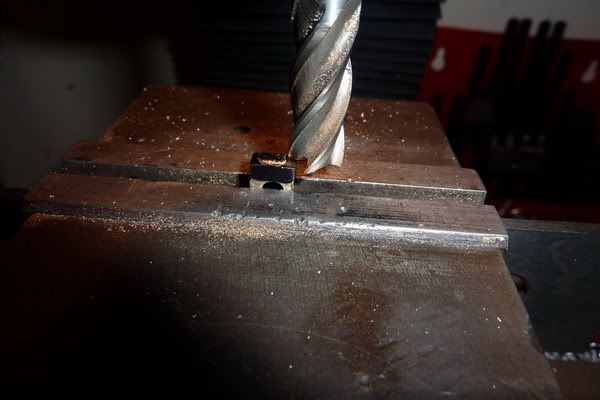
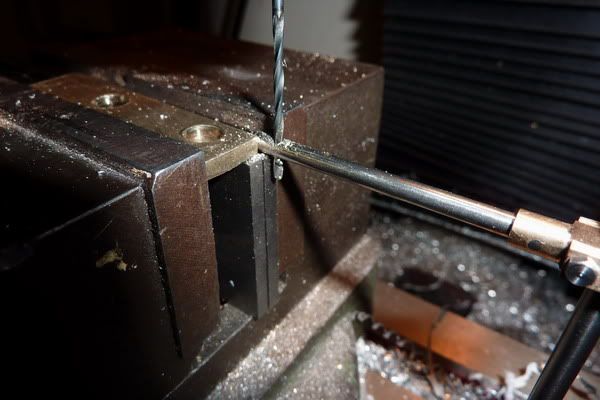
Another picture seems to have gone missing but I basically set it up as follows, you can just see a bit of 5/32" rod in the pic which I put through the bearing and made it square with the table so I knew I was drilling the hole for the gudgeon pin parallel to the big end. Centre drilled

2011-01-2022-31-01_0007.jpg


and drilled through. Again, next number drill size above the pin.

2011-01-2022-32-11_0008.jpg


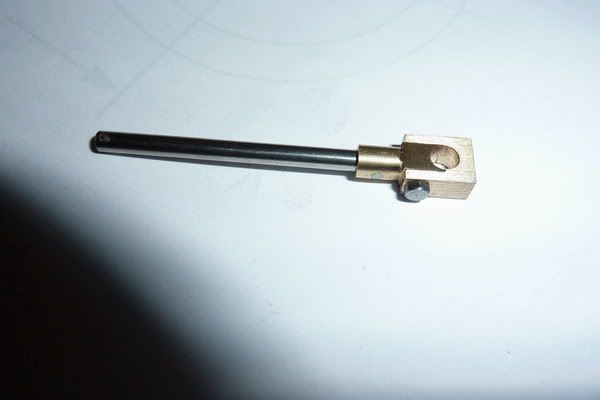
Here's the finished rod. You can see in a couple of pics that it's not spot on but once assembled you won't be able to see and I don't think it'll affect anything, it's neglibible.

2011-01-2022-36-32_0009.jpg


So that was the last real component for the engine. Still got the burner and base to do but I decided to assemble the engine so it'll be ready to try a run tomorrow if I get the burner and base done.

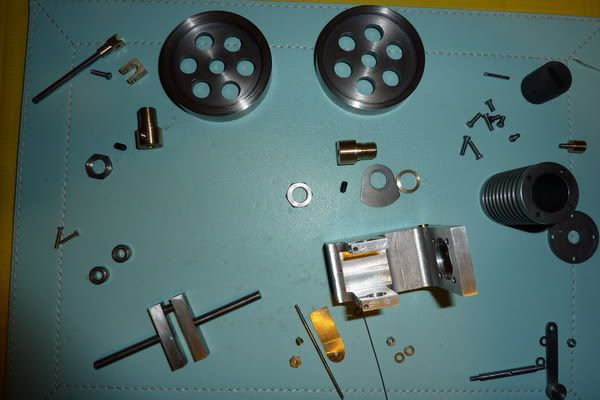
I stripped the engine down into little bits, here they are:

2011-01-2023-01-24_0010.jpg


Lapped the end of the cylinder and both sides of the cover again. I want to give it the best chance when I try to run it and there is no gasket so these surfaces have to be flat to seal well.

Assembled the engine back together with things placed more precisely. I found the build up of tolerances on the cylinder bolt holes, holes on the standard, piston and rod have meant the rod is slightly ofset to the left when looking down the bore at the piston. So I've put a washer in on the right side of the crank which keeps it just in the right place.

The assembly was very fiddly indeed! :bang:, I wouldn't recommend this engine for a beginner because of things like I mentioned, the build up of tolerances - there isn't much room for manoeuvre, everything is planned down to a tee, all the clearances are built in so you have to make everything to as near to drawing as possible.

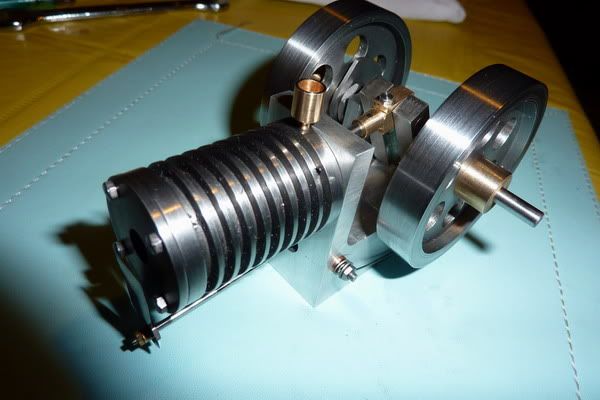
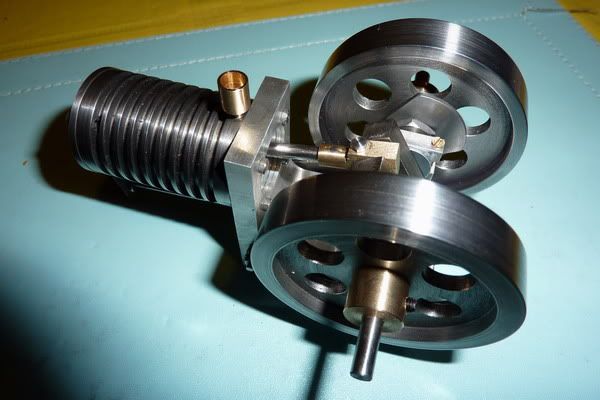
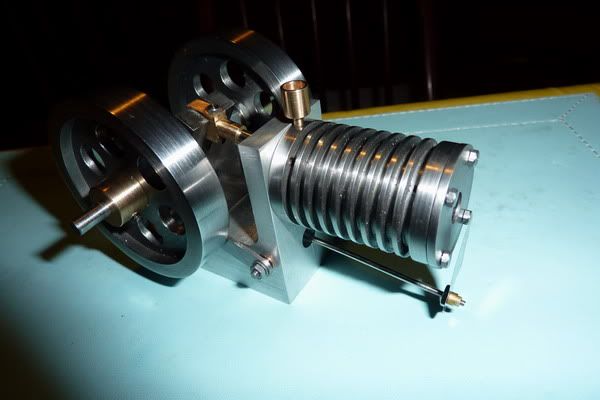
Here are a few snaps of the engine assembled, ready for the base and burner tomorrow:

2011-01-2023-50-57_0012.jpg


2011-01-2023-50-45_0011.jpg


2011-01-2023-51-08_0013.jpg


Looking quite good now I think, should look good when on its base. The question is, do I stick to my red flywheel scheme?! I deliberately left the centres of the flywheels rough so I could paint them.

Flicked it over a few times to get a feel for any tight spots, & whether everything seemed to work. It sounds promising, I can hear some suction and in fact it sounds just like Rick's from HMEM! Can't wait until tomorrow ...................

[ame=http://www.youtube.com/watch?v=4gkViVZm4WQ]http://www.youtube.com/watch?v=4gkViVZm4WQ[/ame]

Yeah right!!! :big: ... I've had you going long enough - I admit, I couldn't resist trying it to see if it would run!

Here are a few attempts. I missed the first one, I put the camera on but then didn't have enough hands so it just ended up pointing at the wall! I should have made the fixture for putting it on the mag base as Bogs suggested - will still do that soon.

I should point out that these are warts and all videos and unfortunately I've realised I waffle just as much in real life as I do in these posts. I seem to be mumbling quite a bit and probably not even making sense so apologies for that but anyway, you'll get the picture!

[ame=http://www.youtube.com/watch?v=pkMiXoXjBYI]http://www.youtube.com/watch?v=pkMiXoXjBYI[/ame]

[ame=http://www.youtube.com/watch?v=QlhpRWZ5OyM]http://www.youtube.com/watch?v=QlhpRWZ5OyM[/ame]

[ame=http://www.youtube.com/watch?v=q4TQvSpKZMA]http://www.youtube.com/watch?v=q4TQvSpKZMA[/ame]


;D ;D ;D

 
woohoo1


Well Done Nick!!!

Before I got to the end of your post I thought "How could he resist putting a flame to it" I am glad you did.

She really runs great, great sound too.

I had the same problem with the valve arm coming loose. A bit of lock tite and no problems since. As long as the valve does not get kinked, it is a pretty reliable runner.

Kel

ps. thanks for posting all the vids of the first runnings. Most people don't get to see the "Fiddly" side to model engineering.
 
Nick

Congrats! th_wav

I've enjoyed following along, and now comprehend how these
ones work... Thanks!

Cheers, Joe
 
woohoo1 woohoo1

Nice stuff, I think the 'Poppin' may have just made it onto my build list

Congrats on the great runner
Steve
 
Hi Nick
Pretty well done!
So satisfying to see them running!
Looking at the picture of the dissembled engine, I wonder how come you ended with so many little parts; this will not help for maintenance.
I also agree that the valve stem is the weak point of this design, a first class one anyway.
Congratulations

Zephyrin
 
Thanks Kel, yeah think I'll put a dab on the valve rod that goes into the arm too - as that swings loose. It shouldn't really need to come out hopefully. Maybe I could just use super glue or something a bit less permanent.

I think I'll tweak the extreme corners of the valve up as think it moved, warped and went into the port hole once!

I couldn't resist lashing it up to try it, I wanted to take vids straight away seeing as people had showed the interest.

Cheers Joe, hopefully you've done us a favour knocking us out of the cup too! Don't want a repeat bad run like last year after man u!

Thanks Steve, I'd definitely recommend it, I have always loved the way these run, similar to stirling in that it's simple, all you need is a flame but by contrast the noise is more like an i.c! I'll be continuing to watch your excellend plunket build.

Zephyrin, many thanks. They are really satisfying and you gave me help and advice way back when this was just a distant dream for me! There are lots of little fiddly parts to this, that's why I took that picture to show that. It's definitely the most complex thing I've made so far. Good design though.

Thanks to everybody for supporting me and for the advice. I hope to make a decent job of the base and burner now, maybe add some paint and will repost a new photo and video soon.

Nick
 
Cheers Vic, just can't wait to finish it properly no so I can sit back and watch it run rather than having to hold the burner and keep it from wobbling off the table!
 
Very nice Nick. I know you have some tweaking to do yet but it is most definitely a runner!! Thanks for taking the time to post the videos even though the hour was late. Well done!! :bow: :bow:

Bill
 
Cheers Bill, yep just got to tweak it and neaten it up on its base etc. Should make up for the duff christmas present I gave my dad - think he'll be happier with this one!

 
I am sure your Dad will love it Nick. I have done the same for my Dad over the years and he loves them all.

Bill
 

Latest posts

Back
Top