Kozo A3 in 1.5" scale

Home Model Engine Machinist Forum

Help Support Home Model Engine Machinist Forum:

This site may earn a commission from merchant affiliate links, including eBay, Amazon, and others.
The loco was in the bed of your truck? It broke free?

How long is this engine? How much does it weigh?

I just looked at the photos and the electrical outlet box.. I estimate about 4 feet long? It is a much bigger model than I thought. :bow:

"G"
 
The front restraint is an angle iron with a piece of 1/2" square bar screwed to it. The bar has a hole for fastening to the front coupler pocket. The screw came out, and the secondary hold-down, a ratchet strap, broke. The loco did not derail, just rolled backwards until the water gauge hit the tailgate.

The loco and tender are each 3' long, and when hooked together just fit in my 8' bed with a toolbox taking up some space in the front. Had I had the tender hooked to the loco things would been fine. I am going to loctite the screw on the front and use a much stronger ratchet of other holddown in the future. The loco probably weighs around 250 lbs at present, and the tender about 200.
 
Spent 6+ hours in the shop working on piping issues. After a few different tries, I ended up with this for the injector water supply:

large.jpg


To get the barb sufficiently above the track I needed to make a 1/16M x 1/8F adapter from some 7/16 hex bar (dark brown fitting). The flexible hose will only be a few inches long to connect to the tender's hose barb.

The turret is finished for the time being.

large.jpg


I ordered a different pressure gauge from McMaster, one with a 1/8NPT connection. This one has 1/4NPT, and necking it down with fittings makes it too high and too heavy. I moved the water gauge connection to the rear boiler connection and used the front for the gauge. When the replacement water gauge arrives I'll need to redo the upper pipe.

The tee pipe from the left of the turret is for hooking up the steam whistle with an extra port in case I add something later, such as steam operated cylinder cocks.

Assuming that the water gauge and pressure gauge arrive this week, I need only hook them up and do the piping for the lubricator to be ready to fire the boiler, possibly this weekend. I also need to up work on the tender for the left side water supply.
 
What length and diameter of glass do you need? I've got some 1/2" redline on my desk cut to 2.845 or so.
 
The glass is quick easy and cheap to replace but......

I'm new to this but I see some of the arrangements people have for transporting their locos, even the guys who have been in the game for years, and wonder how well it would do in a crash test dummy situation.

Just think what a 200lb mass is going to do even in minor fender bender. A broken sight glass would be the least of their problems, but I'd guess they could well be beyond caring.

........back to the show

Pete
 
Nice bit of progress, kvom. :) It would be awesome if you were able to put a fire in her by the weekend.
 
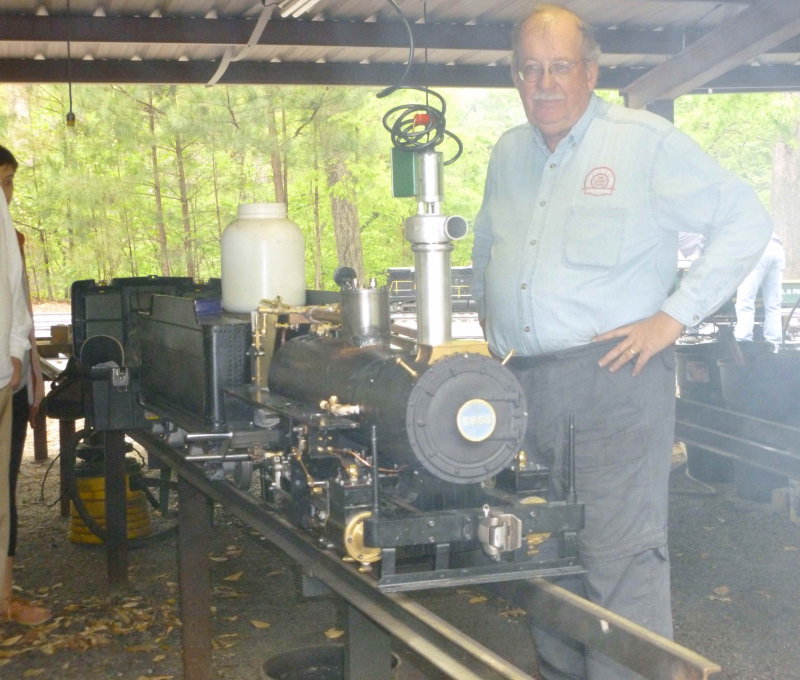
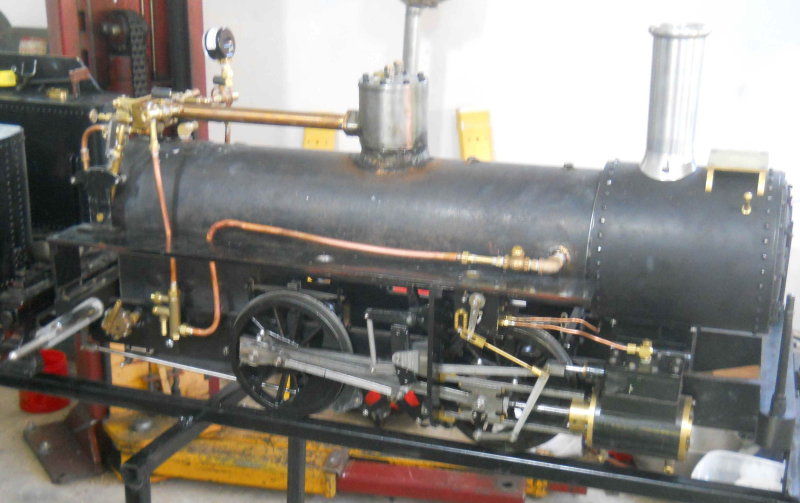
Fired the boiler for the first time at the CSP&P track roundhouse. Thanks to several fellow club members who provided, in addition to advice, kindling, coal, a coal scoop and poker, and load of a stack blower. It took a while to get pressure up, but eventually the needle came off the bottom.

Things that worked well:

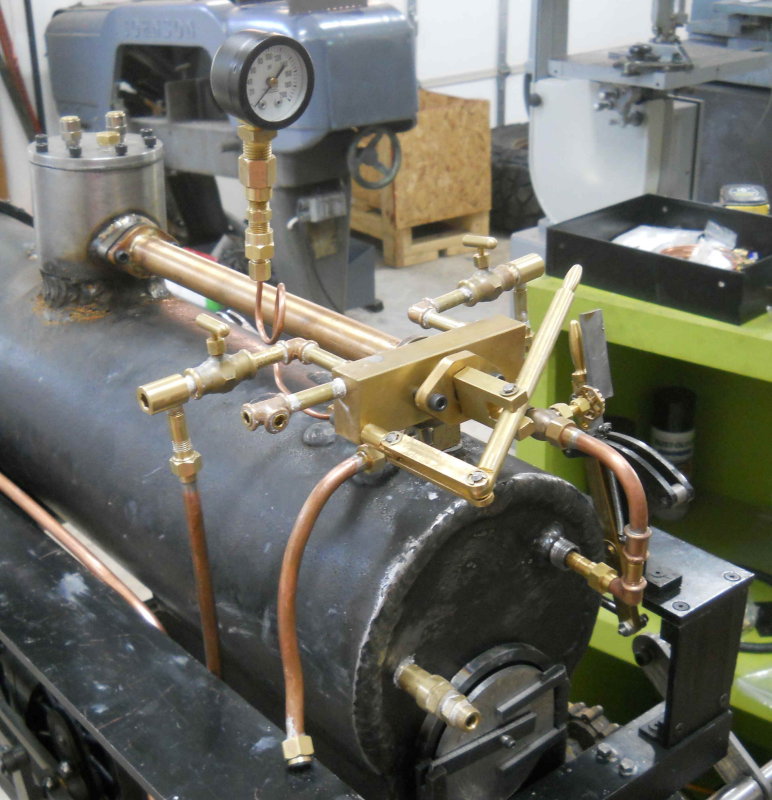
1) The 100 psi safety let loose with the pressure gauge reading 100.
2) Superscale economy injector fed water into the boiler from the tender
3) Steam blower worked very well

I wanted to move the engine under steam to the turntable and back. But when the engine had moved about 3 feet the gasket between the throttle tube and the turret let loose and I lost all the steam pressure. We quickly dumped the fire and called it a day, time for lunch. I didn't take any pics myself, but some fellow members and friends got a few. I'll post some when they mail them to me.

Things that need fixing:

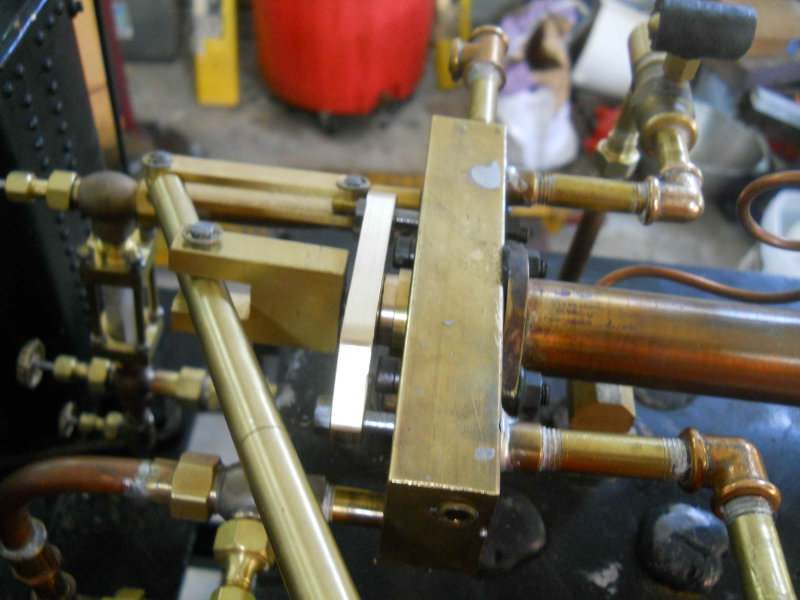
1) The throttle-tube.turret junction. I was actually most worried up front on this since if the connecting bolts are really torqued down they squeeze the gland (o-ring) around the throttle rod too tight.

2) The SS grate is a tad too long and expanded so that the grate was tight in the firebox. This made raking out the fire awkward. I'll take a bit off each grate bar for the next time out.

3) One of the Locoparts blowdown valve leaks a bit
 
Congrats! Great news on the reliefs, injector and steam blower. :)

To bad about the throttle though. How do you plan on solving that issue?
 
Glad to hear you had a great day. Now put your hand out to get slapped for no video. Lol

Dave
 
All in all a great day, you'd expect a few niggles first time out. I bet you are pleased with yourself?

Pete
 
Been a while since the last update, but I haven't been entirely idle. I re-jiggered the connection between the throttle tube and the turret to use separate bolts from those for the gland. With a new gasket in place I can tighten down the connection without making the gland too tight as well.

large.jpg


I also piped the right side injector.

large.jpg


My tender didn't include a water valve on the right side, so I've been working to supply one. Everything is in place except for the need to make a long spindle on the valve. That work has been sidelined by need to work on my Jeep in preparation for a trip to Moab, Utah next week. So no more progress until June. Other than that I do need to prime the lubricator before attempting a second steam up.
 
Looking very good, sir!

What will you be using for boiler lagging when you come to that?

Todd
 
Not sure if I will use any lagging as it's relatively ineffective at these scales. But I will need to space the jacket a bit, so cork might be the ticket. Sheet lead would be excellent for traction.
 
Haven't posted for a while because of vacation plus working on Jeep stuff. However, I did manage a few tasks including getting the right side water valve in the tender and priming the lubricator. Also installed a valve in the bottom for draining the tender. I'm also working on a tool to clean the flues.

So tomorrow I plan to fire it up for the second time.
 
Got to run the loco around the club's yard loop a couple of times, and found a couple of issues. One is that the steam pressure in the dome wants to force the crank arm on the throttle valve to open. Thus the engine wants to take off full speed, whereas I really only need to crack it a slight amount to start. So I'm thinking I need a notched quadrant on the throttle.

The other issue is that this small boiler doesn't have a lot of steam capacity, so I will likely need to keep busy feeding it coal. Second try around the loop I lost the fire after only going about 100 yards, what with having to hold the throttle I couldn't easily easily manage the shovel. Had some suggestions that perhaps the grate bars aren't far enough apart, so I'll look at that this week.

OTOH the engineer-side injector worked correctly, so some positive news there.
 
Hi Kvom,

A throttle that wants to push itself wide open is not a good thing even with a quadrant that has notches. There might have to be a redesign on the throttle assembly required as this is a safety issue. I am part of a club that has steam locos that pull passengers around a mile of track with safety rules that talk about risky throttles. Not being familiar with Kozo's designs I cannot say where the problem is.

IMHO with the firing of coal and the grate, I would say about 1/8" to 3/16" gap between the bars for your size engine. You will definitely have a learning curve not only with your engine as well as the type of fire it needs. Perhaps it needs a deep fire similar to a hay stack or one that is light in the front and thicker at the back. When you do figure out the mysteries of your engine it will be a delight to run I am sure. Managing that boiler for steam is all part of the challenge and joy of running a steam loco.

Propane firing is easier to begin the learning curve of firing a steam loco and yet when you get the hang of it, it seems easy compared to coal firing.

Hang in there and I am sure you have folks that can help with pointers on the intricacies of steam running.

One little note about the British steam train running is that upon reaching speed they would have the throttle full open and just use the reverser to change speed. Works the charm.

Cheers,

Daniel
 
The grate spacing is 1/4", and my club members suggest that 5/16" may be better, given the size of the coal being used. Tightening the packing may be a partial solution to the throttle. When cold it's fairly stiff, but ball valves apparently loosen up when hot.

One of the next steps will be to cut notches for the reverser quadrant and see if it runs OK "notched up".

I also found out that the foot-operated brakes work well, at least on flat ground.
 
It is funny you mention the foot brake. My first few times engineering a loco I pulled out the emergency foot brake too. I think it goes back to the go cart days with no brakes.

The grate size as you mentioned is determined by the coal size, however, too big a coal chunk and you have larger air voids between the coal chunks. I am not sure how big your fire grate is for your engine. Smaller coal chunks like 5/8" - 1/2" cube might be better. There is a balancing act between coal size, air pocket size, grate area, and grate bar gap.

It is odd that your ball valve has a tendency to open up under pressure. Usually ball valves are known for holding their position. Is your valve on the wet side or dry side of the super heaters? Never mind that question as I looked back and there aren't any superheaters. At my club we tried ball valves after super heaters and found that the teflon gaskets disintegrated with the super heated steam.

Cheers,

Daniel
 

Latest posts

Back
Top