Ignore this topic

Home Model Engine Machinist Forum

Help Support Home Model Engine Machinist Forum:

This site may earn a commission from merchant affiliate links, including eBay, Amazon, and others.
Status
Not open for further replies.
It goes into a reducing gearbox that we put in our snowblowers. This box weighs about 4400 pounds dry:eek:) The bull gear is 24" in diameter and 6" thick. The teeth are straight cut and the pitch is about 1.5".

Wes
 
Tim, Alpha,

I'm also interested in IC engines. That's why I got a subscription to Engine Model Builder.

Now if Rick can avoid throwing something hard and heavy at me ;D may I say that according to the name of this forum it says and I quote "Home Model Engine Machinist". I take it that you can build any engine you desire and show it off here. ;) (Running to doan my fire resistant suit)

Bernd
 
We are DEFINITELY going to do an IC engine. I want one bad. I would like to progress the degree of the team builds to do that. I think with the talent (and the guys with CNC) we can pull it off. I for onee would like to see a team designed and built engine.

What do you guys think of that? Team design and Team built?

Eric
 
Wes
That little trick was just filed for future use...(grin). It's going to add quite a nice flourish to the little project engines. (Marv Klotz memorial BLING filtering device is activated)....LOL

Steve
 

Having never built one, how hard is the odds and ends hit and miss to build? I just ordered the book from village press friday after seeing the recent posts on it. I have never tackled anything remotely that complicated ???, but I guess thats what the team build concept is all about. :)

-Bret
 
How about something like the Hoglet or Jerry Howell's v-twin for the 3rd or 4th build?

Pix-29.jpg


Eric
 
Holy crap Wes! those are fantastic. I received the extra cylinders from Tim and they are awesome as well. I think we are going to get some nice engines out of this! I am really glad we decided to do the team builds.

Eric
 
That sounds pretty good Eric. I would think that would be an "over the winter project". Like maybe from October to March time frame. Not much to do during the winter months.........though I still have the house to finish on the inside..ah well.

Bernd
 
Sweet!

You really get a sense of scale seeing the shot with the 5C collet. And boy, there's a lot of them too!

Best,

BW
 
Yes they really look nice! ,they should go well with the bases ( no-one made any comment, I hope I didn't p**s you all off with the lack of photos but I'm just going through my 2nd divorce as of a couple of weeks ago, so things are a bit fraught at the moment!)

Giles
 
Giles.... Those look really nice!. Can't believe I missed this thread. Again, everyone is doing amazing work!

Eric
 
gilessim said:
Yes they really look nice! ,they should go well with the bases ( no-one made any comment, I hope I didn't p**s you all off with the lack of photos but I'm just going through my 2nd divorce as of a couple of weeks ago, so things are a bit fraught at the moment!)

Giles

I missed the thread Giles. My past couple of weeks have been pretty rough as well. I was laid off unexpectedly and have been trying to come up with ways to make an income. The IT job market isn't very good right now.

Hope things go better for you!

Eric
 
Giles, Those look great. I think they will look good contrasting with the wood.
Tim
 
Would the Upshur farm engine be perhaps a little less intimidating for a first go at IC? (certainly seems like it to me... :big:)

Joe
 
I'd love to join a team build, but have to finish the house addition first.

I am part way through building Jerry Howell's V-Twin. It's definitely not a beginners engine. Don't get me wrong, the plans are top notch. It just has a lot of parts, some of which are very time consuming. It also takes some larger chunks of cast iron and aluminum, so the cost goes up.
Jim
 
Back in the saddle again! ;D

I spent two hours the other day, breaking 4 1/16" endmills and 1 twist drill trying to get the tap out. Probably should have tried the caustic soda. I never did get it out. Somewhere I read that if a part is easily remade, don't even try to remove a broken tap. Amen!

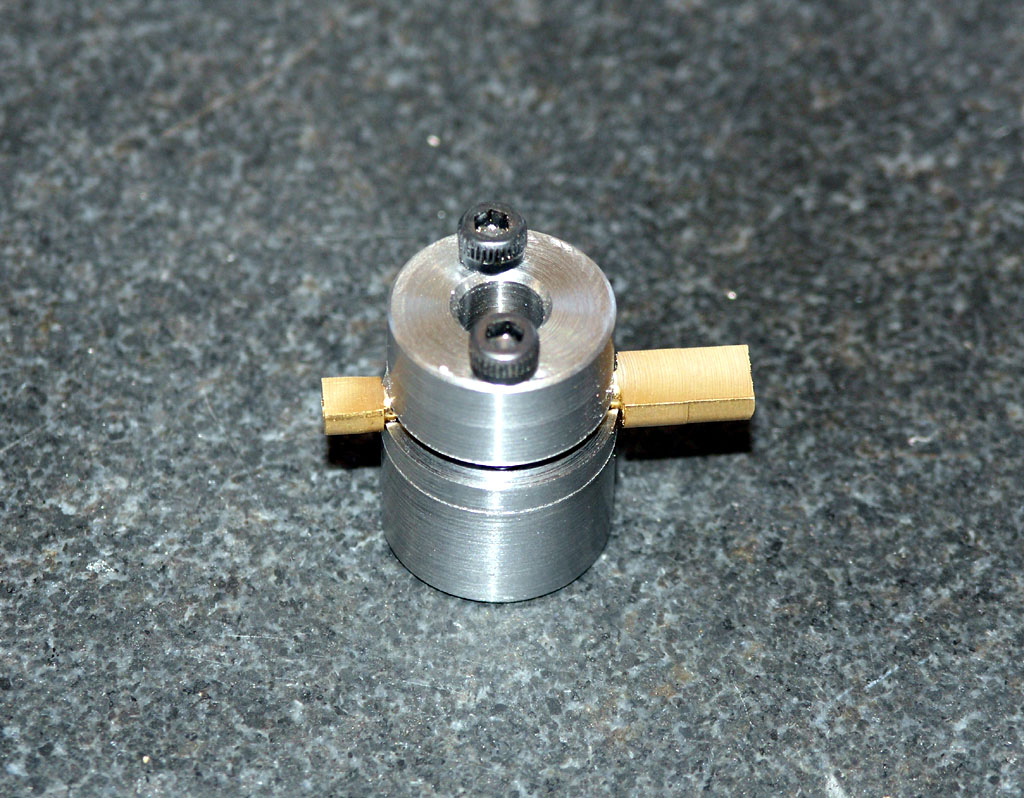
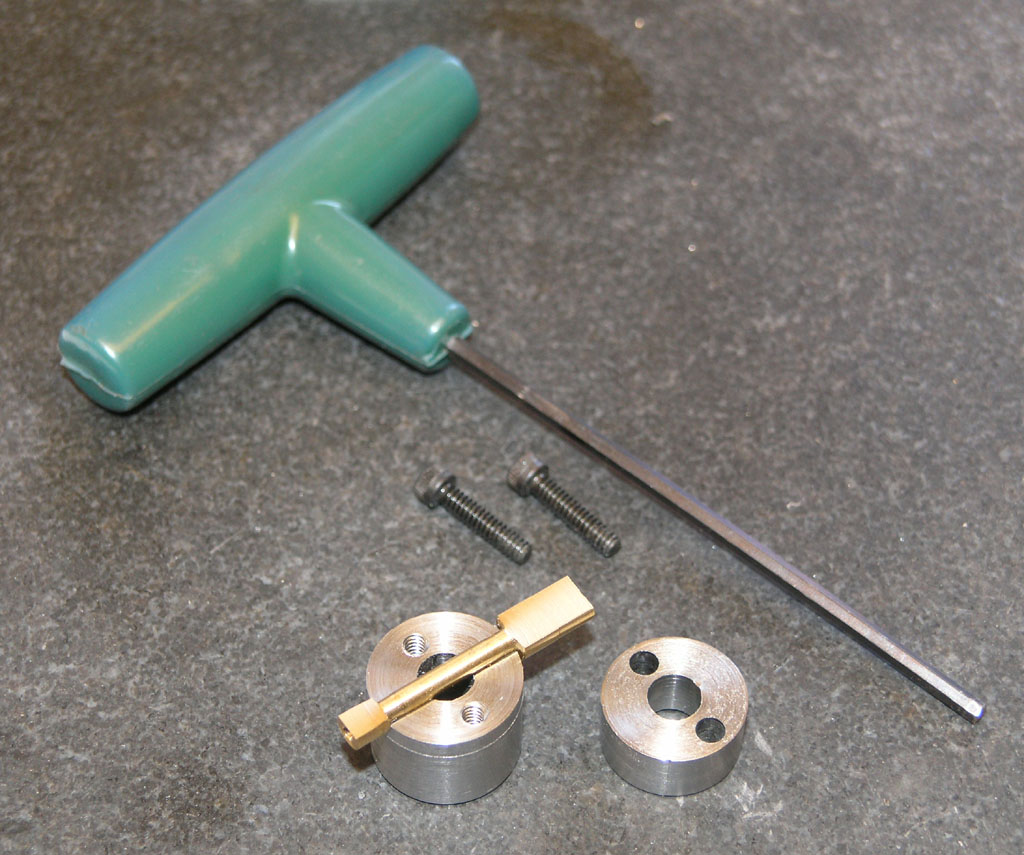
Now onward! I managed to scrape together 3 hours to work in the shop today. I completely remade the button v-block in that time and tried it out. This time around I made sure the tapping came as early in the project as possible. I turned the blank and immediately drilled and tapped the holes without even parting off the top. Success!

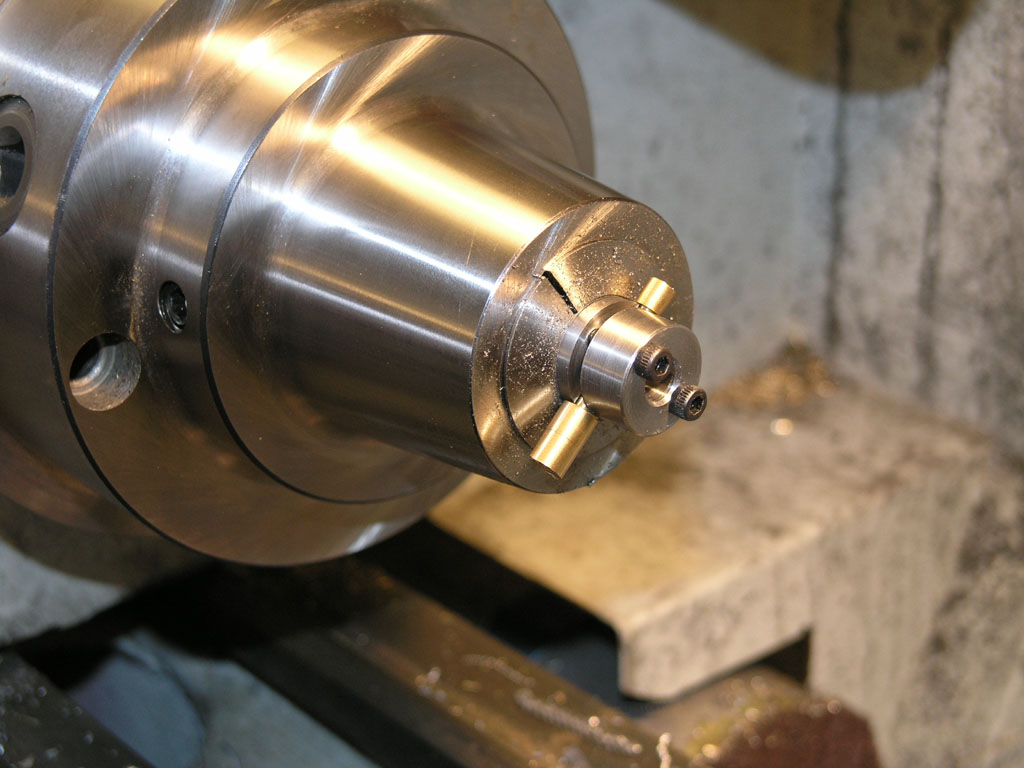
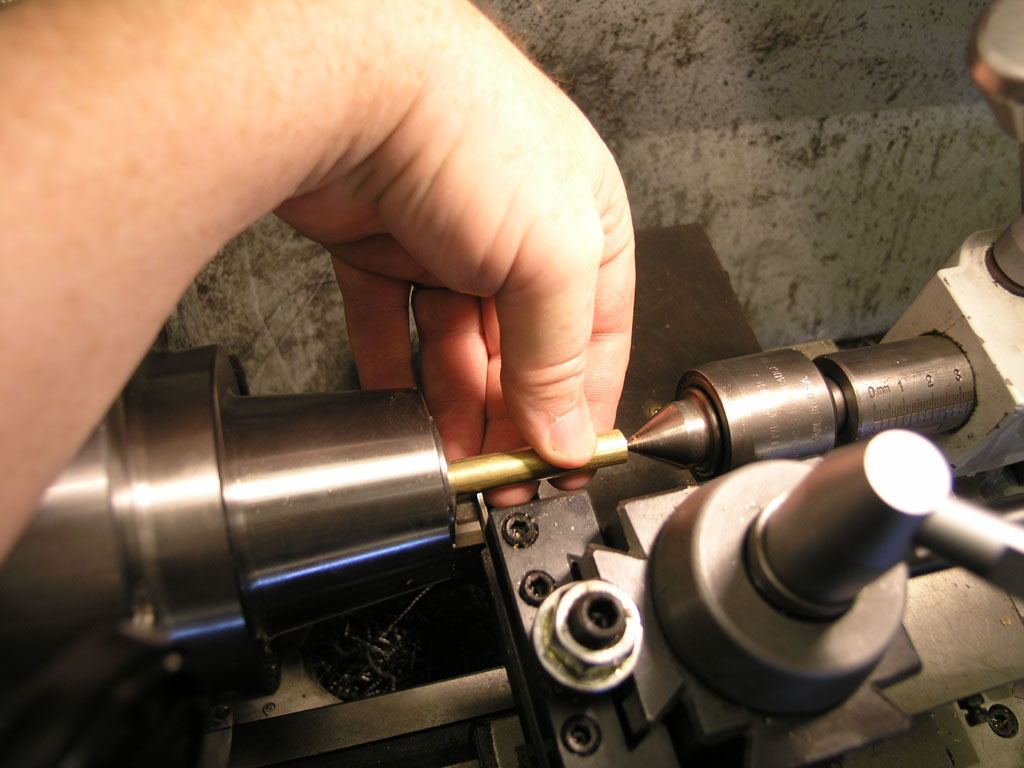
Now, connecting rod fans, let me show you what it's good for. After turning appropriate diameters for the big end, small end, and middle of the con rod, insert it in the button v-block and install on the lathe:

P1010578.JPG


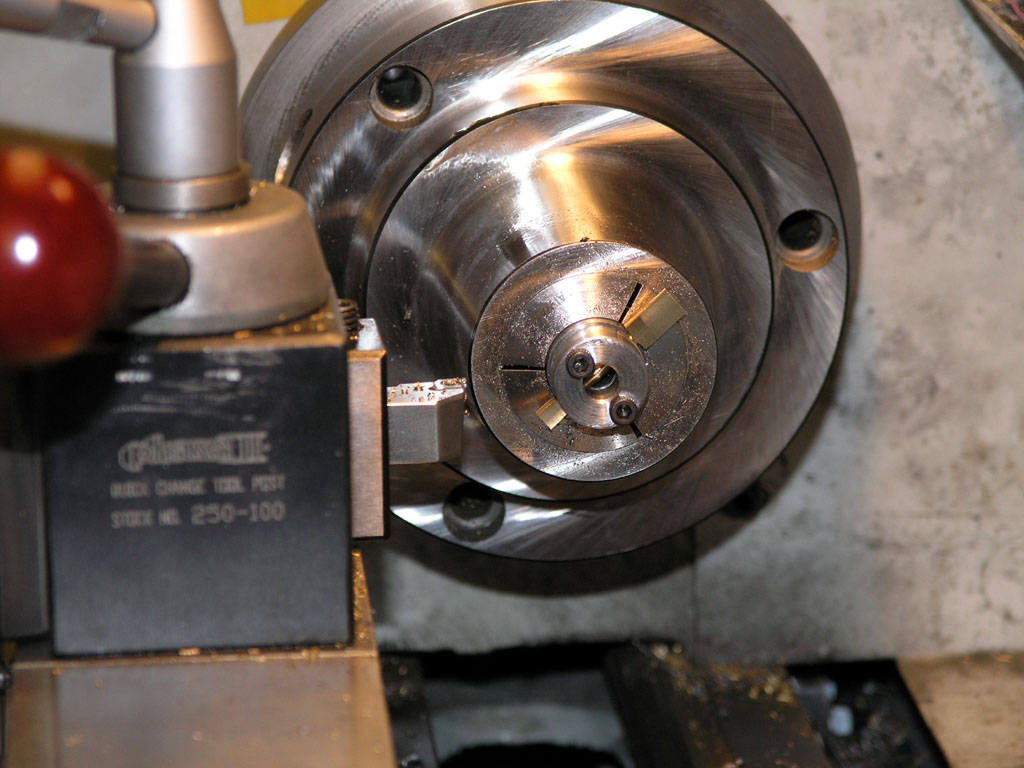
A simple turning operation and voila, you got flats:

P1010581.JPG


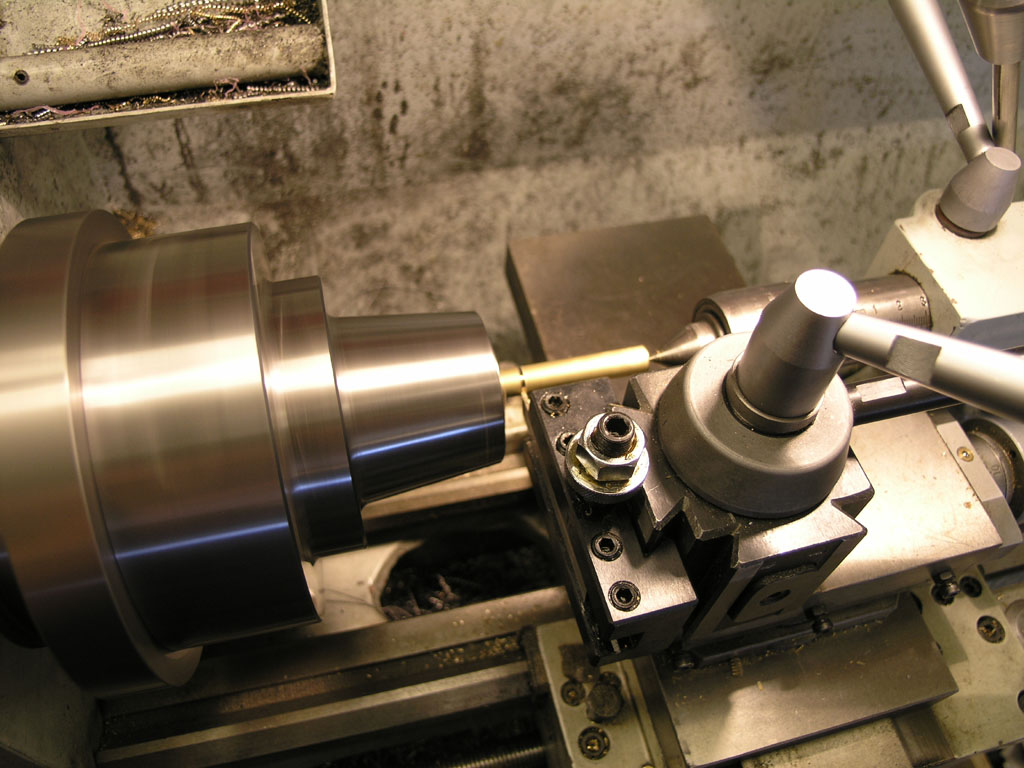
Surface finish is pretty decent, and no sign of chatter:

P1010582.JPG


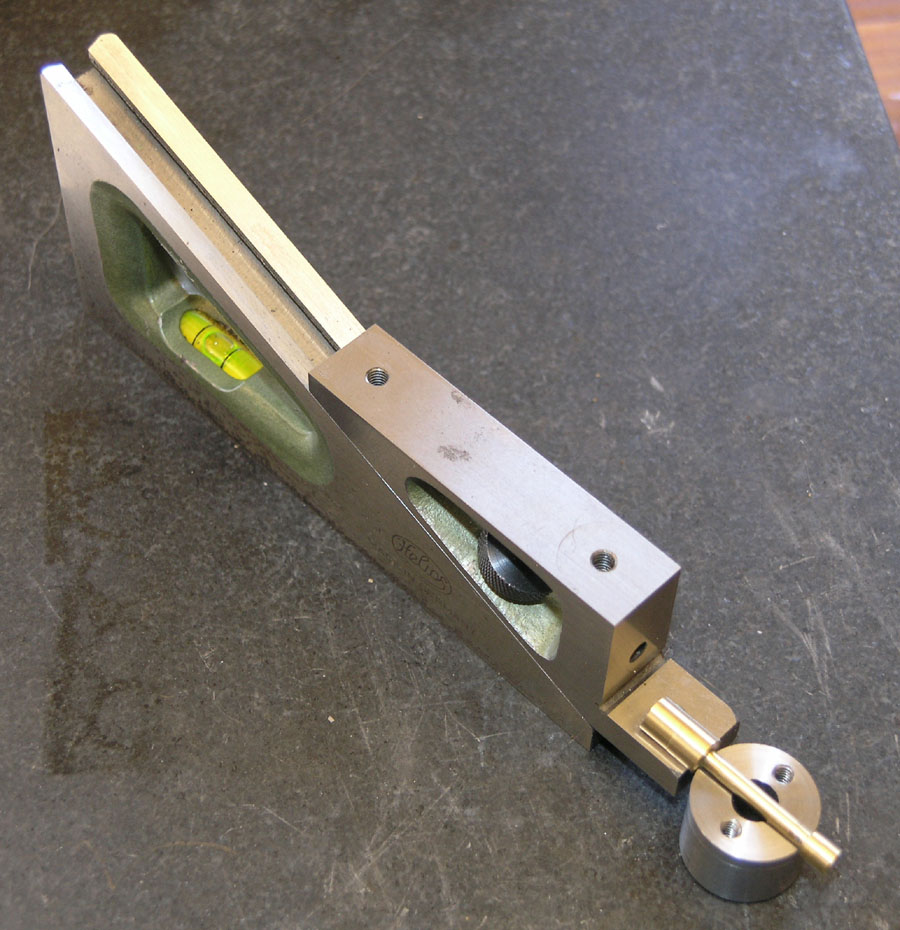
To flip over and do the other side, I use my Helios Planer Gage:

P1010584.JPG


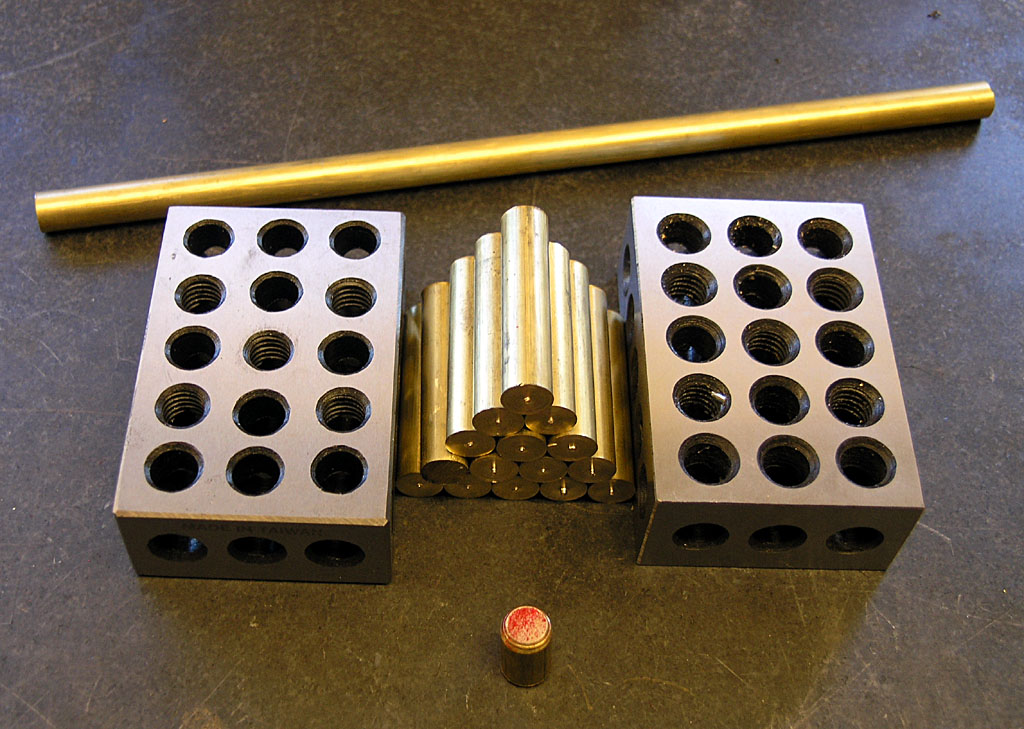
If you're going to make these dad-gum little bitty parts, you need one of these!

 
P1010583.JPG


That now makes 4 pieces of tooling made. Did I need to do that? Probably not. But I now see why Marv has a drawer full of little depth gages and other gadgetry! :big:

I've taken to wearing my head loupe to work on this stuff too. You can set it at a perfect height so I can look through the loupe for magnification, and below it for normal vision.

Okay, now I have all the tooling, my reamers arrived from Enco, I need to figure out my "mass production" routine and grind 'em out.

Cheers,

BW
 
Onward!

The first step in the production line is to part the raw stock to useful lengths. For this purpose, I'm doing something that's common practice but new to me. Specifically, I am using a technique that is the manual equivalent of the automated "bar pullers" used by CNC lathes. Follow along with my photos to see how this works:

P1010586.JPG


First thing I did was to cut my original long brass round stock to length. What length? I'm going to be inserting these pieces inside my lathe spindle, so I cut them so that no more than an inch would hang out the back end. That's about 18" for my Lathemaster 9x30 lathe...

P1010587.JPG


Like I said: not too much hanging out the back end. A big long piece hanging out the back unsupported can be very dangerous. Think about the gyroscopic effects: as it spins it wants to throw out away from the axis, but the further it throws, the faster it is moving, making it want to bend even further. Very dangerous! So let's keep it inside ths spindle for the most part. I tested carefully once I had it in there even so to be sure it wouldn't have any tendencies to whip around. Sometimes it is advisable to make up a spindle liner or sleeve to help support the piece inside the spindle...

P1010588.JPG


Next I set up the tailstock with my live center to act as a work stop. To begin, loosen the collet, grab the workpiee, and pull it out until it contacts the stop (live center)...

P1010590.JPG


Tighten the collet, start the spindle, part it off, and do it again. As each part is finished there is a satisfying Klonk! as it drops into the tray below. Not quite as good as "Cha Ching", but it is a happy sound nonetheless...

 
P1010592.JPG


In a very short time, 15 or 20 seconds per piece, you'll have a stack of nearly equal length blanks ready to go. The stub from the first 18" piece is at the bottom, and the remainder of the 2nd piece is at the top. Although I am making 12 connecting rods, I cut 15 blanks just in case some have to be scrapped.

That was a fun process! I've read accounts of CNC lathes printing money doing not a heck of a lot more than that while making simple bushings and such.

Cheers,

BW
 
Nice work on the V block BW. I've got to say I have never even considered measuring stock that way... I certainly will in future ;D
I like that planer gauge ugimibob too, looks very useful :)

I really want to see these engines, everyones work looks so good ;D


Ralph.
 
Status
Not open for further replies.

Latest posts

Back
Top