Ignore this topic

Home Model Engine Machinist Forum

Help Support Home Model Engine Machinist Forum:

This site may earn a commission from merchant affiliate links, including eBay, Amazon, and others.
Status
Not open for further replies.
SmoggyTurnip said:
I thought it was a no-no to part off with the end suported?

I reckon that there may be some conflicting views on this however, I always (and was taught to) use the tailstock with a live centre as puch as possible to support the work; this includes for parting.

If you are parting a largish diameter unsupported, as the diameter cut by the tool reduces, the free end will start to 'wobble' which can cause the tool to dig in the side of the job, either buggering the tool, marring the finish or adjusting your length ever so slightly. Eventually the wobble will increase to an extent that the job will shear away leaving a big pip on both the job and left-over bar. Supporting with a centre, if possible, allows the cut to continue evenly until the tool either breaks through or the weight of the job overcomes the strength of the diameter left and it drops leaving a much smaller pip.

Being a conservative type, I part by feeding manually at about 200 RPM with loads of coolant. The part always drops and I've never had an issue with anything getting caught on the tailstock.

This is what works for me, maybe a thread in the tips and tricks section for others to share their wisdom would be timely.

Bob, good work on your conrods and a nice fixture, will have to remember that!

Al
 
Ha ha ha What a muppet I am!! :big:

I spent the best part of an hour looking on the interweb for the button V block and the Ed Dubosky name and I have had a book with his plans and a talk trough written by the man himself on how to use said V block to it's full potential for the best part of 6 months !!! ::) Found it by accident looking something else up :)

I have got to start reading more!! ;D

Ralph.
 
Peeps go both ways on the tailstock issue--there are those who fear the part will jam with the tailstock there and eventually cause a real problem. Accounts certainly exist of this on PM and other places. In the end of the day, it works either way. I prefer to support it if I expect chatter, but there was none here. Also, the exact length need not be very close, nor the finish. Hence this was fast and easy.

BTW, most CNC lathes don't even have a tailstock. Parting without one is common practice, so try it sometime. Just don't do anything too crazy (envisioning a 1" shaft stuck 12" out of the chuck and parted at the chuck: Bad Idea!). See the safety post about "whipping" with stock extending through the spindle--the same could happen here if you let too much stock go unsupported.

Okay, I have a couple honey-do's and then I'm going to try to get back to the shop and make more progress.

Cheers,

BW
 
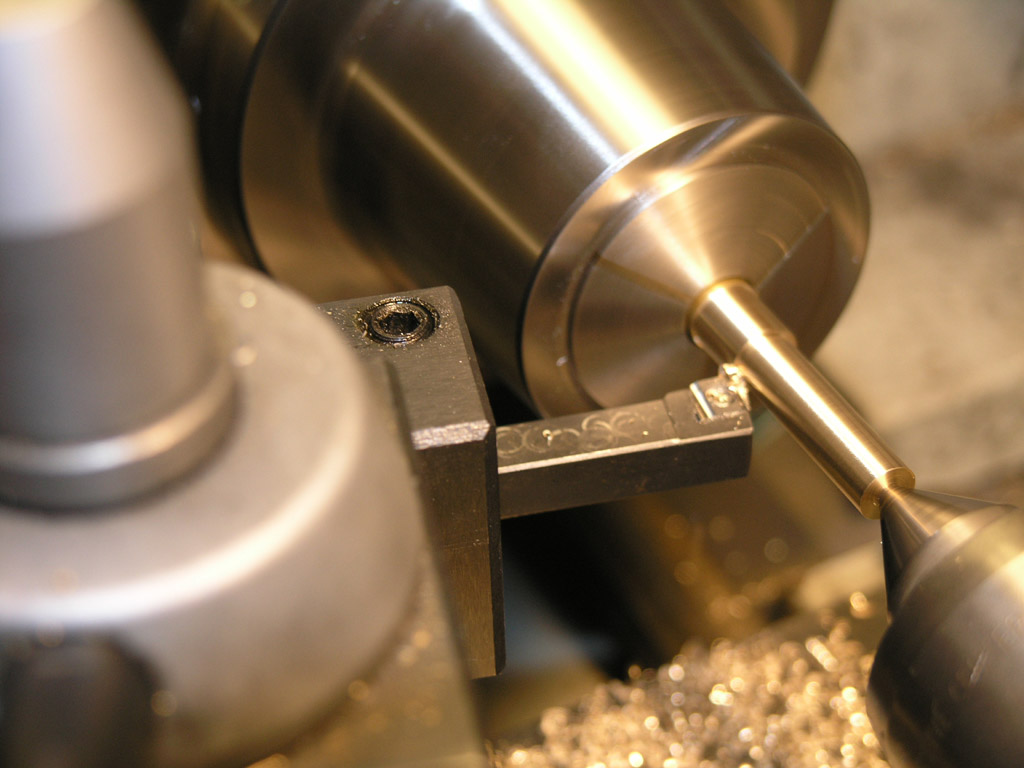
Folks, if you thought it was a no-no to part off without tailstock, wait until you see this next crazy stunt. We're going to turn with the parting off blade!

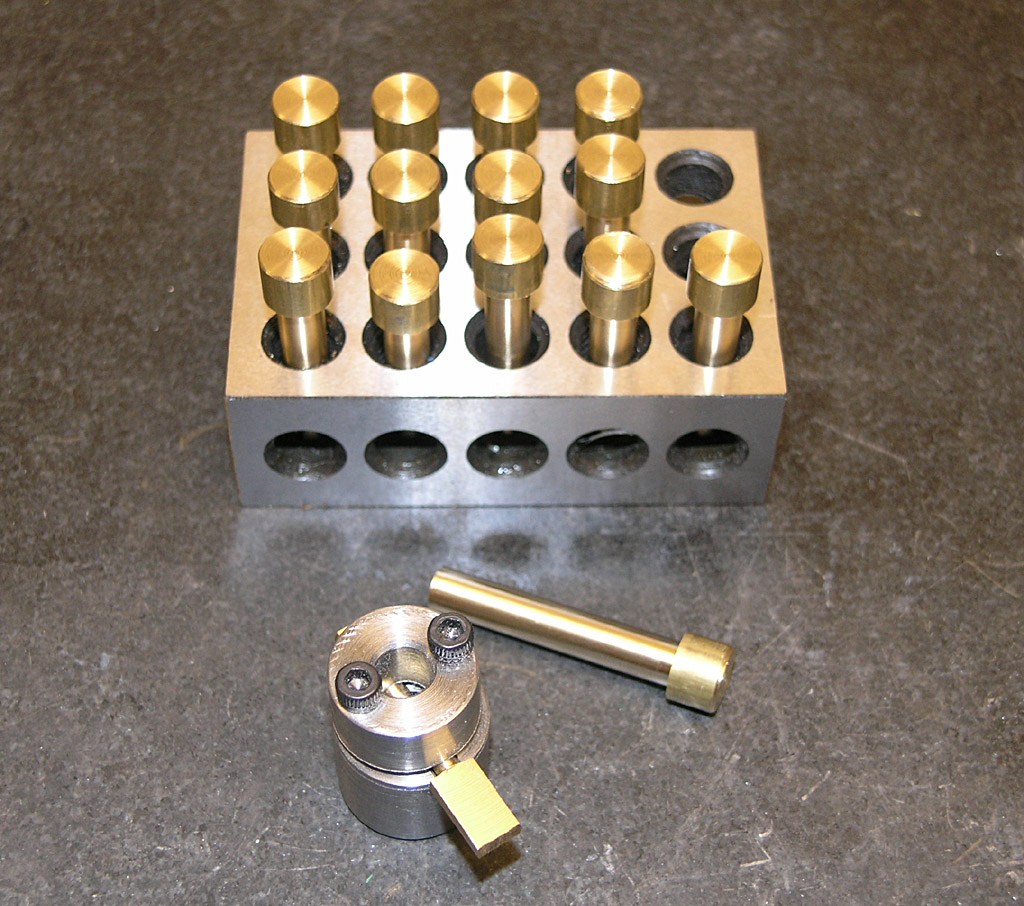
The con rod has three diameters to be turned:

- "Big End" is 0.250"

- "Little End" is 0.188"

- "Skinny Middle" is 0.125"

The challenge is to do all three diameters with crisp shoulders and in the right places quickly and easily.

P1010596.JPG


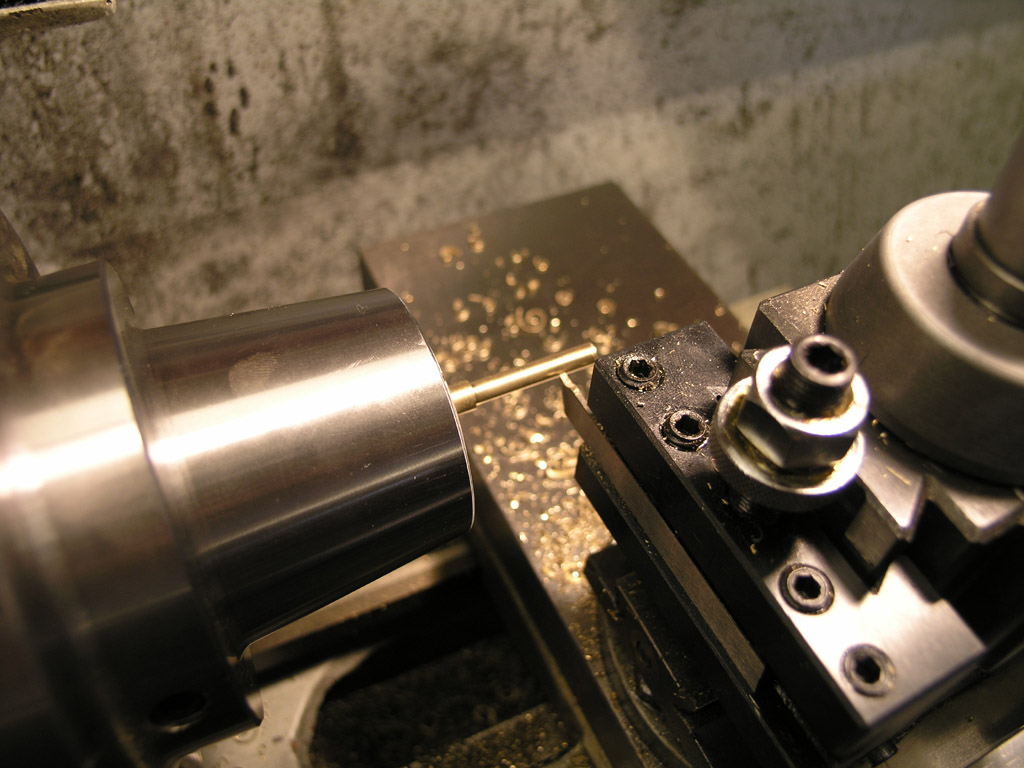
One thing I found early on is that there basically is not enough room to use the tailstock. Even sticking the tool way out of the holder, switching from my 1/2" to 3/8" shank holders, and angling the holder, I couldn't get all the way there without running into the live center. Scratch the tailstock!

P1010597.JPG


The good news is I don't have much material to remove, and so hogging isn't required. I can take 0.020" with a < 0.010" finish pass and life is good with my CCMT turning tool and a sharp CCGT insert...

P1010600.JPG


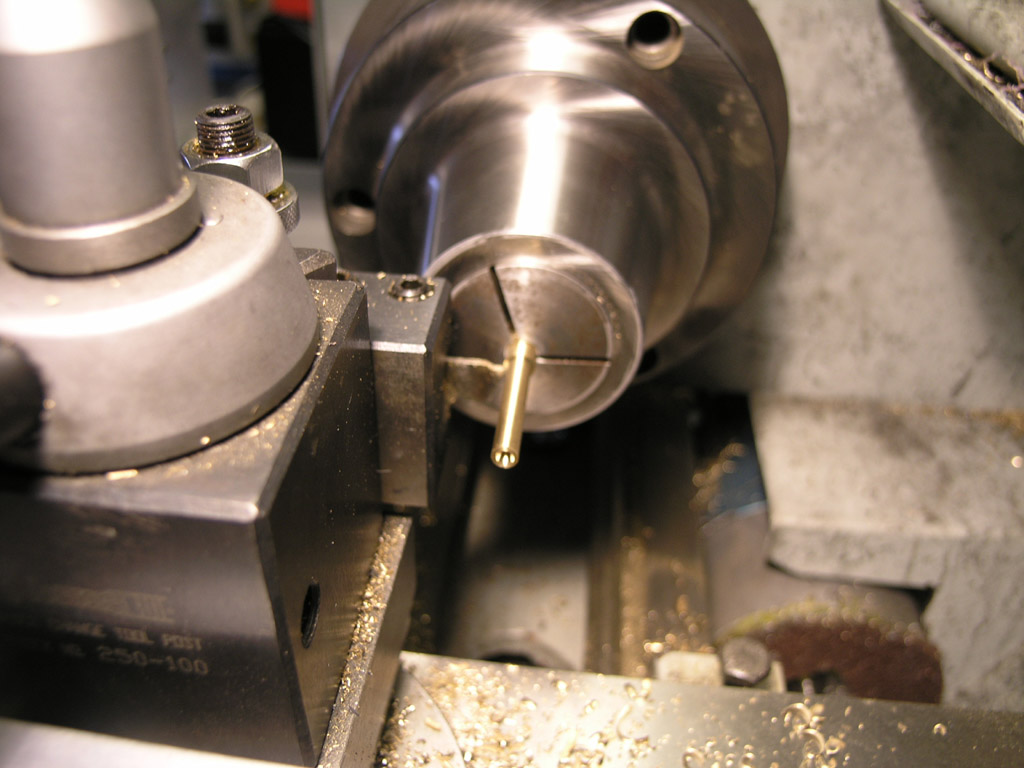
So the first phase was turning to the big diameter: 0.250". The button on the end is from the portion of the original blank held in the collet. We'll flip it around and get that too!

P1010612.JPG


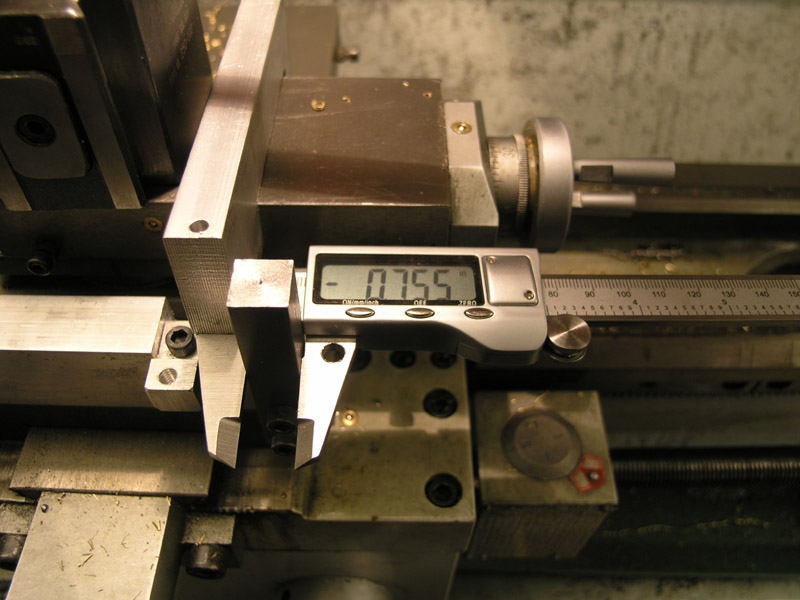
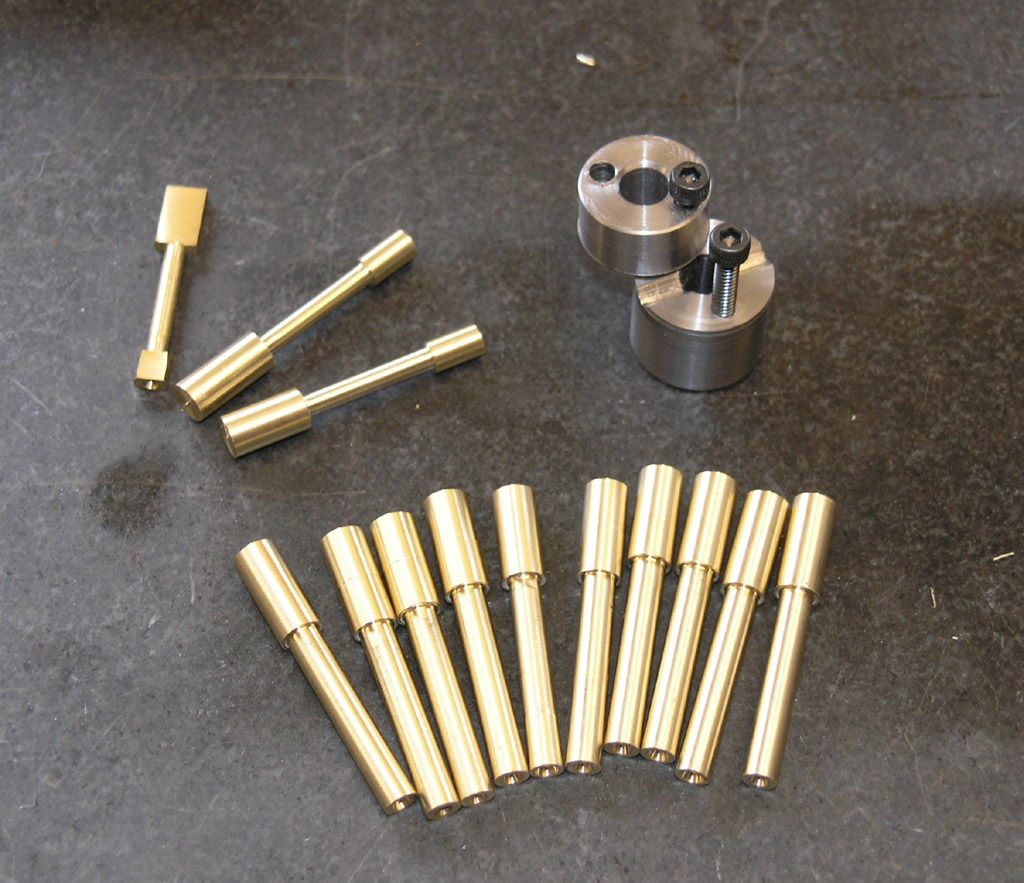
Okay, all the parts have had their big diameter turned, flipped around to finish the big diameter, and then the small end diameter (0.188") was turned. I used a collet stop and turned to the end of the collet. They're not exactly the same length, but we can true that up later...

 
Next up is the hard part: the skinny section between the big end and small end of the connecting rod. I'm going to use a parting blade to do the job. Before I got going with the parting blade, I tuned it up for the purpose. This involved a radius cut on the grinder to get some positive rake (not needed for brass, but I had done it earlier, and it didn't seem to hurt, so I went ahead and listed it here), honing with a diamond hone, and then using the hone to slightly radius the cutting side. You can read full details with diagrams of how I "dressed" the blade on my Parting and Cutoff page here:

http://www.cnccookbook.com/MTLathePartingCutoff.htm

P1010614.JPG


There you can see the parting blade. Note the "hook". You don't really need that positive rake for brass, but I put it on there before this project and it has served me well in other materials. What I'm doing in that photo is touching off on the "Big End" shoulder the side of the blade. I zero my compound DRO, and then turn the crank to measure off the length of the skinny section, allowing for the width of the parting blade:

P1010615.JPG


Next I plunge the blade to cutting depth for the first pass:

P1010616.JPG


Take it easy on the plunge! Very gentle or you'll dig in and wreak havoc. With this parting blade I can easily cut 0.010" and get a fine finish. Trying 0.020" broke the part in half. Your first clue is you can see material building up at the cutting site. In this case, a few 0.010" passes and a finish pass were easy. Power feed worked great. I was wearing a 4x magnification head loupe and disengaging the feed by hand. The magnification really helps on parts of this small size. Accuracy on the rhs shoulder was fine, a few thousandths.

To retract to the right hand shoulder I just used my DTI on a mag base against the tailstock:

P1010620.JPG


Since each part is not situated in the collet exactly the same, and since the collet moves when tightened, you have to rezero the DTI on each part. That's real easy to do since the tailstock ram is on a screw.

 
P1010619.JPG


The result is a con rod blank with nice square shoulders for a minimum of effort. I've still got a few more to do this afternoon!

Next step will be to use the Button V-Block fixture to cut the flats on these.

Getting close!

Cheers,

BW

 
Almost done:

Had a week off while I waited for a new end mill, it finally showed up on Friday so I got back to work:
100_0818.jpg


All finished machining, one polished up, and (on the right) proof that it's important to count all the turns of the hand wheel if you don't have a DRO: four steam ports in perfect radial alignment to the tapped centre hole that is 50 thou out..... DANG. Sure is going to look pretty in the re-cycle bin!

Joe
 
Joe, I know what you mean on that handwheel business. Several times I'll get in the middle of a complex job, get distracted with something that seems out of whack, and when I go back I've forgotten which turn I'm on. I started writing more stuff down on my note pads as a result!

They say memory is the second or third thing to go, I can't remember which! :big:

Cheers,

BW
 
They're looking really good there Bob!, great explanation and I love the trick with the DTI, I've never thought of using it like that!

Giles
 
Hey Joe,

Those look fantastic! The quality of work from the team is AMAZING! to say the least. Bravo!

BobWarfield said:
...
They say memory is the second or third thing to go, I can't remember which! :big:

Cheers,

BW

Hey Bob.... aren't you on the fifth or sixth to go?? ?? :big: Just kidding ofc!! My memory is going as well... along with my stomach... going out that is :eek: I am sure my eyesight is next ;)

Eric
 
The way you guys are polishing those engines we'll have to wear sunglasses to look at them. :big: :big:

Nice work so far guys. :bow: :bow: Can't wait to see an assembled engine.

Bernd
 
BobWarfield said:
I keep begging for the Duclos Halo on a Team Build. This one seems just as nice, though I can't make out much from the pictures on his gallery. I'm going to keep drawing that Duclos engine's plans in Rhino3D and plan to have it be one of my first projects after I get my mill CNC'd. It'll be fun to watch this build and see the differences.

Radials are cool!

Best,

BW

I love radials. I did a modified Elmer's in Alibre - its in the gallery. Do you mean a Hula Hula engine?

Eric
 
Yep, the Hula Hula.

Actually, as I look at the Liney engine, it occurs that one way to approach Team Design (something else some have said we ought to explore) would be to start with a proven design and propose enhancements to it. Some might be largely cosmetic, but others could be more significant.

Cheers,

BW
 
Very close on my parts. I've got the last couple of con rods to drill, ream, and round over.

I have some polisher media on order. Was going to give 'em a dip in the vibratory.

Cheers,

BW
 
Brass_Machine said:
Speak up and tell us where you are at with your parts.

I'm sitting in my garage ,in upstate SC, just outside of Greenville. :big: :big: Wife says I can be a smart @$$ ::)

But really , my components are complete other than a final wipe down to get the garage rain off of them.
Tim
 
Tim: You stole my line.... :big:

My engine parts are ready to go, all I need is the address to send them to!

Joe
 
joe d said:
Tim: You stole my line.... :big:

My engine parts are ready to go, all I need is the address to send them to!

Joe

You are in Tim's garage in upstate SC? Tim do you know this?? :big: :big: :big:

Eric
 
Status
Not open for further replies.
Back
Top