Ignore this topic

Home Model Engine Machinist Forum

Help Support Home Model Engine Machinist Forum:

This site may earn a commission from merchant affiliate links, including eBay, Amazon, and others.
Status
Not open for further replies.
I'm in!

This current one has been a lot of fun. I can't wait to see the finished engines.

I see the Team Build format as letting one "build" more engines that they'd otherwise have time to tackle. It's also a great opportunity to learn some new tricks, not the least of which is some of the skills required for "production" work. In my prior projects, if a part wasn't quite right, it was often an option to modify the parts it was fit to, and thereby avoid scraping. That's not really an option for a Team Build.

As to desired future builds, let's do something a little more complex, and a little more unusual. I mentioned the Hula Hula before. It isn't hard to build, it is ideal for the "production line" process that is a Team Build, and it is unusual. Doubtless there are many similar possibilities.

Cheers,

BW
 
Hi Eric
I am candidate to make some parts for you here in Belgium.
Many thanks in advance to accept me in your team
Jacques
 
Eric,

I know I am new to this sort of thing, but I would love to be part of the next team build!

Thanks,

Bret
 
Hello BW,

I read this thread earlier in the week and spent some time trying to track down a version of the V block you described ... even the name Ed Dubosky didn't help me too much! (spent only bout half an hour looking, it was late!)
Now that I see you cad rendering I get the whole plan. It looks to me like you chose the simpler option for a production run... less machine swaps sounds like quicker and less hassle to me!
Just wondering, since I found no pics of the button V, how do you hold the workpiece into the V?
I thought a screwed down plate over the centre of the work piece? Or is it more elaborate than that?

I know I'm not on the team build ... or even in the hall of accomplished builders! But I do take an interest in the wonderfull descriptions of how everyone does their work... Fascinating ;D


Ralph.
 
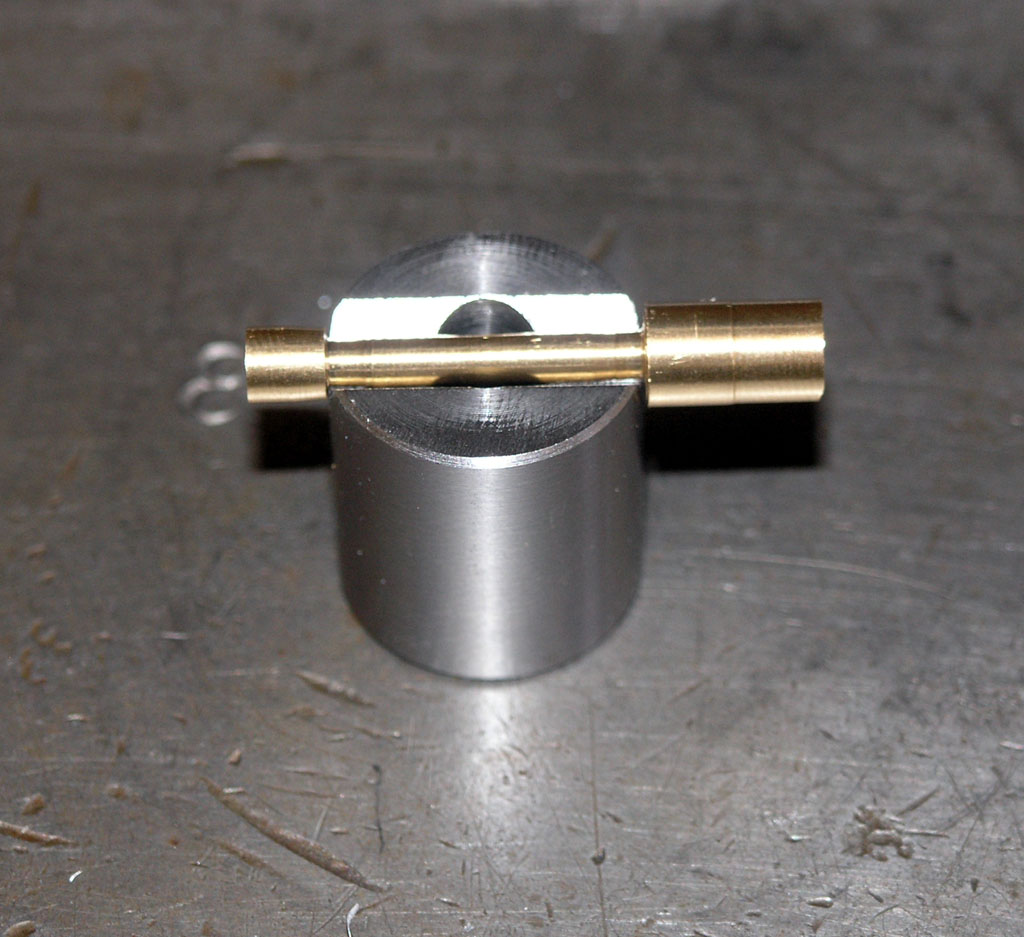
In the original article Dubosky had 2 screw down plates that were round and on either side of a center hole. My V-block is already so small I hate to think of that! I'll be using one screw down plate held by two bolts. Progress was had before lunch:

P1010566.JPG


Need to do the clamp next. I'll write up the whole thing when it's done so you can see what it is and how to make one.

Cheers,

BW
 
Bob
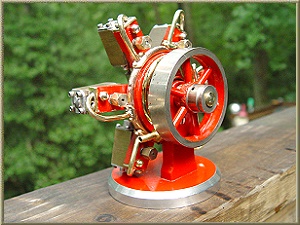
The Hula Hula would be a nice project for the build. Fascinating engine to watch sa it is running. It almost looks alive with all the wiggling going. Have you seen mine after I managed to get all the oil slinging under control? http://www.cedesign.net/steam/radial.htm

Steve
radial-detail-2.jpg
 
I like the hula. Wouldn't mind doing a radial either. But what about something else?? Maybe a Sterling? A Sterling fan even?? A flame licker? Maybe on of Jan's engines?Or should we keep it simple for awhile?

Eric
 
Wow, that's some kinda hot rod Hula Hula you got there Cedge!

Love the paint job!

You can see how with so many duplicate parts for the cylinder assemblies there would be opportunities to split things up in interesting ways for a Team Build.

The only thing about the Stirlings is I'm under the impression they have to be done pretty precisely or they won't run. With that said, I'm good for about anything the group wants.

BW
 
For something slightly different, why not try Elmers 'Kimble'.

If you have any cnc lads in the group, they would be the ideal ones for the cylinder and side plates.

The rest could be made by people of varying degrees of skill.

John
 
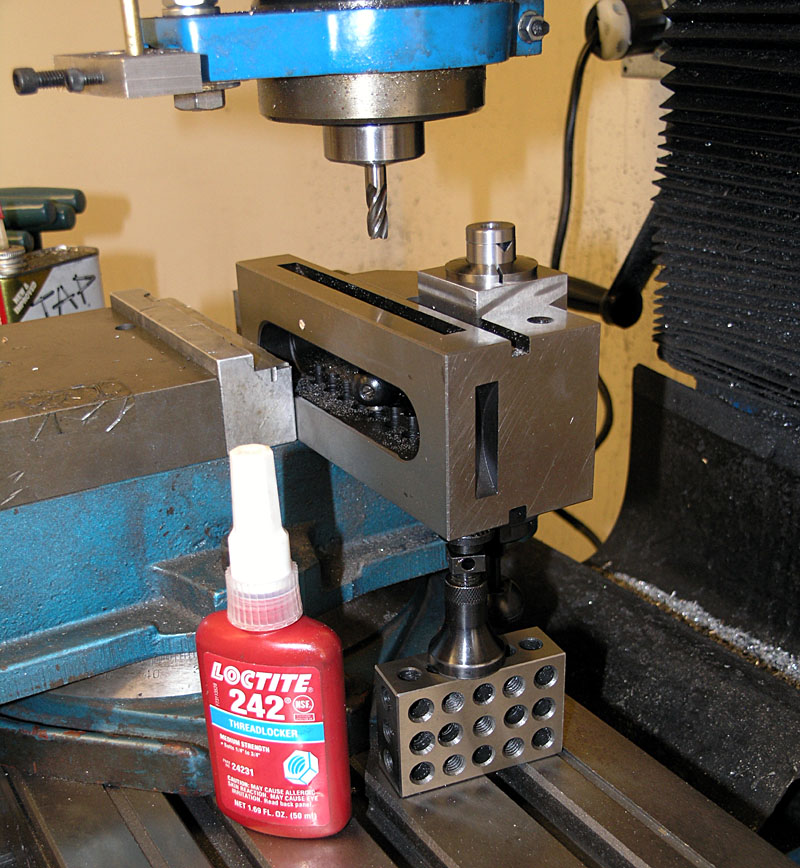
All right, I'm stuck waiting on Loctite, so I may as well get started showing how to make the Button V-block.

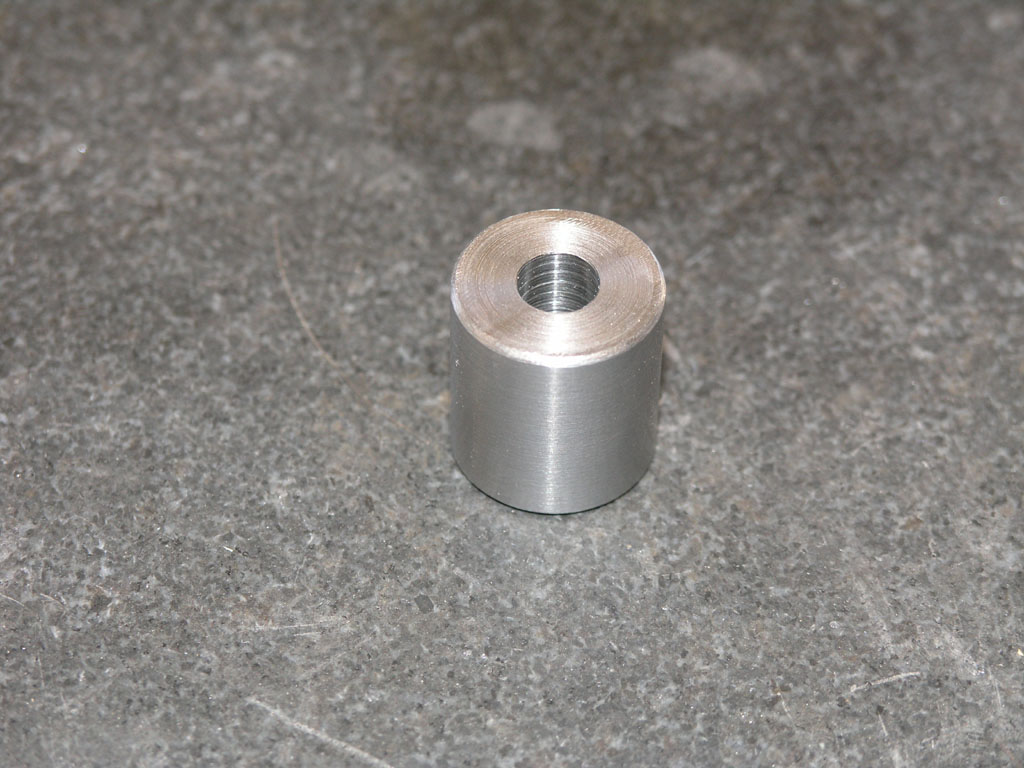
P1010558.JPG


Face, turn, deburr, radius, drill, and whatever else to create your cylindrical blank. The center hole makes the block more flexible because it let's you position a larger radius on the part there as well as at either end. Make the center hole as large as possible while still leaving enough beef to support parts in the "V" and to get your clamp bolts in there. Keep in mind that little guy is about 3/4" in diameter, so it's smallish.

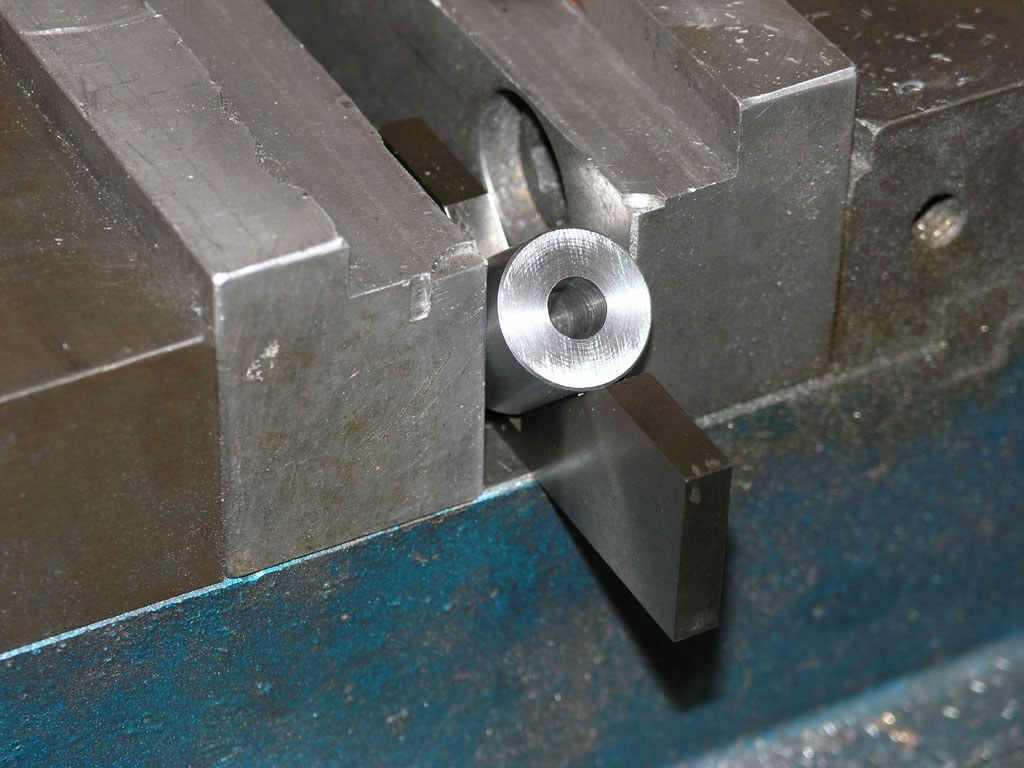
P1010560.JPG


This is how I'm holding the part at a 45 degree angle so I can use a regular end mill to cut the "V". These little import angle blocks have been handy on lots of jobs. I use them more than any other angle-related device in my shop.

P1010561.JPG


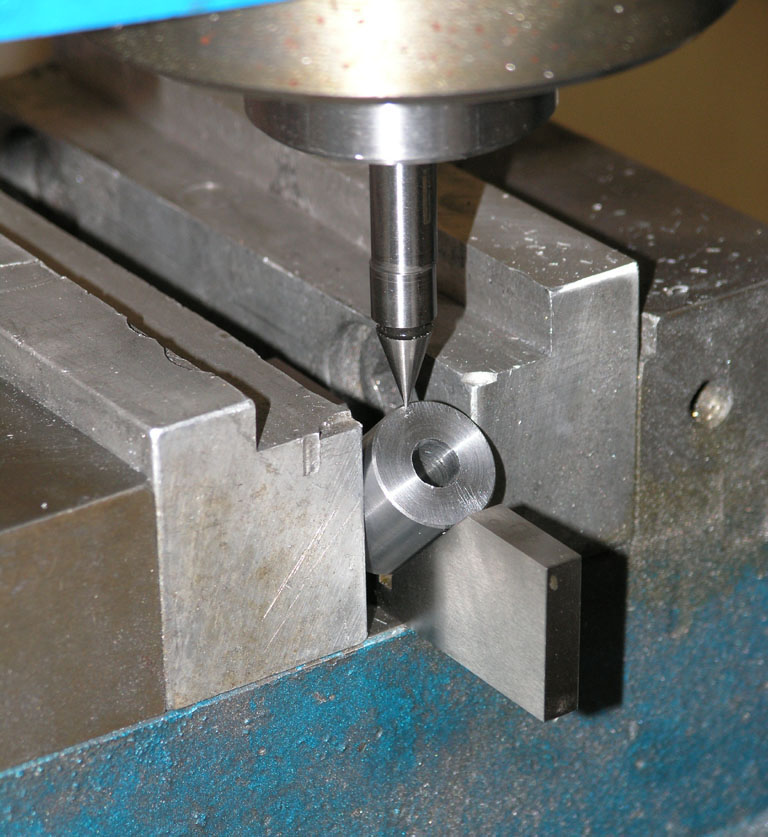
I'm using an edge finder to zero the mill's axis over the high point. There's a lot of eyeballing going on here, so it isn't super accurate, but it will do on this job...

P1010564.JPG


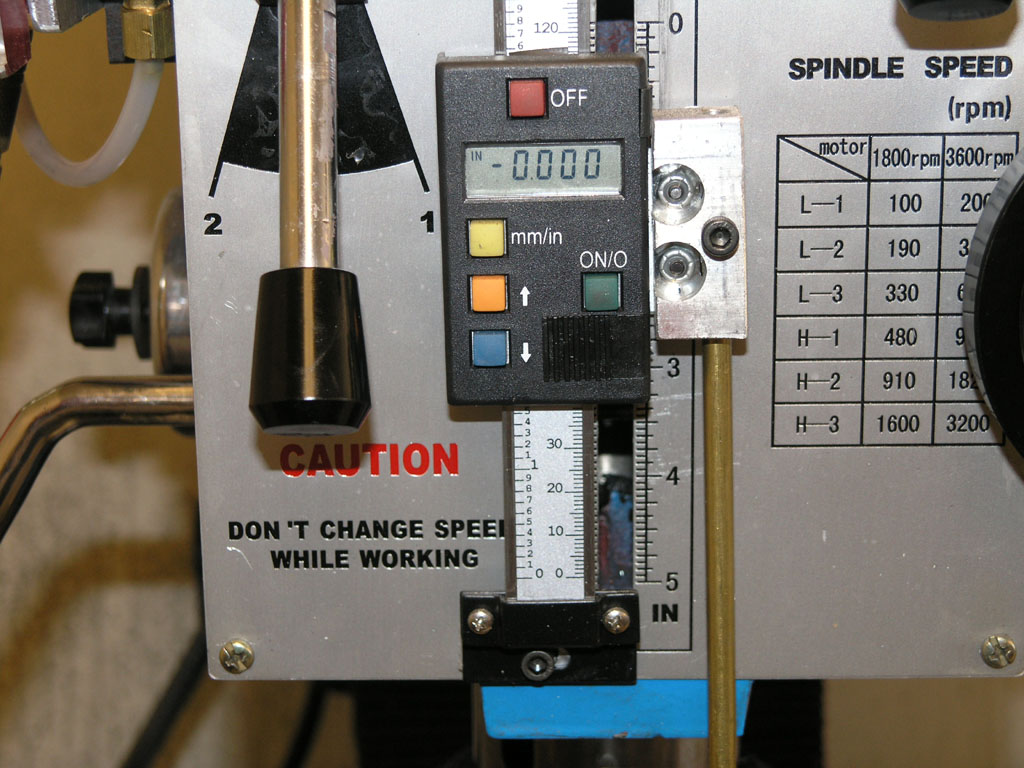
I zeroed my DRO and then cranked the Z-offset specified by my CAD drawing. Then I used my X-axis handwheel to get that offset taken care of. Remember the end mill's diameter!

<continued>

 
The guys in the current team build seem to be having lots of fun, so I would like to join in this one. I have kind of lurked thus far, chimed in on a few threads. I spent plenty of time working in machine shops while I went to engineering school. I have lots of cool toys at work since my R&D lab shares the same building as the jug and fixture department (lots of access to free scrap bits as well).

Brian
 
P1010565.JPG


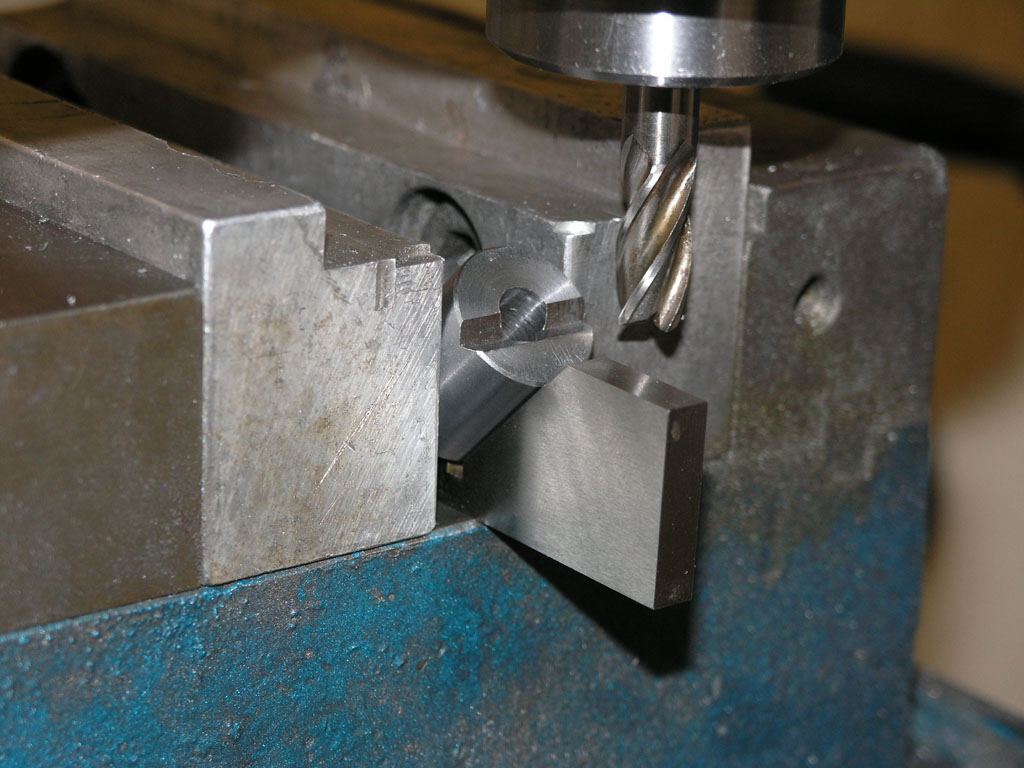
did a little "witness track" to see that my initial cut lined up with the bottom of the center hole. The witness track just barely grazed the part and looked like a line, not a groove. That center hole really helps to visually judge whether things are right. I want the V to wind up same width as the hole's diameter, though it need not be perfect either.

This picture shows the result after several passes. I'm feeding carefully with the Y-axis and setting depth of cut with the X. I take 0.020" passes initially, but remember, every pass cuts more material as you move deeper into the V. After a couple 0.020", I went to 0.015", then eventually 0.010". For the last little bit I was doing 0.005" and then passes of a couple thousandths until I was lined up just right on the hole. You saw the result after this operation up above with the con rod blank laying in the "V".

P1010568.JPG


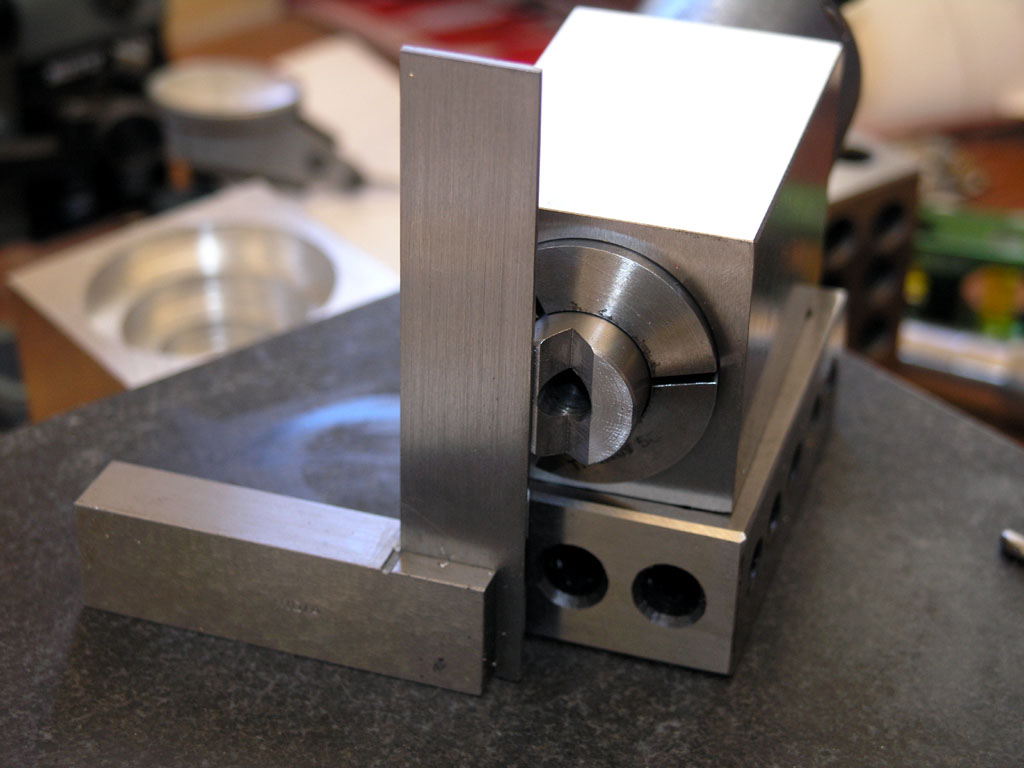
Next, I stuck the part in a collet block and used my square to line up the "V" with the block sides. It's just an eyeball job, but it'll be close enough. If I'd used the collet block to hold while cutting the "V", I wouldn't have to do this!

P1010569.JPG


There is a lot going on here! First, the collet block has a big handle sticking out the back. To get clearance, I clamped the collet block into my grinding vise, then lay the grinding vise on its side in the Kurt vise. The 1-2-3 block and jack provide a modicum of rigidity. I don't need a lot--not hogging, just drilling and tapping 2 small holes. Next, I positioned the clamp blank atop the V-block. I want to drill through both so the holes are located the same. To hold them together, I'm using some Loctite as "glue". It releases when heated so I can get them apart again. To position the two parts according to their proper relationship, I used a trick I learned from Frank Ford. Frank uses it to align his tailstock after set over. He claims that by feel you can get it to within 0.001" or less. In other words, by feeling until the two round pieces are matched up. I don't know if it is that accurate, but it'll be plenty good enough for this job!

Now I have to wait for the Loctite to set up before I can drill and tap...

Back in a bit!

BW
 
I would say to wait and see how the current build goes together at assembly and if the were no quality and fit issues then kick it up a notch. I think the sterling fan would be a great one myself. I also like the Hoglet but I am an IC fellow. It looks to me like the current build is going well and I'm expecting no problems. I did forget to fill out my inspection documentation though. ::)
Tim
 
Sent my address a while ago, did it get to you?

Joe
 
Bob,
Thanks for sharing this stuff. Although I'm not on the team build project I appreciate making fixtures and jigs. It seems like every time I'm faced with what appears to be an impossible machining task, a jig or fixture makes the whole thing come out right. I'm filing what I see here because you've got me thinking out of the box and that often seems to be just what's needed for success ;D.

Cheers,
Phil
 
zeusrekning said:
I would say to wait and see how the current build goes together at assembly and if the were no quality and fit issues then kick it up a notch. I think the sterling fan would be a great one myself. I also like the Hoglet but I am an IC fellow. It looks to me like the current build is going well and I'm expecting no problems. I did forget to fill out my inspection documentation though. ::)
Tim

I agree. maybe a few more simple builds to work out the kinks, then start to increase the difficulty.

Would love to do the Hoglet. Love the V twin engines.

Maybe one of the steamers that looks like an IC engine. Perhaps Liney would give us a discount on the plans for his Engines

Eric
 
joe d said:
Sent my address a while ago, did it get to you?

Joe

I believe some have already sent their addys to Tin. If you did, don't worry about it... you are ahead of the game!

Eric
 
Grrrrr! :-[

Broke a tap at the very end of tapping the last hole. Isn't that always the way? Murphy's Law: Whatever you screw up will be the most catastrophic screw up at the point where you've invested the most work in the project and it is the most expensive to fix!

What a classic way to screw up too. The wife invited friends for dinner. I'm happily puttering away when she comes screaming down the stairs wanting me to come help fix dinner. Just a few minutes and I'll be done honey, be up shortly. So then I put the hurry on and Craaaaack! Tap snapped off because I was in too much hurry to get done and run back upstairs.

It's a little 4-40 too.

I think I read TattooMike say somewhere that a lefthand twist drill is the ticket to get a tap out. I don't have any left handers, let alone one this tiny size. But I do have a crazy idea. I'm thinking I can make a D-bit, which ought to run either direction. I can then set it up and run the spindle backwards. I've still got some small diameter broken solid carbide end mills. One of those could be pressed into service as a D-bit with a little grinder work.

We'll see if I can't salvage it. If not, I'll just make another one doggone it! ;D

Cheers,

BW
 
Status
Not open for further replies.
Back
Top