Henry Ford Engine

Home Model Engine Machinist Forum

Help Support Home Model Engine Machinist Forum:

This site may earn a commission from merchant affiliate links, including eBay, Amazon, and others.
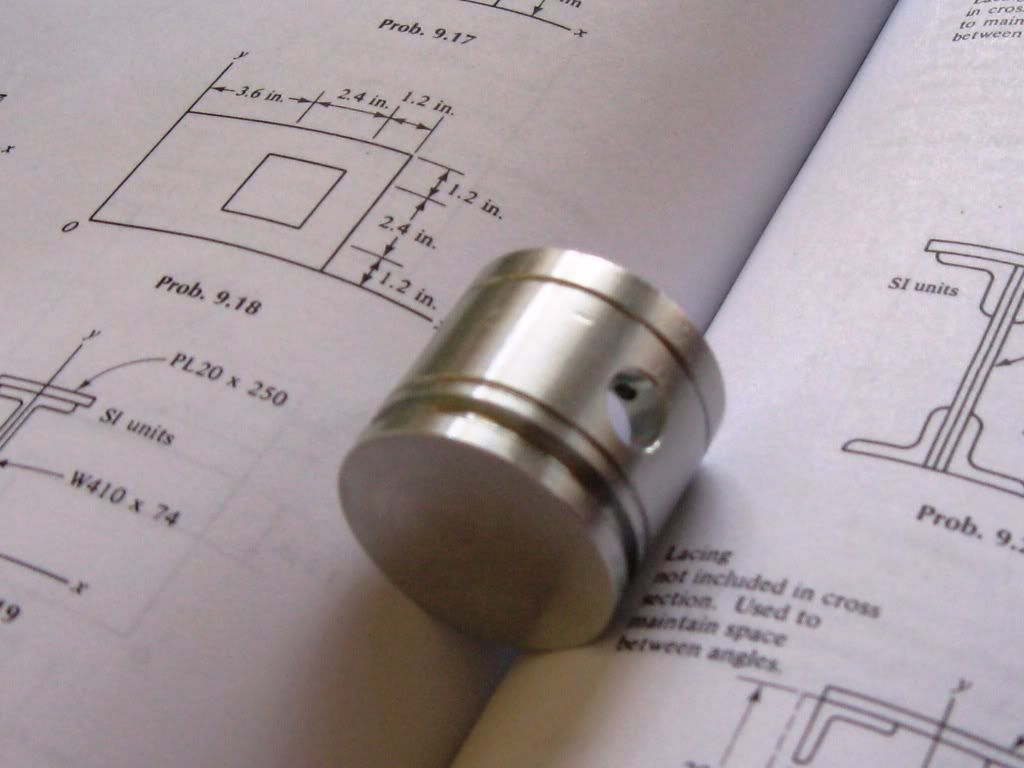
The piston is finished! I decided to go with 6061-T6 aluminum because I had some, though I would have like to have made the piston from cast iron instead. I don't plan on running the engine for long periods of time so hopefully thermal expansion won't be much of an issue. There is only one way I'm going to find out.

Unfortunately my camera does the piston NO justice...I think it came out looking pretty nice and the dimensions are right on the money. It slides right down the cylinder (with the help of some oil of course). However, when I installed the piston rod (dowel pin), it sticks out just enough on each side of the piston to prevent it from sliding down the cylinder. I'm going to try and grind the ends of the dowel pin slightly. This might be tricky due to the hardness of the pin. I'll let you know how I make out. ;)

Next will be the connecting rod.

finishedpiston-2.jpg


finishedpiston-1.jpg
 
Really good progress, Chris.
You'll be able to grind that piston pin just fine. Grinders don't care about hardened steel. (Think of grinding HSS tool bits.)

Keep up the good work!

Dean
 
Nice work, Chris. I wouldn't worry about the aluminum piston too much. If you use an o-ring like I did, you can make the piston kind of a loose fit and expansion won't bother a thing. My plumbing engine has an aluminum piston with a plain old neoprene o-ring and I get good compression. My engine has gotten pretty hot a couple of times when I ran it hard and the piston didn't seize nor did the o-ring seem to suffer any ill affect.

Chuck
 
Thank you Dean! I'm going to try grinding it this weekend.

Thank you Chuck! I'm surprised the "plain-jane" o-ring works....that's good to know. I know it's going to be a while until I run this engine but I can't wait to try.

Thanks again.

Chris
 
I know it's been a while...LIFE kinda got in the way.

I have finished the timing gears for the engine (finally) and am almost done with the base. On Monday I will be line-reaming the two holes for the crank shaft. I will also be "tramming" a mill for the first time! I got a really great traming crash course on Thursday from a 30-year veteran machinist.

I will take lots of pictures of the Ford engine's progress next week.

Until then.
 
Good to see you back a it. I love my little Henry Ford Engine. I keep it in the shop and start it up at least once a day just to watch it run. Can't seem to walk by it without connecting up the battery and giving the flywheel a spin. Usually starts on the second or third spin.

Chuck
 
Glad to see you getting back to it, Chris! Any pics of your gear making process for us?

Dean
 
Thank you Chuck...I can't wait to get mine running as well.

Thank you Dean. The gears were purchased from Boston Gear and came with a minimum plain bore. I bored each gear to suit.

Someday I will attempt to make gear teeth from scratch...someday
 
Here are some updated pictures! These pictures are of the base. My next step is too mesh the gears and locate the hole for the large gear.

ford-4.jpg


ford-3.jpg


ford-2.jpg


ford-1.jpg


ford-5.jpg
 
Dowel pins. I'm likin' it Chris. Sometimes, good things are worth waiting for, I'm glad to see you back in the saddle.

BC1
Jim
 
Chris, am happy to see this thread pick back up...something about the simplicity, use of off the shelf parts, and historical value that is just fascinating regarding these engines. I saw one running a couple of years ago and was hooked on it then. Maybe one day I'll get around to making one, but in the meantime am enjoying your build. Pretty amazing how far we've come since those days.

Regards,
Bill
 
Thanks Bill...

The flywheel casting should arrive this week. I'm hoping to have the gears broached this week also. We'll see what time alows me to accomplish.

Chris
 
Here is a picture of the almost complete frame. I still need to line ream the bushings and did not have a 5/8" reamer.

fordengineframe.jpg


Chris
 
The frame is looking good, Chris. It's a good idea, reaming the bushings after they're put in.

Dean
 
I just broached for the first time!....not as exciting as I thought it was going to be but it worked great and that's all that matters.

DRIVEGEAR006.jpg


Chris
 
Looks like it worked fine to me Chris....it does take a bit more force than you expect though, or at least i thought so the first time i did it.

Bill
 
Looks real good. A keyway broach set has been on "that list" for a long time. Then I suppose I will want an arbor press....

How much force did it seem to take?
 
An arbor press is definitely in order, the size will depend on how large a keyway you are cutting, the material, and what other needs you may have for it of course.

Bill
 
Lakc said:
Looks real good. A keyway broach set has been on "that list" for a long time. Then I suppose I will want an arbor press....

How much force did it seem to take?

Not sure...here is what I used. This is the only one we have in the shop.

BROACHINGMACHINE.jpg


Chris
 
Broaching typically doesn't take much force for the size keys found in our stuff. I have done it with the quill in a drill press but typically I have a taper plug (cut off drill) I put in the tailstock and broach the part while its still in the lathe after finishing the bore. You have to make the guide bushing first, but that makes a nice plug gage while you are opening up the bore
 

Latest posts

Back
Top