My 4" scale steamroller project

Home Model Engine Machinist Forum

Help Support Home Model Engine Machinist Forum:

This site may earn a commission from merchant affiliate links, including eBay, Amazon, and others.

Allen

Well-Known Member
Joined
Jul 14, 2008
Messages
128
Reaction score
55
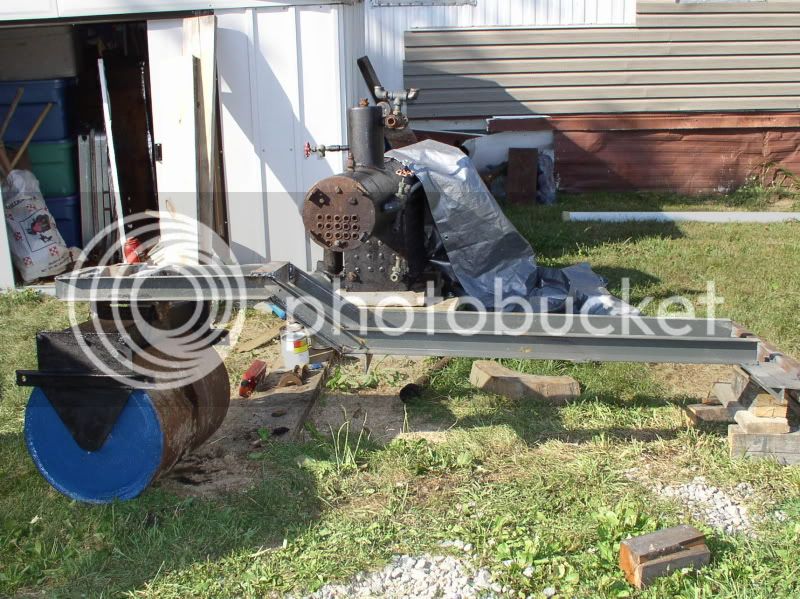
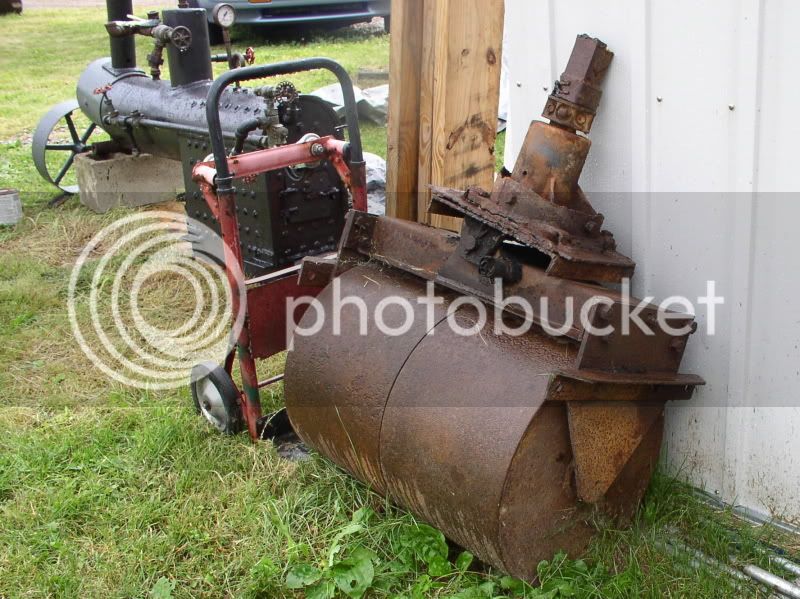
I thought maybe you guys might be interested. It is a 'freescale' 1/3 sized steamroller built from this and that. I started on this... maybe 10 years ago? But hadn't actually accomplished much on it since a couple years before my big D.....

Well, we (my GF Kim and I) FINALLY went to get the boiler last month from where it had been stored for about the last 6 or 7 years, rescued the wheels from my ex's basement, and scrounged the engine and governor parts from out of my van....... So, what I have is all in the same place for the first time EVER!

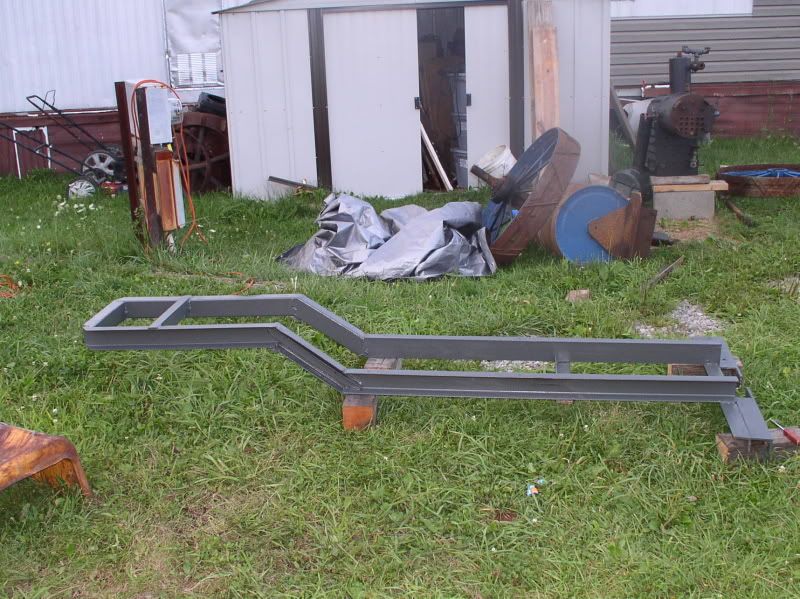
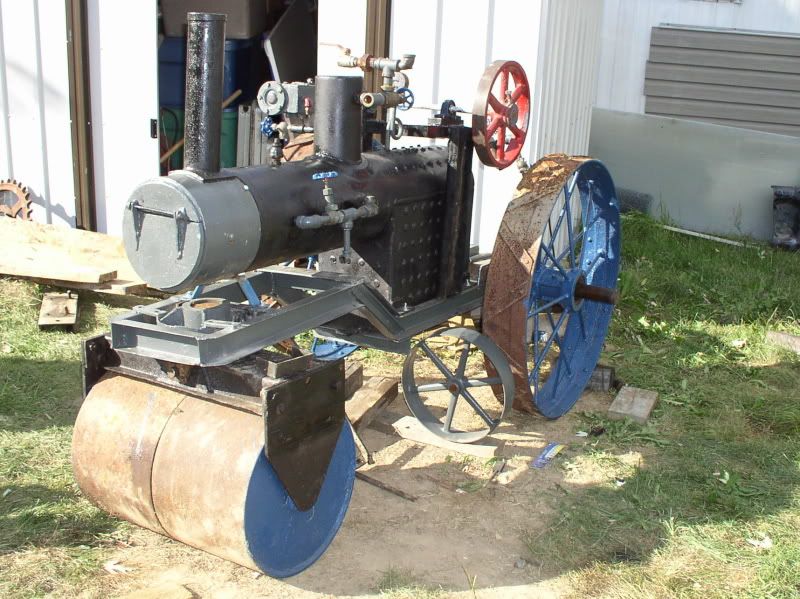
I still don't have a 220v circuit run for the welder yet, or gas for the torches, but at least it is a START, right?. Anyway, rather than have the neighbors upset over a bunch of scattered rusty junque in the yard, Kim and I threw a coat of paint at some of it this afternoon. ----- It may still be scattered junque, but at least it isn't rusty anymore! Kim and my daughter Sara picked the paint scheme. The rolls and gearing will be a dark blue, the engine and bunkers Case 'LC' Grey. -- of course just as we almost finished the sky opened up and it POURED for half an hour...

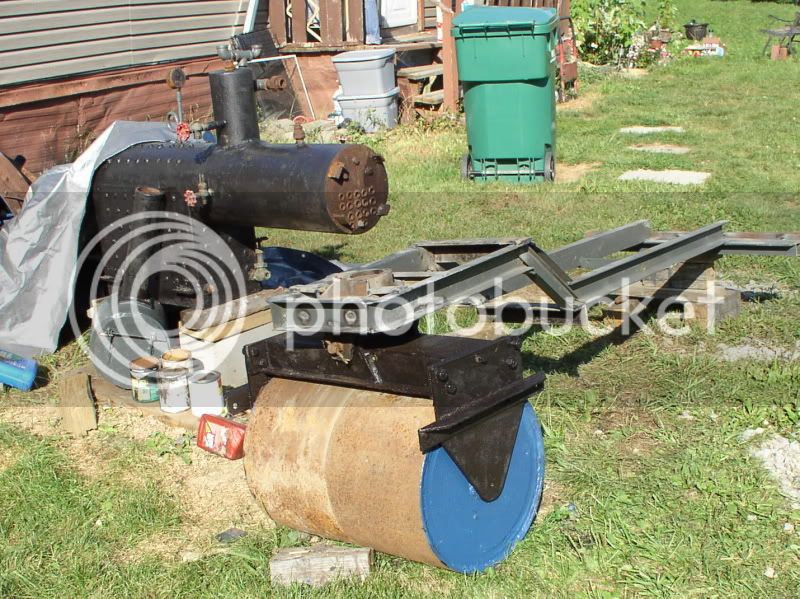
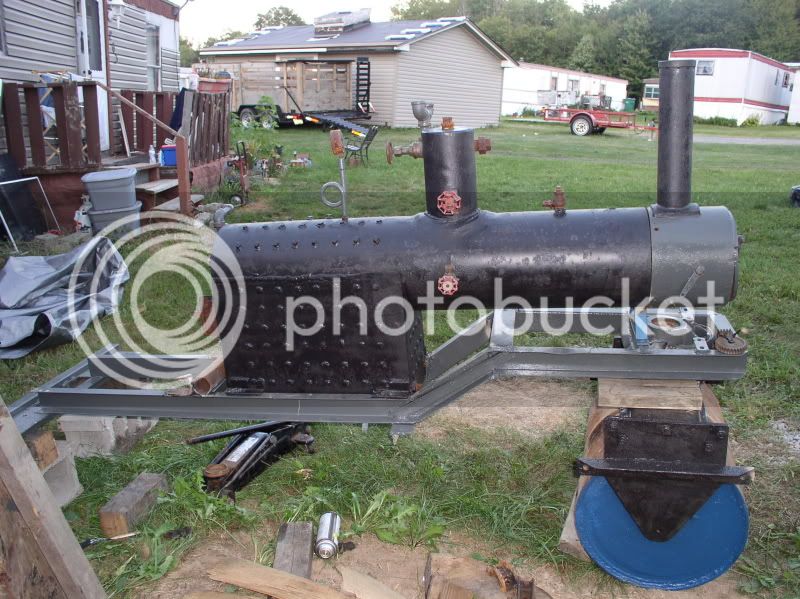
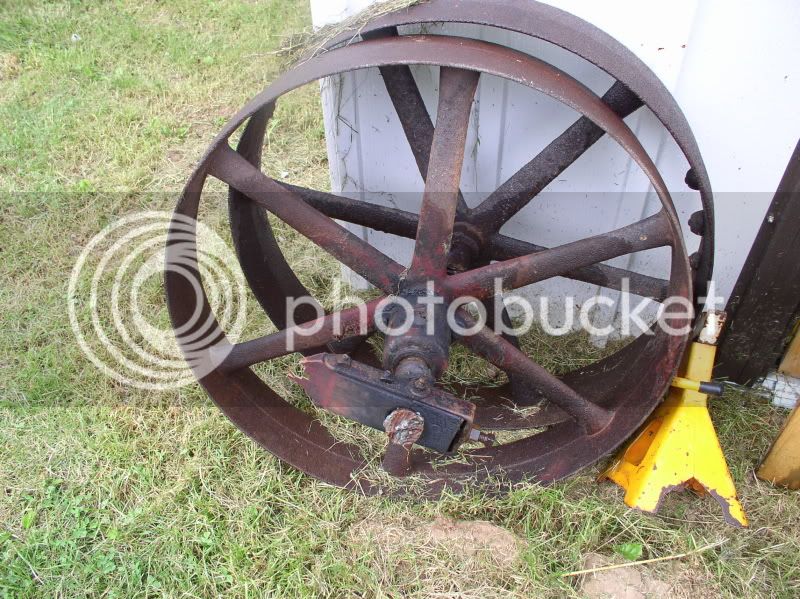
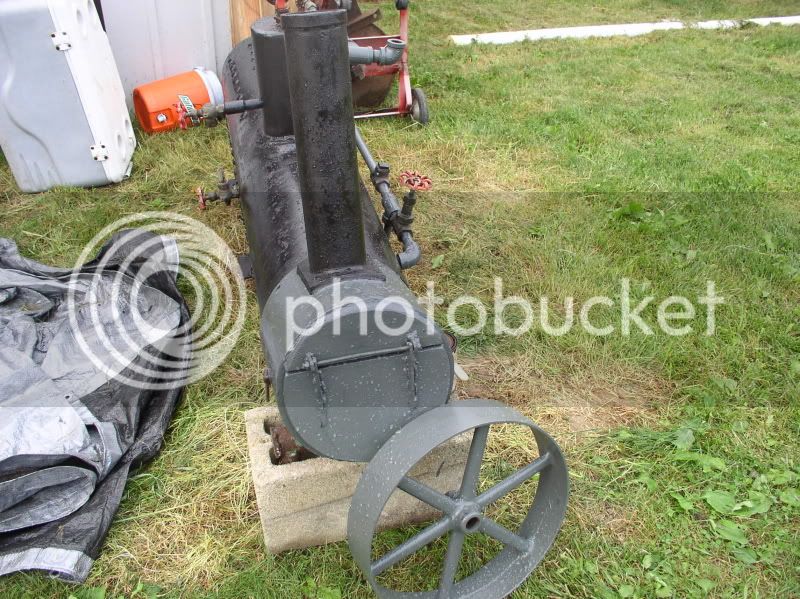
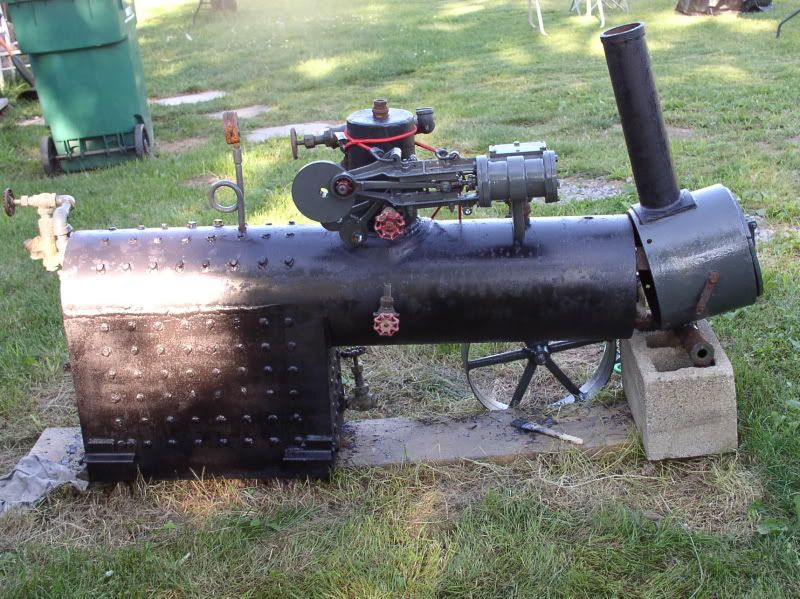
Boiler, smokebox and flywheel all looking rather snazzy. The boiler built to ASME section I part PMB specs, and is 10-3/4" in diameter and 4' long. I'd also love to get a curved spoke flywheel instead, but haven't found the right one yet.
P6270007.jpg


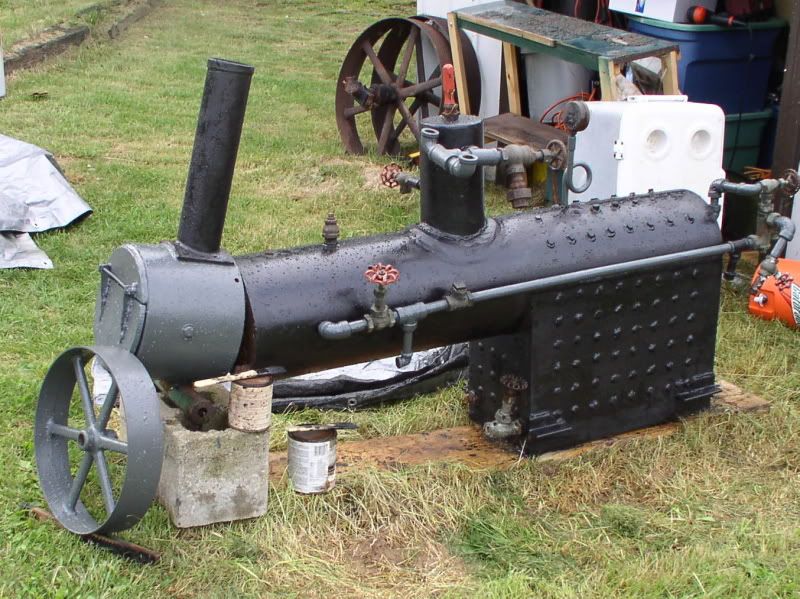
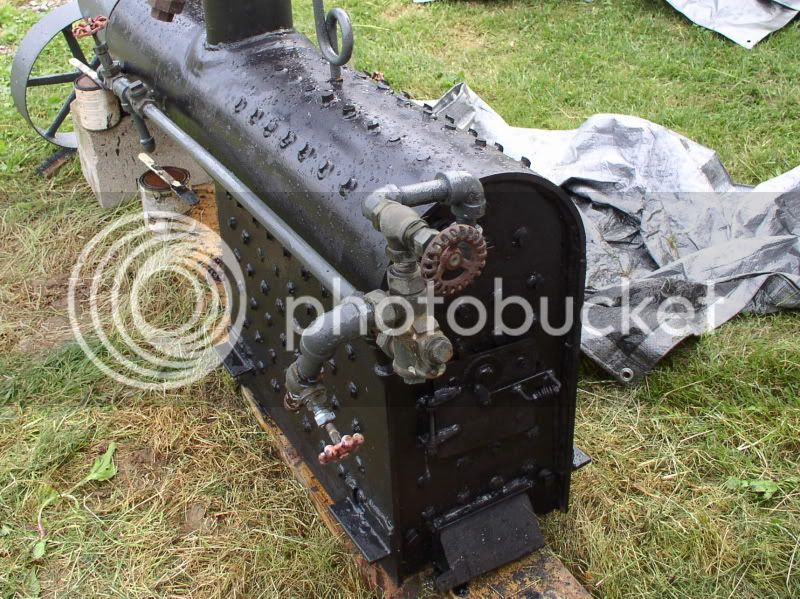
A 1/2" injector, and a 2" bronze hand pump will have to do for my 2 means of adding water. The firebox door is smallish 5" x 6" -- I've thought about firing it on kerosene. The grates seem to have gone missing, so I might have to look more into that.
P6270006.jpg


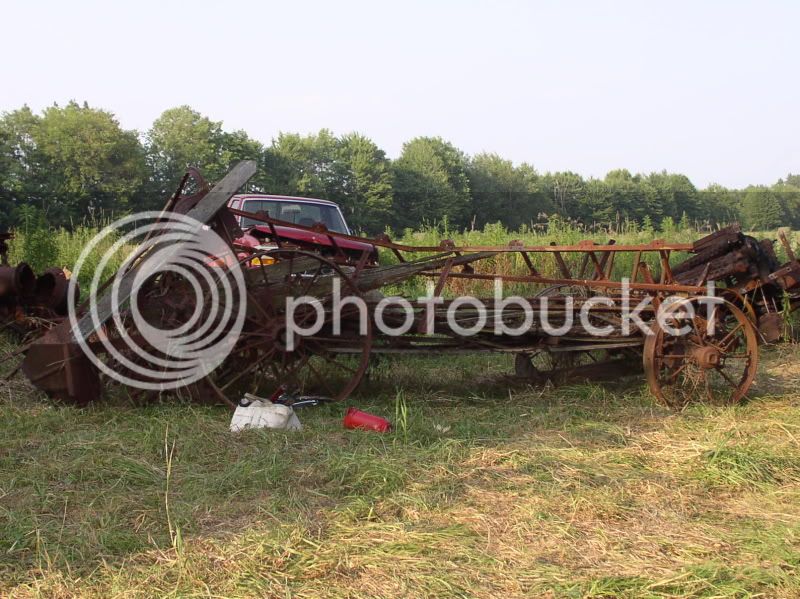
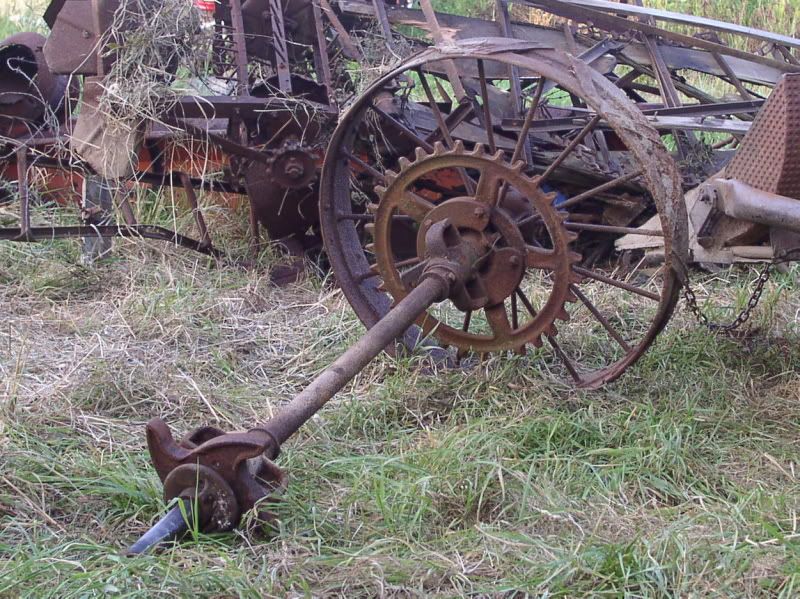
Rear rolls are a pair of threshing machine pulleys. Not what I really wanted, but they were affordable. I may need to bolt sheet rubber or old bald tire treads to them to keep them from jarring and breaking.
P6270005.jpg


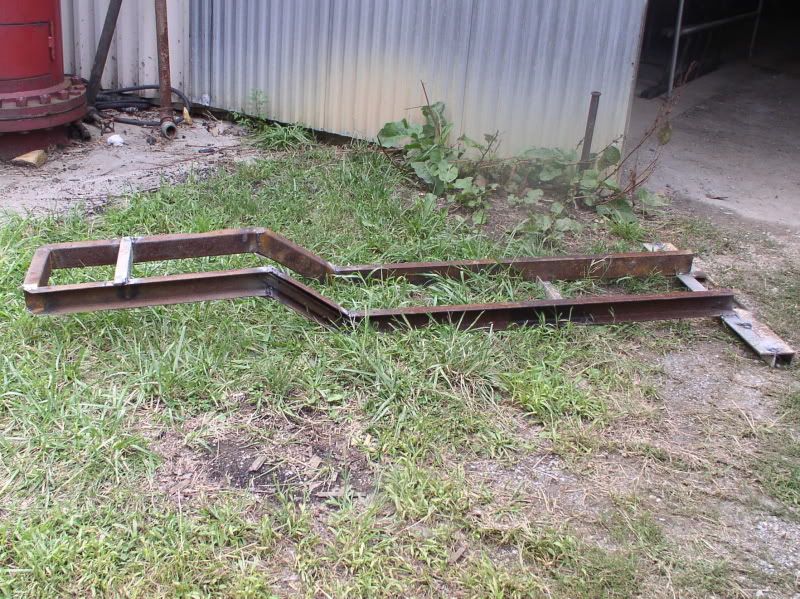
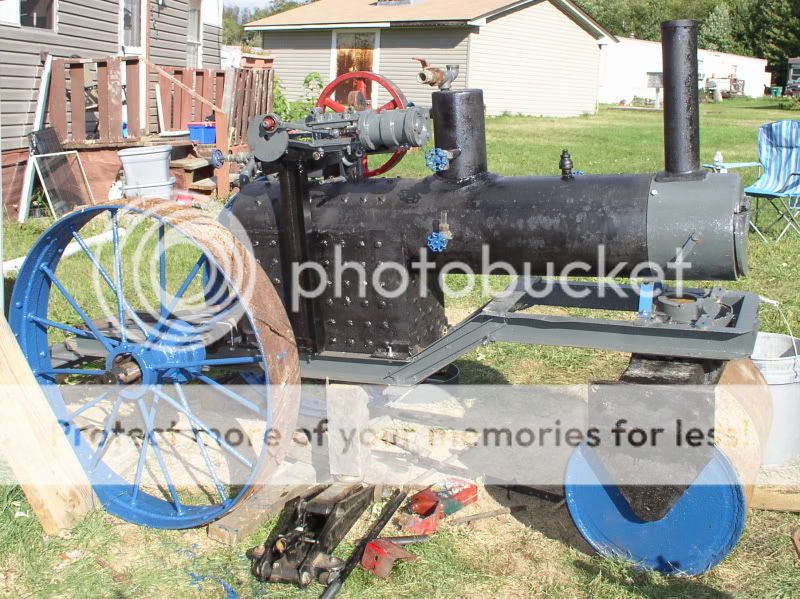
Front rolls are from a 3-ton or so gas roller. A little large, but for $25 I couldn't resist! I'll be cutting down the frame so the boiler will sit about 4" above the rolls.
P6270003.jpg


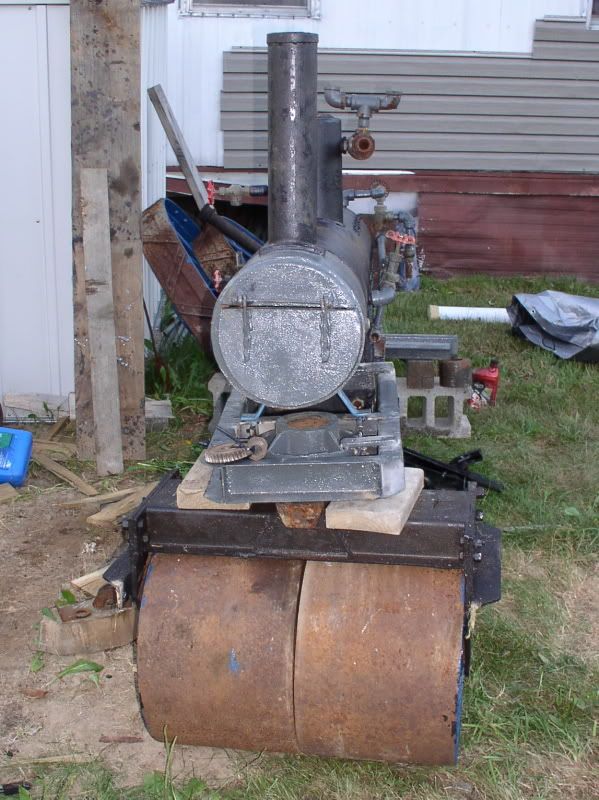
A face only a mother could love? Kim and Sara have both laid claim to it!
P6270008.jpg


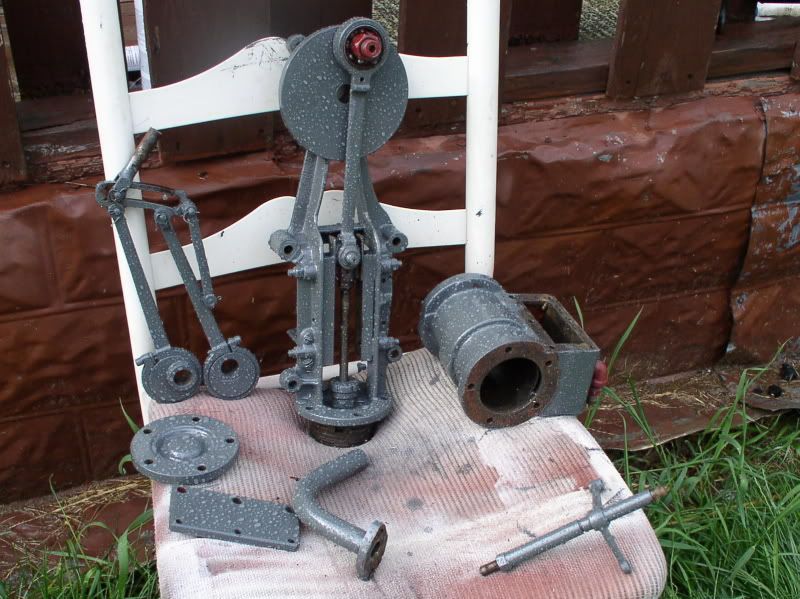
Half a Mason steam car engine will provide power. It's the 'wrong' half, so either the flywheel will be on the left, or the cylinder will be towards the rear... all depends upon what gearing I scrounge up, yet.
P6270001.jpg


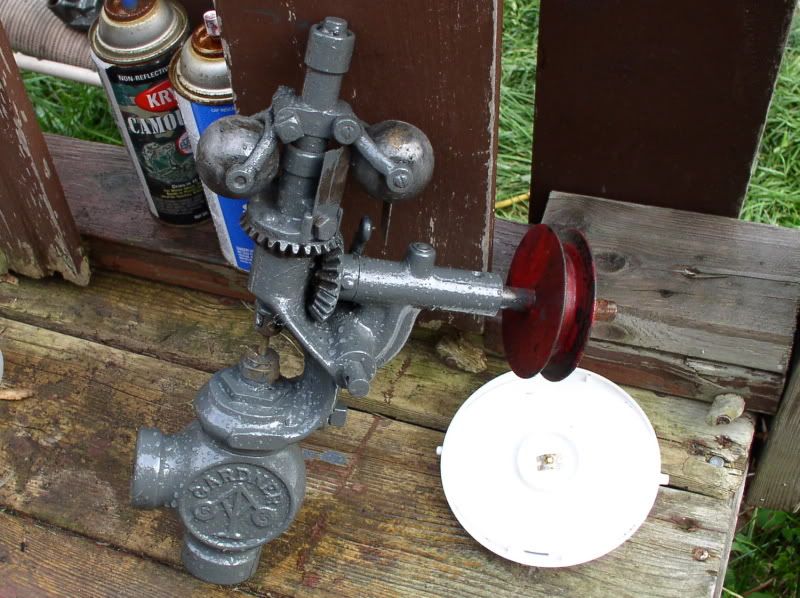
This 3/4" Gardner governor is really too large, but it's here. Yes, I need to get new weights for it. Luckily they are still available.
P6270002.jpg


Still needed: gearing, bunkers, lubricator, canopy, and a money tree..... But I hope to at least have the boiler mounted on the wheels before Fall so we can move it around without an engine hoist!

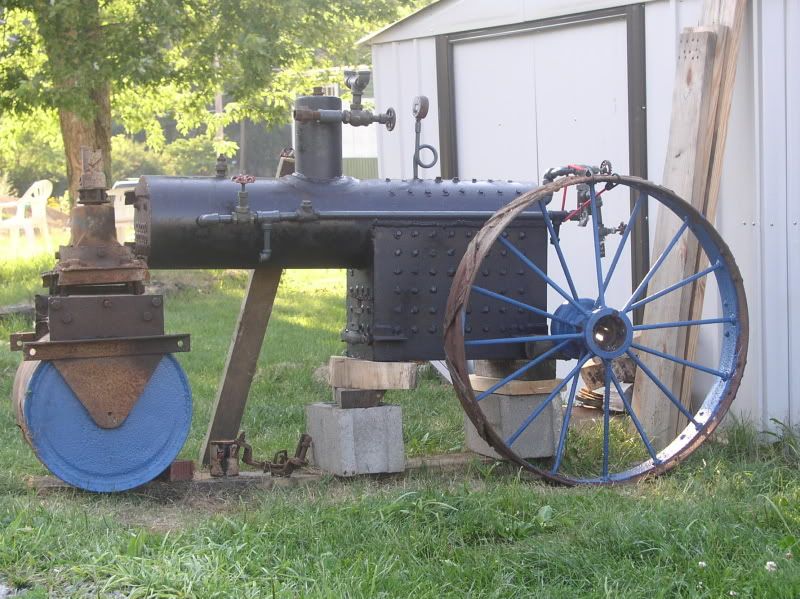
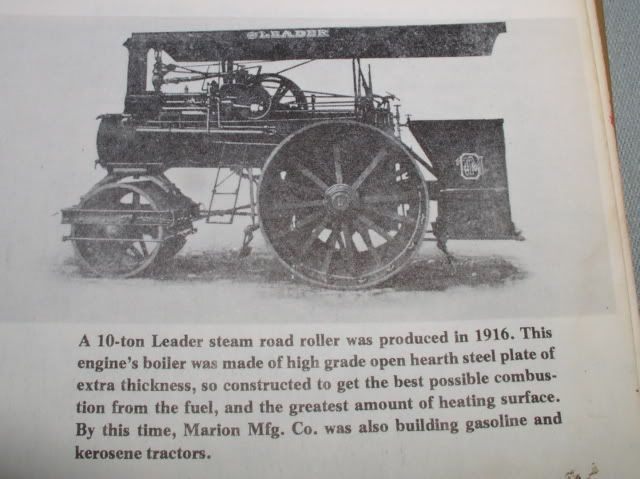
So, just what will it look like when it's finished? Something like a mirror image of this:
P8080001_01.jpg


Thanks for looking! Comments, ideas, suggestions always welcome
 
Allen,

This is quit an ambitious project.

Please keep us posted on your progress.

SAM
 
That is some SERIOUS modeling Allen. Good luck in finding/adapting the parts you need and please do keep us posted on your progress. Traction engines and steam rollers are always fascinating things, especially in this size. No all you gotta do is find a 1/3 scale road to pave :big:

Regards,

Bill
 
Kim was having a bit of trouble visualizing how it would look (She has an artist's eye for taking photos and drawing, but I guess she can't quite do it in 3 dimensions...), so I did a temporary mock-up last night. I need to make a minor change to the upper water column valve piping, so the engine can go down another inch and back about two.......

P6290001.jpg


I'm hoping to find some needed bits at the Ashtabula engine show (Wayne Center, Oh) this weekend.... They have a great flea market for a smallish show.
 
Went to Jamestown, Pa today to get some old manure spreader wheels to use for the rear rolls instead of the fragile pulleys. Anybody recognize the manufacture on this thing?
P7060001.jpg


One wheel was stuck fast to the axle, so we decided the expedient thing was to just take axle, pillow blocks and all. Then soak it all down with Kroil at our leisure. It cost us gas, plus $10 and a couple zucchinis for the parts....
P7060011.jpg


The front axle, and one from a husker shredder, will be rescued as well to make a wagon to mount a couple steam pumps on. The rest of it is pretty rough, so the scrap man will probably get it unless somebody has a parts request.
 
Zucchinis - the leading currency in the scrap business.

:big:


Dirty_Vinylpusher said:
Zucchinis - the leading currency in the scrap business.

:big:
He actually wanted tomatoes, but they weren't ready yet. ;)
 
Being on disability means I don't have much (if any) spare money, so progress is slow. Thanks to some donated steel :bow:, I finally had enough bits on hand to start welding up a frame last week. Most prototypes didn't have a separate frame, but it will make the local inspectors happier, and more importantly, save me a couple pages worth of stress calculations. :big:
Mock-up with the wheels... I think this will work.... maybe?
P7110001-1.jpg


Not my best welding, but considering I hadn't struck an arc in over 5 years, acceptable.
P8120002.jpg


Better with a little grinding and a coat of paint. It will probably go black, eventually. I still need to mount the front bolster, and brace where the chain steering bolster mounts, once I decide to mount it high or low.
P8130006.jpg


The bolster - from a 2-ton gas roller... It needs cut down to fit under the smokebox. - It's HARD, as in spit dull red sparks and trash the saw blade hard. - I may end up fabricating a new one out of steel....
P8130003.jpg


With luck it will be on wheels before the snow flies...
 
That's some project Allen.
I've never welded but have toyed with the idea of learning.

With respect to your thread's title...My 4" scale steamroller project...
What does the 4" refer to? Or 'scale' for that matter.
My inexperienced eyes see a full scale steamroller.

Thanks.
 
zeeprogrammer said:
That's some project Allen.
I've never welded but have toyed with the idea of learning.

Welding is easy. Making good, clean, pretty looking welds with no inclusions is what takes the practice. If you really want to learn, see if your local tech school has evening classes. Teaching yourself is possible but has a sharper learning curve. Also, if you are trying to learn with cheap (mostly 110v or 'pocket') equipment it will just frustrate you. Most of the budget stuff has a very short duty cycle (%-age of time you can weld vs time needed for the machine to cool to prevent failure), and the volt/amp settings are often WAAAY out of proper balance for making really good welds..... An experienced weldor CAN even stick weld with a car battery and jumper cables - when absolutely necessary - but trying to learn that way.....


zeeprogrammer said:
With respect to your thread's title...My 4" scale steamroller project...
What does the 4" refer to? Or 'scale' for that matter.
My inexperienced eyes see a full scale steamroller.

4" on the model = 1 foot on the prototype, or 1/3 scale.... Actually it's probably closer to 2/5 scale with the larger wheels, but that doesn't give quite as nice a round number.. The boiler is 10-5/8" in diameter and 4 feet long (plus another 8" for the smokebox). The rear wheels are 36" in diameter, the front rolls 18". When completed it will be about 34" wide and 7 feet long.....
 
I would have offered to help you learn how to weld, but it would be just a bit of a commute for somebody.... :eek:

 
Allen
I'm loving this project.
Big and chunky.
;D


Zee
I'm a novice welder myslf and am battling along with a cheap-ish arc welder.
I'm ok as long as both pieces of material are the same thickness and composition.

It's all about getting the settings right, using the right sticks and having a steady hand.

There's only one way to learn and that's to have a go.
As Allen said, maybe do a course, but there's plenty of good information on the web and most likely you know someone who's been doing a bit of welding who can give you a couple of pointers?

I say Go for it!


Yesterday, a friend if a friend cut the yoke piece off for me. It took about 20 minutes with a power hacksaw....

Since I no longer had an excuse to not make progress. I spent the evening mounting the front pedestal bearing brackets and some other bits that absolutely needed to be welded to the frame.
P9010002.jpg


P9010001.jpg


Today I finished up welding on the frame and got some help to heave the boiler into place.
P9020005.jpg


P9020004.jpg


After looking at it, I need to lower the pivot point on the front end a little over an inch - easy enough; Jack the frame up, pull the front rolls, cut the ears off the top of the roll bracket and drill a new pair of holes through the hollow bracket itself... then reinstall. If everything co-operates (yeah right!) it should take less than an hour
 
We were at Tractor Supply Co to get grade 5 bolts when I noticed that they had cast iron fireplace grates in 2 sizes. 10-1/2" x 22" and 7-1/2" x 21"... the spacing between the bars was a bit wider than I really wanted at about 3/4", but the smaller set fit perfectly after I trimmed the last section off. Plus, they were less than $20! :bow:

If they last even 5 years at that price, I won't complain... much. :big:

Don't you love it when something goes right for a change?

Debating on side mounted water tanks for a larger reserve (the bunkers, as originally designed, would only hold about 12 gallons, square side tanks would hold about 20)... also whether to build the scarifier (basically a long bar with stakes through it that was used to rip up the old road so it could be graded and resurfaced) that mounts under the platform. It would LOOK really, really cool, but I sorta worry about it getting hung up while loading or some idjit managing to get hurt on it. I need to decide on this BEFORE I cut the rear axle as to whether to leave an extra 1-1/2" on each side for the outer mounting brackets.... input either way is requested on this.......

My 'next' project has already been suggested... I was told I NEED a wagon grader to pull behind the roller. THAT could be built in about a week, IF I can find a husker/shredder cart, a pair of worm boxes, a junk garden tractor snowblade and about 12 feet of heavy 2" channel... but it would take up a LOT of room (about 3' x 5' with the tongue removed) to store. The jury is still out.
 
Spent part of yesterday reworking the front roll mount and welding up an engine bracket.
P9100004.jpg


It's starting to look like a roller... maybe.... if you squint? lol
P9100005.jpg


Definitely thinking I need the larger flywheel, or maybe one even a bit bigger yet
P9100006.jpg


Still looking for gears that I can afford.
 
I don't have to squint! It's gettin' there.
Do you think a sealed bearing would be better on the crank pin? Just a thought.

Dean
 
There's supposed to be a dust cover that bolts over that bearing... I didn't get it with the engine and simply haven't scrounged up a fender washer to make a new one yet. The bearing balls are semi sealed, that's a sheetmetal cover you see.

With luck I might get to test steam the boiler and run the engine before the snow flies..... but I don't expect to have it done before next year this time.
 
Yep definitely no squinting required.
This is such an awesome project.
:bow:

I love it!


Latest posts

Back
Top