Making a Boiler for a 3 1/2" Gauge Locomotive

Home Model Engine Machinist Forum

Help Support Home Model Engine Machinist Forum:

This site may earn a commission from merchant affiliate links, including eBay, Amazon, and others.
Nice progress Stew :bow:

Kind regards, Arnold
 
Picked up some more silver solder yesteday I recon I will have put about £30 worth into the boiler by the time its complete. Got on with drilling the rest of the stays after carfully marking out started by drilling the holes in the throat plate, its a a real awkward position up underneath the boiler tube, so that I can reach made up a extended centre drill with a 1/8" drill at the other end:- this is the beast.

100_3934.jpg


Drill a hole in the end and stuck them in place with Loctite.

They ran out quite a bit so had to get them running as best I could with a perswader :hammer: also centre popping the hole helped because of the length it was quite flexable so it found position for itselfe.

This is the set up first all the holes were centre drilled.

100_3930.jpg


And drilled 1/8 right through throat plate and fire box.

100_3933.jpg


And her it is with the stays assembled.

100_3938.jpg


Called it a day at that and went in to watch the footie.

Stew
 
Whaoooooooo :bow: Very clean work....!
Best regards
Paolo
 
Its certainly looking good and I like the improvisation.

Pete

 
Cheers John

Bit confused I thought we were on for Friday afternoon, probably me got my knickers in a twist again, morning will be fine though if that Ok with you, I'll give you a bell to confirm.

Got some more prep work done today for the next soldering campaign.

Drilled the holes for the side stays, 28 each side right through outer wrapper and fire box wrapper.
This is the set up the well annealed soft copper needed some support from Jacks, centre drill first then 1/8" drill, every fourth hole I pooped a rivet into to keep everything lined up

100_3943.jpg


Gave the stays a trial fit, it looks like a hedgehog.

100_3946.jpg


When it comes to soldering I'm going to thread a ring of solder over each stay as it passes through the water cavity, and one ring around the head of the rivet in the fire box that way each stay will get two rings of solder one to fill the fire box wrapper and the other to fill outer wrapper.

Made the rings by winding the solder around a length of 1/8 bar then snipping them off to make the ring.

100_3947.jpg


And her they all are all 130 they used up 4 lengths of solder at 2 squid a length.

100_3951.jpg


Cheers

Stew


every fourth hole I pooped a rivet into to keep everything lined up

ROTFLMAO. That's an image that will haunt me the rest of the day.

Proofreading is a virtue.
 
mklotz said:
ROTFLMAO. That's an image that will haunt me the rest of the day.

Proofreading is a virtue.

You have to remember, its potty engineering.

:big:

 
:big: :big: :big: :big:

Whoopps fat finger syndrome.

Still it raised a laugh.

Its a poor slip that doesn't raise a smile.

Stew
 
I am really enjoying this thread Stew.
A boiler is in my future and I'm learning a lot.
Thanks.
 
This soldering is getting to be routine with Johns help and guidance soldered the rest of the stays as for the crown stays we put a ring of solder in the water cavity and a ring on the head of the rivets positioned the boiler with the end of the rivets sticking down applied heat to the ends with the big torch and used the little torch for background heat and to locally boost heat where required, all went well, just a couple of stays needed a second heating and a bit more solder applying on the outside, the inside (fire box) all soldered well.

Here a few pics

100_3952.jpg


100_3954.jpg


100_3957.jpg


Taking it along to the inspector this Sunday whilst there I'll buy yet more solder.

Stew


keep up the good work

more copper to heat up now

I used to recon £50 for SS for a 3 1/2 none belpire boiler

just think of the SS to do the one in my avatar
 
Bin away for a few days with my 85 year old Dad just to give him a bit of a holiday did him a world of good.

Soldered the fire box back plate in place, couldn't get hold of John at short notice so press ganged my wife onto the job, she was a bit wary of the roaring gas torch at first, but she soon got the idea and carried out instruction faultlessly with no arguments, which for a strong minded woman must have bin very difficult.

This is the result

100_3970.jpg


100_3973.jpg


Started to mark the back head out for the fire hole and ran into a problem, The drawing for the fire box back plate is wrong it doesn't match up with the position shown an the back head, it positions it too high, I'm stuck with what is a wrong part assembled to the boiler, at the moment the fire door will foul the water gauge.

It looks like I'll have to juggle thing around to get things to fit, still thinking the problem through.

Stew


Nice work on the soldering Stew, looks like I will be made redundant soon.

My recommendation would be to cut the firehole out, or flatten it off on the inside and out, there is no way you are going to get it out of there without damaging all your previous solder work (if you remember, you used that hi temp solder on there). Then rivet (countersunk) and plate the hole over, larger than what is needed, and put a new fire hole in the correct position. There should be enough room for one thickness of plate.

Don't struggle, I have a power belt file and plenty of flap wheels if needed. They would make very short work of it.

Just a suggestion.


John
 
Thanks John

I Nocked up a fire door this morning so I could 3D the problem :scratch:

100_3976.jpg


Spent a bit of time down the club talking the option over with the guys, the best option would be to have the hinges at the bottom of the door, apparently on small gauge engines this arrangement is easy for driving, also did a bit of on line searching and found an engine the same as mine with the door hinged from the bottom it looks like the builder came across the same problem as me. Just to make sure I'm going to make the bottom end of the water gauge and the feed clacks so that I can check they won't foul the door, if they do only option will be to make a new back head and position the clacks under the door.

Stew
 
Thanks Guys

Made enough of the fitting so i could try the fit out, for those interested this is how to fabricate small boiler fitting up, this is for the clacks.

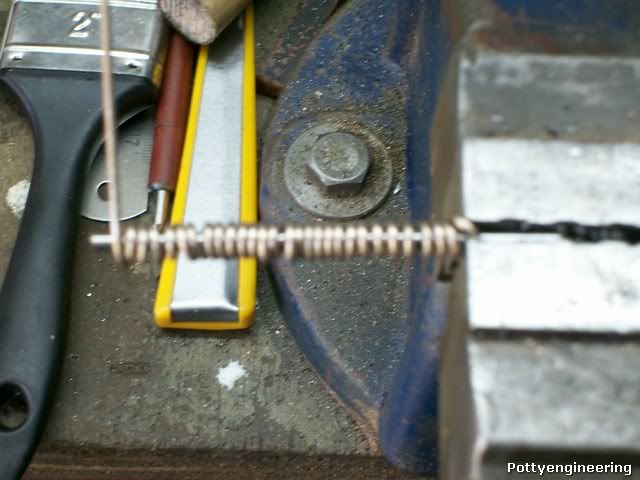
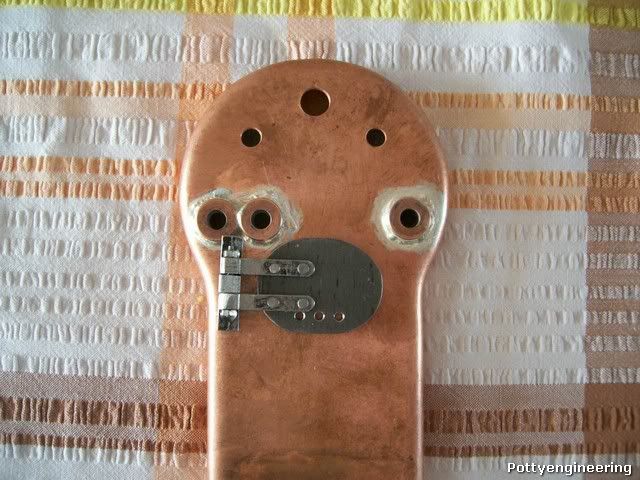
First turn up the parts drill a cross hole in the body 3mm, on the union leave a small boss 3.05 mm dia and drill a pilot hole in the other end part way through, press the boss into the body and solder the bits together.
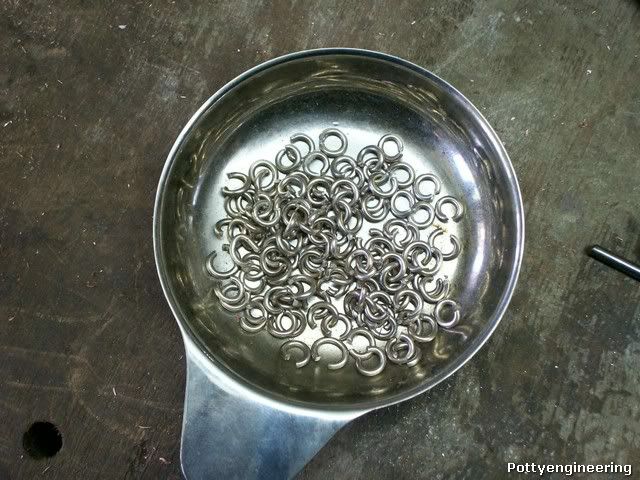
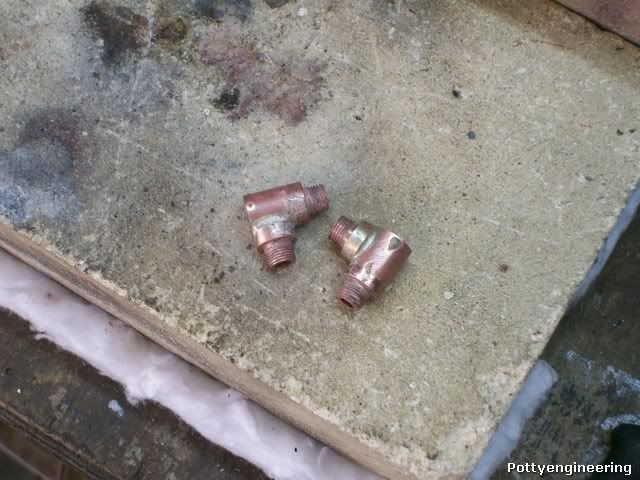
These are the bits

100_3979.jpg


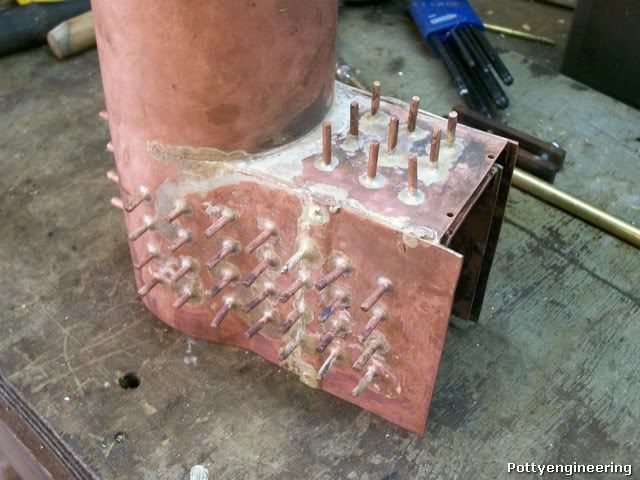
Bits prepped for soldering parts fluxed and a small nugget of solder put on the joint.

100_3982.jpg


When you solder the bits together don't direct the flame on the job you'll just blow the nugget off sneak up on it with the heat when the flux will go white then black then it melts when it melts it will hold the nugget in place give it more direct heat untill you see the nugget melt and flow into the joint, pickle, then drill through the pilot hole into the body, thats it job done

100_3988.jpg


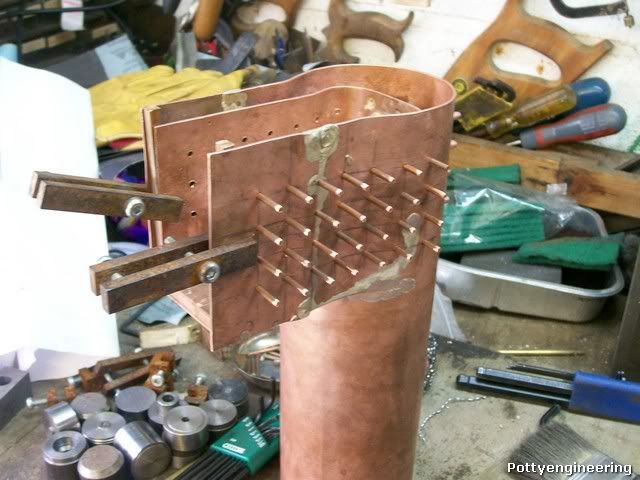
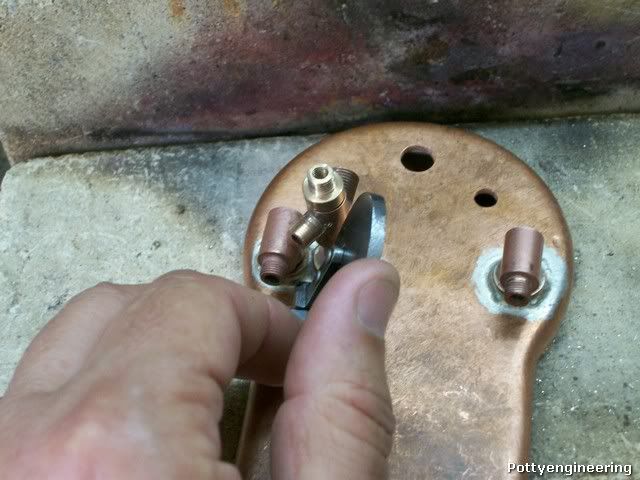
Now this shows the problem with the fitting in the boiler the door fowls them.

100_3994.jpg


100_3995.jpg


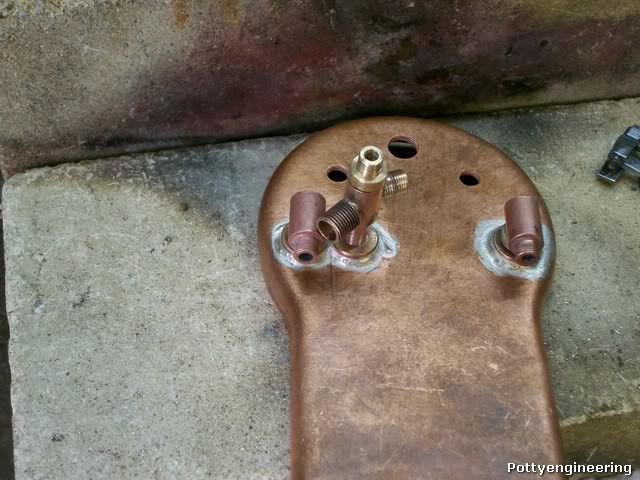
I arnt half glad I made the the fitting as anothe problem materialised, you can't fully screw the bits into the back head they clash with each other.

100_3998.jpg


I'm going to make a new back head but I'll leave that till next week as I'm starting to get brassed off with it, and when that happens I make mistakes.

I may have said before that this was the last engine Curly designed before he passed away the drawing and ME article was finished off by Martin Evans and apparently the two didn't get on, the boiler fitttings are Martins designs they are obviously not what Curly intended, I wonder how many other builders have fallen at this hurdle.

Cheers

Stew
 
Stew,

for those interested this is how to fabricate small boiler fitting up,
I'm definitely interested in how the small fittings are fabricated. The more detail, the better. Please keep posting about them.

Sorry about the interference problem. Now's a good time to find it though.

Dennis
 
how about a Pair of elbows on the Gauge to off set it away from the fire hole. you could make a nice neat all in one elbow combining the gauge

just a thought, but I may be wrong about what goes there.

Peter
 

Latest posts

Back
Top