Making a Boiler for a 3 1/2" Gauge Locomotive

Home Model Engine Machinist Forum

Help Support Home Model Engine Machinist Forum:

This site may earn a commission from merchant affiliate links, including eBay, Amazon, and others.
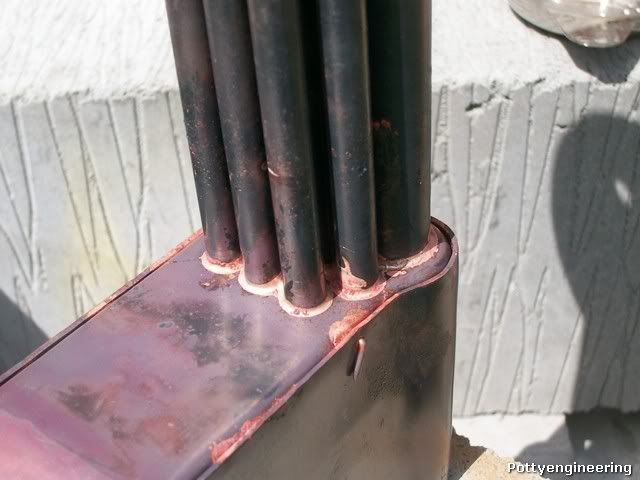
Went to the club track to see if I could touch base with the boiler inspector, and find out if he will be around next week, he wasn't there but I was telling one of the members about the my lack of rivets, he said I've got some you can have just follow me home, People can be real nice:-
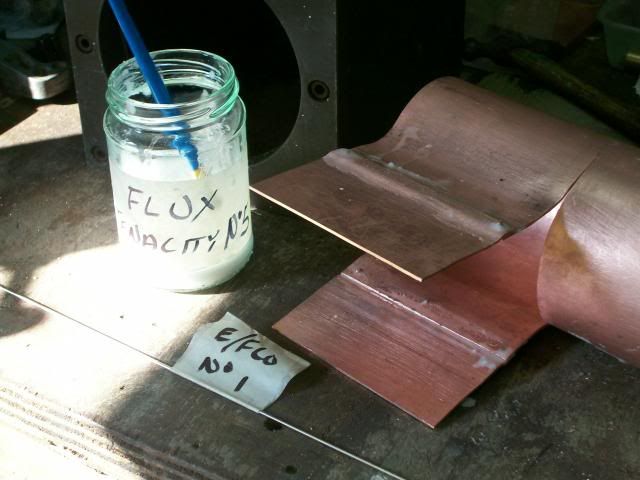
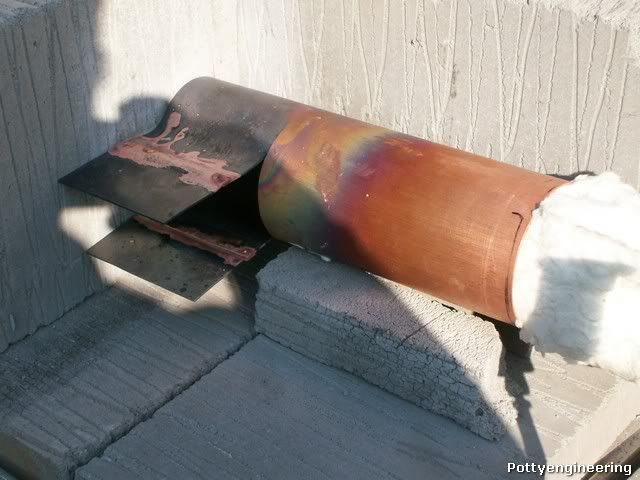
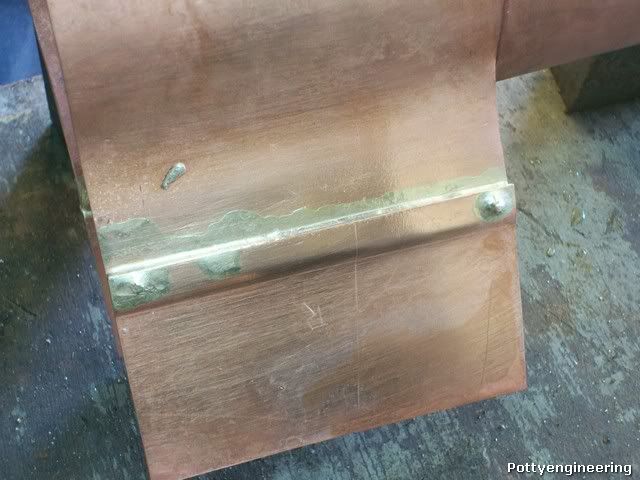
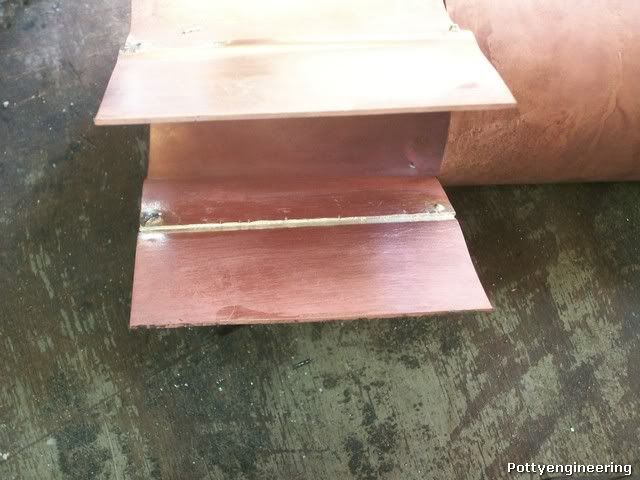
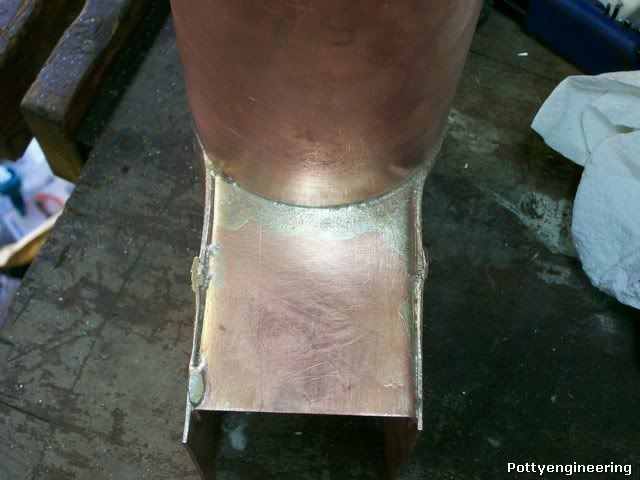
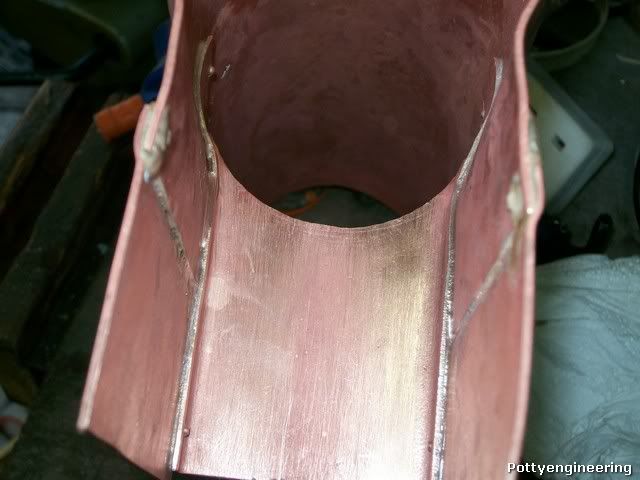
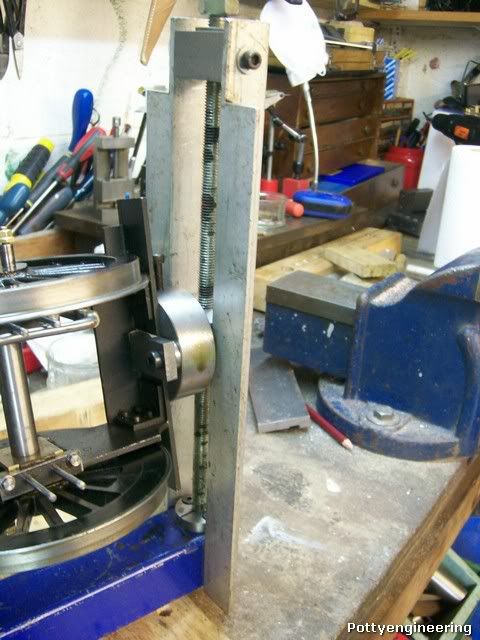
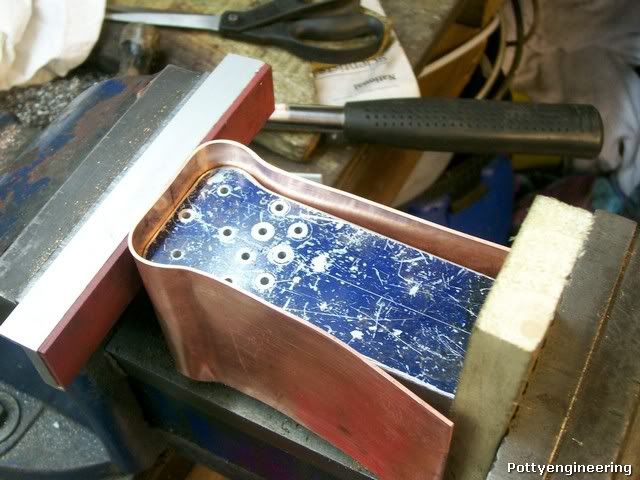
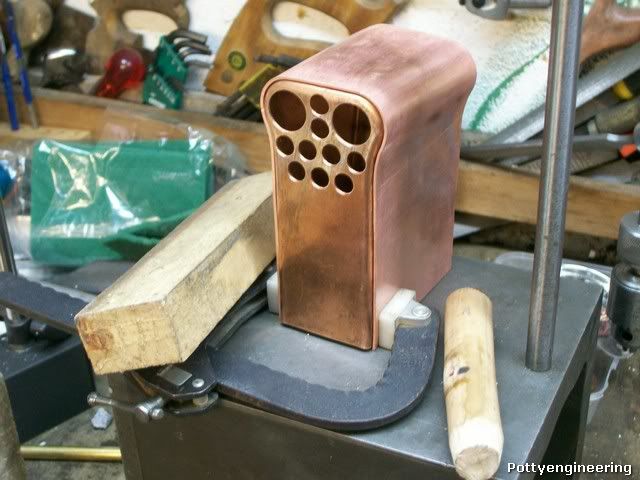
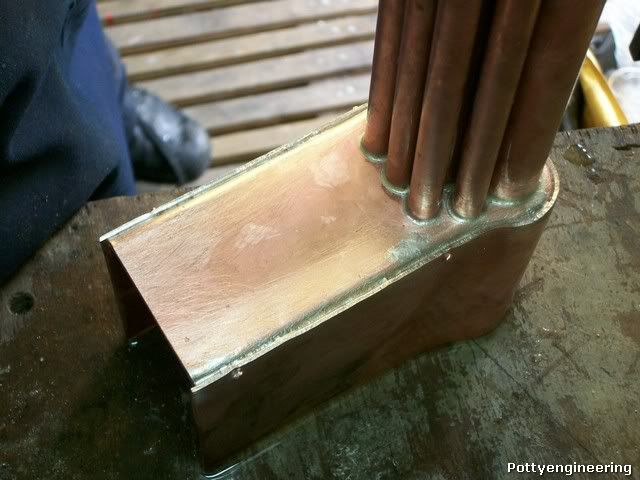
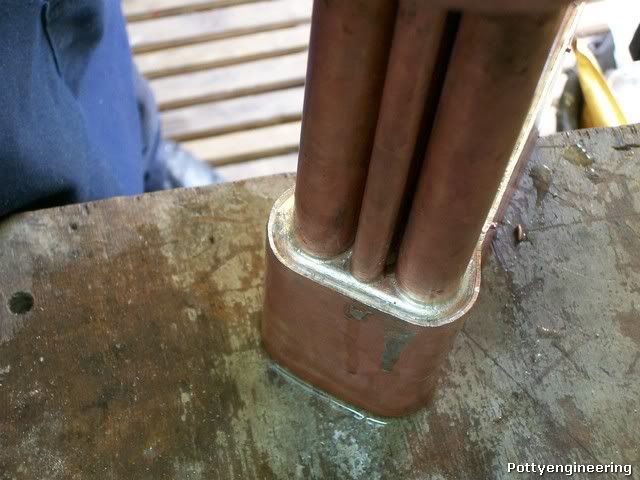
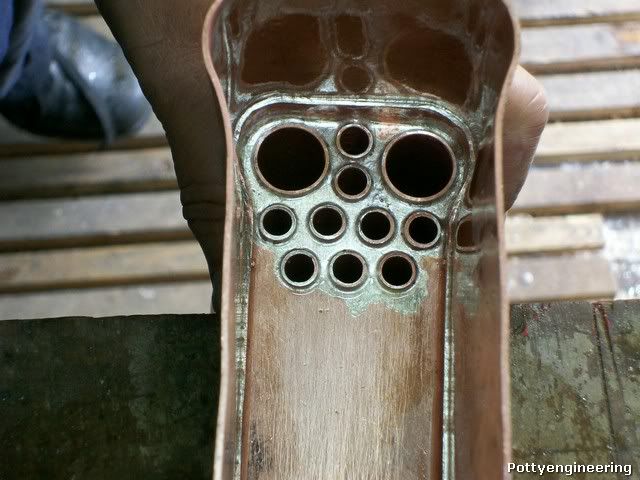
So looks like I'll be soldering next week.

Stew
 
Good going Stew Thm: - it's really nice when one meets someone who is willing to help out, like with the rivets :) Keep going - you have some very nice tips in your build Thm:

Bogs, thanks; my "personal little empire" depends on what I can get or make, so I don't care about the "metric" issue that much any more - in the finer threads I can't get that either. If I can't buy something locally or get it economically from overseas, I'll make it, and 40 tpi is just dandy, as I can easily turn it - easier than metric for me ;D Stew, my apologies for hijacking your thread; back to you now!

Kind regards, Arnold
 
Thanks Arnold

Well got the first joint soldered the fire box outer rapper extension:- the part to be joined were given a soak in the pickle for 1/2 hr then throughly cleaned with some wire wool, flux applied and the extensions were loosely riveted in place.

100_3791.jpg


Then onto the hearth a piece of solder was cut the length of the joint and placed on the joint I did an outside and an inside joint at the same heating, and I bunged the thermal blanket up the tube to keep the heat where I wanted it. fed a little solder into the joint and onto the head of the rivets

100_3794.jpg


I let it cool for five minutes then quenched it in water then into the pickle for half an hour, the pickle was then washed off in water, and the joint inspected, apply another dollop of solder to the joint, then with the boiler flipped over the other way and with less solder this time and the whole lot heated up again and a little more solder fed into the joint and on the other side of the rivets.

Back in to the pickle as before another clean and inspection not to happy with a couple of areas so again as before more flux and a bit more solder in the areas on concern.

Here we go outside.

100_3796.jpg


And inside

100_3800.jpg


Well thats me done for the day the rest of the day will be taken up with that great British institution:- the family barbeque, that is traditionally held on the first and often only dry sunny day of the year. The pleasant sound of birds song and smell of flowers will be replaced by the sound of male of the household cussing as he struggles to get the barbeque lit and the stench of charcoal, lighter fuel, and cremated sausages.

Cheers

Stew
 
looking good ,glad you are in close contact with the inspector

you maybe did not get it hot enough the ss should have flowed though the joint , note it will tend to flow to the hottest part of the joint


BTW the burner you used for the boiler work will light the charcoal PDQ ::)

had to abandon the WS today to hot temp gauge said 30deg c


Stuart
 
Thanks Stuart

I checked that the solder had flown through, it had, but thought a little bit more wouldn't do any harm.

Nipped round to the club track this afternoon to see if I could catch the inspector, he was their just about to steam up his own loco. Asked if he wouldn't mind looking at my first joint, gave me the thumbs up, lots of blokes were their I think the sunny weather had brought them out, just the site of my efforts got them talking:- more advice about boiler making came my way than I could take in at one time. Gave me confidence to keep going.

Cheers

Stew
 
just think each stage out in you mind before you proceed do not rush into things ,as I have said before boilers can and go wrong very quick

with the tubes with such a small boiler you could assemble the fire box wrapper to the fire box tube plate and insert the tubes with a ring of SS around each one and do the lot with one heat from the water side

Stuart
 
Thanks for the good advice Stuart thats worth remembering. I'm planning on doing the tubes and wrapper in one go but from the other side.


Well had a master class from John this afternoon on silver soldering, we soldered the throat plate up, and I learnt a lot in the process, it really is a two man job using propane on a lump of copper like this boiler.

First of all I gave the parts a good clean first in the pickle then with a wire brush, I loosely riveted the throat plate in place with four rivets one mid way on each side of the fire box and one each side of the boiler tube where the saw cut ended, closed any big gaps by tapping and pinching with pliers, and applied flux. One thing I learnt from Johns was you don't need a lot of flux I was lathering it on.

This was the first set up. Sorry didn't take a lot of pics it a process where once you start you can't keep breaking off to take a pic, so you'll have to put up with my description.

We placed a length of 3 mm silver solder down each side of the plate an along the back, then with me operating one torch for back ground heating and John adding the filler rod and controlling the heat with a smaller torch and instructing me where to direct the background heat and when to take it off, with the top once done we flipped the boiler on its side and soldered up around the boiler tube, flipped it on the other side and ditto , allowed it to cool and have 1/2hr in the pickle a carefull inspection showed a couple of areas that needed a bit more work, so same procedure but concentrating on areas as required.

This is what the job looks like.

Top

100_3803.jpg


Inside

100_3807.jpg


The fillet around the curve is on the other side and as its down the bottom of the tube it doesn't take a good pic, so you'll have to believe me:- its real nice.

I'll run this past the inspector.

Stew


Didn't get anything done today except to try the boiler the boiler in the frame of the loco.

100_3809.jpg


The frames somewhat stripped down, I've removed the front wheel and the connecting rod so that I could trial fit the water and oil pumps.

You can read the build log her http://madmodder.net/index.php?topic=547.0

Thanks

Stew
 
That looks amazing. Fits so well.

Well Done! Thm:

Kel
 
Stu

Its going to be a stunner.

And a nice rig for working on the engine. I assume it can be rotated in two axis to provide access with any damage occurring?

Pete

 
Thanks Kel

Pete:- Yes it can be raised and lowered and the engine rotated, its based on others I've seen at shows, mine is over engineered as the stretcher along the bottom is not need, the frame has enough strength to support itself, once made it can be used for any loco assembly. I wasn't too fussy when I built mine just used stuff that I'd got:- ally angle, box section, screwed studding, 1" square mild steel, wood plank:- just as long as it does the job.

Her's a few more pics so you get the idea.

100_3816.jpg


100_3813.jpg


Cheers

Stew

 
By gum Stew there is plenty of space between the frames on that loco

at the moment mine is tweezers just to get a bolt in had to fit some fitted bolts for the pony truck support today, and that is with frames that are 4 foot long and getting heaver by the day
it got all the stretchers as per full size all fabricated up

I must get some pics posted some time when all the wheels are on , what would you like top and bottom shots , but I will start a thread if I do post


Stuart


BTW boiler looking good so far but as you have guessed you are doing the easy heats wait till its altogether , eg foundation rings and back head then the fun will start

the big burner in the pics should be OK looks to be a 73 kilo watt one , as the build progresses make sure you have enough fuel gas to complete the heat as running out is not fun :eek:
 
lordedmond said:
By gum Stew there is plenty of space between the frames on that loco

at the moment mine is tweezers just to get a bolt in had to fit some fitted bolts for the pony truck support today, and that is with frames that are 4 foot long and getting heaver by the day
it got all the stretchers as per full size all fabricated up

I must get some pics posted some time when all the wheels are on , what would you like top and bottom shots , but I will start a thread if I do post

Stuart

make sure you have enough fuel gas to complete the heat as running out is not fun :eek:

Yes things can get a bit tight, when I was setting the valve timing on mine it took an age to take the valve cover off and put it back on again and as for getting the linkage in place, I must have lost a good few BA nuts and pins on the shop floor.

We've got two part used tanks of propane on the go, they have both bin used for quite some time so not sure how long they will last for, so we have a spare tank available.

Also we have another 73 kilo watt burner available so we can run both torches with that size, also available is a pair of bigger burners, so hopefully we should be able to get enough heat into the larger mass of copper as the boiler nears completion.

Yes I would be interested in seeing some pics of your loco, if you've got an assembly rig Peter may find a pic of that useful also.

Peter I'm very interested in your Rob Roy thread as well.


Got a little more done today forming the firebox rapper:-

The rapper was cut to the correct size so first job was to anneal and pickle it then mark the middle and using the end plate former get it bent roughly to shape with the help of the vice, just by hand.

100_3817.jpg


It was annealed and pickled again

Then using the tube plates as formers and bits of woods as bats it nocked to shape.

100_3819.jpg


Tomorrow's job is to solder together the flue tubes the fire box tube plate and the rapper.


Cheers

Stew
 
Fire box looking good glad you have though about the gas supply

no I do not have an assembly frame , the WS is quite small , with a Myford connoisseur , SX3 mill , band saw and cutter grinder its crowded, now that I need wheels myself I have to be careful.

I have used one in the past but this one is very heavy and I worry about the stability.

over the assembly bench I have a 250kg electric hoist on a very heavy door track ( rated at 600kg ) , as the loco has lifting points in the design I use a lifting frame with the hoist. if that will not suffice the whole thing is rolled over.

what I try to do is to do all the work under the frames first

As I have said its 4 foot long tank engine and the tanks do not have a straight line in them the sides have a large radius inside and out

I have to find a way of reducing the pics as they are 18mp and soon expand to 50 mp if they have been edited
 
lordedmond said:
I have to find a way of reducing the pics as they are 18mp and soon expand to 50 mp if they have been edited

Thanks Stuart I appreciate the size of you loco better now.

I use Faststone Photo Resizer if you google it you can get a free down load.

Hope this helps

Stew
 
Another master class from John on silver soldering.

This is the set up for soldering the flue tubes to the firebox tube plate, stepping the tubes worked great in prevent the tube plate slipping down, I cut a bricks to length to give a bit of support.

100_3821.jpg


Some rings of solder were made by simply wrapping the rod around one of the tubes and snipped them off, the tube ends and tube plate were fluxed, and the solder rings placed over each of the tubes.

100_3822.jpg


One things John has taught me is that you don't directly heat up the solder you start by adding background heat to the job slowly bringing the flame up to where the joint is to be formed this way you gat a uniform heat in the joint. We worked with two burners one each side of the job as the solder started to melt we moved the torch slowly around so that each ring of solder was melted in turn.

With the tubes fixed and after a spell in the pickle the rapper was soldered to the tube, this time the job was flipped over so that the tubes were on top, again lengths of solder were placed along the joint, and additional solder fed into the joint as it melted.

Here's the job before pickle.

100_3823.jpg


And after

100_3827.jpg


100_3828.jpg


100_3831.jpg


Cheers

Stew
 
looking good , now for the fun bit getting that lot inside the other bit and lined up.

as its a LSBC boiler I am assuming girder stay on the top of the fire box wrapper to the outer wrapper ;D they are fun to solder up


Very nice indeed Stew, I couldn't have done it any better myself.

BTW, I had to leave before the final pickle, so hadn't actually seen how well it turned out.

The hard bits are yet to come, but at least you are learning as we go along.


For when you build a bigger one. ::)


John
 

Latest posts

Back
Top