You are using an out of date browser. It may not display this or other websites correctly.
You should upgrade or use an alternative browser.
You should upgrade or use an alternative browser.
Brians Radial Engine
- Thread starter Brian Rupnow
- Start date

Help Support Home Model Engine Machinist Forum:
This site may earn a commission from merchant affiliate
links, including eBay, Amazon, and others.
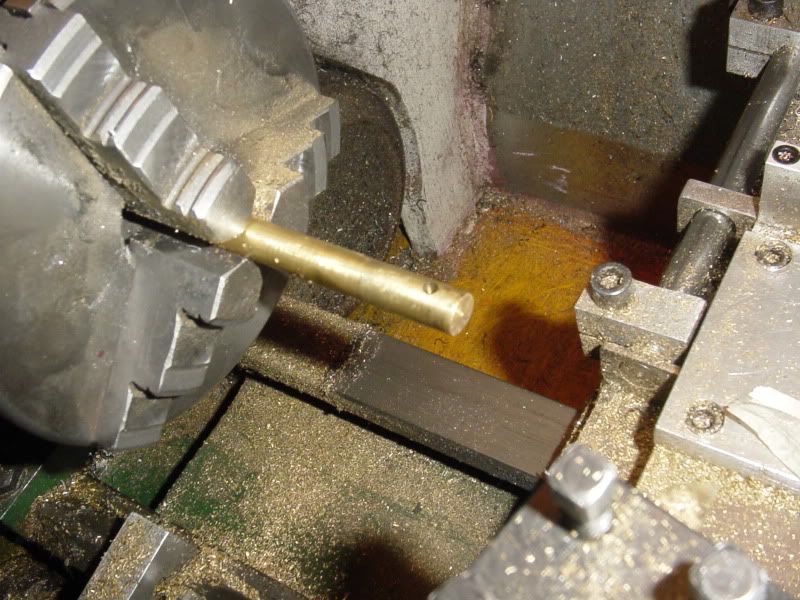
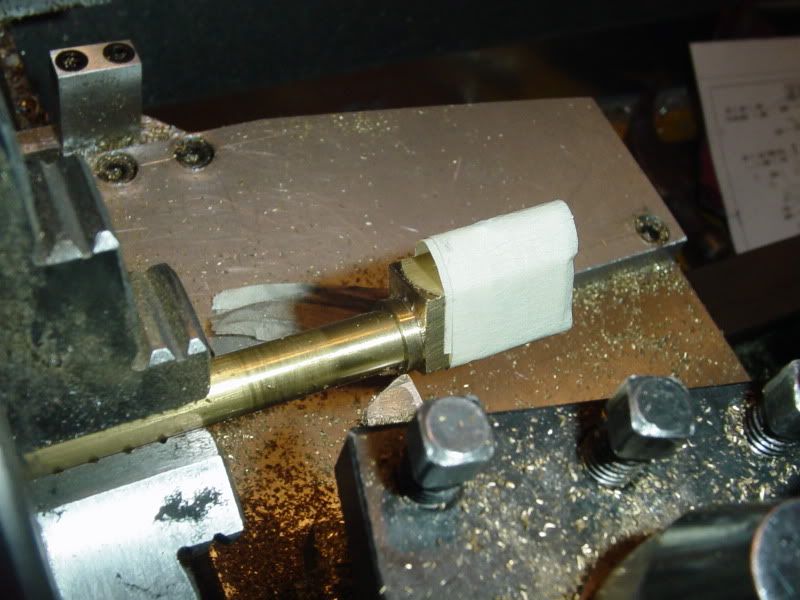
I'm going to show you a sneaky trick I used for putting the round diameter on the end of the rectangular cylinder without using my 4 jaw chuck.--First I drilled a 1/8" diameter cross hole about 1/2" in from the end of a peice of 3/8" diameter brass rod and put it in the 3 jaw chuck.
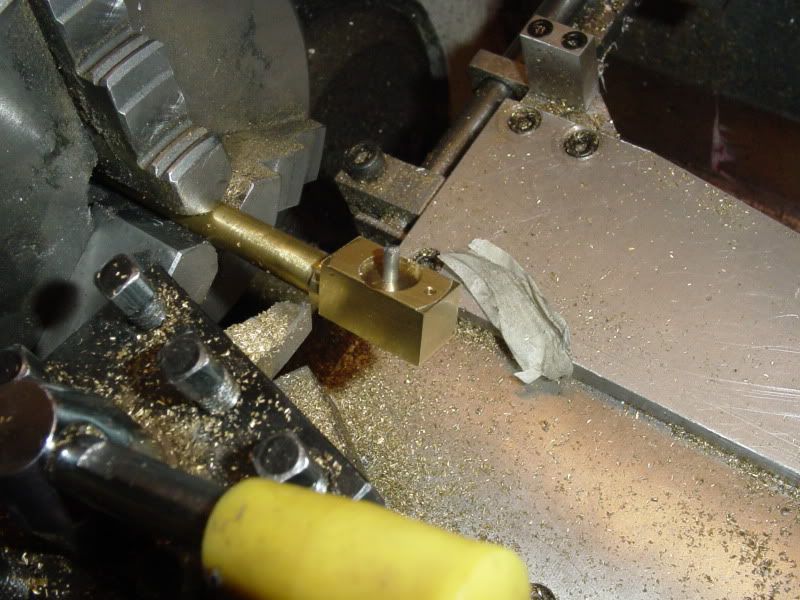
Then I slid the cylinder down over the end of it and pushed a peice of 1/8" diameter cold rolled shaft thru the 1/8" reamed hole in the side of the cylinder and into the hole in the brass rod. (This is a "posed" picture------in reality, the round diameter is not turned yet at this stage.)
Then I wrapped a peice of masking tape around it to keep the steel pin from coming out.
Then I went ahead and machined the diameter on the outside of the cylinder.
I am thinking that the reason I had some chatter marks is primarily that I had the end of the 3/8" brass rod stuck out a bit too far from the chuck jaws.


Well, Thanksgiving is over for another year at my house. We have our celebration meal a day early to allow me a day to travel up to Bancroft and collect my ancient mother on Saturday and deliver her home on Monday. Massive amounts of turkey and apple pie were devoured, and 4 generations represented, from my 89 year old mom to my 2 year old granddaughter. Sure thing, nobody left the table hungry!!! I tried to sneak down into my little machine shop for an hour, but got caught and yelled at by my wife, so no machining accomplished today. I'm tired, I'm stuffed, and I'm happy.----and a Happy Thanksgiving to all my Canadian friends on the forum.-----Brian
Krown Kustoms
Well-Known Member
- Joined
- Aug 6, 2009
- Messages
- 313
- Reaction score
- 2
Nice trick, thanks☺
-B-
-B-
chuck foster
Well-Known Member
- Joined
- Jul 11, 2007
- Messages
- 704
- Reaction score
- 2
nice tip on the cylinder turning :idea: never would have thought of doing it that way.
chuck
chuck
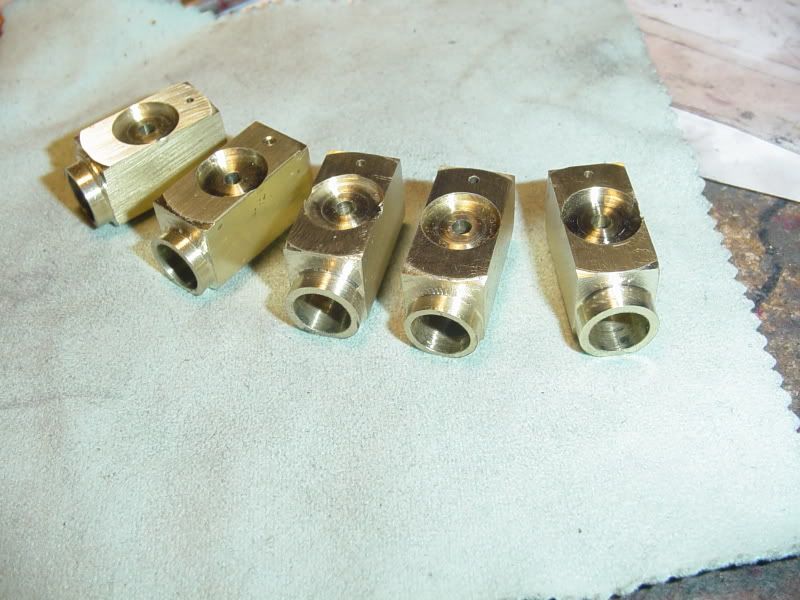
Five little piggies, all in a row---Company all went home, wife and mother layed down for a snooze, and I sneaked away to my shop. Finished up the last of my 5 cylinders. I used Kvoms suggestion of using a parallel for a "deadstop" at the end of my vice jaws and it worked just fine. Thank you Kvom--It made multiple set-ups much quicker. I just love it when somebody shows me a neat new trick!!! We are closing in on this engine. All I have left to make are 5 pistons and 4 connecting rods---and a whack of silver soldering.

Krown Kustoms
Well-Known Member
- Joined
- Aug 6, 2009
- Messages
- 313
- Reaction score
- 2
Eagerly waiting.
-B-
-B-
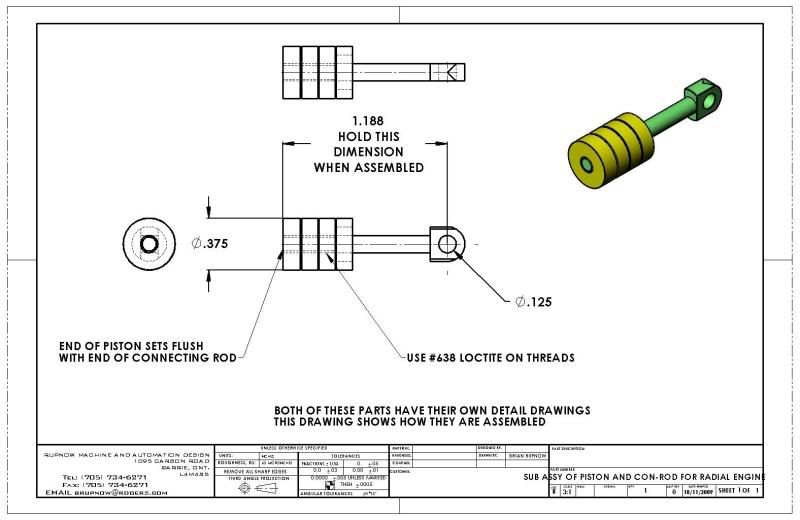
A plethora of pistons---4 laying beside the cylinders and one mounted on the master rod.
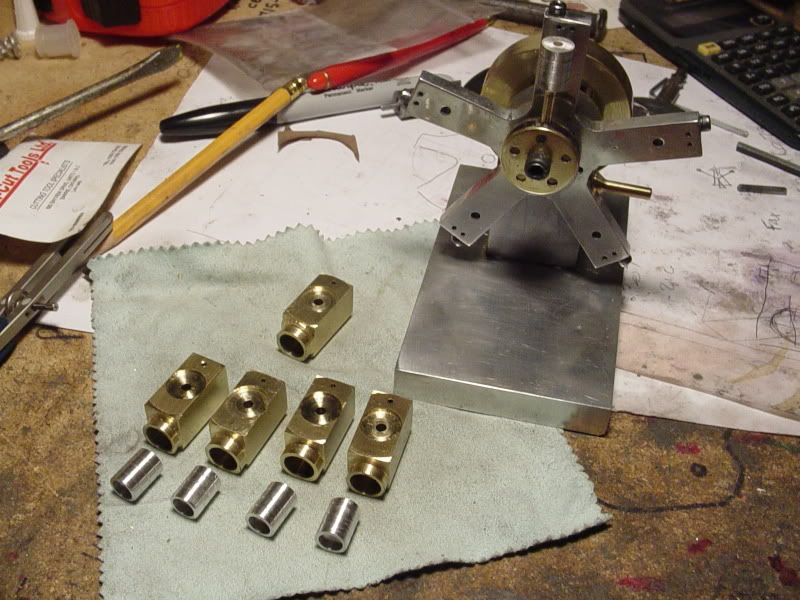

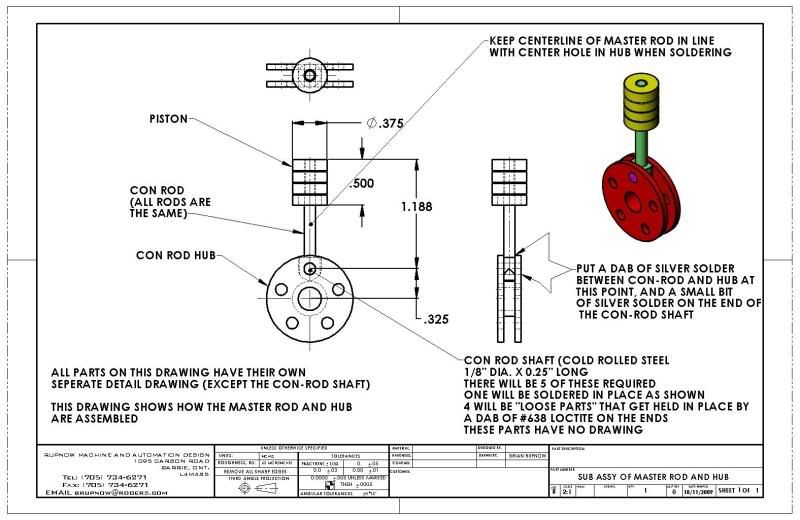
This morning I finished the connecting rods. My, but they're tiny little buggers!!! I even found the piston I lost in the swarf pile last night ??? ??? (I lost track of how many I had made, could only find 3, so I built another. Now I have a spare!!! Yahoo---I just had some REAL WORK come in. Gotta quit playing machinist and put my design engineers hat back on now. Progress will be slowing down a bit now.
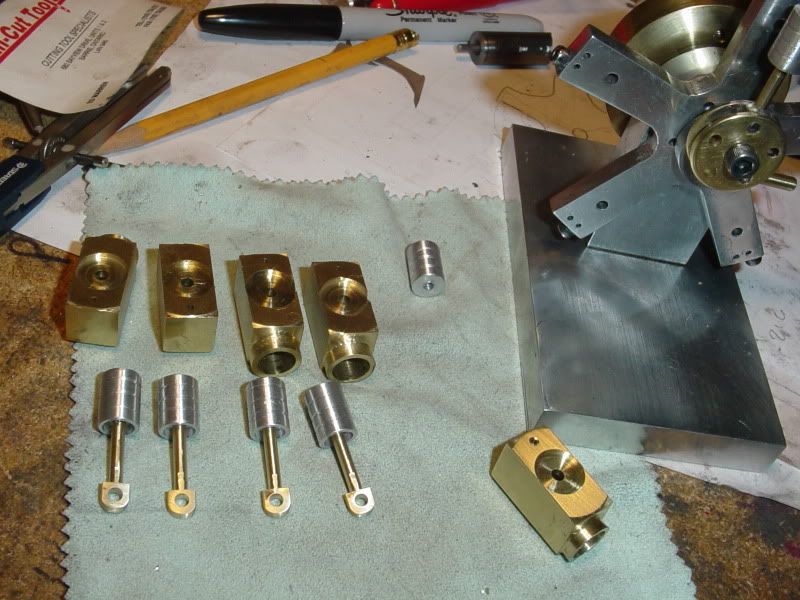

This evening we have 5 "Cylinder pins". Not the greatest threading job in the world, but the threads will be good enough to hold a #5-40 hex nut in place. (And yes, I used a threading die.) Now I'm off to the garage to silver solder these pivot pins into the cylinders.---Wish me luck!!!!
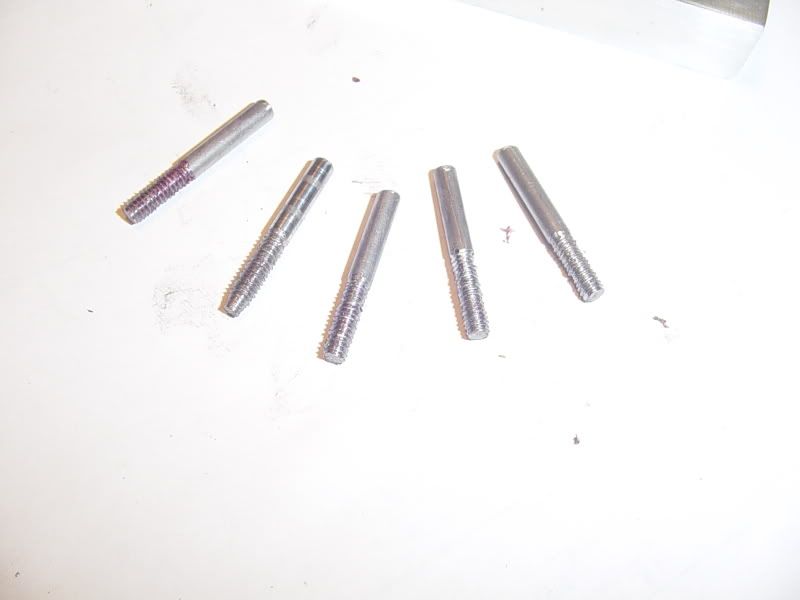

Yes, they are on a 1/8" diameter. As I said, they are not the greatest threads, but they will be sufficient to hold a #5-40 nut in place. They have to be chased anyways after my silver soldering is finished, and they should clean uop some then.
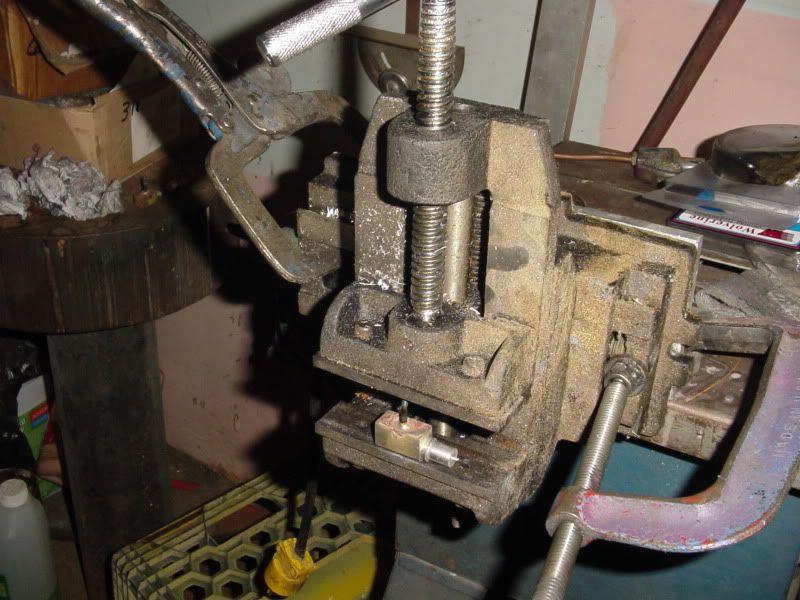
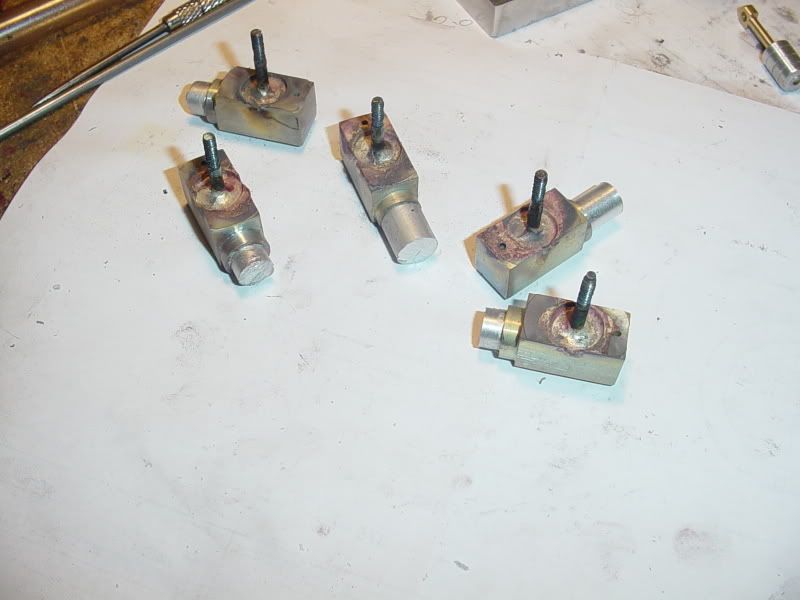
Making it up as I go along---Take#2----I decided not to build a jig to solder the cylinder pins in place. Since silver solder will not stick to aluminum, I turned five 3/8" diameter aluminum plugs to insert into the cylinders, full length. Then I used one of my home made gasket punches to cut 5 peices of 1/32" thick paper gasket to 1/8" diameter and dropped the circle of gasket material into the 1/8" hole in the brass cylinders. Then I set up one of my old vices and after inserting the cylinder pins I closed the vice on them, one at a time and silver soldered them. The vice is not tight--its just snug enough to keep the pins from jumping out of their holes when the flux begins to melt. The resulting steam as the water in the flux boils away will lift the pins out of the holes if they are not restrained as shown. The soldering was succesfull, and now the cylinders are cooling on the end of my desk. If I have lived right, I will be able to get the aluminum plugs out after things cool down.


Brain, it would be best to wait till you are done to down load the drawing and thanks for posting the pictures of the parts and how they were made on the lathe or the mill for us who are not as sharp, I am ready to see it run, thanks again for sharing, Lathe Nut
zeeprogrammer
Well-Known Member
- Joined
- Mar 14, 2009
- Messages
- 3,362
- Reaction score
- 13
Brian Rupnow said:If I have lived right, I will be able to get the aluminum plugs out after things cool down.
Had I said that...it would be a certainty the plugs are there forever. Forever!
Enjoying the thread Brian. Thanks.
Similar threads
- Replies
- 413
- Views
- 42K
- Replies
- 61
- Views
- 8K


