A Table Engine Tale

Home Model Engine Machinist Forum

Help Support Home Model Engine Machinist Forum:

This site may earn a commission from merchant affiliate links, including eBay, Amazon, and others.
Hi again guys - thought you would like to see the proof ;D

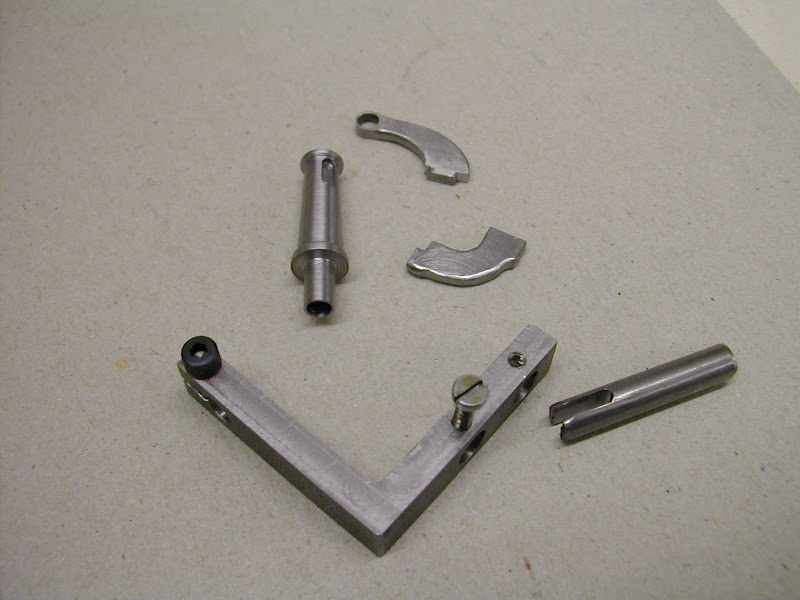
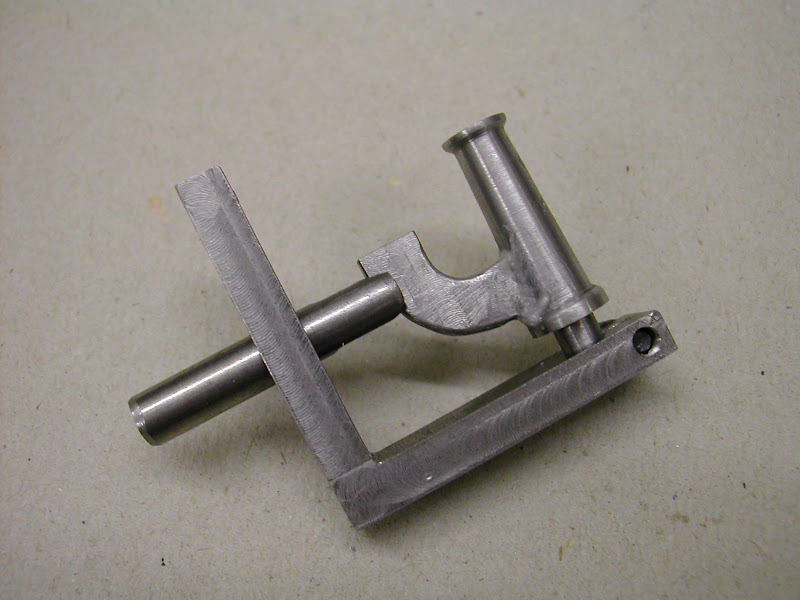
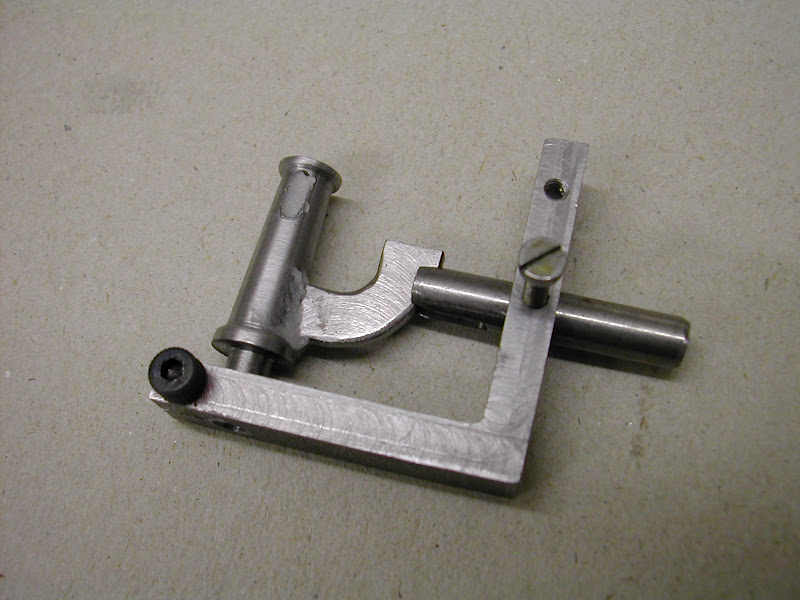
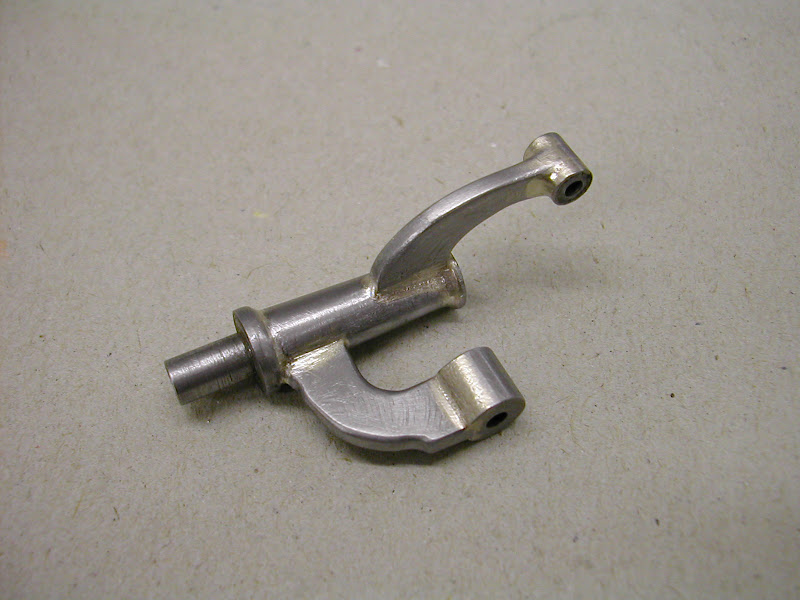
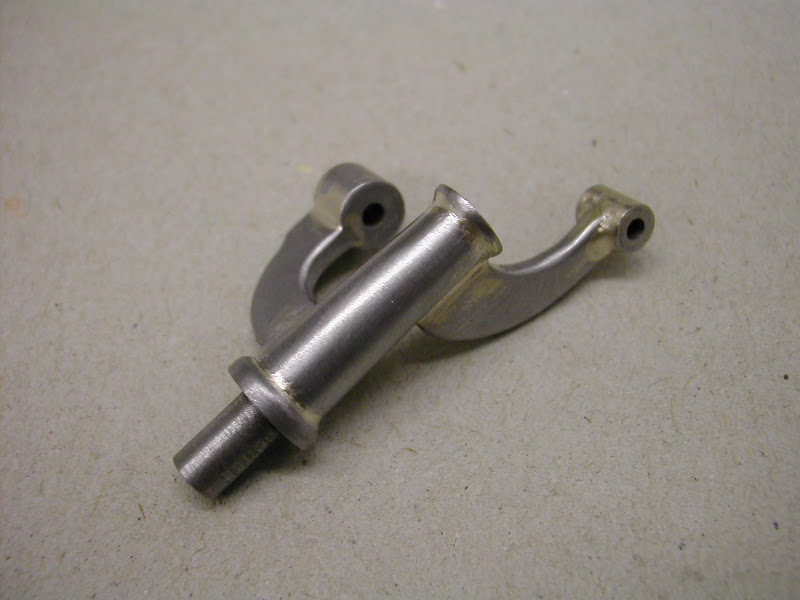
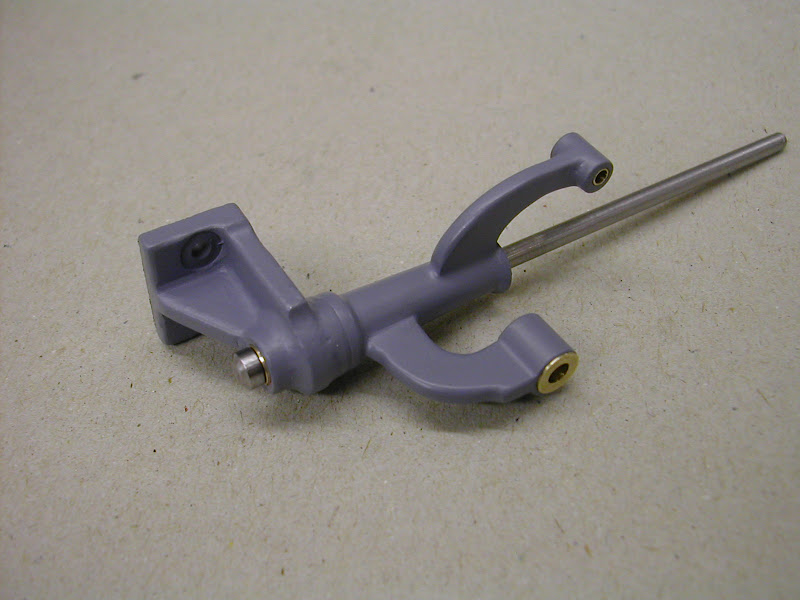
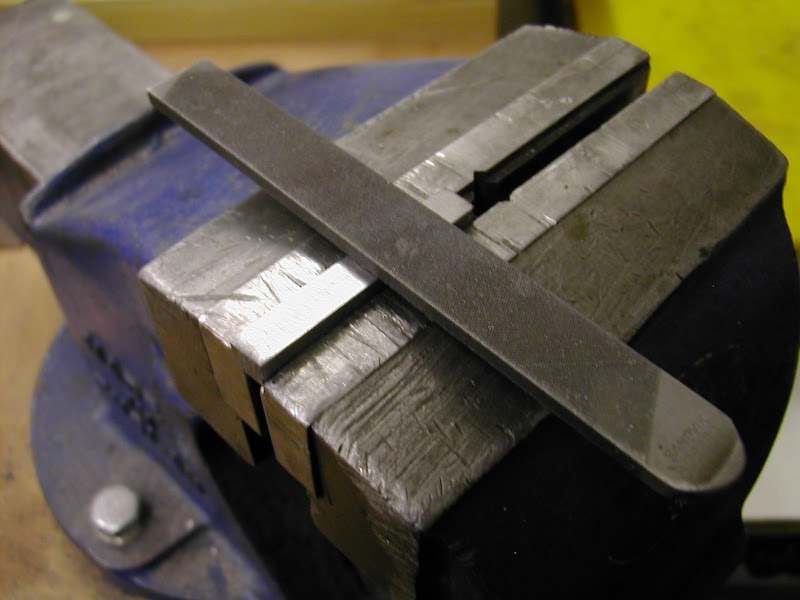
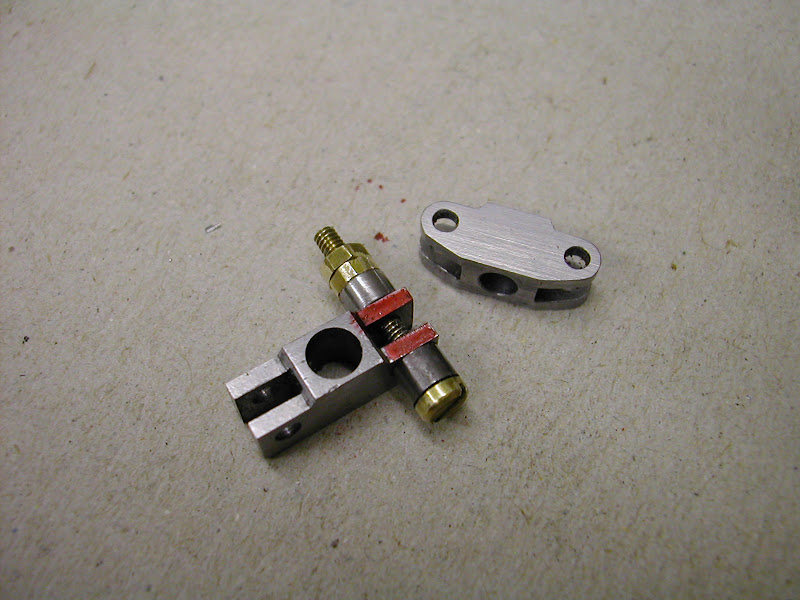
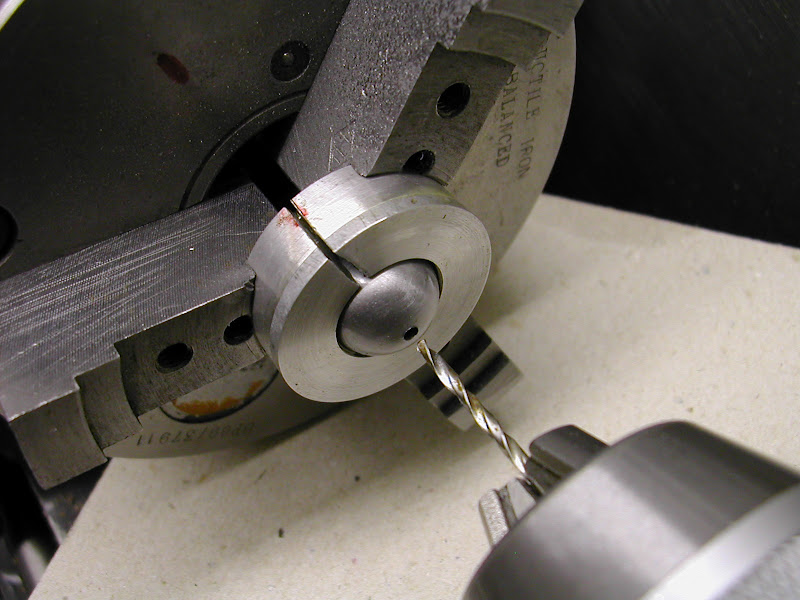
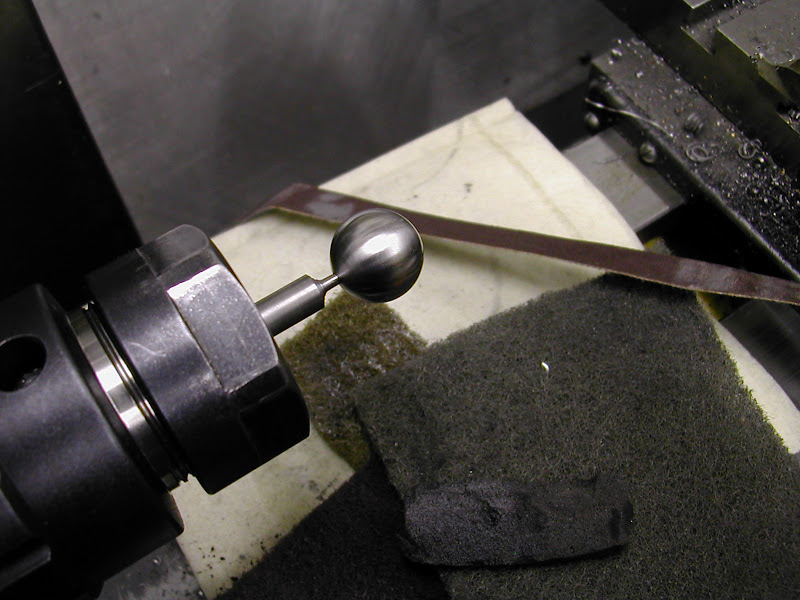
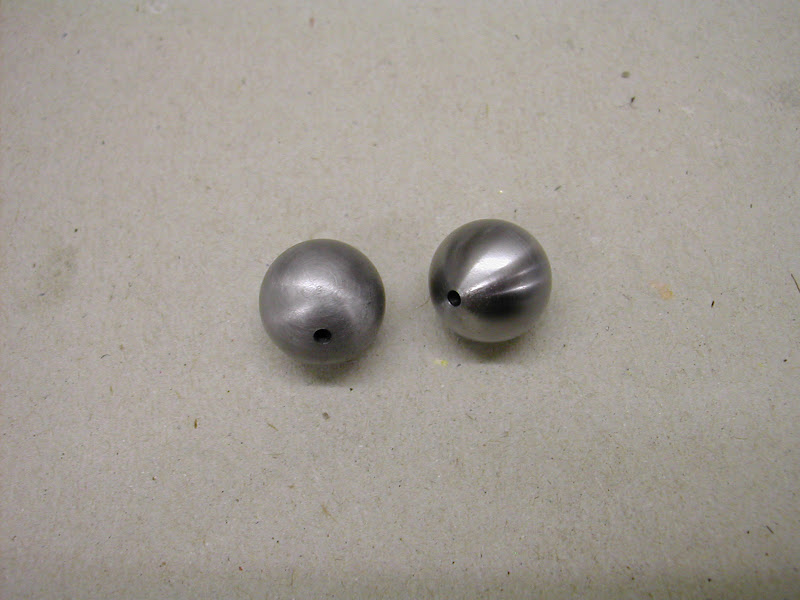
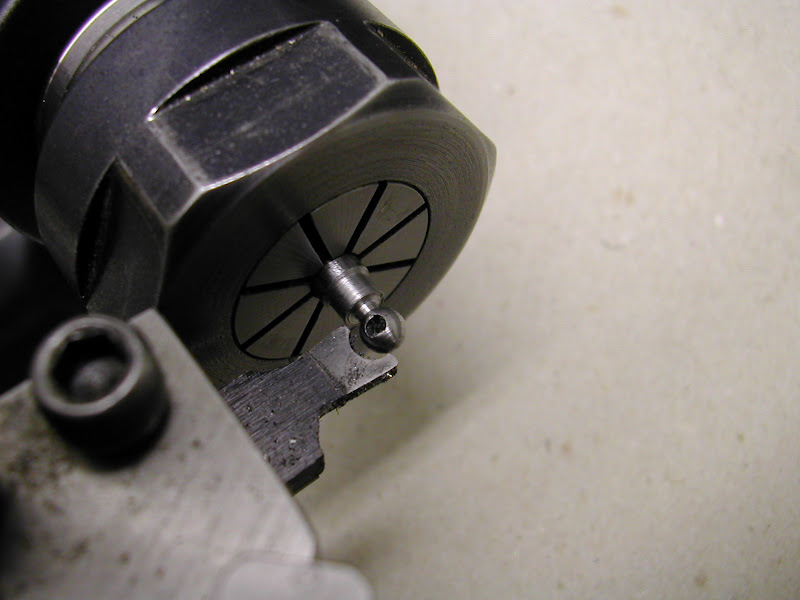
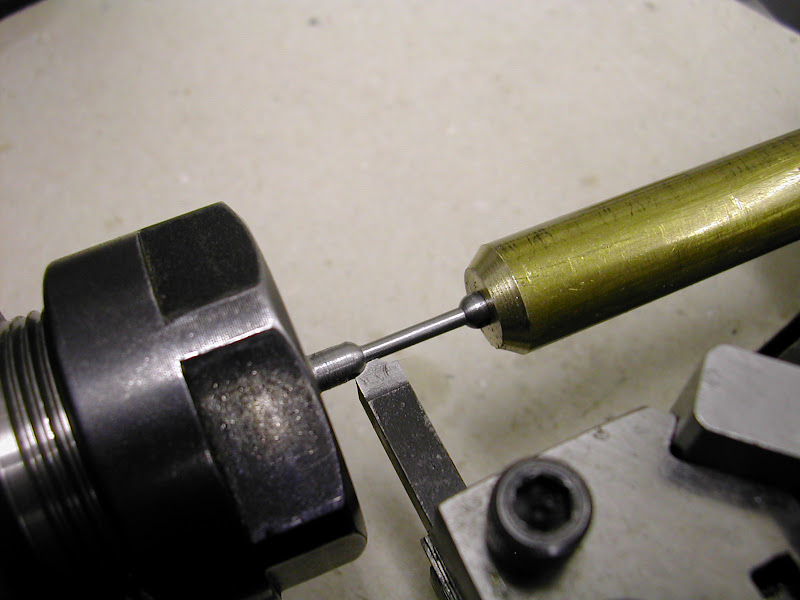
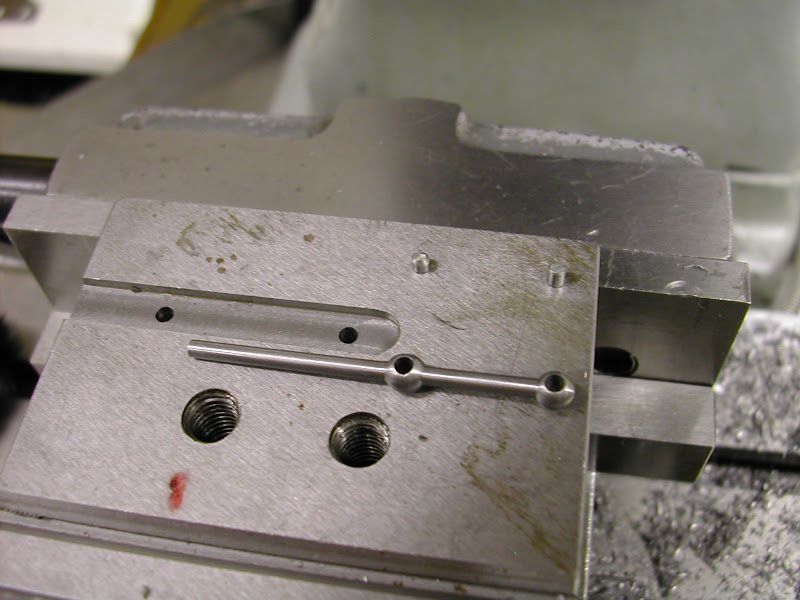
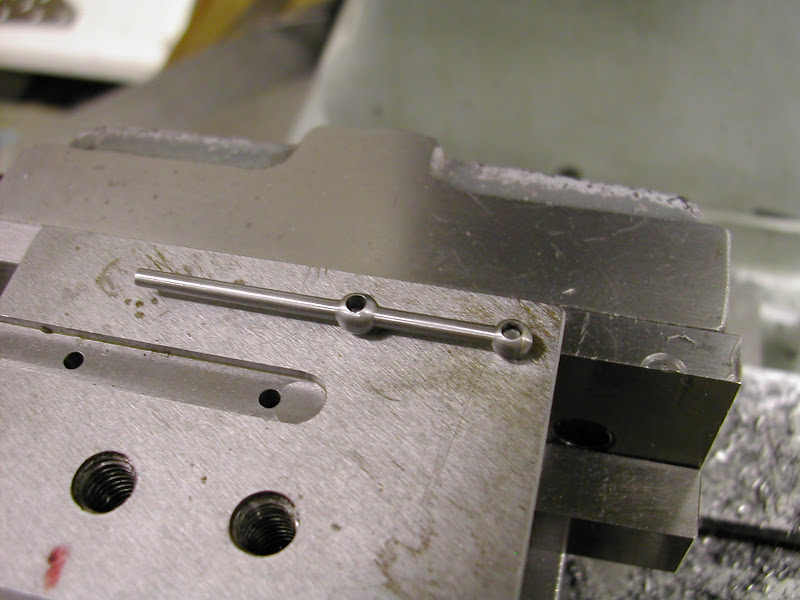
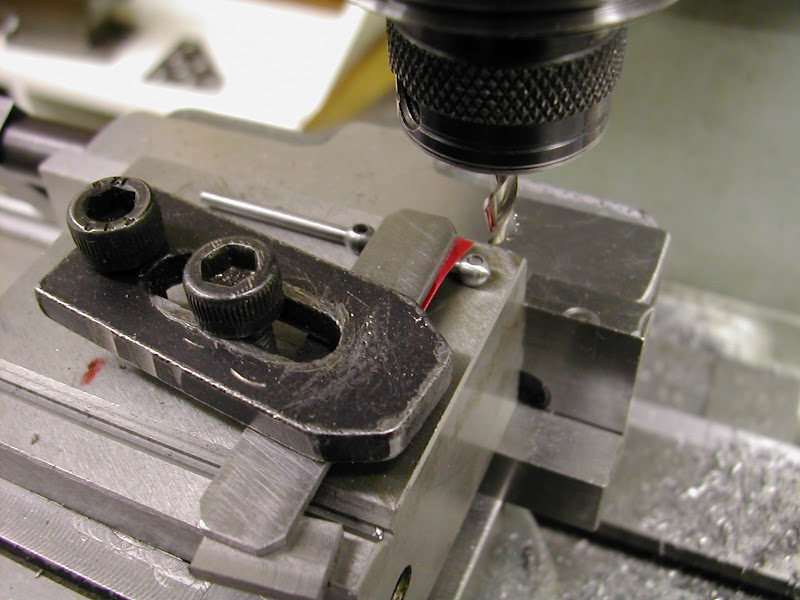
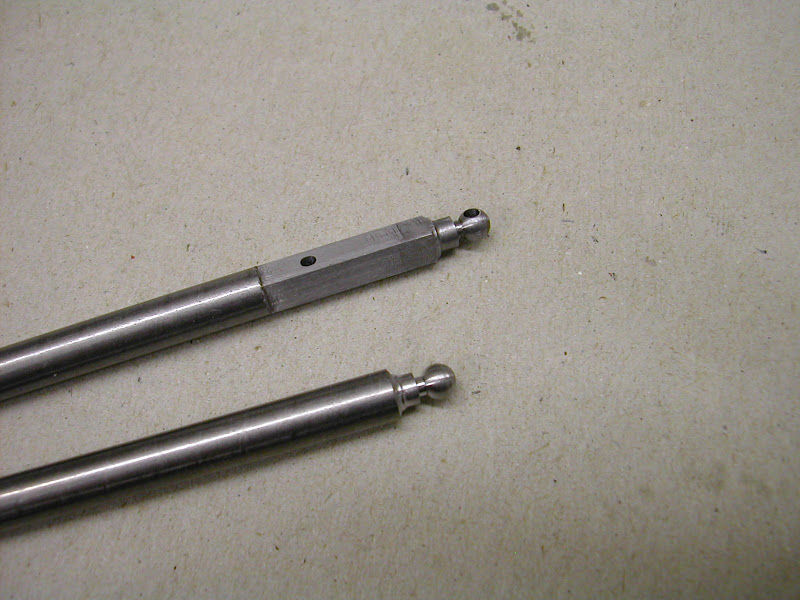
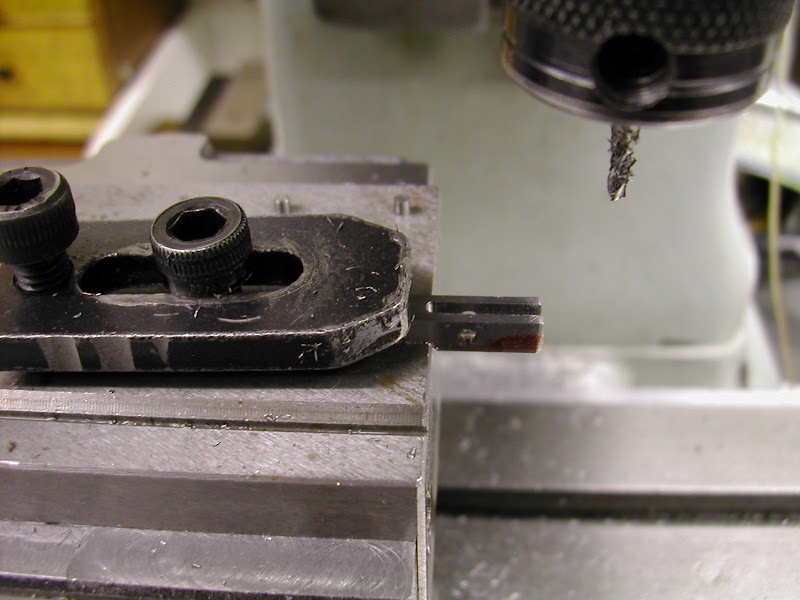
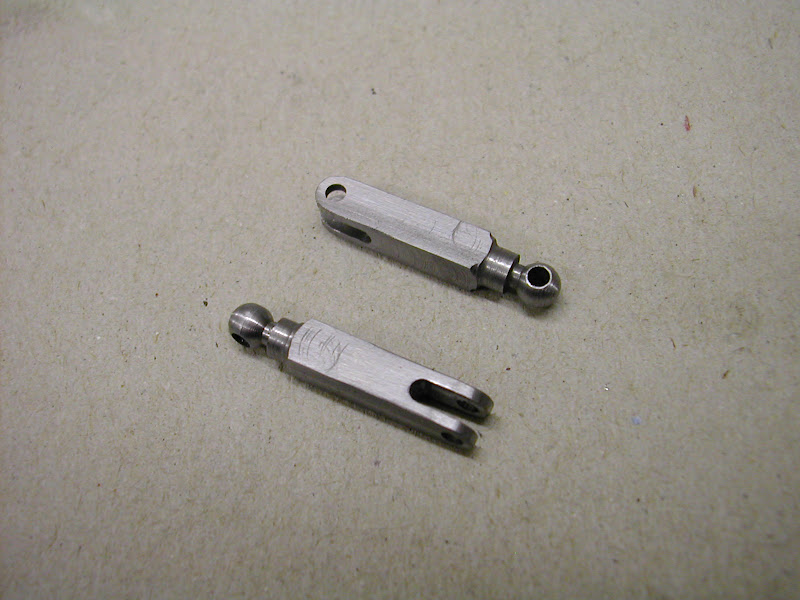
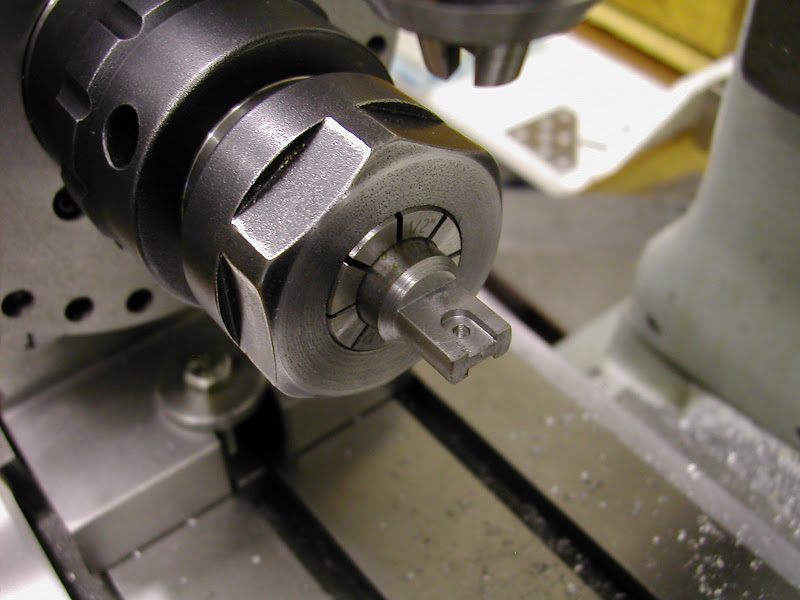
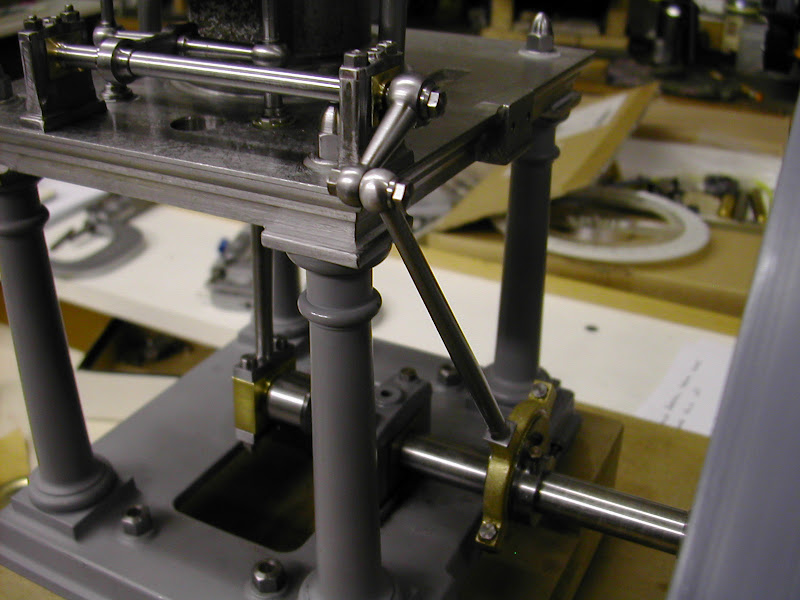
Made a proper rod today and a nice little bronze bushed pin and assembled it all up.
DSCN3908.JPG


DSCN3910.JPG


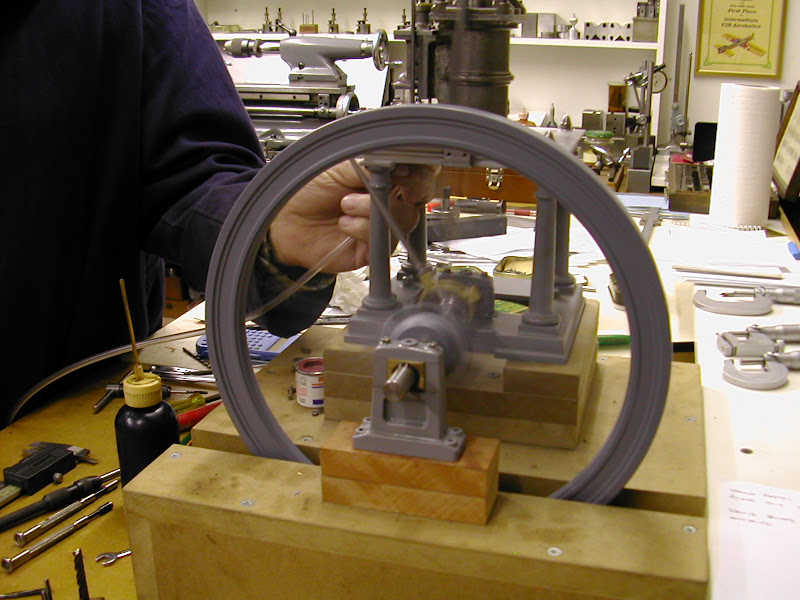
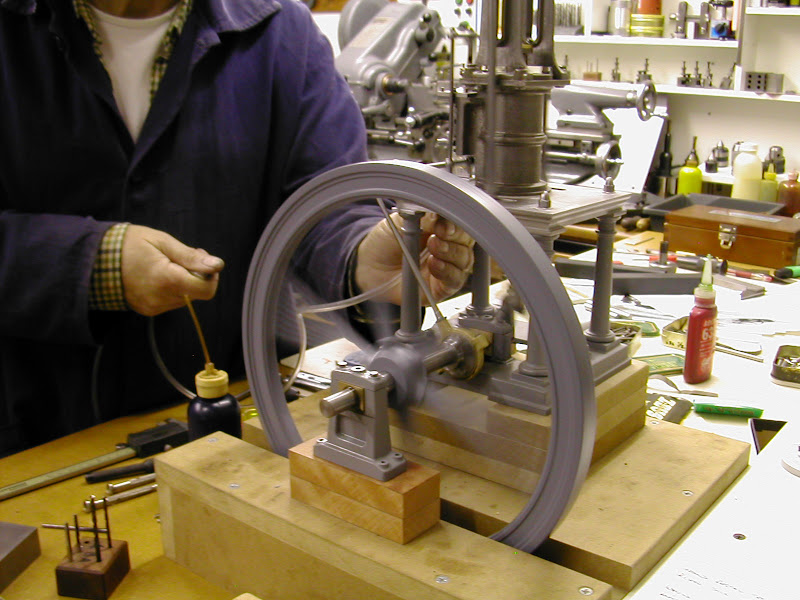
Enlisted the help of Sue (note the better quality pics :-[) and tried to get the flywheel in semi motion. It looks as if it's revving like an I/C motor but the airline is just stuffed into the steam chest hole, air escaping all round and pressure about 15psi. It's running at no more than a fast tick over.
DSCN3913.JPG


I tried crimping off the tube to restrict what little flow there was further but the camera still couldn't capture it. No video as yet I'm afraid but a friend is due to visit next week who may just be able to help so in the meantime this is the best I can come up with. The exhaust gives a lovely soft 'chiiiffffff' 'chuuffffff' on each stroke so hope that doesn't disappear once the exhaust pipe is connected.
DSCN3915.JPG


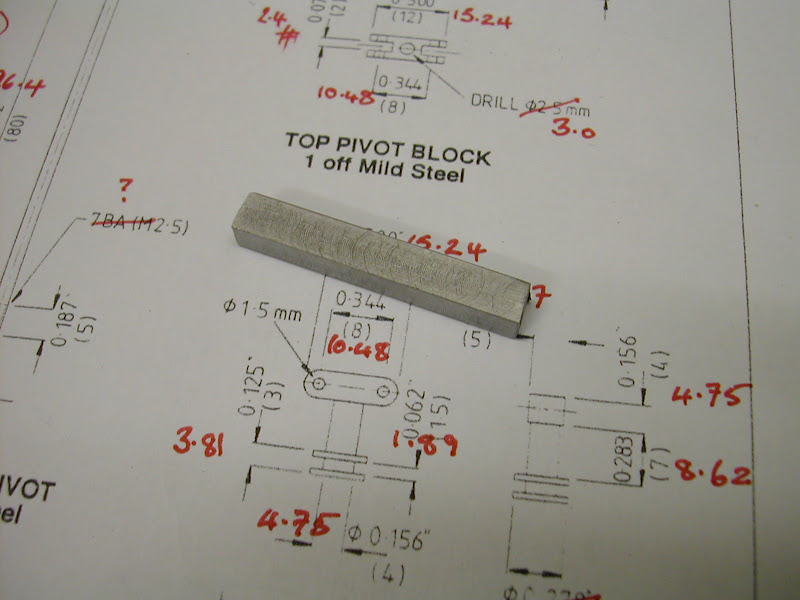
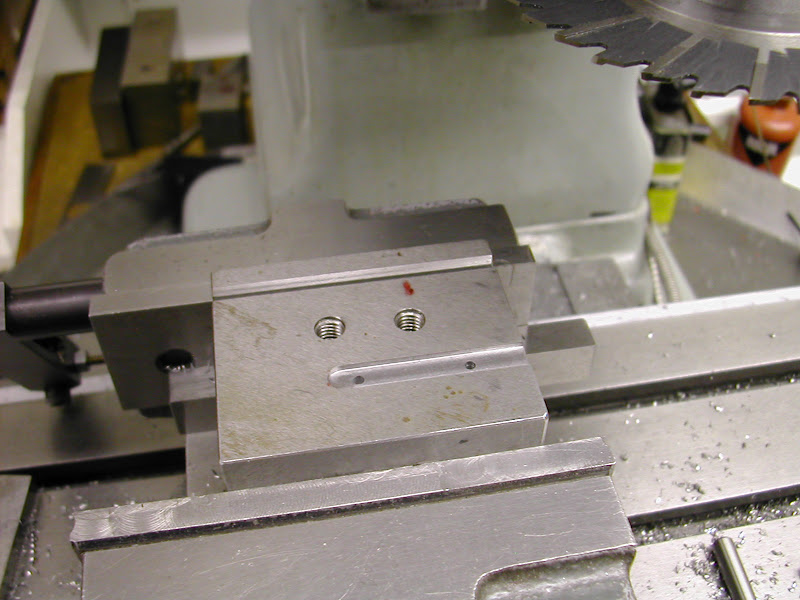
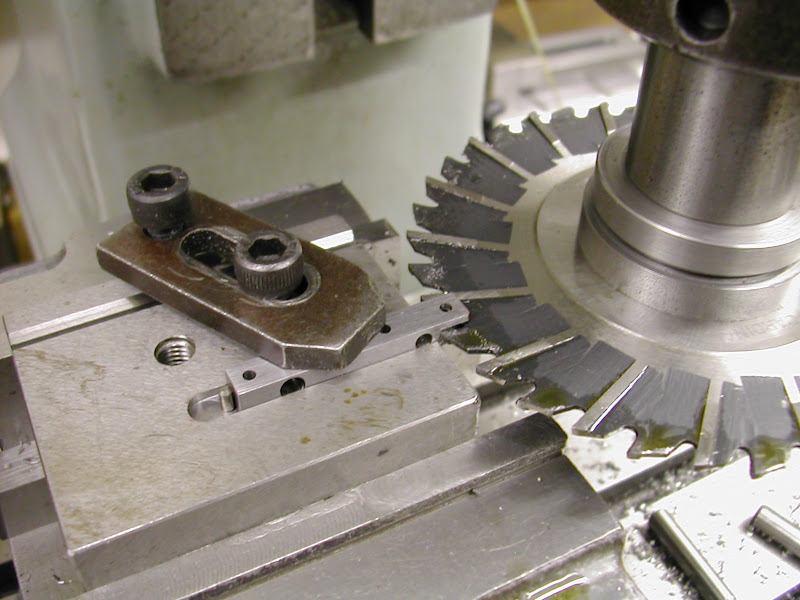
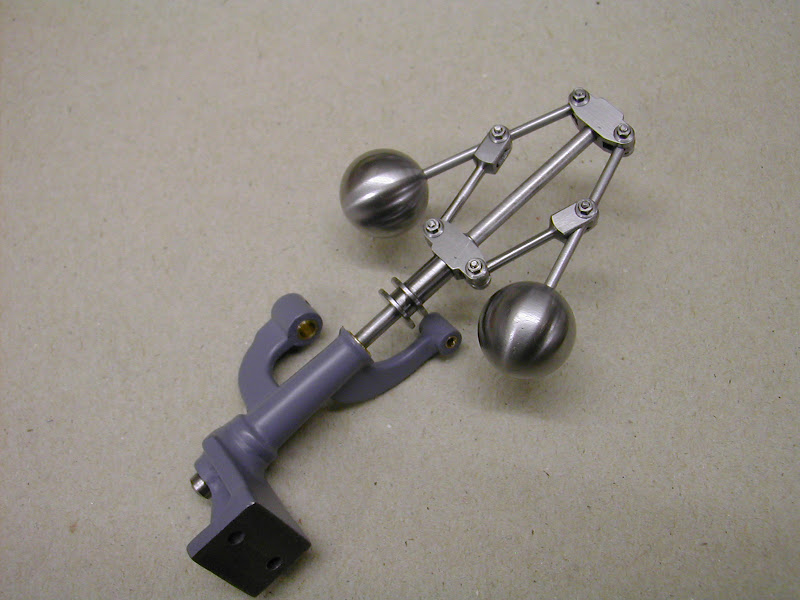
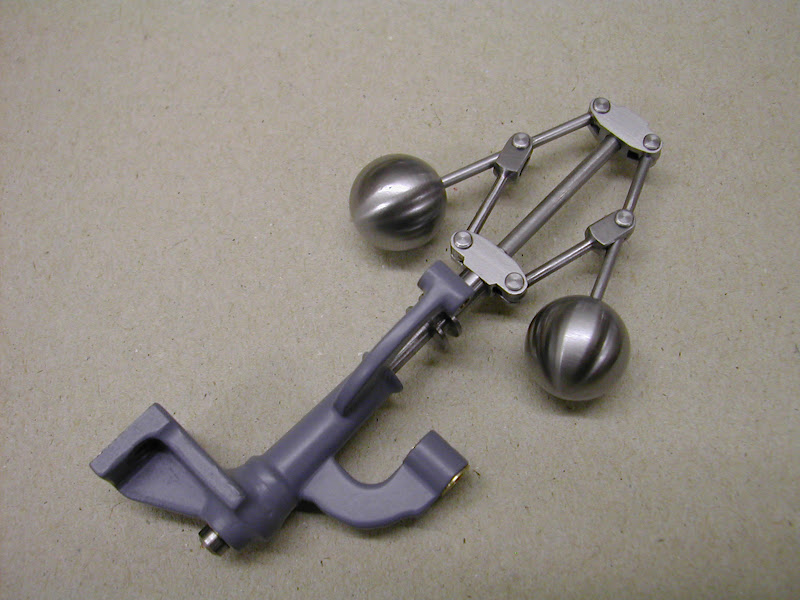
I've finally come to a decision to finish it off before starting another I/C engine so it's on with the governor parts next and a first attempt at gear cutting though it will be a week or two before I can get to grips with it as frequently as has been recently

Back sooner rather than later though I hope

Regards to you all - Ramon
 
Okay guy's you win - I can see you're not going to accept anything less than a full blown video ::) but you'll have to wait a bit longer till my friend with the camera gets over - no, believe it or not I don't posess one.

I have managed to get a small start on the governor parts and thought you might like to see the 'casting' of the body.

All parts are steel. The small soldering fixture was made from a slice of bright steel angle
DSCN3920.JPG


DSCN3921.JPG


The arms were put in one at a time. The slot for the link arm is filled with flux to help prevent it from becoming too oxidised on the first heating
DSCN3923.JPG


The bosses for the gear shaft and link arm were done after the arms with a slightly lower melting point solder
DSCN3926.JPG


Clean up with a few needle files and some emery didn't take long
DSCN3931.JPG


DSCN3932.JPG


Attached to it's bracket a coat of primer soon brings it to life - still haven't decided on what colour to paint it yet
DSCN3934.JPG


I now have to delve into the mysteries of cutting two small bevel gears - a first time ever so it will be interesting to see what transpires.

Regards - Ramon
 
That is beautiful work Ramon.

Thanks for posting that.

Pat J
 
Cracking job that man

:bow: :bow: :bow:

Stew
 
Ramon I am only on page 2 of your build and agree with Pete in reply #17. that you are if anything under posting. This is quite a common thing to do when you are aware that you have very experienced people reading the thread and feel that you are in a Granny and eggs situation, but for those of us with little experience such as myself, detail is absolute gold.
Having said that, I fully understand the time constraints of going into fine detail, where the write up, pics etc, could end up taking longer that the build itself. Fascinating stuff though and extremely nice work.

Les
 
Hi again guys,

It's very pleasing to hear that you are finding this useful and interesting. I take on board what you are saying Les. I tend to take pics as I go anyway these days as a reminder of ways gone about things - it's much quicker than making constant notes which is what I would do in the past. Putting it on here and on the ME forum for the benefit of others that may find it useful is not exactly an onerous task so I'm quite happy to do it if it's what members would like and after all that's what we are all here for eh ;)

I have spent too much time in the garden and on an 'impossible to refuse' the 'invitation' to go on a shopping trip to town ::) today to achieve much since the last post but rather than post a lot at once here's a short update on what has got done. The parts themselves are no big deal but the way it's been tackled may be of use.

Before the gears are tackled the linkage parts were started. I decided to make the lower Pivot Block in two parts rather than from all out of the solid so began both blocks with reducing enough for two in the mill as one piece
DSCN3940.JPG


The bar, about 35mm long, was then draw filed to eliminate the machining marks. The file is a 4" flat #4 cut with the tang removed specifically for this type of op and for hand deburing. for this type of task I find it much easier to control than with a handle fitted.
DSCN3942.JPG


Though it looks quite grainy in this pic it is infact quite smooth but will get constantly 'improved ' and smoothed on a sheet of emery on a flat surface as ops progress
DSCN3947.JPG


The ends were squared and the two vertical holes were drilled and reamed the correct distance from each end plus a .25mm filing allowance
DSCN3948.JPG


The cross holes were then drilled and reamed, spaced equally about the vertical holes, the block being turned end for end set against the dead stop
DSCN3950.JPG


Despite a constant check for tiny bits of swarf on each placement in the vice the part still picked up dings - out of view in this pic - definitely not what's wanted as the surface gets smoother
DSCN3955.JPG


Next up was some means of holding it for slotting the ends. It could have been done in the vice but once cut in half there would be little held between the jaws so a small fixture was called for. I have three or four small blocks of steel like this that are ground square all round and kept for this type of requirement. They are a product of my working days and once used up will not likely be replaced. If you are in a similar position to get such blocks ground I can well advise to do so as they are so useful. It has to be acknowledged - the trouble with retirement is the total lack of perks :(
The slot was milled to a good fit for the part - the two holes are for a removable stop pin - first and second ops
DSCN3957.JPG


With the part set against the stop pin a light clamping was all that was needed.
DSCN3958.JPG


Ready for a deburr and cutting in two
DSCN3961.JPG


The ends were milled to length leaving a filing allowance and the ops repeated this time with the stop pin set in the second hole
DSCN3976.JPG


To keep the emery marks parallel to the part it was rubbed back and forth on 150 grit emery lubricated with paraffin and oil against a parallel. This op is continued on wet and dry paper down to 600 grit for a very smooth non 'polished' surface.
DSCN3972.JPG


That's as far as I've got - tomorrow, hopefully, I'll make some filing buttons and get those ends finished off and get the lower block Loctited to its partner before making a start on those rather flimsy ball arms.

Thanks for the link to the gear making Dave. Quite unexpectedly I have found a number of copies of articles on gear cutting, obviously squirreled away with potential future ideas in mind but totally forgotten about. (Definitely an age thing without a doubt) I think I now have the info I need but theres a bit of preparation work first before I can actually get cutting but no doubt there'll be more on that later ;).

Thanks again for your interest

Regards - Ramon

 
Nice to watch someone go step by step making a part. Always possible to pick up tips on any build. I've picked up a few from your build so far.

Nice work
Ray
 
It's been a pleasure to watch so far Ramon, please continue and thank-you.

BC1
Jim
 
Great looking engine and great build write up.
Thank You!
 
Hi Ramon, your work is outstanding :bow: :bow: :bow:

It very inspirational and educational. Compliments for the detailed description of the last part you have made, I know it takes a lot of time to take the photos and write it up, but it very much appreciated!!! I learned something here, thank you for that.

Looking forward to the bevel gears, I also need to make a set for my Stanley steamer car. The big problem is that the angle is 60 degrees and not 90....

Thanks again for sharing and have fun!

Regards Jeroen
 
Hi Guys, once again my thanks for your kind and considerate comments - as already said if someone is getting some benefit from this 'tale' then I'm quite happy to continue.

The last few days has been affected by 'circumstances beyond control' and I've not really had any 'flow' in the workshop but never the less have managed to keep picking away at the governor parts as time permitted.......

Two small filing buttons were turned up, hardened and the pivot arms finished off altering the shape slightly in order to make them look a little more convincing. I usually harden buttons as opposed to leaving them soft as soft buttons have to be able to roll to be effective in controling the file.
DSCN3983.JPG


Next up was to prepare the ball bearings so that they could be drilled. They were heated to a good red/orange colour with no inner 'shadow' for about 3-4 mins, well beyond the temp in pic - this was taken just as the heat began to build.
DSCN3986.JPG


Then they were dropped into this pre heated coal fire ash to cool slowly. Fire ash appears to be the best thing for retaining the heat for annealing other than hot coals unless of course you have a small furnace.
DSCN3985.JPG


The balls oxidised to a fair degree which proved almost glass hard in parts but a short soak in some hydrocloric acid soon softened it
DSCN3995.JPG


A quick collet was turned from a stub of ali and held the ball secure enough for rough emerying and then drilling. The material had softened suitably enough for this but was still rather tough, speed having to come right down to prevent work hardening
DSCN4000.JPG


A short spigot was turned to hold the balls for final emerying and polishing. No attempt was made to bring them back to the original lustre but just enough for then to give the appearance of being turned
DSCN4001.JPG


A 'before and after' shot
DSCN4007.JPG


Next up were the ball arms and yet another two radius tools
DSCN3991.JPG


The first one lifted up on to the tool on the second ball and broke off so a steady was made by holding the piece of brass in the drill chuck in the tailstock and centre drilling it from the lathe chuck. That's the first time I've tried a steady like this and it works perfectly with a bit of lube. In order to keepthe material as strong as possible the second ball was turned from both sides
DSCN3993.JPG


That block came into play again and two pins were set to locate the arm
DSCN4009.JPG


DSCN4011.JPG


The arms were gently clamped and the bosses milled down to fit the pivot arms
DSCN4012.JPG


So far so good, a start was made on the lower arms today so it should not be long before the 'twiddly bits' can be assembled then it really is onto those gears.

That's it for a while then - as always hope that's useful to someone

Regards - Ramon

 
Coming together nicely Ramon! Thm: Thanks for letting us follow along!

Cheers

Jeff
 
Well, I actually managed to get a good full day in the workshop today and have finished off most of the parts for the govenor save the gears.

The last parts to be made other than the hinge pins were the lower link arms. It was felt these would prove a bit of a challenge to hold and form as the metal was gradually removed but as it transpired things worked out fine........

They began by forming the ball ends using the previous radius tool on the ends of two pieces of 5mm MS bar however this time the holes were drilled and reamed after the part was transfered to the dividing head on the mill to ensure squareness of the part relative to the holes. A tentative start on removing the machining marks was made in the area that would be left as stock.
DSCN4015.JPG


Another slot was milled in that block - that's certainly earned it's keep on this job - and the part clamped in for slotting this time using FC3 cutters roughing first with a 1/16 followed by a 2mm to size the slot
DSCN4018.JPG


A few minutes with some filing buttons and the parts are ready for the final op.
DSCN4025.JPG


Thinking about Simon's ('smfr') rather inovative way of driving his linkage parts for his beam engine a quickly made drive fixture was milled up and transfered still in the collet chuck back to the lathe
DSCN4027.JPG


The previously used brass 'female centre' was put into play again and provided very good support and concentricity. As previously mentioned this is the first time this little 'get you by' has been tried - it's certainly going to get some use from now on.
DSCN4037.JPG


The fixture worked well and taking small cuts at a high speed (revs) the metal removed with ease with no distortion
https://lh6.googleusercontent.com/-v2H4H1HxeA4/Tu0B08uZ5LI/AAAAAAAAFo0/L5MJvZ0rxDY
/s800/DSCN4038.JPG

Incidentally, the turning tool being used above is made from a discarded FC3 'throwaway' cutter shank. This is a rich source of small section HSS. Held in steel holders they are quick to grind particularly when very small section tools ie grooving, chamfering, radiusing, screw cutting etc, etc are required. They certainly take the pain out of reducing larger pieces of HSS on the off hand grinder.
DSCN4034.JPG


And finally after making the hinge pins this evening and fitting them with short pieces of 12 BA studding it was time for a trial assembly
DSCN4040.JPG


DSCN4042.JPG


The next session, after a clean up, is to start prepping in order to cut the gears - in the meantime if any one has any questions about anything done so far do ask.

Back in a day or two then, hopefully with a new 'machining experience'

Regards - Ramon

 
Lovely Jubly :bow: :bow: :bow: :bow: :bow: :bow: :bow:

Stew
 
Top Job Mate :bow:
Pete
 
Excellent workmanship, a fantastic project very well explained. :bow: :bow: :bow:
 
Crikey!!!

Fabulous!!!

And...you make it all look so easy! :bow: :bow: :bow:

I too, occassionally, suffer from the 'impossible to refuse invitation', but she goes to Tesco's in your town...I could lose her in the aisles and slip round to watch a master craftsman at his work...she would never notice, well, until it got to the 'what do you want for your lunchbox?' But there again, I get complained at for causing her to spend too much...and that is after my stock answers of 'whatever you like', 'I don't mind', don't get me anything special', 'it's only fuel'! AND THEN, I get criticised for not looking ecstatically happy every second of being in complete hell with all the little demons and zombies ;)

Of course, I bet nobody else feels the same way about that dreadful 's' word that women indulge in. How is it that women make a simple thing like shopping so arduous? I am as happy as anything when I go shopping. Put me in any tool store you like and I will that happy bunny! :big: :big: :big:
 
OUTSTANDING! Ramon. Simply outstanding. And a K to you for showing that nifty, inexpensive tool bar/holder. Mn you do some fine work and so easy looking.

BC1
Jim
 

Latest posts

Back
Top