Wallaby

Home Model Engine Machinist Forum

Help Support Home Model Engine Machinist Forum:

This site may earn a commission from merchant affiliate links, including eBay, Amazon, and others.
They're not errors Pete, just little built in tests of character! ;)

Nice progress matey, while I've still barely seen the inside of my workshop.
 
Hi Mate
I recon if this thing works, my Character will have improved greatly :big:
SANY0050.jpg
 
Sweet Pete!

(The machine work mate, not you personally) ;D

Keep the Pix coming

I'm enjoying seeing the progress.

Bez
 
Hi Bez
I think I will line bore the block in the Lathe
not sure how to do it yet
more bearings then I'm used to :big:
So far I have just drilled it out undersize from both ends with a 1/4 pilot and then at half inch.
I had thought of buying a reamer but I might just make some kind of bore thingy ???
Pete
 
I have often thought of making a mount plate for my QCTP, then using a boring bar mounted between centres but wondered if it would be rigid enough. I just bored a block for my steam engine with 70mm of overhang and held the block in the 4 jaw. It came out okay I think because it was not a continuous cut just the webs at each end it did not build up any side force. Interested to see how you do it.
Brock
 
Hi Brock
I have my own unique solution ;D
I just did something else :big:
made the lifter guides out of brass rather then bronze as its all i could get and probably cheaper too. If they wear out I have enough 7/16 hex to remake em, still have to ream out the lifter bores.
I will reread how u did yours and see if it helps in the anxiety department :big:
Pete
SANY0053.jpg
 
Pete,

With regards to your comment about line boring and having to work it out.

Well, on the last picture of your last post, it shows that lovely machined top face, that has to be the datum to work from. Everything else just won't work right.


John
 
Hi Bogs
when i drilled out the mains undersize i had the top deck clamped to the truely set angle plate and miked up on the block ends to get it square.
I'm sorta thinking about mounting the top deck on the cross slide of the lathe in much the same way, as the slide has two hold down slots going across the ways, What is scaring me a little is making the between centers boring bar!
it would need fine adjustment and i do not want to get distracted on what seems a project all on its own.
It seems obvious i will need one as my engines get more and more complex, but at the moment i have no idea how to go about it.
On another note, you mentioned you had built a couple of engines by ETW
I would love to see them :) as I'm thinking of doing more of his later.
Pete
 
Pete,

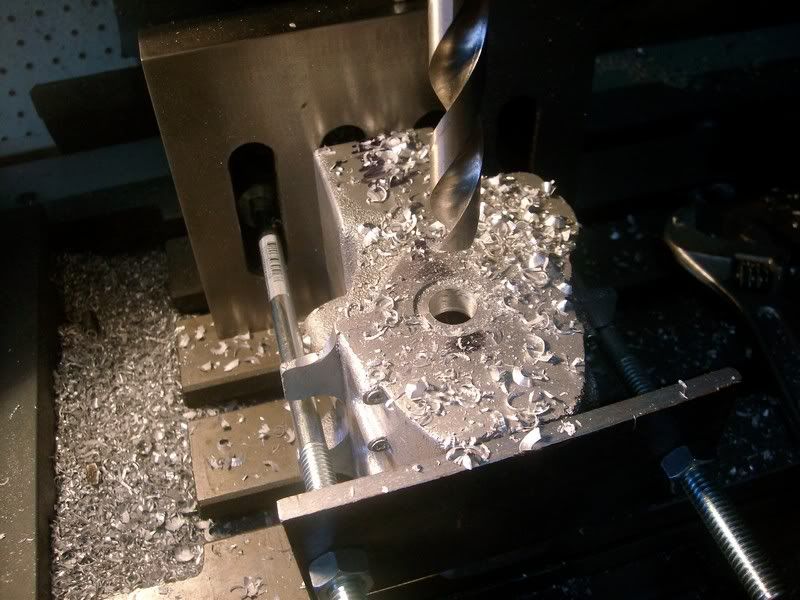
You will find that when you come to make some engines, you will spend more time making tooling and holding fixtures than actually making the parts, that is a fact of life in our hobby.
Just wait until you come to make the camshaft the Westbury way.


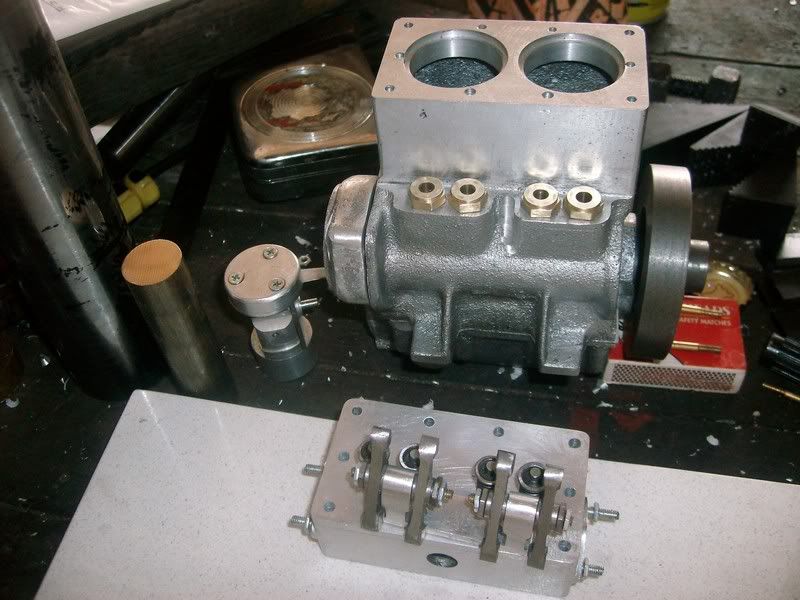
This is a Whippet I built a few years ago and is still in my collection.

These pictures show it after it has run for a fair while. You will notice that the side valve mechanism isn't too oil tight, I think you will find the same on the Wallaby. The Seal actually uses a cover to keep it away from prying eyes. It was this engine
that put me off working with castings for a long time. The ones made by Woking precision were abysmal, and it looks like the Hemingway ones are no better.

engine1.jpg


engine2.jpg


The only other one that I have pictures of are for the Cygnet Royale

cygnet1.jpg


cygnet2.jpg


cygnet3.jpg


As featured on the FAME Site, in their external combustion archive. Another picture of it is also used on the Hemingway site, the green one at the top

http://www.hemingwaykits.com/acatalog/The_Cygnet_Royal___Edgar_T_Westbury.html

Now residing in a new home.

Going back a long way now, I built the Seagull. From what I do remember, It had cylinders and heads like the Whippet, as they were separated units, and the pistons as far as I can recall, went up and down together, one on compression stroke while the other was on exhaust.
That was donated to a good home as well, as do most of my engines, eventually.

I did have a set of Seal castings to make, but after reading about all the drawing problems and half hearted cures needed, I sold them on. That would take a lot of research to get one built and working correctly.


John

 
imagine having made so many engines that they are given away :bow: :bow: :bow:

This is my first attempt at an engine from castings, mine have been cast by one of our members Bezalel.
he made the molds from scratch after i sent him a copy of the magazine articles and has done a really great job.
The first version had no provision for clean up of the deck height but he added a bit to the mold and also modified the sump slightly.
The mark 2 castings are just great and I'm scared silly of stuffing em up.
When I went to see him the other day, i asked about the possibility of casting up the clutch housing too, so we shall see about that.
I'm starting to get excited about the Wallaby and am really looking forward to getting the crank done.
Pete
 
What Bog's said....you end up building the "engine" 2 or 3 times over in the form of fixtures and cutters,jigs. There are some plans around on between centers bars....have at it and then practice setting it by boring the housing, or some other part, to a target undersize dimension....for practice. Then with your new found confidence and experience, bring the bore out to the size you want.

You can do it Pete....I know you can.

Dave

PS Here I'm using a boring bar to correct my SB 9" counter shaft bearing bores on my big lathe...the bar came right out of the lucky box.....

100_0089.jpg


Hi Dave
I want to make every engine a little more involved than the last in order to keep the learning curve steep, so one of these days you might see a pretty messy lesson learnt :big:
Boring the Big end Caps can wait a couple of days while i gather courage :big:
I will do a search for some bar plans tonight and see whats out there.
Pete
 
Messing up a casting is not fun (ask me how I know) even a crap one (unlike yours) but if itis a steep learning curve you want cracking a useable casting is like a shovel to the face. Dam senile cat Rof} Rof} Rof}. Keep up the good work Pete.
Brock
 
your cat deserves a pay rise, not its fault you did not heed the warning :big:
Pete
 
metalmad said:
imagine having made so many engines that they are given away :bow: :bow: :bow:

If I kept everything I made, my shop would be full. Once something is built, which is the main area of my enjoyment, it sits on the shelf in my shop for a while until someone mentions it, then if they are a good friend, they usually get it for nothing (but only if I am in a good mood, that's not often nowadays). There are a couple I keep in the house, but other than those, there is not much left.
There are hardly any on my shelves worth having at the moment that is finished, even the Whippet still has things to do to it.

It was different when I used to show them at steam rallies for charity, but those days are over for me now, so why not let other people get enjoyment from them.


John
 
Metalmad -

You were worried about making a between centres boring bar. It really isn't that difficult, just make it as beefy as you can - but the interesting bit is how to get a fine adjustment. There are several ways of doing this, from a 'micrometer screw' adjustment to push the tool out a defined amount, through to cutter units like Microbore cartridges. A slightly different approach is to use a boring head to give a controlled amount of offset to one end of the bar. A variation on this is to make something that can apply a small controllable offset at the headstock end, so you get close with moving the cutter in the bar and then take the last bit with the headstock offset. See picture of one tool that I made that does this. It is intended to attach to a faceplate or go in a chuck. The centre is on a eccentric so that as you turn it moves slightly off-centre. Hope that makes sense, let me know if you want more information.

Dump140211244.jpg


Bill

Dump 140211 244C.jpg
 
There is a similar way to do that with a boring head to support that. I find the other complication of keeping the bar from rotating with respect to the boring head to be problematic for me anyway.

I start by boring undersize, and then I measure the bore made.

Then I just use the head end of the dial calipers to bring the tool out a set amount relative to the bar.

Current diameter + 2 X (tool movement) = cut diameter.

Then , sneak up on it! ;D

Then take a dead pass or two with no tool feed, to take the spring out of the bar.

Dave
 
Hi Bogs
I can understand how you feel once the engine is done, as im a little the same, but of course if i gave anything away, id have nothing left :big:
If you ever need a good home for the whippet, give me a yell ;D
with a nice polished base, it would have pride of place in my display cabinet!

Hi Bill
I do have a boring head and may well use that, but at the moment work has stopped again so even though i have time, im broke :big:

Hi Dave
In your photo of your boring bar, are the dots i see cutters?
perhaps held in by grub screws?
Pete
 
Hi Pete,
No, its just holes left over from the shafts previous life.....it made putting a cutter in pretty
easy..
:big:

Dave
 

Latest posts

Back
Top