Tailstock Die Holders

Home Model Engine Machinist Forum

Help Support Home Model Engine Machinist Forum:

This site may earn a commission from merchant affiliate links, including eBay, Amazon, and others.

arnoldb

Well-Known Member
Joined
Apr 8, 2009
Messages
1,792
Reaction score
12
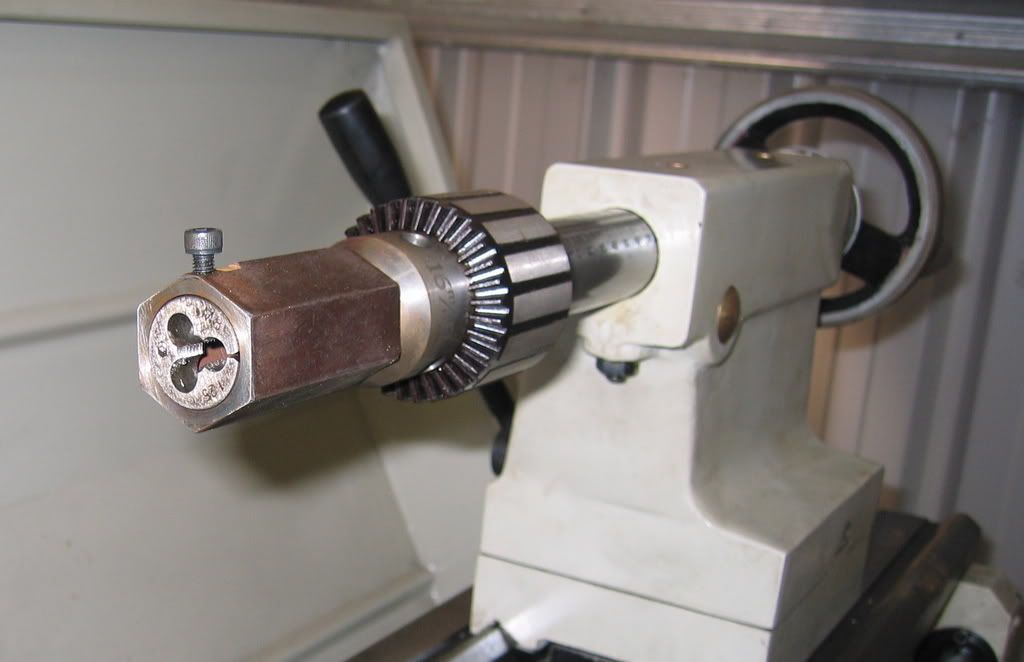
One of the items on my "to build" list is tailstock die holders. 99% of the time when I need to use a threading die, it is in the lathe, so it is worthwhile making life easier ;D

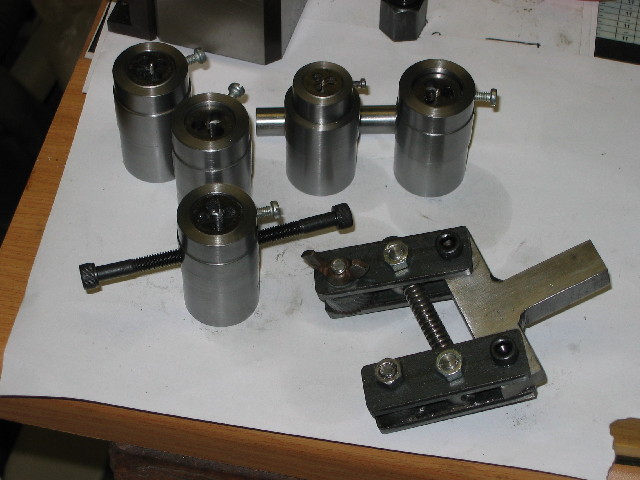
I decided to go the route of making a separate holder for each of my frequently-used dies; this will save a lot of effort changing dies, and being a lazy person by nature, some work up front is in order. This means I need to make holders for 2, 3, 4, 5, 6 and 10mm dies; these I use the most. My 3 to 6mm dies all use exactly the same holder, so there will be 4 identical ones, and then the other 2 for the 2 and 10mm dies

I have about 5 meters of 32mm hot rolled steel - very nasty stuff to machine, but it's on hand and should do.

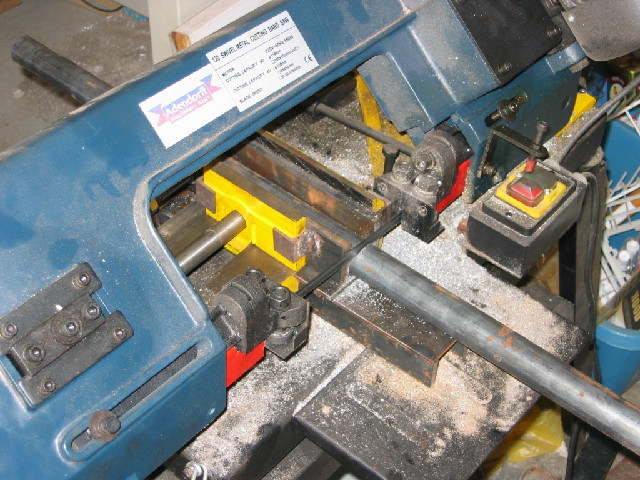
First up, I cut 2x460mm sections off the length of HRS; these are the longest I can easily machine in my lathe:
smaller-IMG_1392.JPG

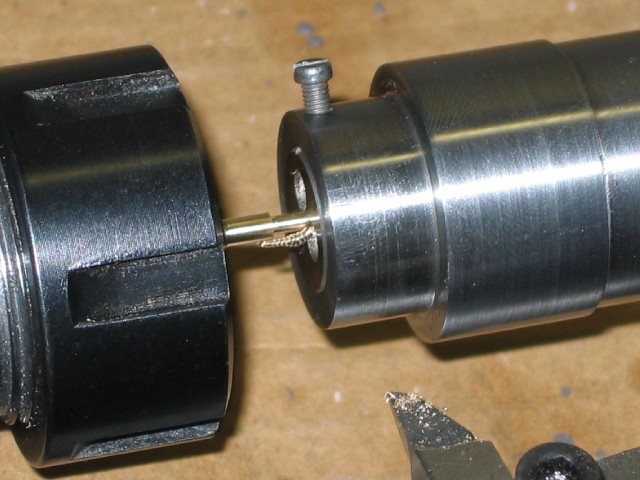
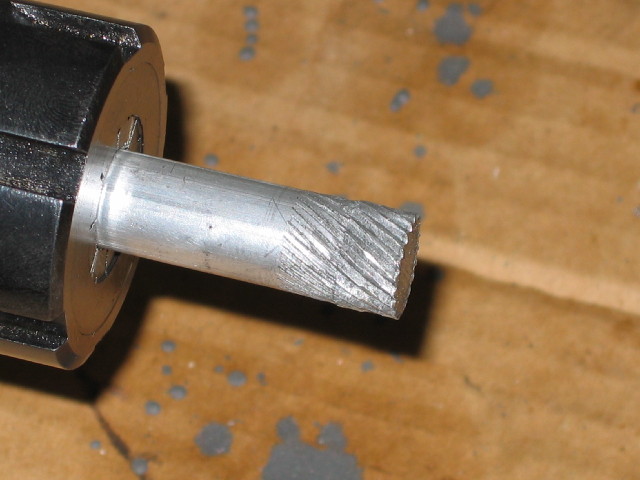
These were then center-marked at one end, and I used my electric hand drill to drill center holes for tailstock support.

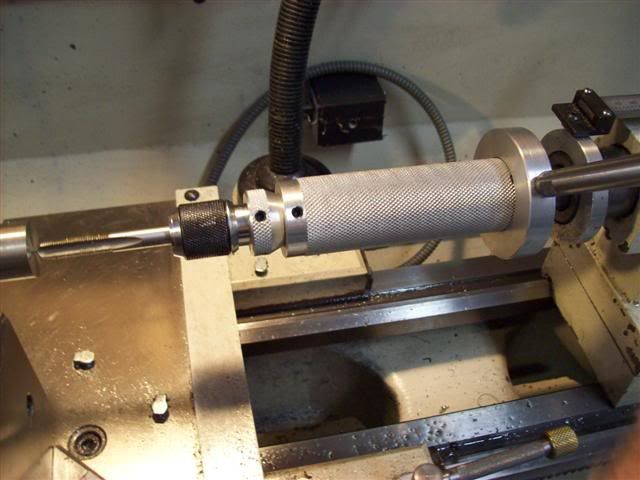
I very rarely use power feed on my lathe, as it's a pain to set up, but I wasn't about to manually turn both these down to get rid of the scale, so I set up the Myford's fine-feed gears, and let it do it's own thing:
smaller-IMG_1394.JPG

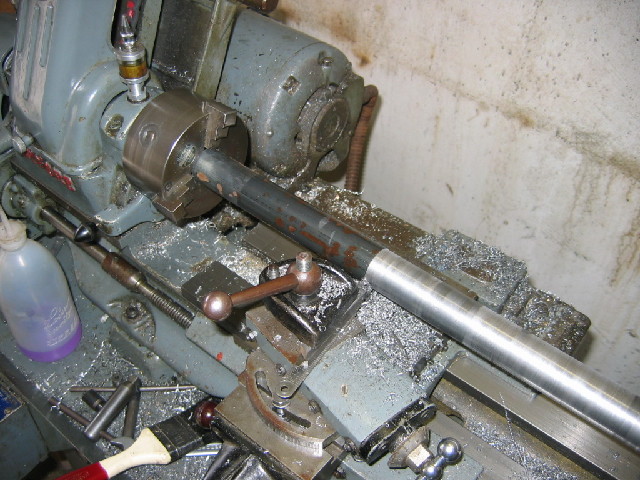
The first owner of the lathe broke one of the teeth off the internal jaws of the 3-jaw chuck, and this stock is at maximum clamping range for it; not wanting more broken teeth, I used the external jaws.

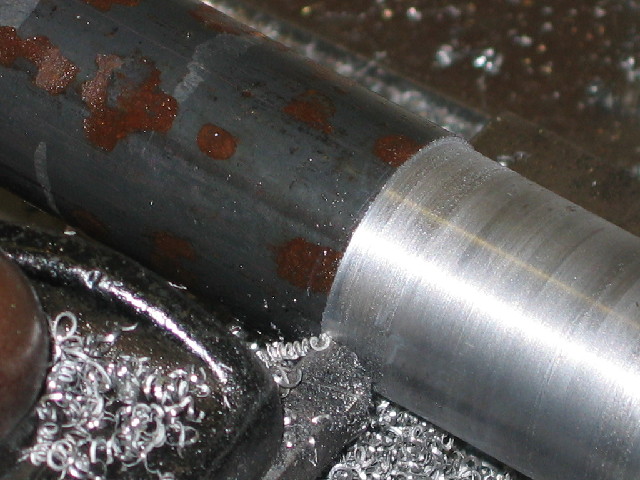
A close-up of the cut - in action... When I descale, I try and get rid of all the scale and rust in a single pass, with a deepish undercut; it's kinder to the HSS toolbit. In this case, I'm taking a 0.5mm (0.02") cut:
smaller-IMG_1393.JPG


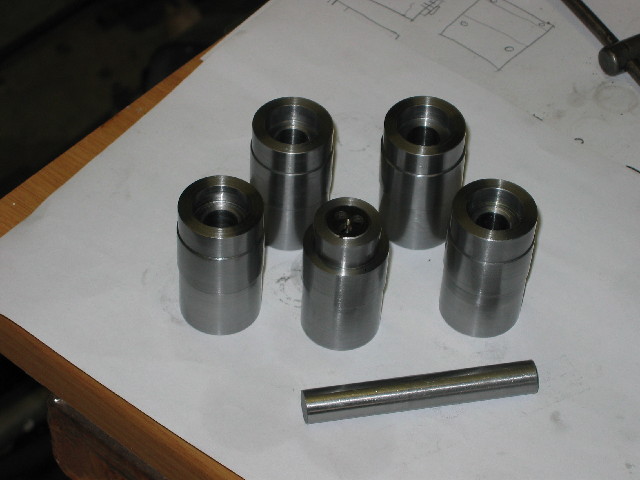
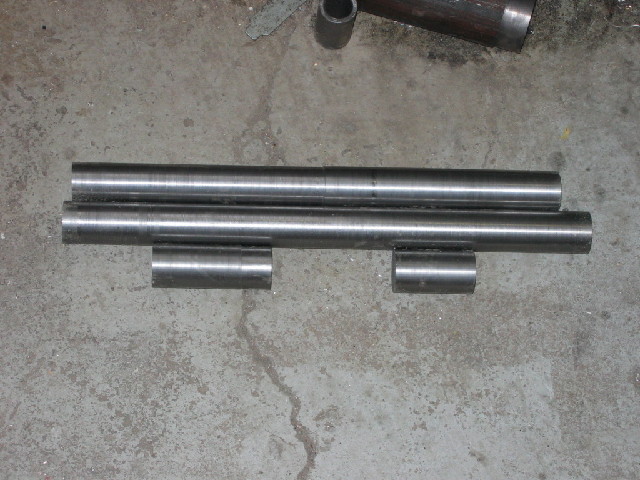
Some cleaned up bar - the short bits are from the original chuck end; I cleaned the bars as far as possible, then sawed off the "unclean" ends with a cleaned bit left on each, and just chucked those on the cleaned ends and took the scale off:
smaller-IMG_1399.JPG


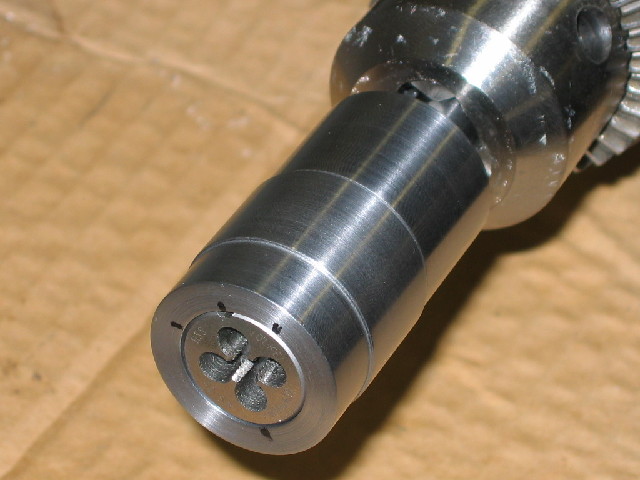
Having lots of cleaned stock, and a VERY dirty lathe contaminated with scale & rust, I spent 2 hours to thoroughly clean & service the lathe, then made the first die holder. It's not finished, as all the holding screw holes still need to be done, as well as some knurling on the raised bit I left for that purpose. For now, I'll use the die holders on a piece of 12mm silver steel just clamped in my tailstock chuck, as the tailstock is very well aligned. Later on, I'll make a dedicated tailstock adapter - if needed:
smaller-IMG_1398.JPG


Hopefully the knurling wheels I ordered will arrive this week - (I need to make a knurling tool as well ::) ) - need to finish these tools so I can get on with the IDRIS!

Regards, Arnold
 
Nice job ,that was one of the apprentice jobs i had to do when i served my time ,you could bore out one of the bars and make a pointy bit and get a spring you get a tap centre then in with the bargain !!!
You cant beat making your own tooling :)
 
Nice Arnold. I think I'll add that to my list of tools too. I keep swapping out dies and thought it would be nice to have them ready to go.

I have a decent supply of aluminum rod...no reason I couldn't use that?
 
Another tuppence worth. If you are buying material for your 1" die holders rather than using what is to hand, consider buying a piece of 32mm/1 1/4" hex.

This means your die holders automatically come with an impressive array of spanner flats.

Nice work arnoldb, multiple holders all set up and ready to go is a good idea.

tailstockdieholder.jpg

 
Thanks everyone :)

chillybilly, thanks for the idea on the tap center - and yes, I do enjoy making my own tools (mostly out of necessity :D)

Zee, Aluminium should work fine IMHO, and not having to change dies all the time would make for more machining time ;)

Bob - thanks for the suggestion on the hex stock :)

Regards, Arnold
 
I used aluminum for my die holders and it works just dandy. Rather than fitting the die-holder in a chuck, I just bored the aft end of the die-holder to a smooth sliding fit over the tailstock ram and didn't want to use a material that would damage the ram.
 
Well, some progress - not much, but some.

Turned up 3 more 20mm holders, and the 16mm holder for the 2mm die.
All still needs to be cross-drilled & threaded for holding screws, and knurled - when I eventually get the knurling wheels I ordered.
smaller-IMG_1438.JPG


Regards, Arnold
 
gunboatbay...if I understood correctly, you just slip the die holder onto the ram itself so a tapered rod (MT2 in my case) or chuck is not needed. Someday I hope to have a bigger/better lathe and I suspect the ram would be a different size. Would the idea be to just make new or modify the holder?

My mini-lathe ram has markings on it for measuring distance. Would they get damaged or worn away?

Nice holders Arnold! I'll be interested in the details of the knurling process.

 
arnoldb said:
Well, some progress - not much, but some.

Turned up 3 more 20mm holders, and the 16mm holder for the 2mm die.
All still needs to be cross-drilled & threaded for holding screws, and knurled - when I eventually get the knurling wheels I ordered.
smaller-IMG_1438.JPG


Regards, Arnold
Arnold why do you not use both ends of the holders for different size dies this is what i did for my die holder which is the same as yours in every other aspect, or am i missing something obvious here?
Anyhow Arnold keep up the good work, nothing more satisfying than making up a tool that works and you can use often
Regards Max...........
 
Zee, Max - Thank you :)

Zee, I'll be happy to show the knurling - don't expect much though, as it will be a first for me :) Done lots of reading-up, but the practice is always different from the theory ;)

Max, you missed my laziness :big:. As I have very rarely used dies outside of the lathe, I'm putting my most-used dies into the holders semi-permanently. With a double-sided holder, you still need to insert & remove dies all the time - to turn it around. The bar in the photo is a close-running fit for the back of all the die holders, so I can just chuck it up in the tailstock chuck,and slip over the die holder with the correct die and use it. In fact four of the holders in the picture are exactly the same size.

Kind regards, Arnold
 
Gee, Arnold, you must do a huge amount of threading with a die. What are you making that requires enough threading to justify this investment in time and effort?
 
Zeeprogrammer,
Yes, you understood correctly. As mentioned, my dieholders are made from aluminum; much softer than the tailstock ram, so there's no wear on the ram or the depth markings if they're etched on like mine are. I've used mine for several years and am happy with their simplicity. You must keep in mind though, that any die-holding device held in the tailstock to cut threads from scratch will not totally eliminate the potential for mildly 'drunken' threads, only reduce the potential. When I'm really intent on accurate threads, I single-point them to a almost complete state and use a good-qiality die for the final finish.
 
Hi Arnold

Looks like your getting a very nice finish out of that hot rolled steel :bow: ,

Regards Rob
 
Nice job.
Die holders have been on my todo list for a while.
I made a couple of tap holders for my lathe / drill press ehich I use all the time.
I just haven't got round to doing the die holders yet.
 
Marv, I do a fair bit of threading; the engineering company where I get my metals have started referring some of their "small" customers to me for making small parts - these sometimes come in batches. I don't make big money from this but it contributes drops to my mill fund. Most of making these die holders is actually for gaining more experience; it allows me to play around with different toolbits and feed rates and so on, as well as practice in making multiple parts to the same specific dimensions - just playing really ;D

Rob - Thanks ;D - and yes, this HRS is darned tricky; brass & aluminium's much easier :big:

tmuir - thank you; I cant wait to get them done - should make life a lot easier :D

Regards, Arnold
(Happily listening to the sound of the first rain in 6 months falling on the roof :) )
 
I read thru this post and thought I would add my solution to this problem. I do a lot of tapping on the lathe. I have 2 jobs I do a few times a year that involve a lot of tapping and a lot of cutting external threads so I came up with this solution.
First you need to make a shaft with a morse taper to fit your tailstock, mine happens to be a mt3. You can find the taper angle in Machinery’s Handbook or follow some of the posts that show you how to copy a taper.
The shaft is steel, all of the sleeves are aluminum but could be steel. Use what ever you have in your surplus material supply center (the junk box)
The tap holders are Irwin about $20 and hold everything I need from 2-56 for the small one up to 9/16 for the large one.
The smaller one has no lever because I can hole the knurl until it spins in my hand. The large ones, including the die holders have levers but care must be taken when using them. If you get too aggressive you will either break the tap or your hand. I tap in , reverse out then tap in again. When I get near the bottom I use the inch/jog button. I included a picture of how I hole the lever. Should something go wrong the lever pulls thru my fingers and if you are quick you can stop the machine before the tap breaks.
There are 3 size die holders because (guess why) I use 3 different size dies.
Hope this helps someone.
Thanks,
Ed
TapDieholder002Small.jpg
 
Another tip.
I found at a flea market an old worn out ream with a Morse taper shank that fit into my tail stick. It has a shaft of about 9/16" dia.
I cut off the flutes and made die holders and a tap holder with a Jacobs chuck to slide over the round shaft.
Any reasonable size would work depending on your lathe size.
It has worked great for years.

Doug
 
Ed, that's a neat set you have there :bow:

Dough, thanks for the tip ;D - whoo man - do I wish I could find this kind of stuff at our local flea markets!

Made some more progress; finished drilling & tapping for all the required holding screws, and some handles for the 6mm die holder. Also made a quick 'n dirty knurling tool; if only the knurls I ordered would get here...

Results of today's work:
smaller-IMG_1441.JPG


Tried the 2mm die on a bit of brazing rod - works like a charm :D:
smaller-IMG_1440.JPG


All the shafts for the knurling holder is made from silver steel (drill rod) - 6mm for the shafts for the wheels, and I made the adjusting screw cross-mounts from 16mm silver steel; turned down & threaded M6 on the outsides, one of them cross-drilled & threaded M6, and the other for clearance. The mounting is a weldmend made from pieces of flat iron. I ran out of M6 nuts, that's why there's an ugly old wing nut sitting on the one knurl-wheel shaft... (Zee found nuts, but those wouldn't work for me; besides, Shrek would bit me if I stole his supply ;) )

I tried the 2 knurling wheels I have (both 1.5mm spacing left-hand - definitely not ideal for use together in this type holder...). Some experimentation will be required :):
smaller-IMG_1443.JPG


Regards, Arnold
 
Your die holders look good, Arnold, especially for using HRS. It's not much fun to turn for me either, but if you work at it, you get a nice finish like you have here.

How are you coming with the knurling?

Dean
 

Latest posts

Back
Top