Snow Tandem Engine

Home Model Engine Machinist Forum

Help Support Home Model Engine Machinist Forum:

This site may earn a commission from merchant affiliate links, including eBay, Amazon, and others.
zeeprogrammer said:
It gets more and more interesting.
tel...did you get that popcorn? got any left?

I thought you were bringing it Zee - I just brung along the beer!
 
Thanks, Zee. Crankshafter: I've been following the hoglet builds with great interest! I'd like to try that one one day, it's the closest to a bike that I'll ever get ;D Dean: Thanks, and it sure is a lot of them! Tel: don't depend on Zee for the snacks, he'll be bringing you M&Ms instead of popcorn, and then he'll eat them all. And judging by some previous posts in another thread, he gets snarky about his perceived share of the beer.....

Presently plotting and planning the order of machining for the rocker arm brackets, will probably start cutting metal tomorrow.

Cheers All, Joe
 
joe d said:
don't depend on Zee for the snacks,....he gets snarky about his perceived share of the beer.....

Rof} Rof} Rof}
Only when it's owed me.
 
Hi all

In between baking cookies and butter tarts and other christmassy stuff, I've snuck in some shop time here and there...got the rocker arm brackets done except for final cleaning up.

Started out by bolting the material on a sacrificial plate on the rotary table to mill the rounded-over end, and then mill the decorative reliefs in the sides
7ef21509.jpg


Then in the vise to cut off the excess on one side
bca0a816.jpg


milled out the slot that forms the arms, and drilled the mounting holes
6e5df311.jpg


Then they got flipped over to cut off the excess material on the other side. You'll notice some quick & dirty filing buttons I made up out of some drill rod, so that I wouldn't mess up the radius on the end when cleaning up the cut with a file. As they only had to last for 8 parts, I didn't harden them
ac304747.jpg


One more cut to make the radius at the bottom of the arms,
2e1e5afa.jpg


And here we are!
bf59824c.jpg


Still some cleanup to do, and then on to rocker arms!

Even better, don't have to be back to work until Tuesday... can you say SHOP TIME ;D

Cheers, Joe
 
You do nice work, Joe!
This seems to be a pretty complicated build, and you just keep plowing through it. Good job!

Dean
 
Thanks, Dean.

This is a very busy build indeed, but like anything else, get in and get going and next thing you know you've got another part in the scrapbox so you can do it right the second time :big: :big:

Got back out in the shop after supper and got half of the brackets cleaned up before my fingers gave out with all that sanding and polishing, here's a snap of the where they belong
cd736116.jpg


Cheers, Joe
 
joe d said:
Thanks, Dean.

This is a very busy build indeed, but like anything else, get in and get going and next thing you know you've got another part in the scrapbox so you can do it right the second time :big: :big:

Cheers, Joe

Har!
Nothing funnier than the truth, Joe. I've got a cruddy cold, and now I have pink cough syrup shooting out my nose. Thanks for that! The laugh did me good.

I really like the looks of this engine. I remember seeing photos of one some years ago in a magazine and thinking "what a neat contraption". (That's a compliment, in every sense of the word.)

Keep up the good work.

Dean
 
Wow, this is really looking good. So many threads, I can't follow them all... I've somehow been missing this one!


joe d said:
Tel: don't depend on Zee for the snacks, he'll be bringing you M&Ms instead of popcorn, and then he'll eat them all. And judging by some previous posts in another thread, he gets snarky about his perceived share of the beer.....
So true! Well said! Watch that guy. ;D
 
Here I am again....

Dean: it was really the "contraption" look of this thing that appealed to me... all kinds of stuff going on at once, and most of it out in the air where you can see it. Contraption isn't a dirty word to me, I've been building them for years....
Vernon: Thanks for the compliment, and no need for the warning regarding that Zee guy, I think we've all got him figured by now ;D(I've hidden the M&Ms)

on to work: I was going to start the rocker arms, but realized I had used up the stock for them in an unrelated job a while back...so instead I've done the front guard (I presume it's purpose on the original engines was to keep the tourists from being smacked in the head by the end of the piston rod as it reciprocates out the end of the cylinder)

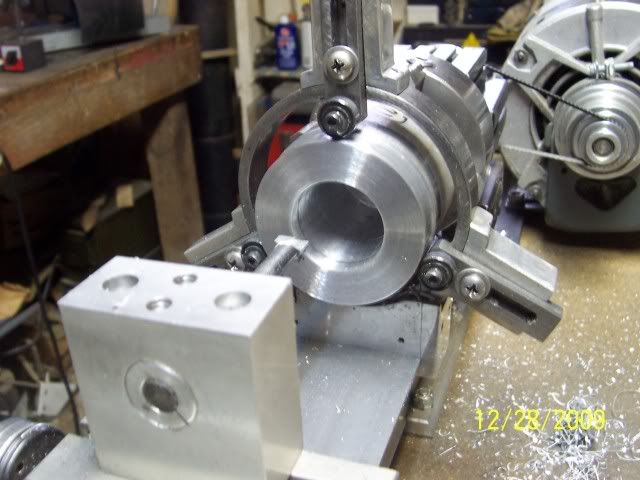
cut some pieces of stock, trued one up in the 4-jaw, gently turned a little segment true and mounted the steady rest, and got busy boring it out
a96da1f6.jpg


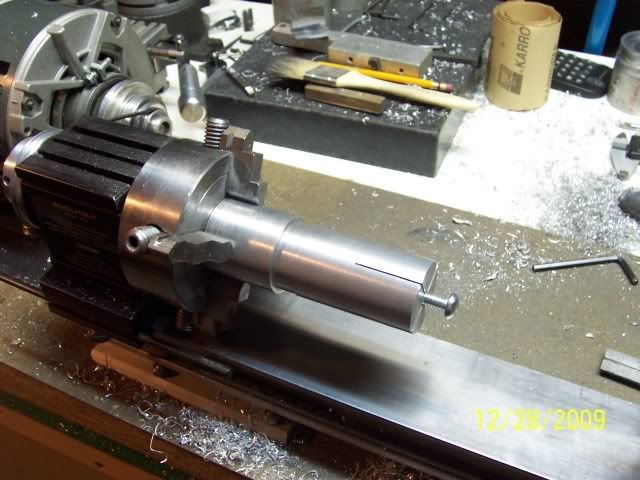
Made up a mandrel for turning the outside (which will also be used for the next part, so worth the little time spent to make it)
bf55fcbb.jpg


here it is after turning is done. The drill chuck is holding a temporary centre that runs in the socket of the screw in the mandrel. This gives me a little room to manoeuvre with the saddle, as the tail stock ram is pretty short.
97450a6f.jpg


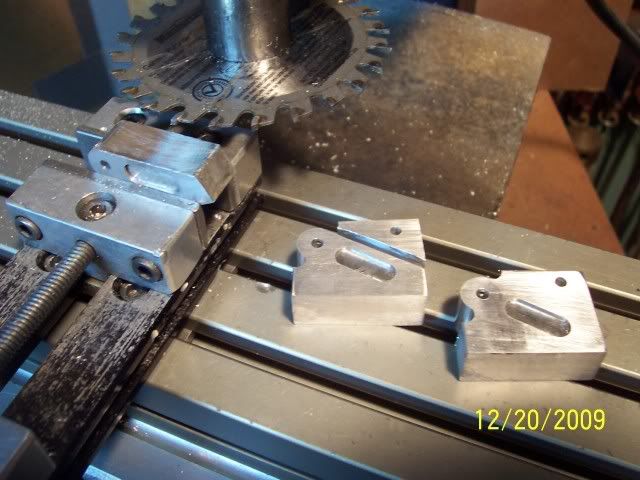
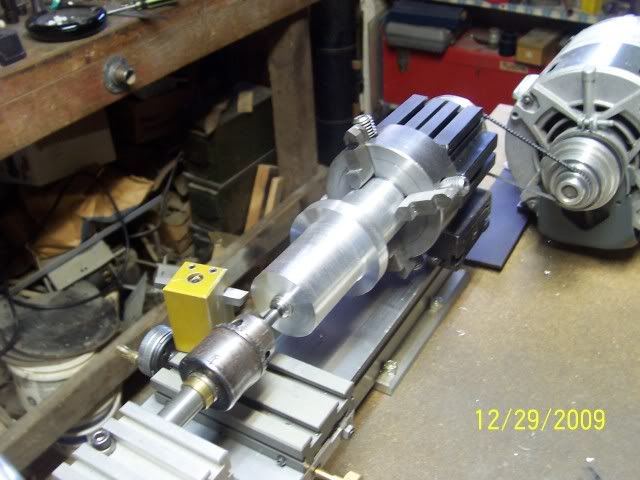
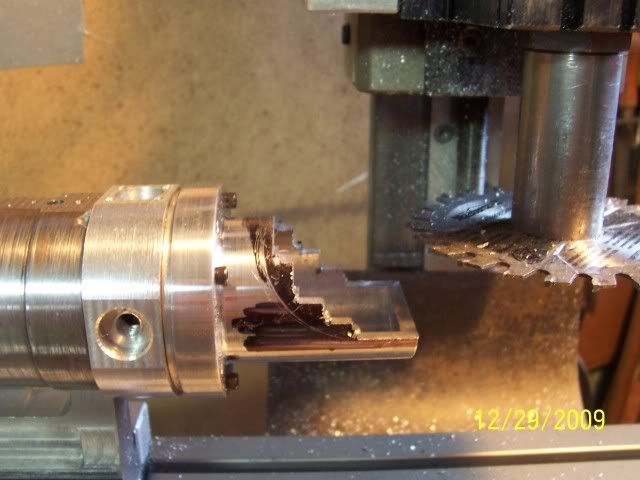
The designer suggests cutting the majority of the waste stock out on the band saw. I would, except I don't have a metal cutting band saw. So, several cuts vertically, and several more horizontally, and Robert's yer mum's brother...
6c938f0c.jpg


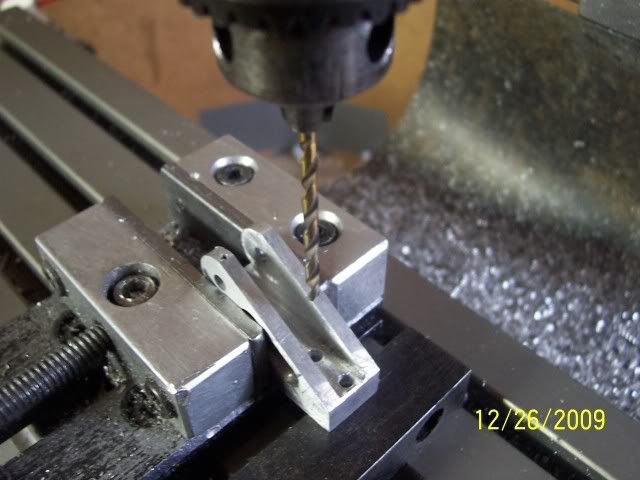
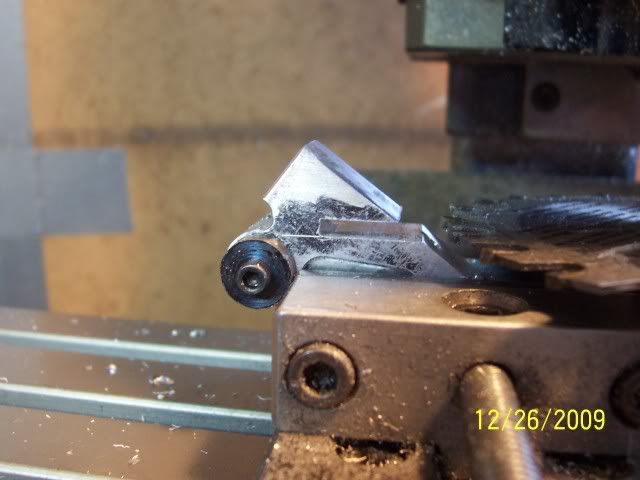
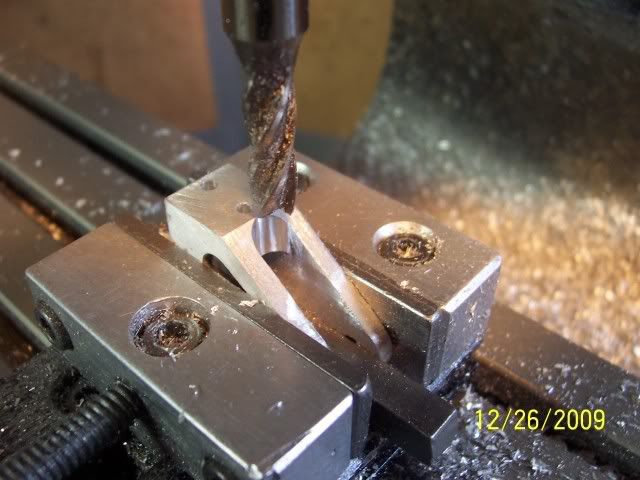
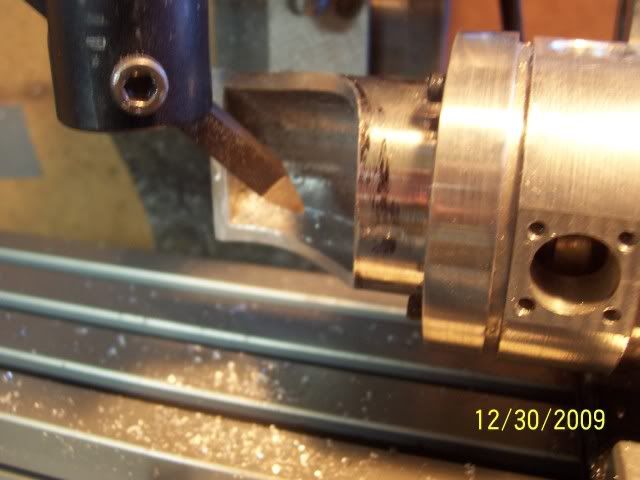
In the previous photo and this one, you'll note that I've used the cylinder assembly as the work holder for the part, bolted it to a 1-2-3 block and had all sorts of clamping possibilities.. here I'm cleaning up the saw cuts with a fly cutter
00ca8289.jpg


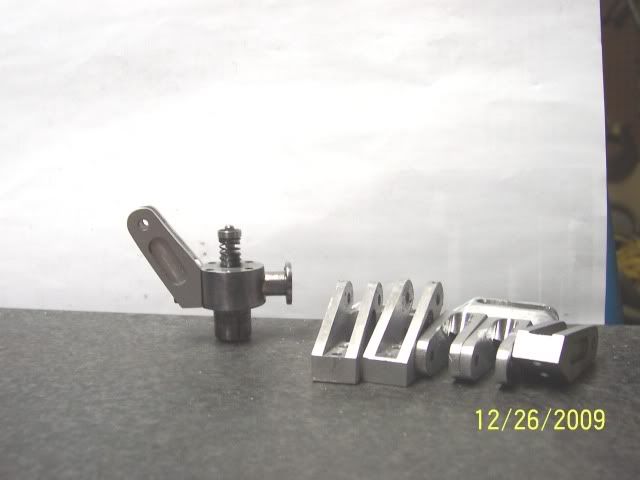
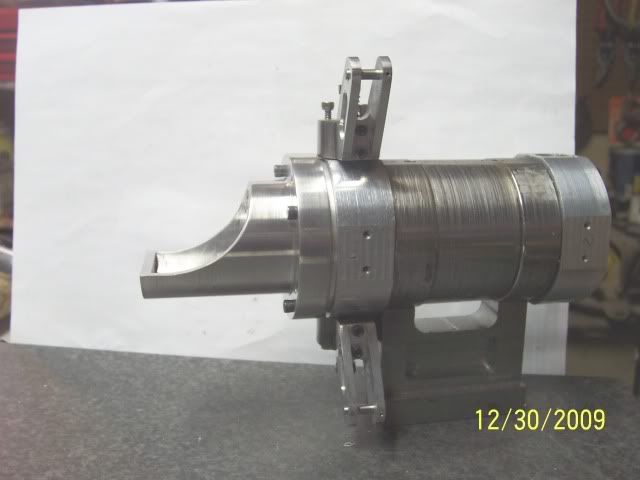
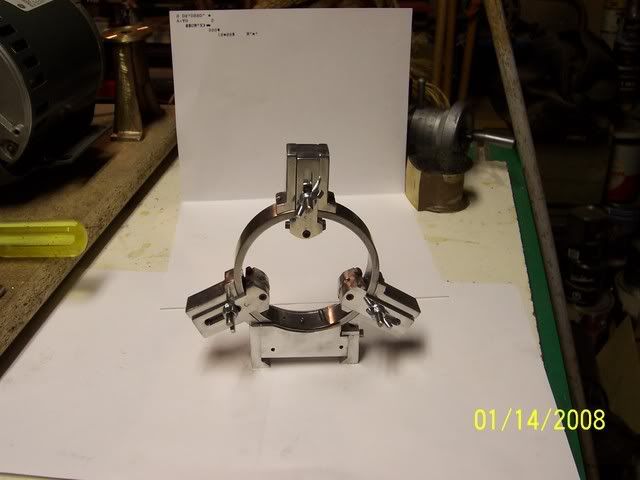
a little polishing here and there, and here it is
167d9b48.jpg


That's all for now, Joe
 
Nice work, Joe. You got that little Taig pretty well tricked out, huh. I keep thinking I really need one of those!

Chuck
 
Looking good Joe.
Doing those curves with the short cuts and flycutter was a learning for me. Thanks.

Beware the messengers Joe. Beware. ;D
 
Now, that's a nicely done job there, Joe. Looks like you thought it out well before you started slingin' metal.

I like the steady rest you made. Looks excellent! I have the stock Taig item, which works fine, but won't take the size piece in your pictures.
Good to see another guy making the Taig really work. I often think that the guy who makes these machines probably didn't expect them to be used for 3"-4" diameter material, then think, "well, maybe he did".

Keep up the fine work. Pleasure watching you go at it.

Dean
 
Hi guys

Thanks for the kind words

Chuck: I would recommend a Taig, it's done everything I've wanted it to (within the limitations of it's size), I suspect that a Sherline would be as useful in this end of the lathe sizes... and I have the Taig mill as well, so tooling is interchangeable which is a good thing! I've made a few extras for it over the last couple of years which have really expanded what I can do with it.

Zee: Isn't it usually the MESSENGER who needs to be worried?

Dean: This steady is directly the result of realizing that you can't put 3" stock in a steady with 1" capacity... just when I was faced with turning something too big for the stock one, John Stevenson posted a picture on the HSM forum of a huge one he had made for some giant beastie of a lathe he has: so I immediately swiped the basic idea and re-worked it to fit my machine. Thanks, John! The long-term goal is still to fit up some kind of lead screw so I can do threading, I'll get there eventually. There are rumours of Taig making one available, but that almost feels like cheating :big:

The next part is the connector between the two cylinder assemblies, it's pretty much the same deal machining wise as the last part, so I'll limit myself to posting a photo of it when it's done.

Cheers, Joe
 
Thanks for that, Mike. Been a while since I've browsed their site. Does look like it's pretty limited.

Cheers, Joe
 
Joe;
Cheers from the west coast! I suspect you've run across J.R. Bentley's site, but in case not:

http://lathes.jrbentley.com/taig.html

Love what he's done to his Taig. His version of the leadscrew is here;

http://lathes.jrbentley.com/leadscrew.html

He's the first to offer that one would be crazy to copy his dog coupling but the leadscrew is neat all the same. I haven't run across anything in mods that would allow for thread cutting - nothing I'd want to build anyway.

Great work on documenting your builds and thank you for posting. Sorry for the Taig hijack but I love mine too.....good to see it generating complex models.

Garry

 
Joe, look up Tony Jeffree on google. He has a Taig set up for cutting threads in the manner of a regular screw cutting lathe. Tumbler, banjo, and all that.

I made a lead screw setup for mine, and made a few false starts at change gear design, but still am not there yet. It's one of those things that keeps getting put off to do other fun stuff. I have the full set of change gears cut and ready, but just haven't thought of a way I like to implement them with my lead screw. It'll get done, someday.

I think I'll copy your copy of John's steady, if you don't mind. I need to make one for the little Atlas, too, so might as well make two of them while/when I get in the mood!

Happy New Year to you. Looking forward to your next post!

Dean
 
Garry: Right back at you from the East! Thanks for the kind comments and the link, I had seen his site before but neglected to book-mark it.

Kvom: Coming from you, I really appreciate that. I've been watching your Halo build... need I say more?

Dean: I've got Jeffree's book... that's what had given me the bug for a leadscrew in the first place! It's still a ways off, but now that I've got a dividing head, I can do gears...

Here's a couple of "as built" pics of the steady, I very quickly abandoned the overly complex roller assemblies for the more usual bearings, other than that I've had no trouble with it, does what it is supposed to do.

A Happy New Year to all!

100_0797.jpg


100_0799.jpg

Cheers, Joe
 
Joe;

What diameter did you settle on for the steady rest ring?

You've done it now; I was on the Home Shop Machinist website looking for the Snow plans! Unfortunately they don't list the Part One back issue as available - I'll have to call them. Has anyone seen plans published elsewhere?

Happy New Year!

Garry
 

Latest posts

Back
Top