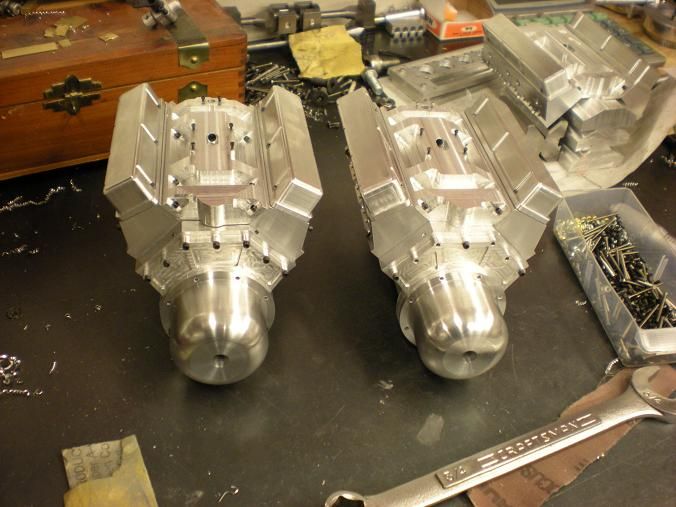
I started out with 3 blocks. One got damaged and now there are 2. I still make enough for 3 and hope for enough for 2. I guess I make a few extra incase something happens along the way.
You need to couple those two engines together like a V-16. I saw this at a tractor pull. Some zoomies and velocity stacks, perhaps a shot of NOS and caty bar the door, she's getting away from me.
You need to couple those two engines together like a V-16. I saw this at a tractor pull. Some zoomies and velocity stacks, perhaps a shot of NOS and caty bar the door, she's getting away from me.
It's actually going very well. I just posted an update in the breakroom under the old thread. I think I have my black and scarlete problems cured and thanks for asking.
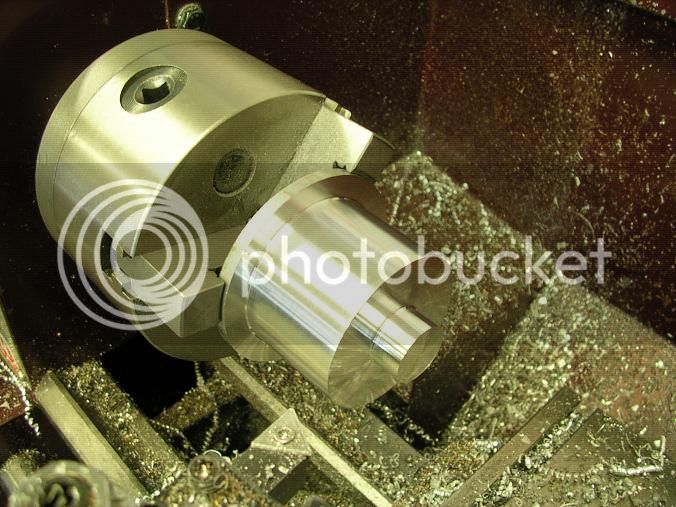
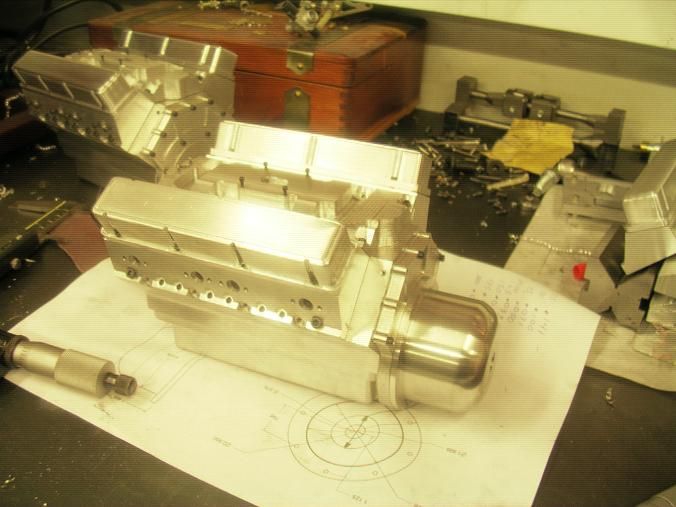
Managed some garage time today. Worked on the bell housing.
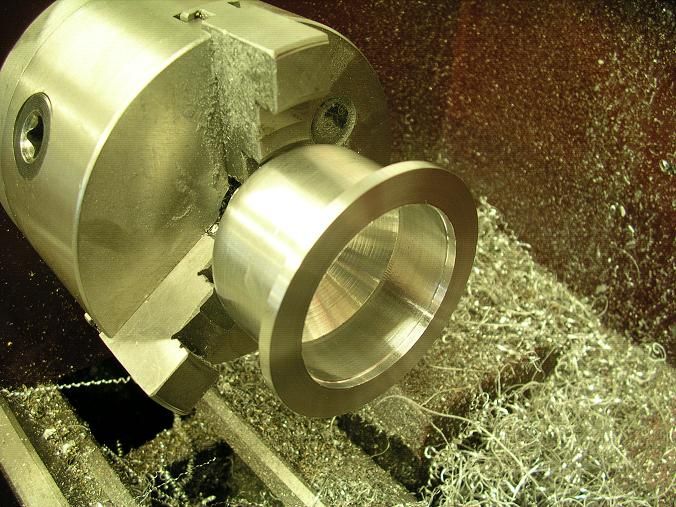
Started by machining the OD of the housing and establishing the back of the flange. Then I machined a small boss on the rear so there would be something to hold onto the part when it gets rotated.
I learned this one from watching the members on the HMEM site. I machined steps every .025 to the proper depth to form a .500 radius.
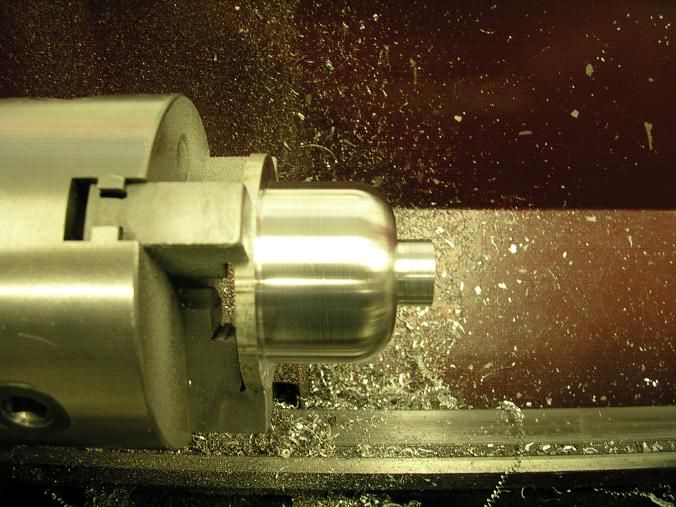
Then with a file and some sand paper, the steps were blended together to form the curve.
The part was then rotated and the flange was brought to size.
The inside was drilled thru and the two bores were made.
The insite corner was knocked down on a 45 degree angle to complete the inside shape.
A small step was them made to give the proper size to fit the boss on the rear plate.
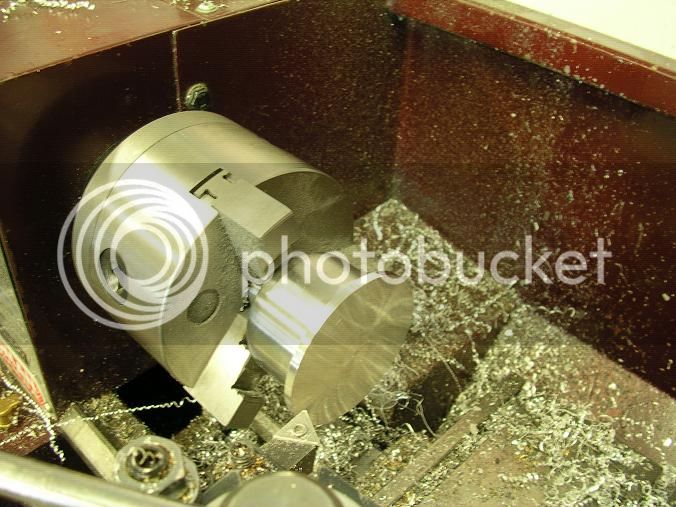
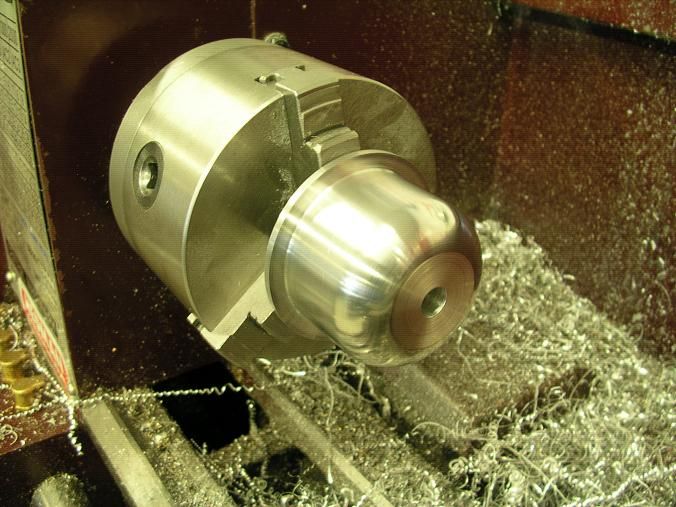
Again the part was rotated and the holding boss was removed and cleaned up a little.
I still need to drill the hole pattern to mount the piece but that should be a quick deal!
To be honest, It's a product of hanging out around here. I use alot of the things I see around here and some of them even work. I don't think i would have the guts to try something like this without the support of the HMEM and NAMES people. It's nice to know if I get myself into a jam, I have a little it of help.
Steve is still a surprise for me
this fellow is in this hobby from a couple of years or so, but many of us can not even aspire to his skills in 10 years :big:
Steve is still a surprise for me
this fellow is in this hobby from a couple of years or so, but many of us can not even aspire to his skills in 10 years :big:
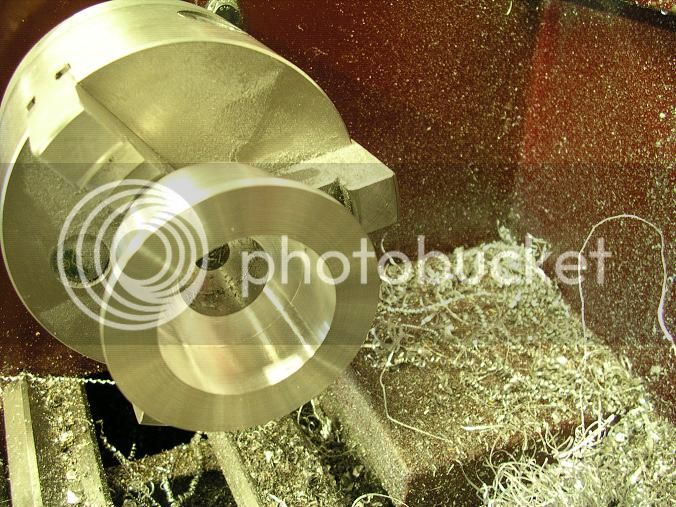
Well that finishes the bell housings. Sorry the pics are very dark but i'm trying to learn a new camera.
I was going to make a few cylinder liners but it is just to hot. Maybe tomorrow.