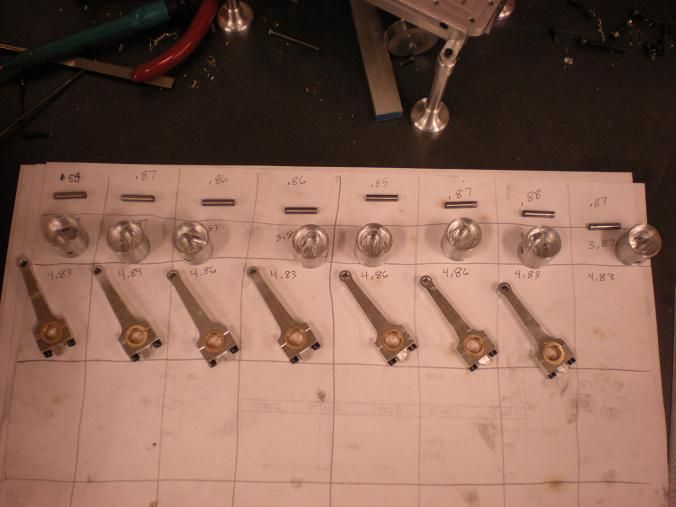
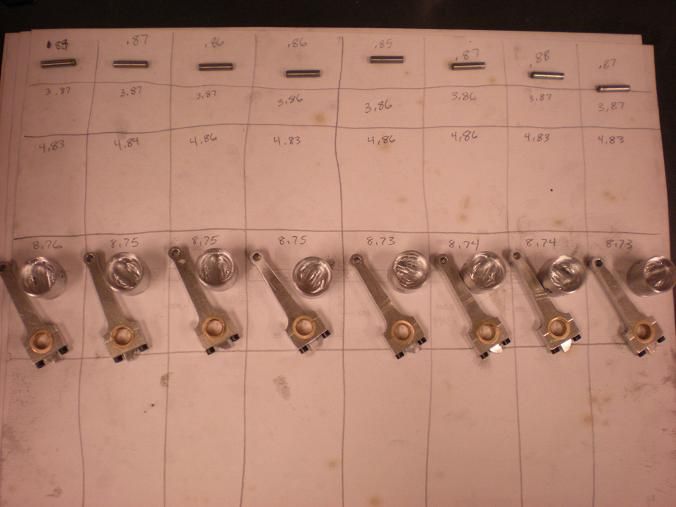
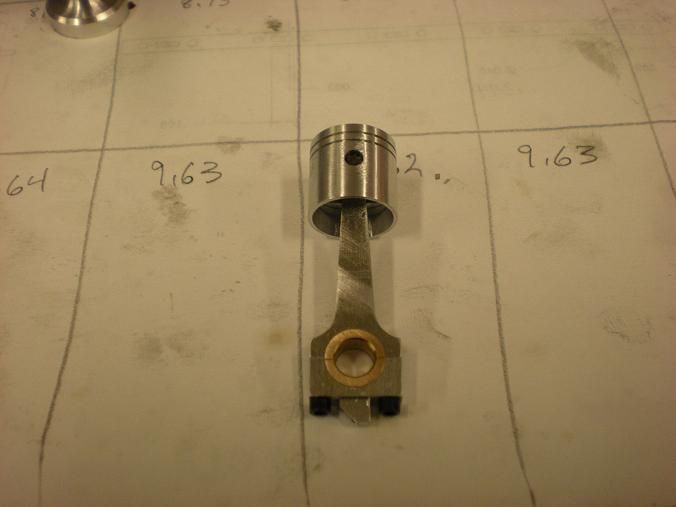
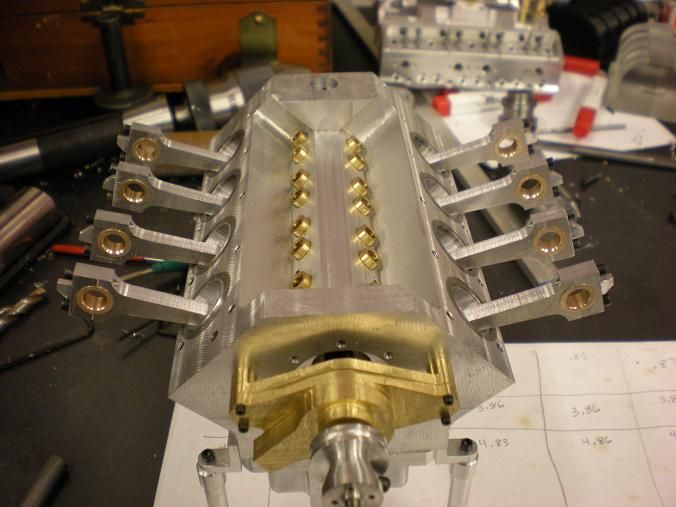
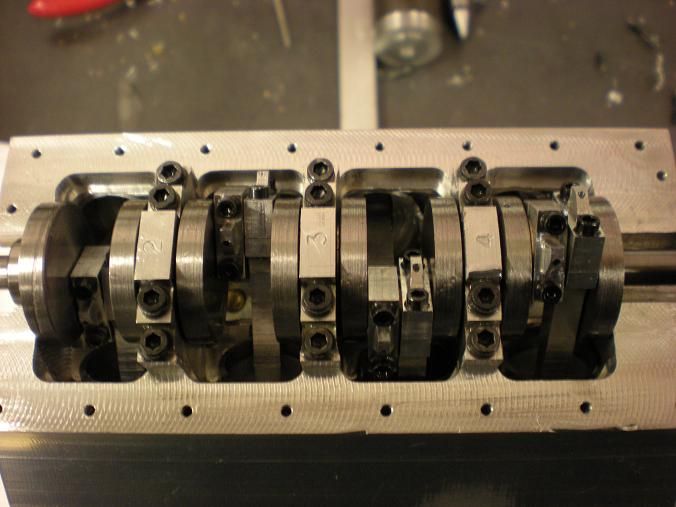
- is the wristpin end also bushed like the bottom end, or plain?
- what type of bearing material did you use?
- on assembly, would you locktite the bottom end bolts, or normal torque is ok?
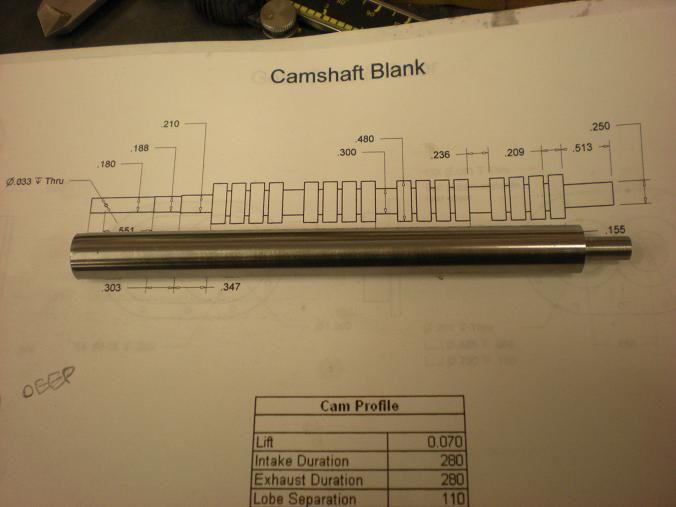
- material = dill rod? hardened?
- what keeps them retained in the piston