My next build--A cross beam vacuum engine

Home Model Engine Machinist Forum

Help Support Home Model Engine Machinist Forum:

This site may earn a commission from merchant affiliate links, including eBay, Amazon, and others.
But what did he use the cylinder head, crankshaft carb etc, for, after he cut off the barrel and piston?
I must try a gas-torch on my flame eater... instead of the spirit burner...
Hi Brian, I notice his engine uses an eccentric for valve operation, rather than a cam and follower that you are having trouble with...
K2
 
Well I've suggested that to Brian a couple of times as it is far easier to alter position and flame size on a gas torch.

On of the Alyn "CHUK" engines running from a lighter

 
I'm running out of clever tricks to make this engine run. Today I machined away a lot from the beam itself, which started life at 3/8" wide and is now 0.140" wide, except at the center boss and the ends. I also milled away much of the brass strap that has the cam follower attached to it. The poppet valve inside the "smoke-stack" is working (as tested by the "I can suck air thru it but I can't blow air thru it" method. I keep thinking about machining an aluminum piston, rather than the graphite one it has now, but the graphite piston is sealing reasonably well. A machined aluminum piston may give a tighter fit, but the added friction will not agree very well with such a low powered engine.
lZhYNo.jpg
 
How did I do??--Not great. I think that removing material from the beam and the support for the cam follower helped, and I have spun the engine so many times by hand trying to start it that the beam no longer requires a spring and the engine has loosened up amazingly well. It won't go with one flywheel. It won't go with the bronze "smoke-stack" taken out of the equation. There is only one piece remaining to take some weight out of, and that is the con rod. that will be my next trick.
 
I shaved any excess material off of the con rod, and still no joy. I'm just about beat here. I've lightened everything that can be lightened, I've tried it with one flywheel, I've tried it with the "smokestack" capped off. The engine turns very freely. I can't think of anymore things to do right now. It may be a function of timing, but I have tried the cam in a few different settings and it doesn't seem to help. I'm going to hide in the closet and sulk now!!!
 
Oh Man--I hope the machining Gods will forgive me for this. A couple of people have told me that I need spring steel for the valve----not brass. So--I just cut up a 0.020" feeler gauge that I've had for 40 years to make a new valve flapper out of. I didn't have any steel shim stock, and neither did my supplier here in Barrie, so the feeler gauge was sacrificed.
 
No real luck even with a steel flap valve. I had a problem with the original design of this engine.---The engine has a 3/4" bore, but the flapper valve was only 1/2" wide. (Don't ask me how I did that-s$#t happens!!) To correct that problem, I sandwiched a piece of 0.030" steel with a 3/8" hole in it between the cylinder head and the cylinder. This solved the problem in theory, but the reality is that when you start drilling four bolt holes and a 3/8" flame hole in the center, the 0.030" thick plate doesn't stay flat.---it becomes somewhat deformed. I think I have a problem caused by the spring steel flapper valve trying to seal against a 1/32" plate that isn't truly flat anymore. Tomorrow I will remake that piece from a piece of 0.125" cast iron that I can polish absolutely flat.
 
Flip the head the other way round so the slot for the shutter faces out and make a thicker plate to retain it which won't get distorted. Have the slot just a fraction say 1 thou deeper than the shutter and make the hole in the cover plate smaller than the 3/8" that you have.

You should not actually be able to feel compression when turning the engine over in the direction it runs but YOU SHOULD feel the vacuum making it harder to turn the flywheel as the piston approaches BDC and the shutter has closed. A further check for a good seal is to disconnect the shutter and leave it in the closed position and then turn the engine over in it's running direction, this time you should be able to feel a lot more resistance as the piston moves to BDC as the inlet will be closed rather than open as it is for most of the stroke during normal running. If you then also block the exhaust you should feel resistance as the piston comes up to TDC compress.

As I think I said on HMEM I run thicker shutter material so there is no rule that you need shim.
 
Jason--what thickness of shutter do you run? I'm using 0.020" material, cut from a feeler gauge. I'm pretty well stumped here. I made a thicker (0.100") plate with a 0.375" hole in it and both sides polished to allow good seating of the shutter against the hole in the plate. There is a gasket between this new polished plate and the cylinder. The groove cut in my cylinder head for the shutter to slide in is 0.030" deep. The engine turns very freely. I finished these modifications this morning, and they seemingly made no difference when I tried to start the engine. What do you run for piston material? I'm using a graphite piston, but I'm beginning to have my doubts about that.---Brian
 
As I posted earlier in the thread a Utility knife blade is quiet common and what I use on teh CHUKY. The Grey Nattie that I showed has a shutter cut from 1/2 x 1/16 flat steel strip.

After soldering but before cutting to size
DSC01980_zpsf8op6tbq.jpg


Nattie shutter, slot is no more than half a thou deeper than the shutters thickness

DSC04658.JPG

20210110_115535.jpg


The CHUKY is running a piston turned from Cast Iron bar lapped into a CI bar cylinder. The Nattie uses a spun brass piston that wa sfinish turned and then lapped into the cylinder which is an iron casting.

CHUKY has a very different cam profile to yours, closed for longer than it is open
DSC01951_zpsocoiv6tt.jpg
 
Jason--Thank you so much for your help. I think I will make up a cast iron piston and lap it into the existing cylinder. I really do appreciate the helping hand.---Brian
 
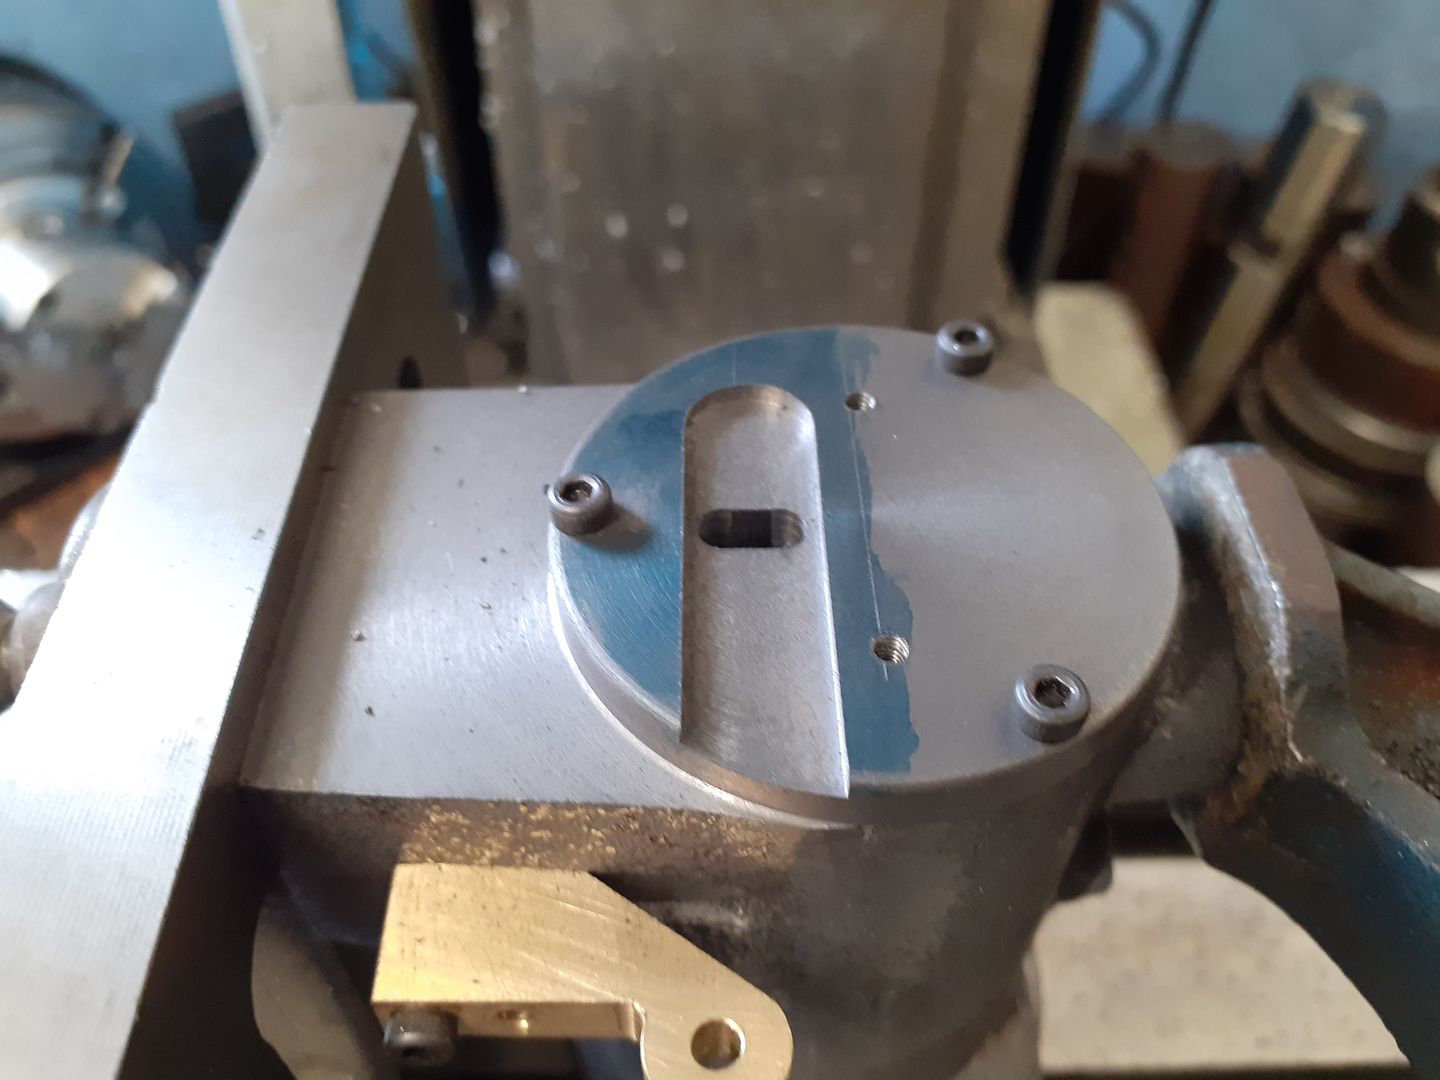
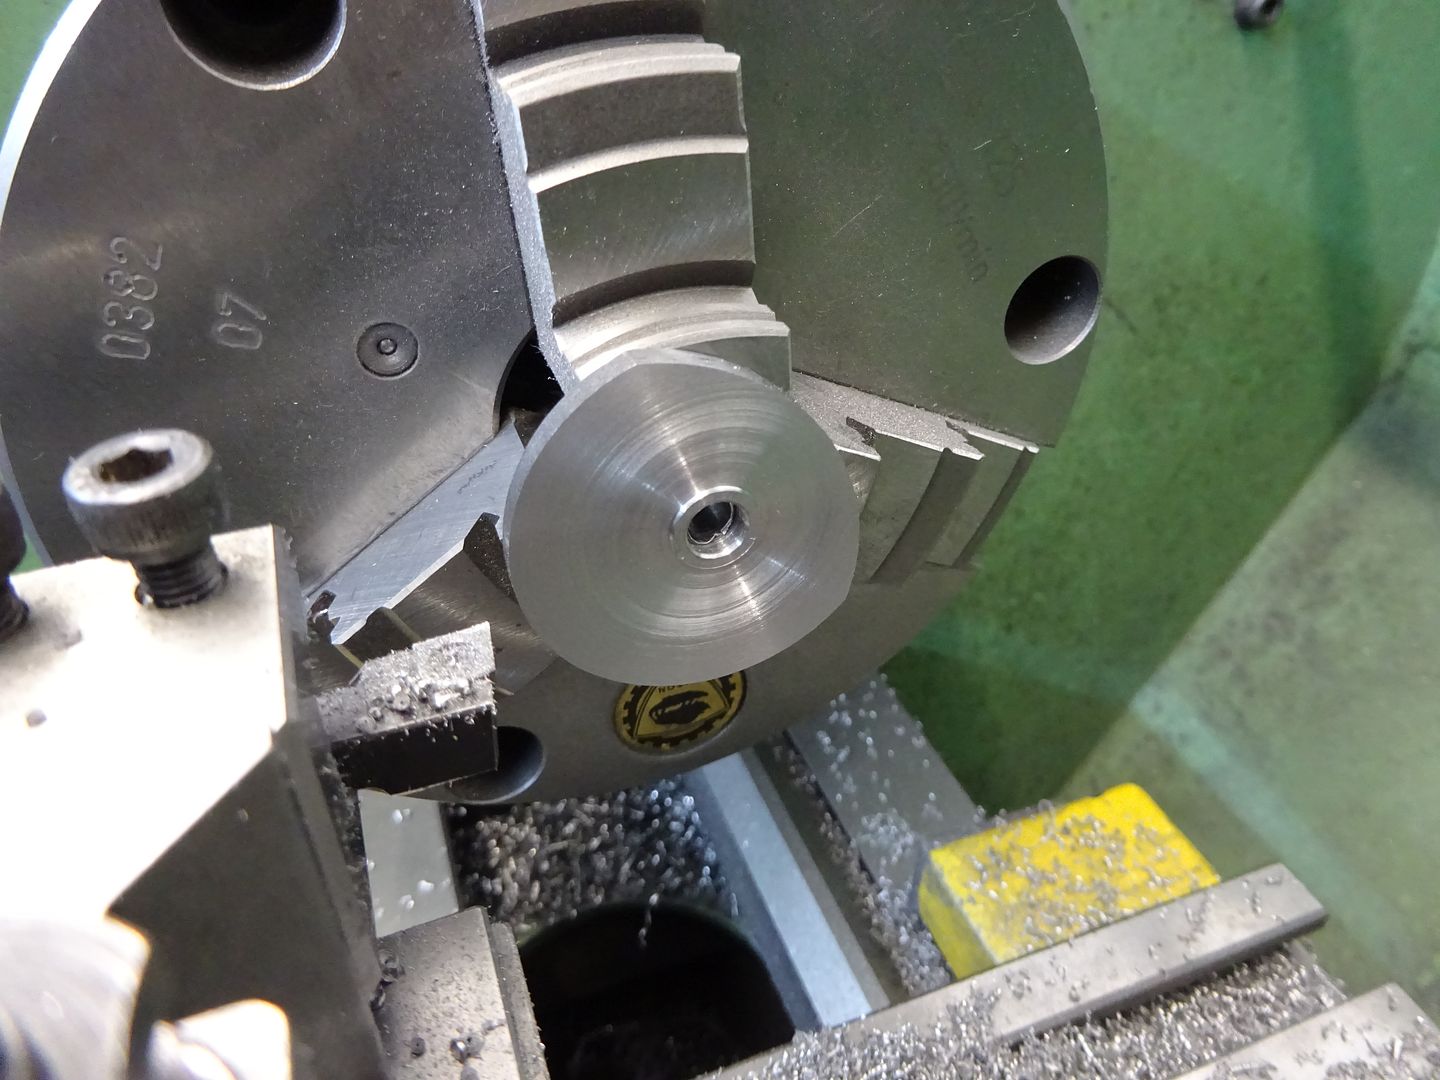
For those of you who are following---Today I made a new cast iron piston, left it about .001" to .002" oversize and lapped it into the cylinder with 600 grit lapping paste. The bore of the cylinder measures exactly 0.75" diameter. It was reamed to size with a 0.75" reamer when first made, then honed with a 3 stone brake cylinder hone. The brake cylinder hone probably opened it up .0001 to .0002", but my measuring equipment won't measure that anyways. The graphite piston was turned to an exact 0.75" and was a snug fit into the cylinder when first made. This morning when I removed the graphite piston, it measured 0.745" in one plane and 0.747" in the other. It was a sloppy fit into the cylinder, and if I tried to spin the flywheels with my thumb held over the end of the cylinder, it had no "bounce back" at all. I really don't trust graphite for a wear item like a piston, and probably won't use it again. The slot I milled in my cylinder head was milled 0.030" deep, and I used a 0.020" feeler gauge for the flap valve. I have since spoken to Jason from the U.K. and he tells me to use a flap valve about 0.001" to 0.002" less than the depth of the machined groove. Since I have already used a feeler gauge to make the first flap valve, I don't feel so bad about cutting off a 0.028" blade to make another flap valve.
 
Well boys---I think I'm whipped!!! My new cast iron piston and thicker flap valve hasn't made the magic difference. I've tried pre-heating the cylinder. I've tried it with only one flywheel. I've played with the timing. I've tried it with the "smoke-stack" taped shut. I've tried it with the propane torch blowing directly on the flame hole in the cylinder head. I've tried every trick in my arsenal, and it's not happening. This is a big disappointment to me, as I truly believed I would have a runner. I have no tricks left to play, and now I have to think about what to do next. I may reconfigure all of my parts to make a different style of flame licker. I may take up tap dancing instead of machining as a hobby.
 
The profile of the cam is the only part of this engine which I am not sure about. I am using the same cam profile as my "Poppin" engine which I built and ran successfully about 5 years ago. The profile needs to be such that the valve flap is open when the piston goes from tdc to bdc to suck in the flame. The valve must close very quickly at the end of this stroke, so that the flame sucked into the cylinder goes out and creates a vacuum. The vacuum sucks the piston back to tdc, the valve opens, and everything repeats.
 
The popping engines shutter moves away from the port rather than slides across it as you have on the beam engine so is unlikely to be giving you the correct timing.

What timing do you have at the moment - starts to open, fully open, starts to close and fully closed ? Take positions off the actual engine not what the drawing shows
 

Latest posts

Back
Top