My 4" scale steamroller project

Home Model Engine Machinist Forum

Help Support Home Model Engine Machinist Forum:

This site may earn a commission from merchant affiliate links, including eBay, Amazon, and others.
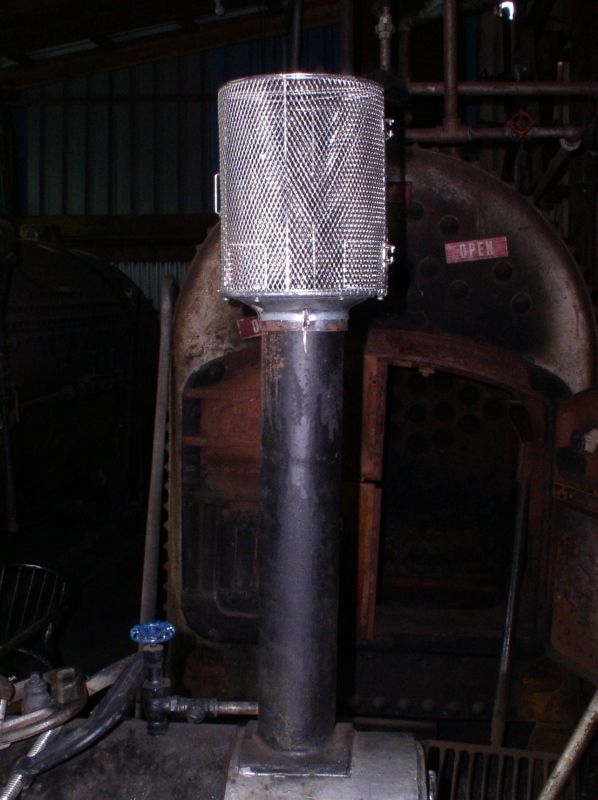
I promised to get back to the spark arrestor, so that is today's update. Guys who run the live steam in the grand scales are quite welcome to borrow my design....

This thing is a real high dollar deal. 50c for the wing basket, plus $3 for a weather flange. The stainless basket will probably outlast 3 or 4 flanges, but that's OK. Both will be easily replaceable.
P9230001_zps60191477.jpg


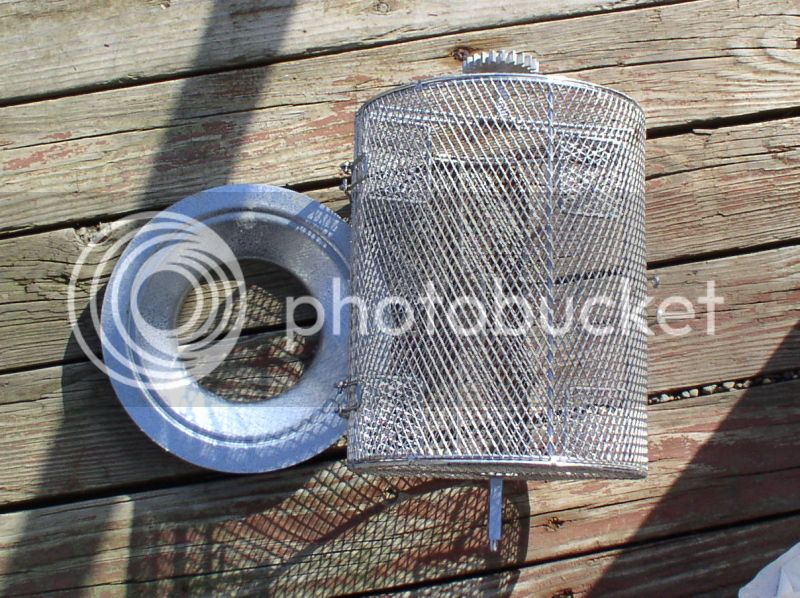
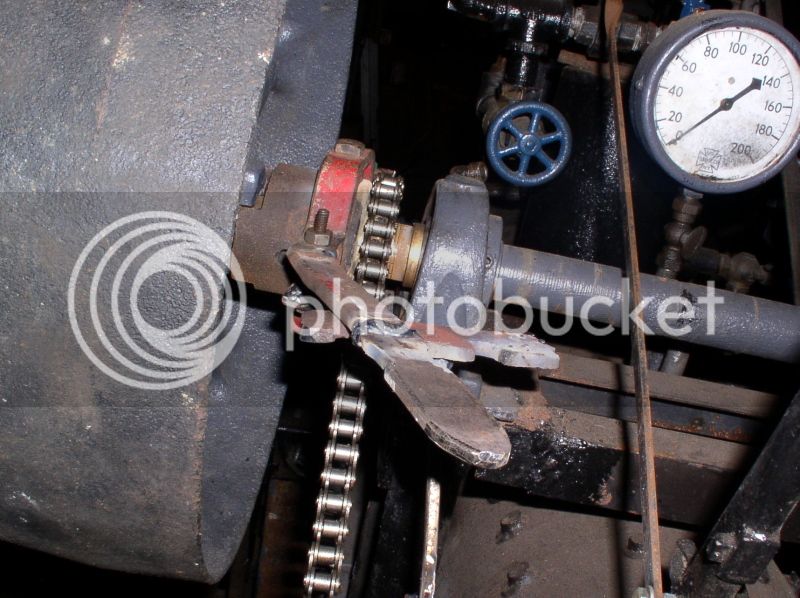
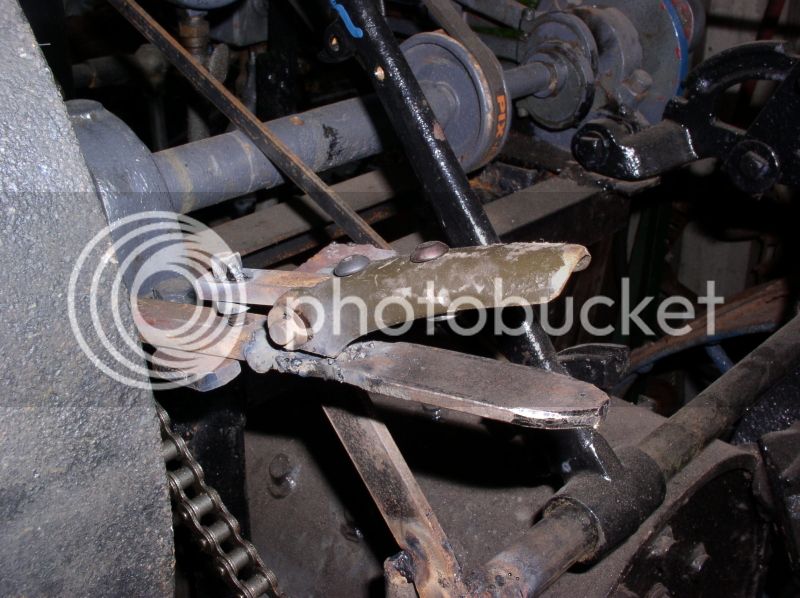
The axles just snapped off (some baskets don't even have them), then I cut a hole the size of the chimney internal diameter in one end and removed the internal paddles
P9230002_zpsaa44f99d.jpg


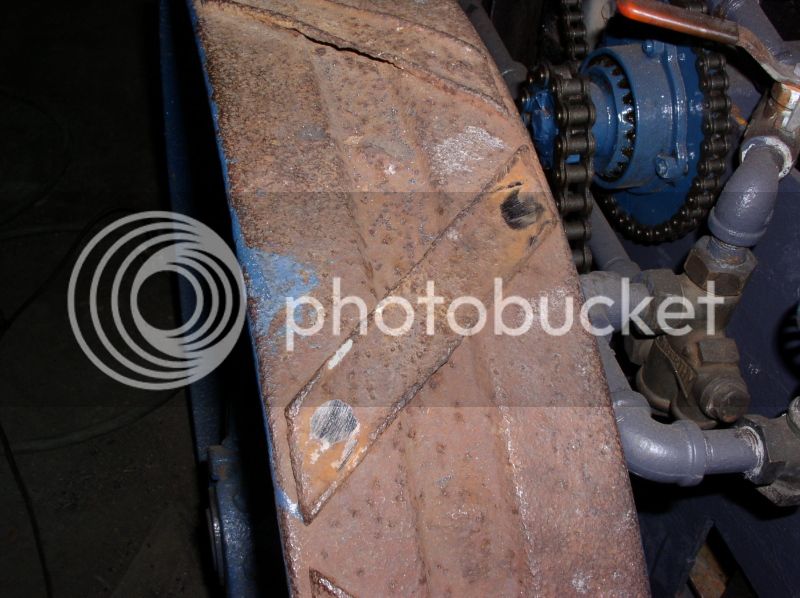
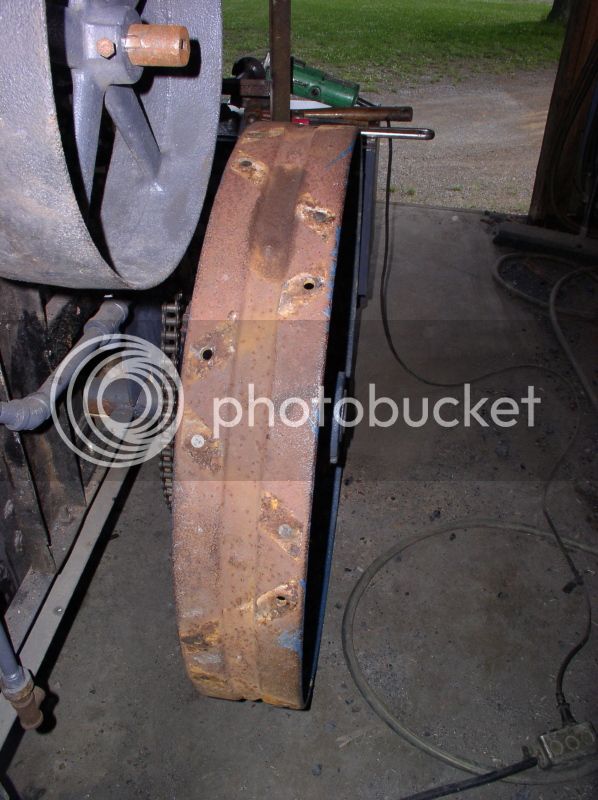
Six screw holes drilled in the weather flange will allow it to be attached firmly to the basket, yet still easily separated.
P9230004_zpsae04e61b.jpg


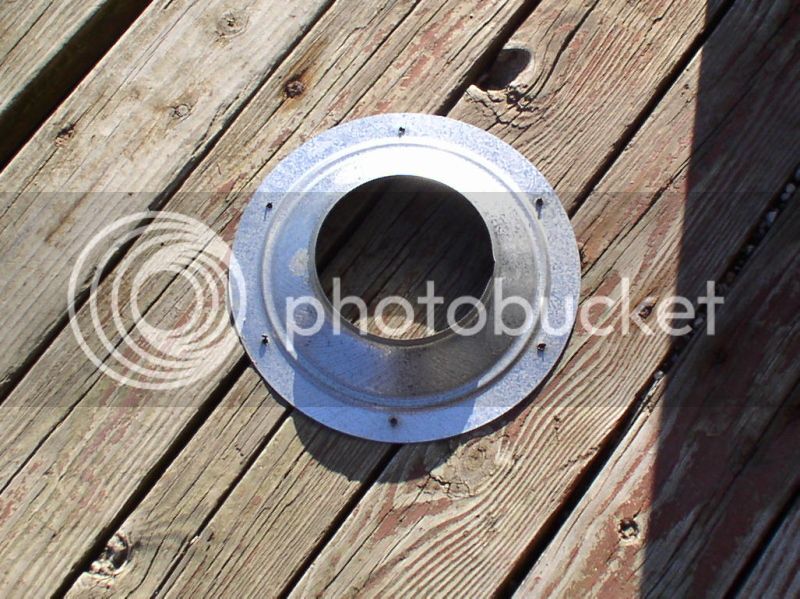
I also bent the excess flange up around the edges of the basket to make it look a bit more 'professional"
P9230005_zps9cbb2766.jpg


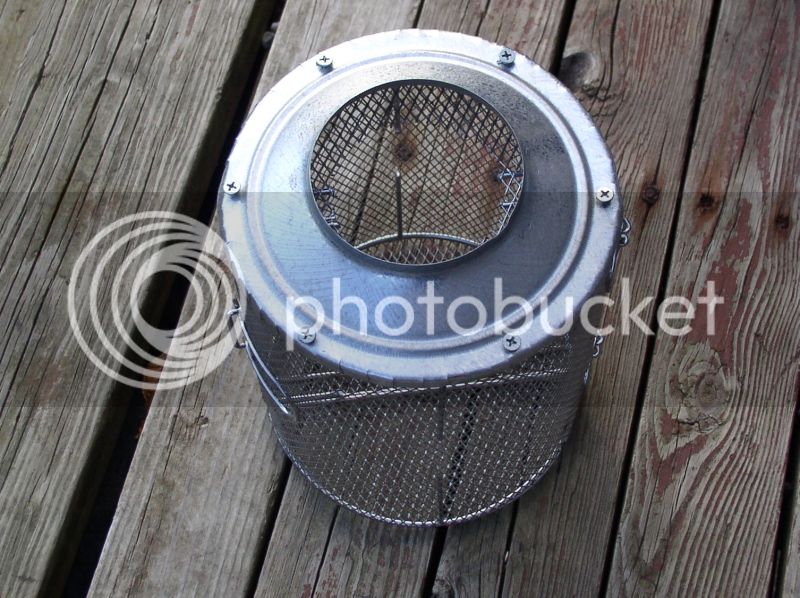
approximately 20 minutes work, and it was done. When I go over next I'll mount it on the stack.
 
Weekend Update (And no, I'm still not Chevy Chase):
The weather flange was a bit oversized, so I 'cold forged' an adaptor ring out of flat bar
P9280001.jpg


I also bent the handle for the hand pump to go through the 'window' in the side plate while I was in the blacksmith shop.
P9290013.jpg


Aaand, spark arrestor installed. I'll drill it for a couple retaining screws when I mount the bunkers.
P9280003.jpg


The final drive chains took an hour or so to get them both right. Mostly because there's no provision for a tightener. We had to run to the store for half (offset) links. I'll mount wick lubricators later to keep the chains from wearing too much. Oil is always a LOT cheaper than hard parts.
P9280004.jpg


About twelve years ago I found these military surplus cable controls at a flea market. I think I gave $10 for them. They are handsome, but useless to me as-is
P9290007.jpg


So the first order of business was to tear it apart. The frames are aluminum and won't be used, but the levers themselves are good cast with brass hardware.
P9290009.jpg


One was stripped to use as a throttle
P9290008.jpg


Installation started. This was the best solution I could think of that didn't require attaching them directly to the boiler.
P9290012.jpg


The cable plate from the levers just happened to be drilled with the proper spacing to use it on the cylinder drains. I'll probably grind it dogbone shaped just for looks before we're done.
P9290010.jpg


Meanwhile, I gave the coolers a base coat while I had grey out to paint the supports under them. Next time I'll fasten them down with sheetmetal screws.
P9290011.jpg


Next weekend is Portersville's Fall show, so whatever I get done Monday will be whatever it looks like for a while. We'll have steam cooked apple butter and steam pressed cider for sale during the show, too.
 
Last edited by a moderator:
Well, today was probably the last uninterrupted day to work on this thing until after the fall show (Tomorrow starts apple peeling for apple butter). So I got some stuff done that I had been putting off.
The first order of business was to change out the throttle valve. Why? Because somebody "made me an offer I couldn't resist" for the butterfly valve... and it simplified the throttle reach rod geometry in the process, anyway.

Old layout with butterfly throttle valve: throttle reach rod and pressure gauge would have tried to occupy the same space.
P9280005.jpg

P9290012.jpg


Butterfly valve (right), and the steam rated ball valve which will replace it.
PA010015.jpg


To get the handle to point in the right direction, a little cut and weld was in order.
PA010016.jpg


Now the handle, when fully closed, is just beyond parallel with the pipe rather than perpendicular to it.
PA010017.jpg


The reach rod now runs alongside the gauge with just a bit of room to spare.
PA010018.jpg


I also timed the engine (I simply hadn't reset it after I made the new crankshaft) and installed the governor belt. Every step towards completion reminds me of 3 more things I still have to do.

One thing I'm having a bit of trouble locating is bulkhead fittings for bottom of the coolers.
 
A couple weeks ago Ben brazed the sprocket to the dog clutch for me (I'm out of gas, and too broke to buy more)
PA240003.jpg


Cleaned up and ready to install
PA240004.jpg


One of those many little parts that needed made, the front roll brace is 5/8"x 1" solid bar.
PA250011.jpg


Kim had a director's meeting this evening so I went over to finish up a few things before they got misplaced. Today may well have been the last day to work on this until spring. It was 39*F in the boilerhouse according to the thermometer hanging on the wall. My fingers got so numb I didn't realize how hot a piece of metal was until I'd already burnt them. So I spent the remainder of the evening trying to work wearing welding gloves...

First I fitted the #40 primary drive chain. I thought I did good with cold fingers, I only dropped it 3 times
P1010036.jpg


Then I ground a custom key for the crankshaft (and burnt my fingers with it... Who needs fingerprints anyway?). I still need to change the bolt in the flywheel hub for a shorter one or a setscrew.
P1010037-1.jpg


And finally, I started to assemble the clutch throwout before I forgot how I wanted to do it. The brackets and linkages will be built in place because of all the stuff they have to clear.
P1010038-1.jpg


Maybe we'll have a couple nice days in a row in December to work... Unfortunately, even if we get them, it will probably take 2 or 3 days to pull the chill out of the metal. (I don't have a torpedo heater, and little ceramic cubes don't put out enough heat)
 
Well, winter was longer and colder than expected, and I spent much of my spare time and $$ helping a friend who was having health & marital problems, anyway.

But I found a few small needed pieces in some scrap and swarf that was headed to be recycled this week. So I finally made a little progress. Starting with the mounting bracket.
P5180043_zps84a351f7.jpg


A bit further along. One man's useless junk is another's "just what I've been looking for"
P5200015_zps51baac15.jpg


Still needs a quadrant and handle (and oiler), but is already fully functional.
P5200016_zpsc07e6657.jpg


Next up? Finish the hand pump and see about side tanks.
 
Allen,

Glad to see that you're back. I have been enjoying your posts.

I echo that, pleased to see you back in the workshop enjoying better weather.

Art or Engineering? My answer is it is a lot of both.
Keep us posted on this very interesting project.

Eric
 
Did a bit more yesterday before the rains set in. Fabricated a couple braces and the handle & quadrant for the clutch. I also built the detent, but didn't get it installed.
P1010039_zps86a11b08.jpg


And a couple apron bars from a manure spreader became rear canopy supports.
P1010041_zps8d5c6853.jpg
 
This past Tuesday, Kim had to go to a Director's meeting at the showgrounds. So while she got frustrated with a bunch of stubborn old men, I got to take my frustrations out. Some wit pointed out a couple weeks ago that "Steam rollers don't have strakes on the rear wheels..." Well, no sh-t, Sherlock! I just hadn't gotten around to removing them.

So grind the head off 80+ yo rivets, drive a screwdriver underneath and 'pop!' lots of heavy beating to drive the rivets out tho.

P6110001_zpsd4ed436e.jpg


P6110004_zps6b39bea6.jpg


I also finished (except for a spring) the detent latch on the clutch, using the one from the lever I used for the throttle.

P6110002_zps7bf90c73.jpg


My buddy Ben brought over a pair of these to see if they could be cut down for side water tanks... I think they're a little fat, and thin so they'll rust out in a few years - but they may have to do if I don't find 12" diameter ones.

P6110005_zps020b7933.jpg
 
Back
Top