Gingery Lathe

Home Model Engine Machinist Forum

Help Support Home Model Engine Machinist Forum:

This site may earn a commission from merchant affiliate links, including eBay, Amazon, and others.
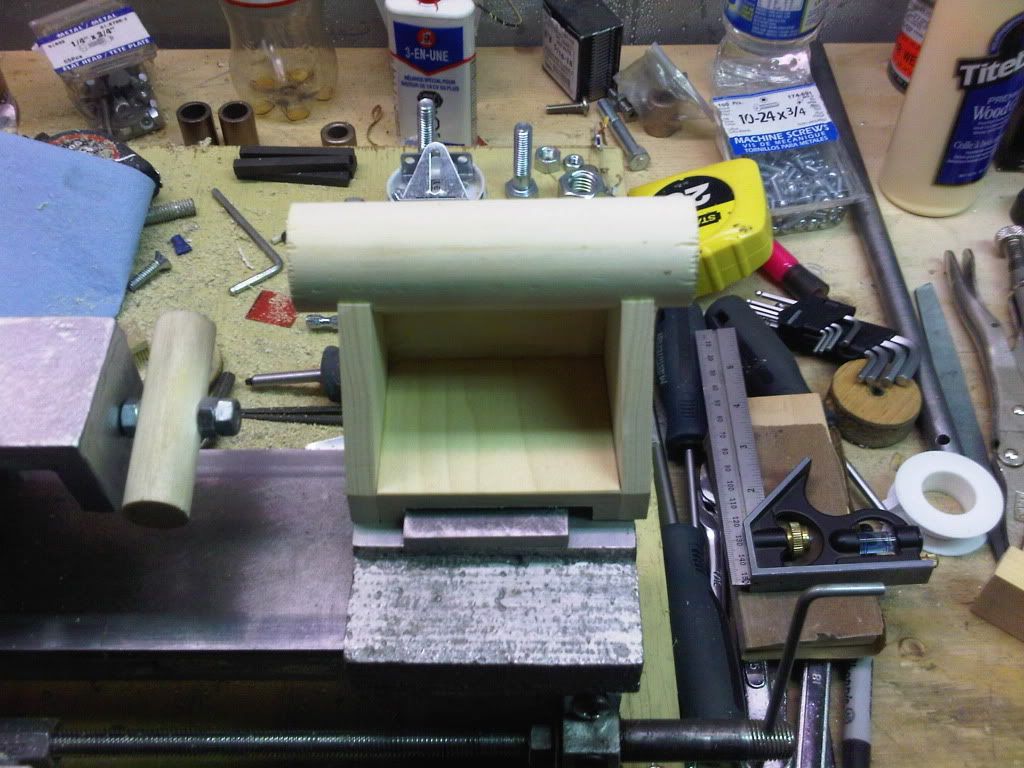
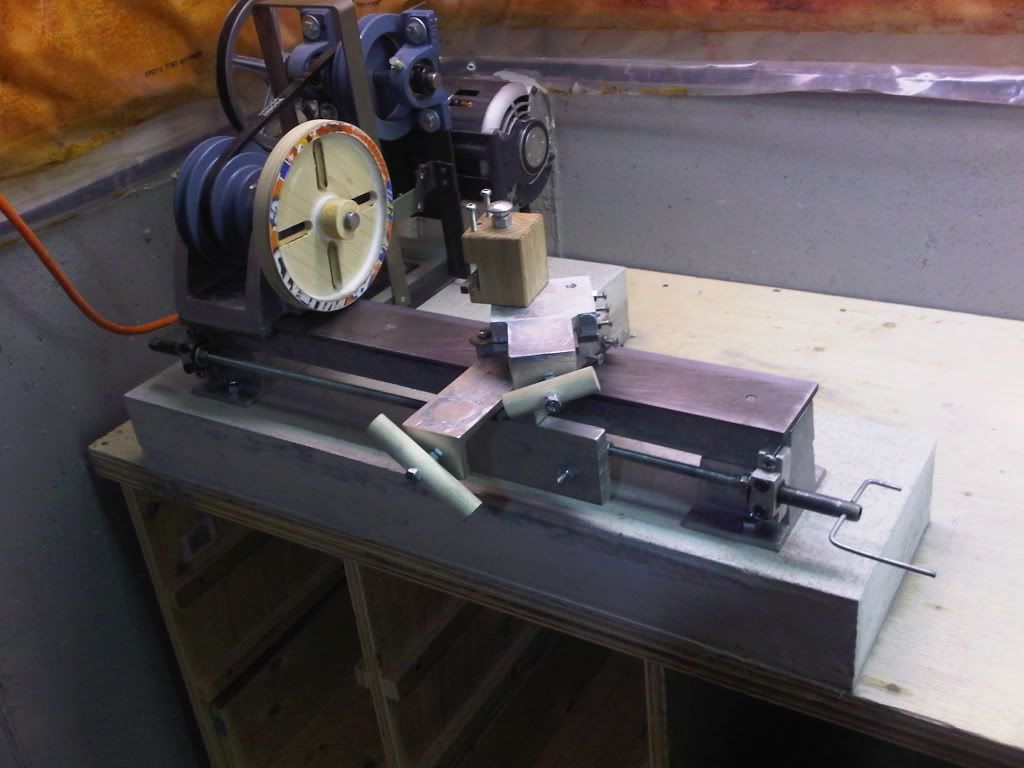
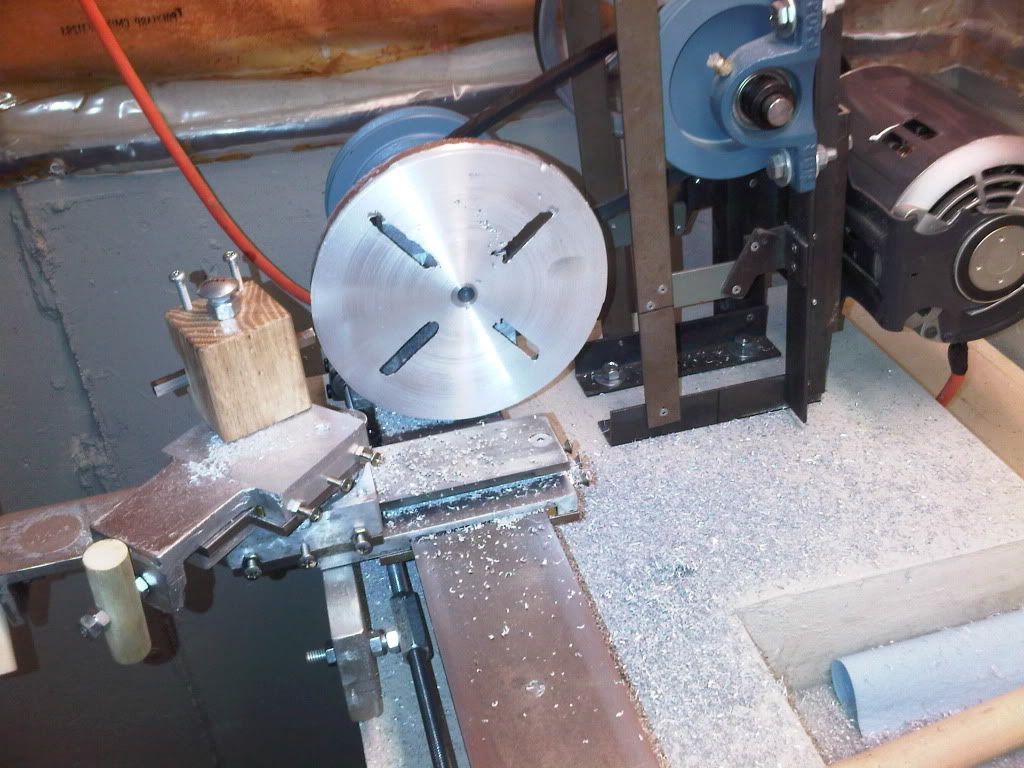
I wanted to get a 5/8" reamer, I only need it to ream out the faceplate bore hole in the pattern so couldn't see going and buying one.

In the 6th book of the Gingery series they show you how to make cheap hand reamers.

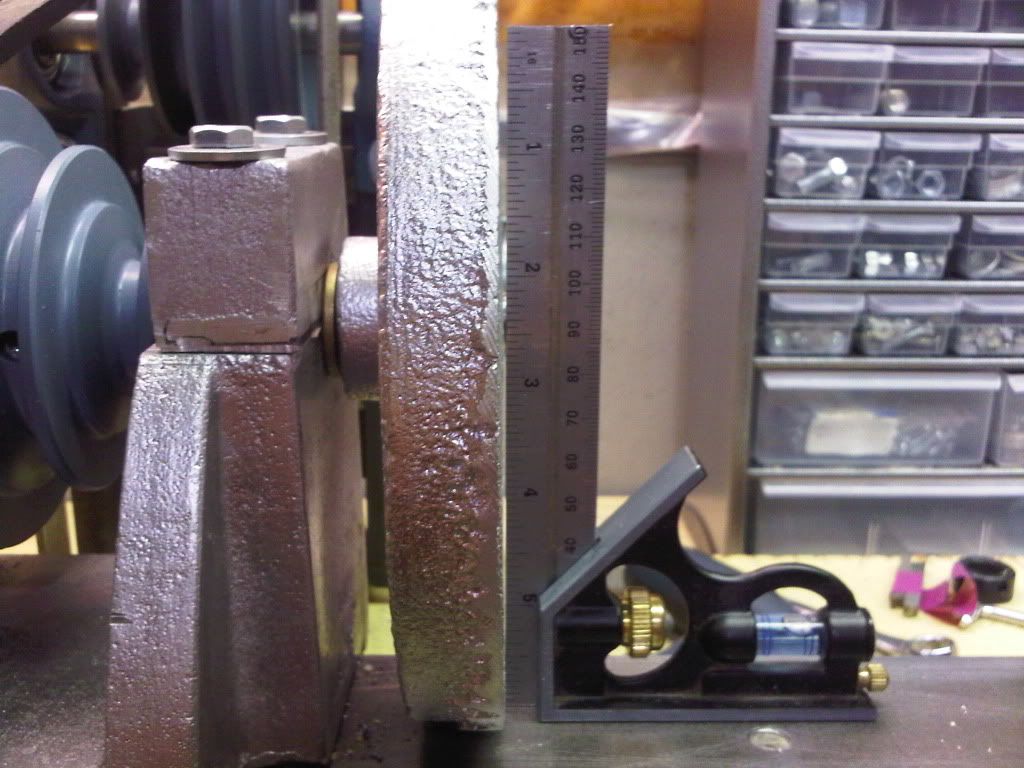
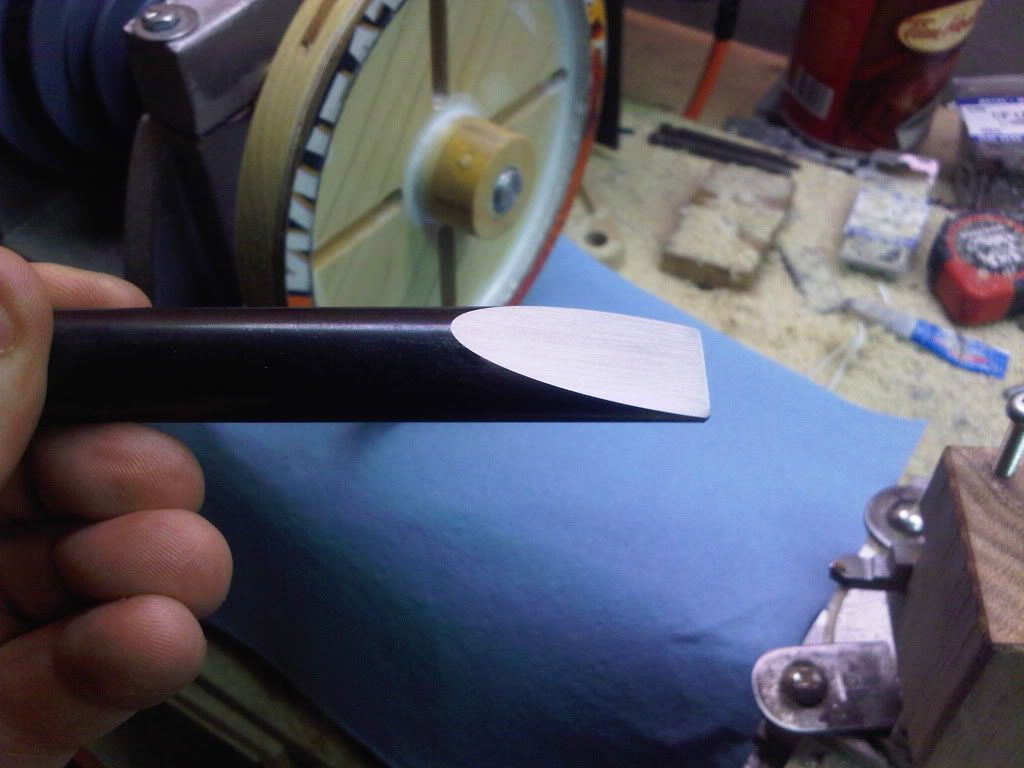
I have some cold rolled 5/8 left and cut a piece to size, took my time measuring and cutting the angle.

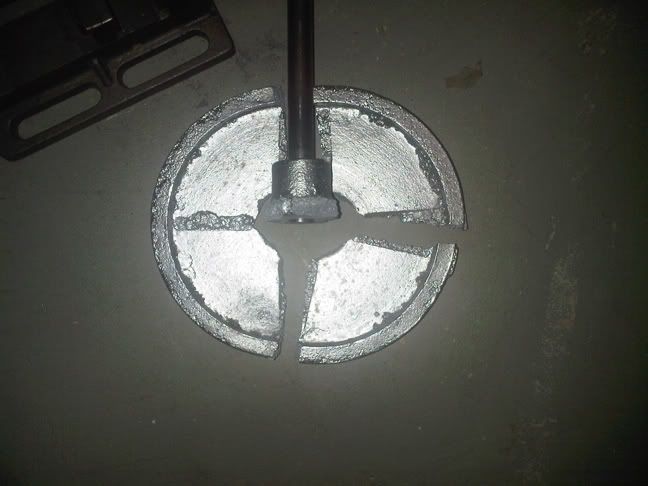
Filed all the cutter makers off, then went to the honing stones. When through the 4 different stones I have, which is probably over kill since I am just going to cut soft wood with it.

Here it is, turn out pretty good.

Remer.jpg


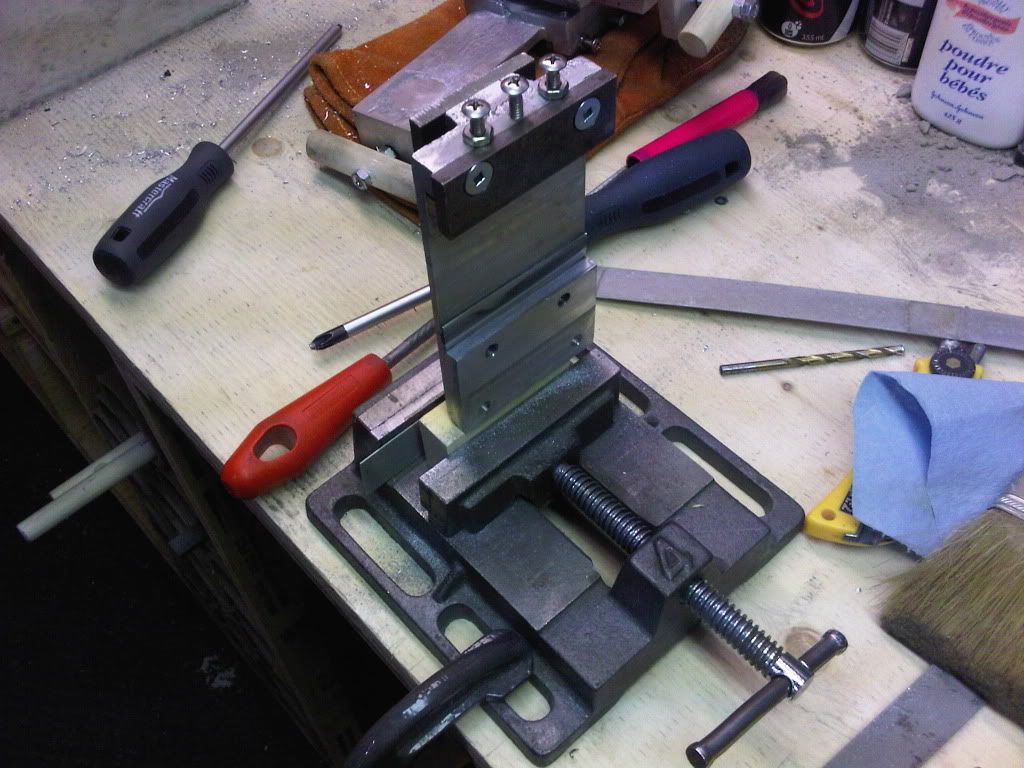
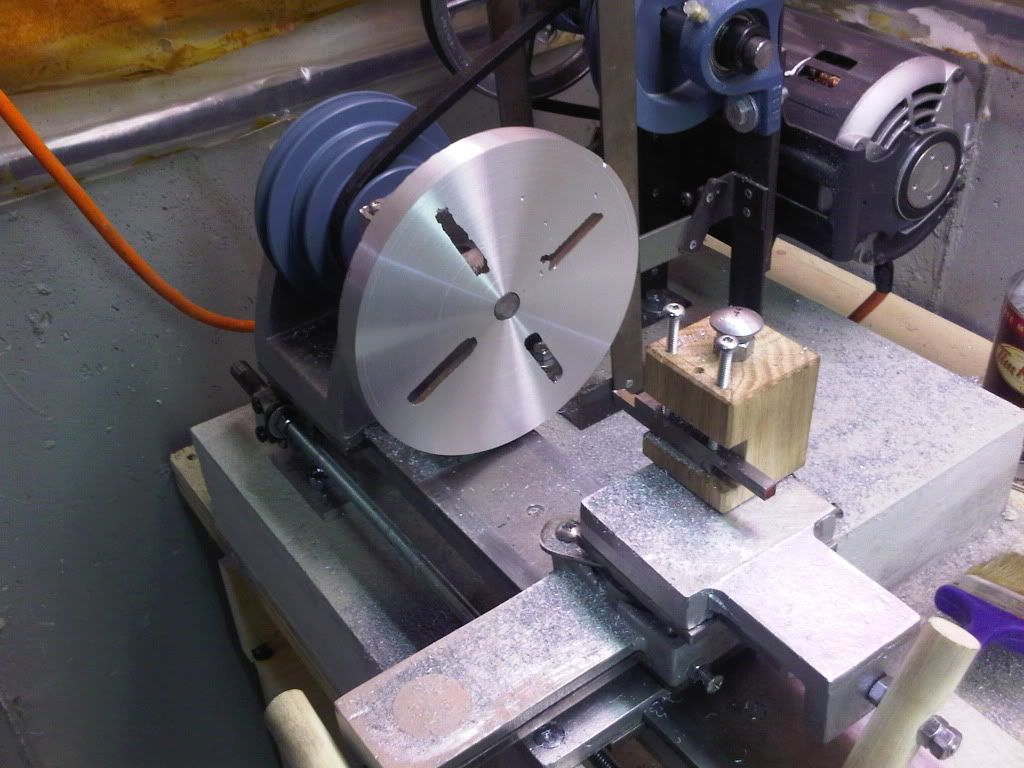
Went over to my drill press and try to put the newly made 5/8" reamer into my 1/2" chuck. ???
Hmmm it seems I don't have anything to put this into to ream the hole I need. But I have a nicely finished 5/8" reamer :)

Guess the 5/8" drill bit will have to do.

List of things to buy - 5/8" chuck for drill press.

Oh well, it was fun making it.

John.

 
Well, the wife is a work, my son is at Grandma's. Christmas presents bought and wrapped. Couple of hours to kill, so, it's not to cold out, off to the garage. :)

An hour later one tail stock pattern 3/4 done.

TailStockPattern.jpg


The face plate has one coat of varnish, The tail stock is coming along. Just might be able to cast these next week???


Hope everyone has a great Christmas!!

John

 
I'm enjoying watching you build your lathe Woodnut. I've built a few of the gingery tools, shaper, mill, and dividing head.
I've since got the machining bug so bad I've invested in more tools, a G0602 lathe and a G0619 mill and a bunch of tooling to use those machines.
I found the foundry one of the best things I've built for making the toys I want to make. I didn't use Gingerys designs to build the foundry just searched the web to find the ideas to make my foundry. I use waste oil to fire the foundry which is very inexpensive to operate. Plus it's a very simple design gravity feed for the oil and no special stuff to make it work. It takes about 20 minutes from lighting the furnace to melting the metal it takes more time to set it all up.
Well enough rambling from me I waiting to see your lathe completed soon I hope.
The only draw back from building the Gingery machines is they are not real robust for doing larger work but for a learning tool I don't think you can beat it sort of like a home schooling on metal working.
Oh yea Happy new year!!! To you and all. ;D
Norman
 
Thanks Norman, and Happy New Year as well.

I have enjoyed working on the lathe over the last few months and was thinking of diving right into the milling machine after I finished this. But I am now thinking it might be better to save up and buy a small one. It will probably take longer to save up for one then build it, but then it would be stronger and more accurate. I don't know, any way I will finish the lathe first and have some fun with it for a while before I make any final decisions.

Speaking of the lathe, not a lot has happen the last few days. I have enjoyed time with family and friends and only have putter around with the lathe. The face plate is ready to be cast and the tail stock is not far behind it.

Me and my work area had it out the other day, I kept putting tools down and it kept hiding them on me. So it was time for a over hall. Sat down and drew up a new work table. Took my son to Home depot and got some wood. Got it home, check it all out and then put Zac back in the car and went back to the store to get the wood cut right this time. For some reason I took 2' 7" for 27" and not 31"?? Zac learn a new word that day. At least I could use the mis-cut pieces for the drawers.

New shop table.
NewShopTable.jpg


Still have 12 more drawers to build. The open space between then will be shelves for bar and round stock. I got the cardboard tubes from a carpet company free for the asking. They usually just throw them out. They are 4" round 12' long, cut them down and I have easy storage.

When done I am sure I would be able to find anything. :p

John


woodnut said:
Thanks Norman, and Happy New Year as well.

............................. For some reason I took 2' 7" for 27" and not 31"?? Zac learn a new word that day. At least I could use the mis-cut pieces for the drawers.

..............................When done I am sure I would be able to find anything. :p

John

Hi John,

Nice work bench. Haven't we all made that mistake with feet and inches. It's one of the reasons I now use the metric system now, it's not foolproof but it is easier to read drawings without making those sort of mistakes.

As for now being able to find things, I'm not so sure. I still lose the tool I have just put down on the bench, and then after 30 minutes of futile searching I find it in exactly the place where I put it ???. If I listen carefully I can just hear the hiding fairy giggling from some corner of the workshop Rof}!

Have a great New Year,

Best regards

Terry
 
Hi Terry

I like the metric system better as well, but the panel saw at the home depot is "inches only" and I didn't bring my cut sheet with me. Ohh well, it all worked out in the end.
The new bench is coming along, can't believe I have used 6 1/2 sheets of plywood!! I do have 16 drawers now (you should seen the face on the guy at the panel saw when I gave him my cut sheet for the drawers :big:), now lots of room for the shop fairy to hide things on me.

Took a bit of a break from fighting the shop fairy today and finally got the face plate cast!!

Making the sand mold for this today was a pain, Not sure if it was because I tempered my sand a bit wetter then I normally do, or I didn't have enough of an angle on the sides for it to release.
Took 4 tries before I got it to release without the mold being completely useless. It's far from a good casting but, a bit of clean up and she should work just fine.

FacePlate1.jpg
FacePlate2.jpg


FacePlate3-1.jpg
FacePlate4.jpg


John


Well it's seems that something went....wrong.


Either the shaft miss aligned when I put it into the mold or all the attempt's at getting a good mold caused something to wrap.

FacePlate5.jpg


Across one center its pretty even turn it 90o and its out by over 1/8" AND I can't get it off the shaft. The book says to just drive it out. All I manged to do it mushroom the top. Didn't move a bit.

I think I will use a sand core for the remake.

John

 
Go ahead and machine it. If it don't turn out good you can redo it. Machining it would be good practice if you screw it up at least your trying.
Did you soot the shaft before you did the cast? Sometimes a little heat to the aluminum will allow the aluminum to expand a little so you can press off the shaft.
It don't look all that bad.
Norman
 
Hi Norman

No I didn't soot it, I do remember reading that somewhere, but didn't remember to do that at the time.

It WOULD of been a good practice piece, but I didn't support it enough while hammering on it, I still only moved it 1/4", I will try the sooting and heating the next time.

Faceplate6.jpg


So I went back to the pattern, and yes the shaft hole is off. Put it on the lathe and it wobbles just like the cast piece did, not quite as bad.
Checked the drill press and yep the table is tilted to one side just a bit. Loosen up the adjusting bolt, re-adjust the table with my square and 1/2" bit in the chuck. Re-tighten.
Drill out the shaft hole to 3/4" and put it on a spare shaft and it looks to spin true. So glue in the 3/4" piece, let dry, cut ends flush, re-mount in drill press, re-drill the 5/8" hole, put on lathe and she still off a bit, but much better. Going to have to play with the drill press some more to get things lined up right. While the pattern is on the lathe I adjusted the sides to give me more draft. Hopefully this will help me remove it form the sand mold easier.

Not the best day in the shop, but I will take it over a day a work any day.

John

 
Ouch!!!! that,s to bad, :( oh well practice practice ::)
I am still watching your progress but I am not going to build the shaper now as I picked up a 8 inch Logan and just about have it all cleaned, painted and fine tuned ;D
I dont like pouring AL on a steel shaft for the reason you found out, if I must, I use a short shaft that i can bore out if it is to stubborn :eek:
Will be waiting to see the chips fly when you get it scoped out.
 
Well don't feel bad you can fix that pretty easy.
My new Dro on my metal mill died tonight less than 2 months old working one minute and the next the read out just turned off no power inside of it? Checked the fuse which was good. Put a meter on the end of the power cord that goes into the read out head and I have 120 v ac. So something inside the read out head has quit. So back to Dro Pros it's going to go. That really burns my butt!!!
Just an up date on the dro the guys from Drp Pros called me and told me to send it back they will make it right. Can't beat that!
 
Well the SWMBO said the the honey do list was being ignored, so time in the shop has been little.

I did manage to do a couple of things. I was following Lazylathe on his concrete counter top build. http://www.homemodelenginemachinist.com/index.php?topic=16122.0
And of course, I can do that, popped in my head.

Had a bit of plywood left from the new bench, measured up the lathe.

CBase1.jpg


I wrapped the plywood in plastic as it was rough. Glued in the dowels for the bolt holes, I can drill them out later (if i can find them ::)).
A good couple of hours later it was poured. I used my sawsall with the blade removed to vibrate the sides. I guess i didn't do this enough as there was bubbles all over the sides. I didn't take a picture of that. I did mix up some cement only and using my hands filled in the holes. Sprayed a bit of water on top and covered her up. She won't be glass smooth as my experience with concrete is limited. I have done lots of post holes for decks, thats it.

CBase2.jpg


For what I need it for I think that it will work out fine.

There are TOO many good ideas on this form!!!

One of these days I will finish one project before starting a dozen others. Ha! who am I kidding....

John


I was able to get a few hours in over the last few days.

I took the forms off the next day and drilled out the wooden dowels while the concrete was still soft.

BaseHoles.jpg


So far everything looks good. Took apart the lathe from its old wooden base and did a test fit. Some how the holes lined up?? There was a bit of a wobble but i was able to scrape some of concrete that was going to be under the foot down a bit. Sits nice and flat. I will probably paint the base at some time, not sure when or what colour.

BaseTestFit.jpg


Covered it back up and sprayed it down with some water for a couple of days, took off the cover and let it dry for a few more days.
The holes go right through the bench, I got some 3/8" threaded rod and cut 8 pieces 6" long, the concrete is 3.5" and the bench top is 1.5", some washers and nuts and she is bolted down.

BaseFinished.jpg


I started her up on the highest speed and there is still a bit of a bounce, but no where near what it was like before.

Tomorrow goal is to recast the face plate or cast the tail stock. Not sure which one I will try yet. Hopefully it won't be -15C outside tomorrow.
If its too cold maybe I will finish the drawers? Who knows...

John


Hot Stuff. ;D

The picture really doesn't show this to well, the whole inside of the furnace is glow red hot!

IMG-20120122-00688.jpg


The pouring of the face plate went well, just waiting for things to cool down. I sooted the shaft this time so hopefully I can get it out this time.

John

 
So far it looks good.

Faceplatetake2a.jpg


Even after sooting the shaft it won't come out, so I am going to have to drill it. First I have to get the face some what flat. Made sure the shaft was long enough to fit into the lathe.
Faced off the front, so far everything is working good great.

Faceplatetake2b.jpg


Need to make some sand cores for the tail stock. See if I can't do that some time this week.

Thanks for lookin.

John

 
Hi Woodnut
Great going Mate Keep it up
Love this build :)
Pete
 
Thanks Pete.

Today's fun was getting the cross slide adjusted. After taking several passes on the face plate I checked it to see if it was flat, close it was about 1mm off over 3.5", it was high in the center. Had to take the whole cross slide assembly part so I could file the guide down a bit. Filed it, put it back together, check it, take it apart, file it, put it back together, check it. Only had to do this 4 times thankfully.

Crossslidefix.jpg


Put everything back together and faced her off again. After about 3 passes I check it again and it seems to be right on. Of course I only have a 16" metal ruler to go by.
I wanted to get rid some more of the surface imperfections so a kept on taking off more. Just a bit at a time. Not sure if something got loose or flexed but on one pass about 1.25" from the center the bit started diggin in. Can't see it in the picture too much as I turn more off, It must of dug in about 1/16". Ok I had the bit out a bit far so moved that back and faced off again. everything was good for another 5 or 6 light passes, then it started to do it again this time about 1/8" from the outer edge. Not as bad but not sure why its doing it?

FacePlatefaced.jpg


I think my bit is still out too far, really have to make a metal tool post!! I was able to do another 2 passes, I used my calipers and only took off .001" each pass, it's not glass smooth but it's not bad for someone with no training at all.

I am sure the wife will like the new mess I can make with this!!

Before I forget I did get the shaft out. I was able to drill it out. Thanks to me not being able to center anything, when I got up to the 9/16" bit it just took out one of the sides of the shaft just enough so I could beat it out. My Reamer I made and thought I couldn't use came in handy. I put it in the vise and hand turned the face plate on it. Face plate fits on the new shaft great, Drilled and tap for the set screw and off we go.

John


John

I have been following along on your build here and like what you are doing. One piece at a time and it will all come together. Sometimes it seems as though one isn't making any progress then a couple more pieces and it all starts to come together. Keep up the good work, I'm going to keep watching. :bow: :bow:

Cheers :)

Don
6493​
 
Nice job John, your going to end up with a lathe ifin you keep at it ;)
 
Nice job on the lathe. I admire your tenacity!

I suspect the wooden tool post is the source of your tool creep problem. Wood has too much flex in it for metal cutting. I once tried making some #2 Morse Taper shanks out of hard maple. That went nowhere fast!

Chuck
 

Latest posts

Back
Top