Gingery Lathe

Home Model Engine Machinist Forum

Help Support Home Model Engine Machinist Forum:

This site may earn a commission from merchant affiliate links, including eBay, Amazon, and others.
John, I can tell your bitten by the machining bug!!!
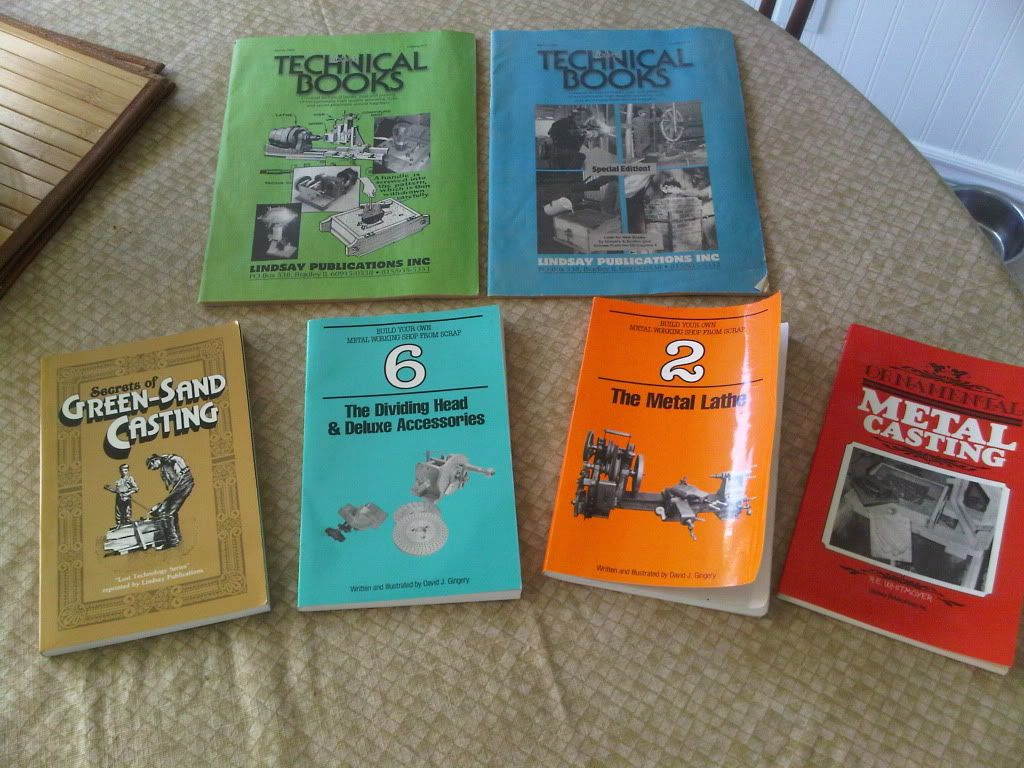
Start saving your extra money you will be buying a lathe and mill someday. You WILL out grow these home made machines. The building of the Gingery series is a good way to learn at home. I went low buck on the start of my adventure of metal shop from scrap and still try the low cost approach. I use a waste oil fired foundry myself. It costs me only for the electric power for the blower, I use any and all types of oil to power my furnace.
I didn't build the lathe or some of the tools the books show. You can see some of the things I did build here on this forum I think you even responded to my mill post here. Any way good luck on building our lathe I'll be watching you hopefully from start to finished machine.
 
Thanks Dave, hope it doesn't get to cold to fast. Have a hard time getting my butt outside when it cold. Hope I can make and cast the parts I need and finish them later in my warm basement.

/// I think its time to scratch that itch! Even if its just to melt down some scrap. :)

KustomKB The furnace warms up the garage nicely, but I am not very fast at getting the mold ready, I did that once in the beginning, Had a full pot ready to pour but couldn't get the mold right in time. I don't think the wife will like me ramming up a mold in the kitchen table then bringing it out to the garage. :eek: Have to break out the warm fuzzy's.

Norman. My condolences on your loss. Yes, the machining bug has bitten hard!! I am sure I will want to get better and better machines as I improve. Already saw a Taig mini lathe at LeeValley, maybe Santa will be nice? Thank you your your insight on the Gingery mill, I will keep these in mind when I start that project and I think I will upgrade the bushing bearing to tapered roller bearing for the head stock and use brass gibs on the lathe as you recommended for the mill. For the feed and lead screws (for the lathe) how many TPI would good? The book calls for standard 3/8" 16 TPI threaded rod for the leadscrew and 1/4" 20 TPI for the feed screws.

Thanks

John
 
woodnut said:
/// I think its time to scratch that itch! Even if its just to melt down some scrap. :)

Oh yeah, I'm starting to itch pretty bad!
I built my furnace years ago after buying Gingery's book. I only got a couple of practice castings done when I was given a Sieg C3 7x14 for my birthday. The poor old furnace went into storage.

I will need to sort out a new burner for it. I used to fire it with BBQ charcoal and a blower.
It worked fine for Aluminium, but the ash would vitrify into a dark green coloured glass on the bottom of the furnace that I would have to chip off with some effort and damage to the floor.. I think this glass is what is called 'Clinker'?
 
Got a few more patterns ready over the last few days.

The compound slide and the bearing caps made and one coat of varnished on them.

HeadStocksetup.jpg


I put the pulley on to see how things fit. Not much room maybe a bit more than a 1/16th on either side. Hope I bore this hole straight!

Headstocksetup1.jpg


I made the bearing caps a 1/2" taller than the drawings said. Thinking of replacing the bushing with roller bearings later and want to make sure their was enough room for them.
Even just sitting there it spins fairly true. We will see how badly I screw than up :)

After these its the tail stock, split nut and face plate. Before you know it I will be turning perfectly good pieces of metal into scrap!!

John


Well Saturday was spent helping a friend build shelving units for a upcoming trade show. Take took 9 hours.

After dinner I was too tried to work on the lathe so I cleaned up the basement abit. Really need to organize things down there.

I was happy to find some books I had forgotten I had :)

Books.jpg


Some lite reading for later :)

 
A little bit of progress tonight.

Got the compound slide and bearing caps casted tonight. They turned out OK but will get a better look tomorrow. Had a bit of lifting during the pour, not to bad but got a bunch of flash around the parting line.

Here are tonight's patterns.
Pour2Patterns.jpg


The pour went well, with no problems. It wasn't till I cracked it open that I saw the cope had raised up about 1/8" on one side.
pour2.jpg


Lots of clean up. My sand was too dry, it didn't want to keep the nice edges.
Pour2brackopen.jpg


Here it is right out of the sand, still pretty hot.
Pour2peices.jpg


Patterns and casting side by side.
pour2patternandcast.jpg


Will see how these clean up, I think I rushed the molding process, should of stopped and gotten the sand tempered right.
Its easy enough to do them again if I don't like them.

Thanks for looking.

John


Real nice job, I just got my furnace lined and starting on the burner. You got me all fired up to get back to melting alu. and casting. :bow: Thanks for the updates. ;D
Bill in SE Idaho
 
That sounds great Bill.

Hope to see some picture soon! Were picture happy here ;)

And Welcome to HMEM!!

John

 
Got the head stock cleaned up and the bearing caps cleaned up as well.

HeadCleanup4.jpg
HeadCleanup1.jpg


I don't have a mill so I got a 12mm end mill bit and a 6" 2 way cross slide vise from Princess Auto and bolted it down to my drill press.
NOT the best solution, but I took it slow and just nibbled away at it. I am sure this took 10 times longer than doing it on a mill.

Got the based cleaned up and it fits pretty good. Have to drill the hole for the bolts, build the temp bracket for the boring bar, finish the motor mount, etc, etc....

HeadCleanup2.jpg
HeadCleanup3.jpg


Its coming, slowly but surely.

John


Hi John
Its looking great
Im enjoying your build
keep it coming :)
Pete
 
Glad to see it progressing to completion. I know I never got much pat the dreaming reading stage. Dis build and fill my sand box and make a furnace but the furnace died of neglect. maybe some day.
Tin
 
A bit more progress today.

Got the pieces cut for the temporary head stock. Just have to drill and tap them.

TempHead.jpg


Managed to finally get the motor mount assembled. I was thinking that was looking pretty good, locks into place nicely, then i noticed the fan belt a few feet to the right. Take it apart again, at least it was only 4 bolts.

assembledmotormount.jpg


Here are a couple of shots of it sitting in place. I have to get a new drive pulley as the one I have is 3/4" not 5/8". Its just sitting on the shaft so I could get a nice picture of what it will look like. Still have to bolt the motor to it and figure out were its going to be screwed down.

assembledmotormount3.jpg
assembledmotormount2.jpg


Question: How tight should the belt be? when I press on the belt is a 1/2" movement enough?

Thanks for looking.

John


Question on pulley size.

In the book it calls for a 6" pulley on the second drive shaft. The motor has a 2" and is 1725 RPM. With a 5,4,3,2 step pulley to a 2,3,4,5 step pulley on the head stock it gives me the following speeds (if my math is right):
top speed is 1437.5, 2nd speed is 766.6, 3rd is 431.25 and bottom speed of 230 rpm. I don't plan on doing any thread cutting as the book suggests building back gears for that. Is this a good range of speeds? I guess I can change the pulley if more speed is needed later.

John
 
One step forward and one step back.

Click the picture to see a short video.


Temporary head stock done. Check
Motor mount and belts done. Check
Boring bar done. Check
Heat treat boring bit. Tonight
Burning electrical smell from motor. Check
Head stock ready for boring. Need to attach it to the bed and attach it to the leadscrew.
Blue lock-tight bolts. Not done

So ya, just after I took this video the motor crapped out on me. Now I am on the look out for another motor.
Still have some other stuff to do while I look.
Have to check the boring bar again. its down to .001 out at the front bearing but .006 out at the boring end. Not sure if its bent a bit. Now that I need a new motor all the movement will probably throw something out of alignment. So far its been a fun project, I am looking forward to using this by Christmas?? We will see.

Thanks for looking.

John
 
Thanks for the link, some interesting books here.

John
 
Lucked out and found a brand new 1/2hp motor for free from a neighbor. He was just going to throw it out?!

NewMotor.jpg


Now maybe I can get back to making some more parts.

John
 
Slow so very slow progress, but progress.

Now that the new motor is done I re-made the temporary head stock as the old one was p--sing me off. Its now bigger and stronger and more adjustable.

OK back to the permanent head stock. Milled the top of the clamp rails, drilled/taped the holes.

HeadStockTap.jpg


All screwed on, will need some shims under it so it will slide smoothy along the bed. After the bearing holes are bored to the right size I can clamp her down nice and tight.

HeadStockTap2.jpg


Even had time to drill/tap the holes for the gib screws.

HeadStockTap3.jpg


Have to make the bracket that attaches the head stock to the lead screw, make a handle for the lead screw so I can turn it easier.

HeadStockTap4.jpg


And I still need to set some time aside to work on the split nut. After that's done I can start the face plate. :big:

Its late I am going to bed.
John


It was the wife's bday this weekend so not a lot got done on the lathe front.

After I put the boy to bed tonight I was able to sneak down to the basement for an hour or so.

I was able to heat treat the bit, tighten up the head stock so it didn't wiggle as it moved down the bed.
I make a small mistake on the bit as I didn't round the tip. Its sharp like a thread bit so my holes are a bit rough. I still have more O1 tool steel so I will make another bit, the first one was fairly easy. Below is a small video of boring out the back bearing hole. Its still a couple thousand too small for the bearing. When the new bit is done I will finish them off. Of course the back bearing is slightly smaller then the front. Should be fun to try and get them the right size. As the book describes I put some shims in between the bearing cap and head stock in case I bore it out a bit to much. Each shim measured .005 so I should have .010 to play with if I screw this up.

The video is a little shaky as I had to turned the lead screw by hand and try to record with the other.


Thanks for watching

John
 
Got to spend a few hours in the basement today.

Finished boring out the head stock and got it mounted, put on the boring bar and pulley. I did have to remove one of the shims in the back bearing as I bored it a bit to big. I could push the bushing in and out with my fingers. Removed the shim and she bolts down nice.

The boring bar is sticking out 8" and the dial indicator says it out by .0025" I think I can live with that :)

IFinishedHeadStock.jpg


Now to finish off the carriage assembly, cross slide, compound swivel base and compound slide. All the parts are done, just have to drill some more holes for the clamps and slide ways.

John


Back
Top