Building the Pumpjack

Home Model Engine Machinist Forum

Help Support Home Model Engine Machinist Forum:

This site may earn a commission from merchant affiliate links, including eBay, Amazon, and others.

Brian Rupnow

Design Engineer
Project of the Month Winner
Joined
May 23, 2008
Messages
14,980
Reaction score
8,274
Location
Barrie, Ontario, Canada
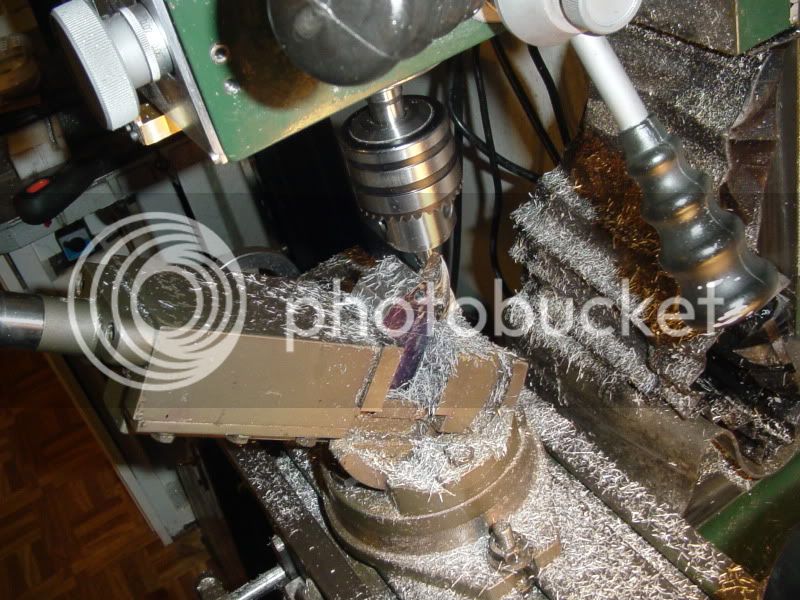
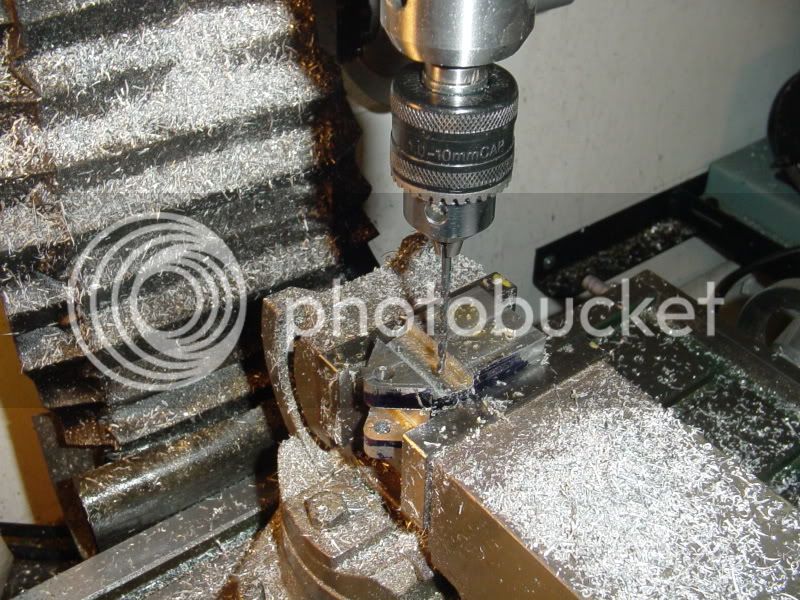
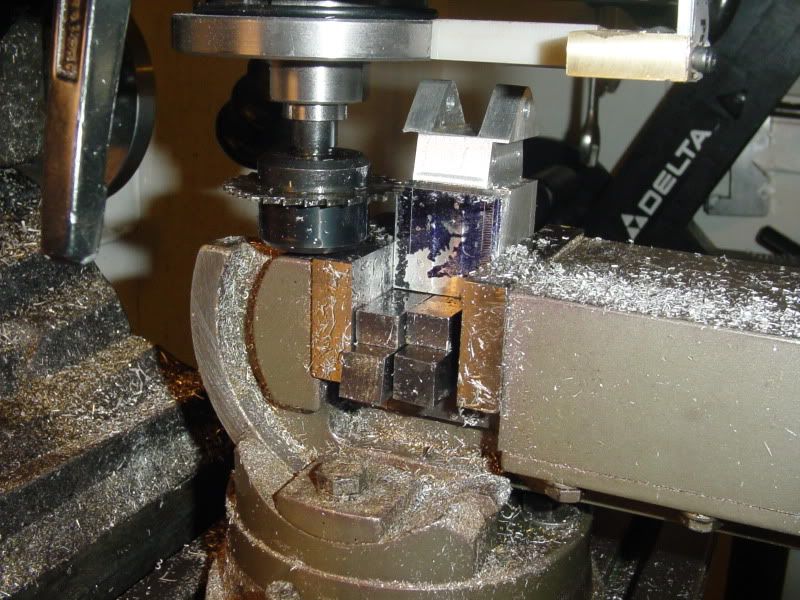
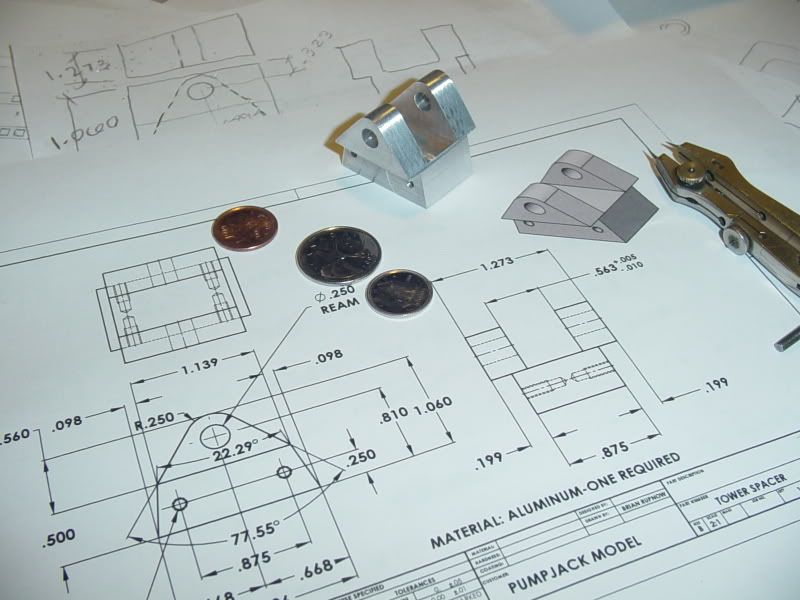
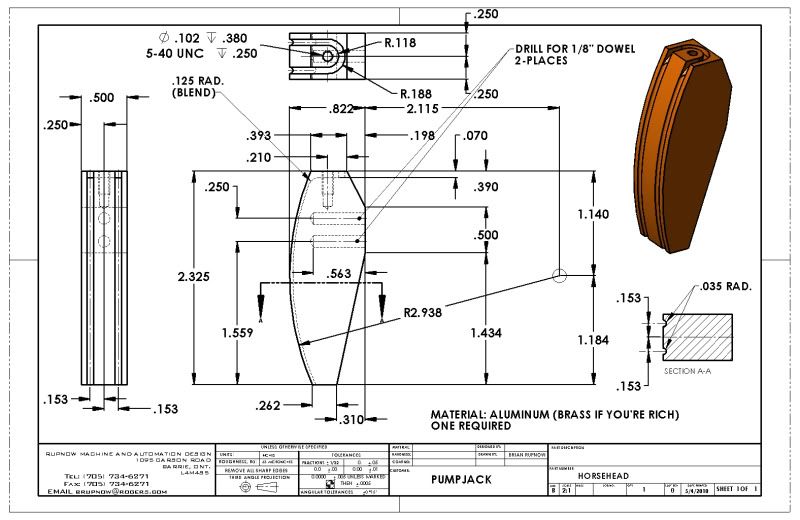
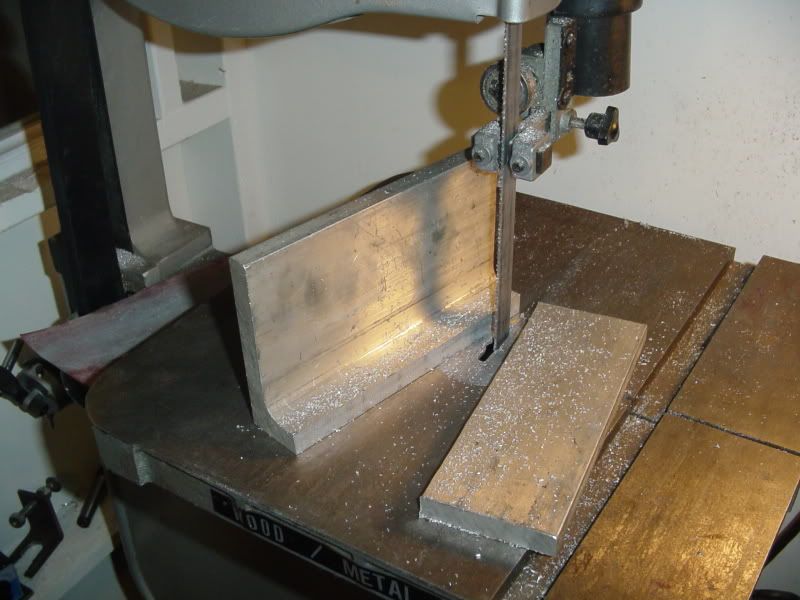
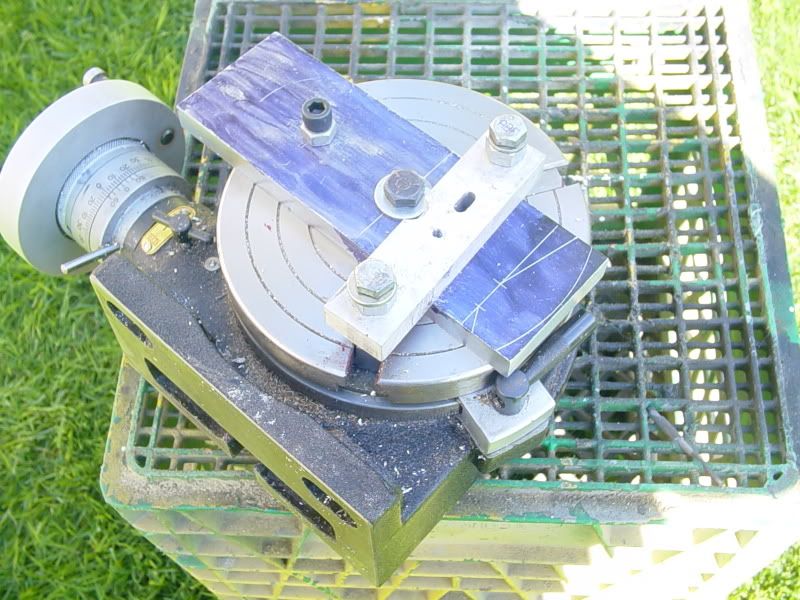
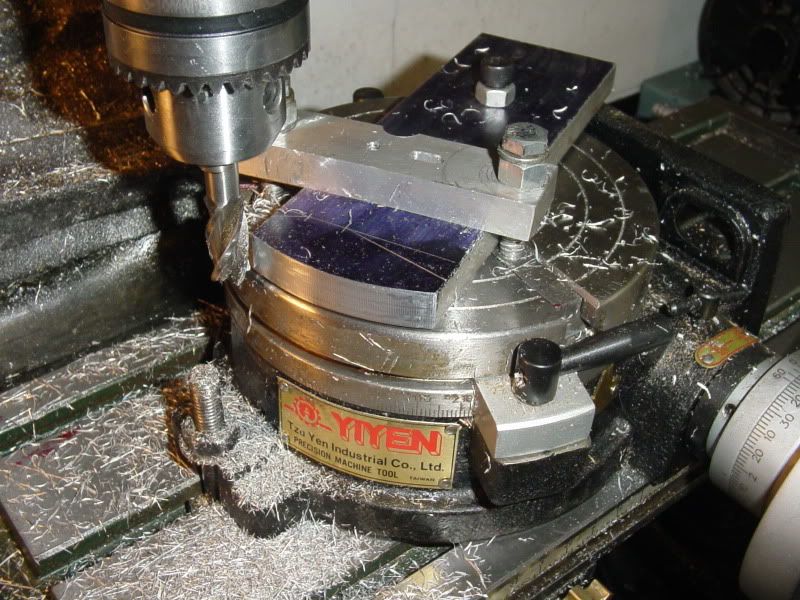
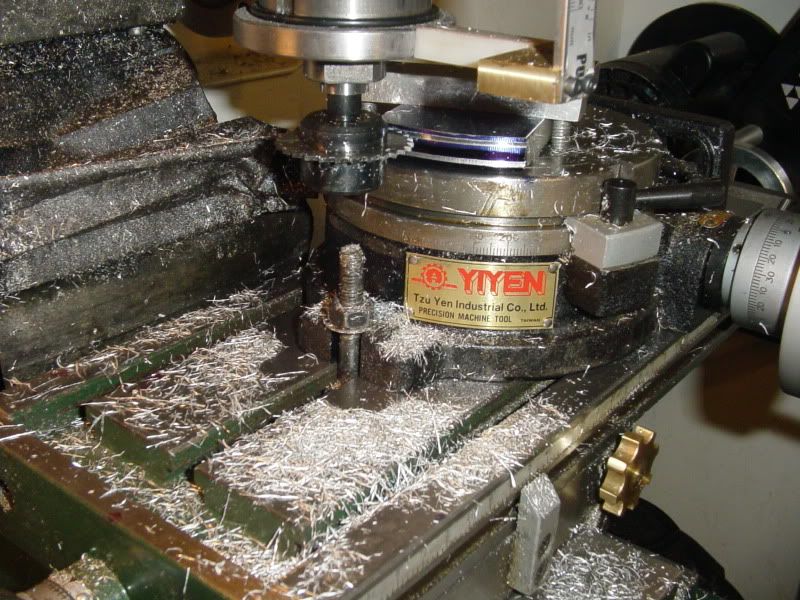
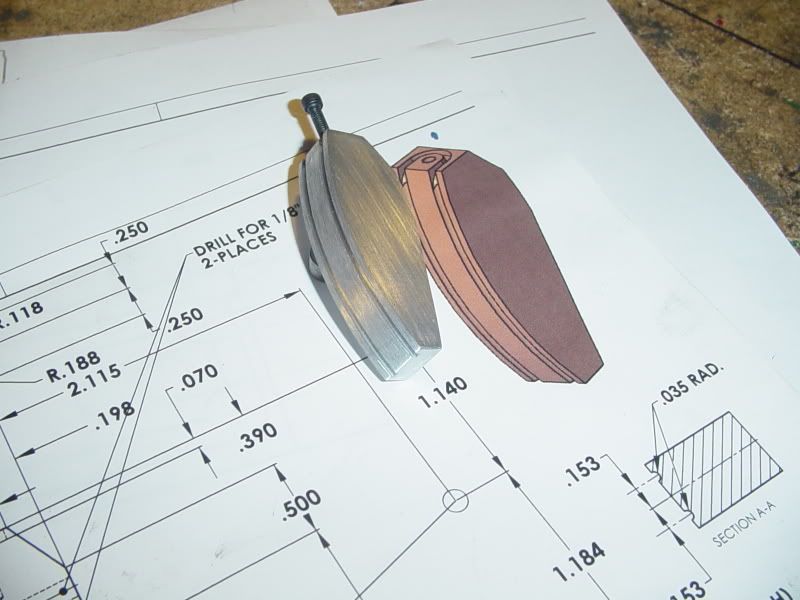
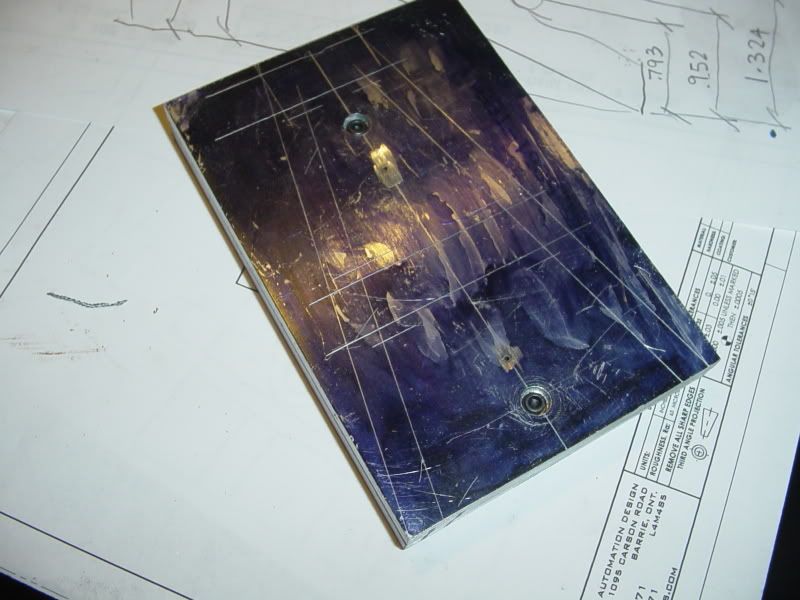
I know, I know---I said I wasn't going to do this. However, nobody else has jumped on it, and my phone's not ringing with work, so I am going to go ahead with it. In my estimation, the two trickiest pieces to machine are the "Tower Spacer" at the top of the tower, and the "Horsehead". I spent the lions share of today machining the "Tower Spacer" and believe me, if I could make it as fast as I designed it, I'd be a miracle worker!!! This is a fairly tricky piece with multiple set-ups, and its one of those pieces where you start with a goodly oversized chunk of aluminum to give you something to hang onto while you are working on it. I machined a piece of aluminum "to size" in two planes, and left it about 1 1/4" longer than the drawing called for. The pictures will explain this better than I can. First thing I did was drill and ream the 0.25" hole to size, then layed out the shape and set up my "Tilt a whirl" vice to let me machine all of the angles.
MACHININGTOWERSPACER002.jpg
 
Next step was to machine the main center slot and drill the holes which will be tapped for #5-40 threads.---Well actually the next step was to mill the other two slots which you see in the picture, but I didn't take a picture of that step.
MACHININGTOWERSPACER004.jpg

MACHININGTOWERSPACER006.jpg

 
I did some real head scratching when it come time to cut off the 'handle"--As in how to cut it off, then square up the remaining "good part". I decided that instead of my trusty bandsaw, I would hold the part by the "handle" and cut it off with a slitting saw.---Worked like a charm!!!
MACHININGTOWERSPACER007.jpg
 
Gee whiz it's hard to keep up with you...
All the great drawings...
and now all the nifty parts.

Enjoying it all. Looks like a great project.
 
Brian,

Nice part.

As usual, great write up and photos.

I'll be following your build closely.

SAM
 
Very Cool Brian. You sure got on it pretty quick. One minute your drawing up plans, the next minute your building it.

This will be a good one to watch.

Kel
 
The next piece I'm going to make is the "Horsehead".---Not particularly because I'm a big fan of horses, but because I get to use my rotary table, which I have never used very much since I bought it.----I used it once to make spoked flywheels about 2 years ago, and its set in the corner since then, a great bloody expensive piece of kit that I new I would get to use "EVENTUALLY"!!! Well, "eventually" has arrived. I may have to try and purchase a ball nose 1/16 dia endmill, but then again, I may put that 1/16" sliting saw to work again.
HORSEHEAD.jpg
 
That looks like a pretty complex part. I will be interested to see your setup on the rotary table. (one of my favorite tools)

Kel
 
kcmillin said:
That looks like a pretty complex part. I will be interested to see your setup on the rotary table. (one of my favorite tools)

Kel

Yes---Me too!!! I'll be making it up as I go along.---Brian
 
For the "horsehead" I started out by digging around in my pile of aluminum "shorts" and rescued a nice piece of angle with a 1/2" thick leg x about 8" long. I cut out a piece slightly wider than the 2.325 overall length of the Horsehead and milled it to finished size, but kept the full length.
machininghorsehead001.jpg
 
I layed out the Horsehead on the piece of aluminum, and was sure to also lay out the center of the radius on the part. I have a tapered MT2 spigot with a tapped 5/16" hole in the center of it that fits into the center of my Rotary table, and has a 0.5" parallel "nose" on it that sticks up about 3/8" above the top surface of the rotary table. I drilled a 1/2" hole in my piece of aluminum at the center of the radius and fitted it over the spigot in the rotary table, then stuck a bolt in to hold it. I drilled a second hole 5/16" diameter whech would line up with a T slot and put a bolt in there as well. Since the spigot is only held into the rotary table by its taper, I then made up a hold down strap and bolted it across the piece which will be machined, and held it in place with a bolt into each of the other t-slot nuts. Since the radius is 2.937 and the diameter of my rotary table is 6", I have 5 spacer washers strategically placed between the workpiece and the top of my rotary table to avoid marking the table top.
DSC03165.jpg
 
Well Sir---That went pretty slick!!! I knew I'd get to use that Rotary table sooner or later. Since I don't have a 1/16 ball nose cutting tool, and don't feel like going across town to get one, I think I will use my 1/16" slitting saw to put in the two grooves in the face I just cut for the rope to lie in.
machiningcurveonhorsehead001.jpg
 
So there we go!!! One finished horsehead!!! I am very pleased with the way this turned out, and I'm thrilled that I finally got to use my rotary table for something other than an expensive lump that sets in the corner. I couldn't figure out a good way to put the tight curved channel for the wire rope in the top without an exotic set-up, so I done what I always do---I changed it to something simpler!!---A word here about Design Engineering---I depend on my 45 years of background experience to create cost effective and functional designs, and in hobbying as in real life, everything I do is a "prototype". ---And once in a while, like this, when I (or a customer) goes to build a machine I design, something simpler and yet just as effective presents itself. This is good. Now if it was a "one off" machine, it would probably get built just as I designed it.--HOWEVER---And its a "biggy", when the "design review" happens (generally after the fact) if the machinist points out to me that he could have done it a "cheaper/quicker/better" way, I remember that for next time. If there are going to be multiple machines built, I revise the drawing so that the rest of the machines are going to get built incorporating the "cheaper/quicker/better" design change.--and thats what I've done here. I have changed the drawing to reflect what I have actually machined. So---All you chaps who have downloaded the .pdf files----This is the new, revised drawing as well.
DSC03171.jpg

DSC03172.jpg

HORSEHEADALTERNATE.jpg


View attachment HORSEHEAD ALTERNATE.PDF
 
Tower Frames---Two for the price of one----kinda. If this works, and it should, I will only have to cut out one tower frame. I have pinned and bolted two pieces of 1/4" aluminum plate together, because untill I mill the 6 degree angles bottom and top, these two frames will be identical as far as the overall shape is concerned. In order to get all of the 1/8" radii in the corners, I will have to drill six 1/4" holes, and this just keeps it simpler.
a-FRAME001.jpg
 
Brian,

The horsehead looks great and I am glad you were able to use your lonely rotary table.

Granted, this model won't see the use or loads of the full size one in the field, I am concerned that the wire rope would get cut on the edge created by the 0.125 spot face.

Perhaps you could use your 4 jaw chuck and machine a circular groove which would have no sharp edges. I'm not sure if you would even be able to grab it in a 4 jaw.

Just food for thought, and please do not take this post as criticism.

SAM
 
Nice job on the horsehead. Your clamping solution seemed to work like a champ.

Kel

 
Sam---Thanks for looking. If I have done things correctly, once the top cover is put on that Horsehead, nobody will ever know whats underneath it. If it were indeed seeing any kind of load, I wouldn't leave it with any kind of sharp edges. However, in the world of models, there is enough work just making something that works and is visually appealing without going looking for work. ;D ;D
 
Making it up as I go along---First I drill all of the 1/4" holes in the "crotches" to give me nice 1/8" radii when everything is cut out---
machiningtowerframe001.jpg
 

Latest posts

Back
Top