Building the Pumpjack

Home Model Engine Machinist Forum

Help Support Home Model Engine Machinist Forum:

This site may earn a commission from merchant affiliate links, including eBay, Amazon, and others.
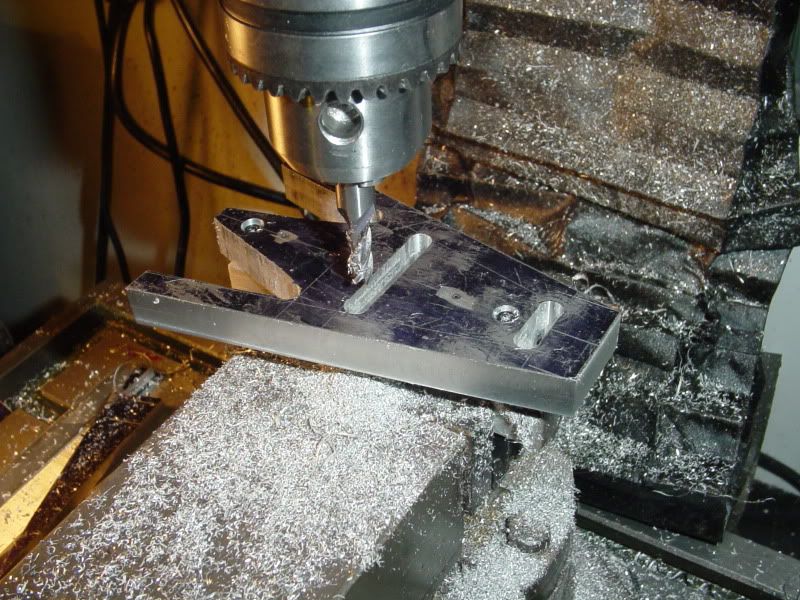
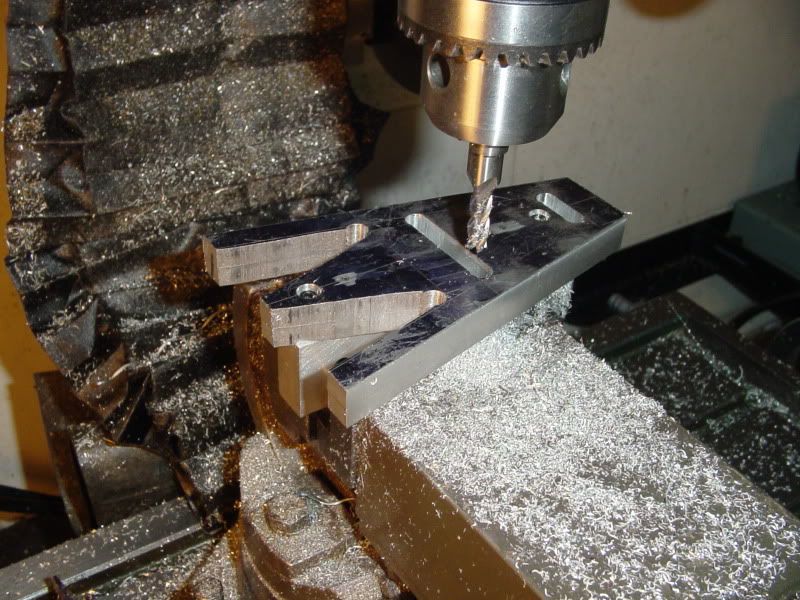
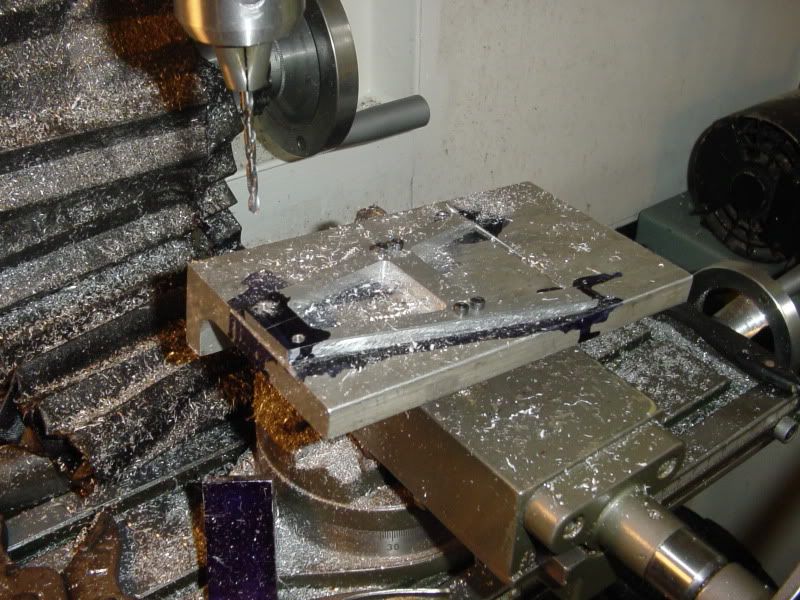
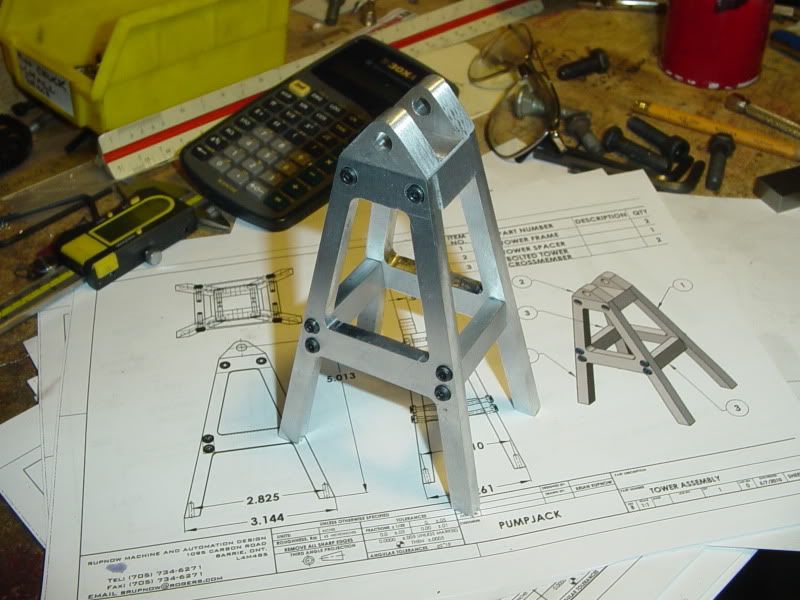
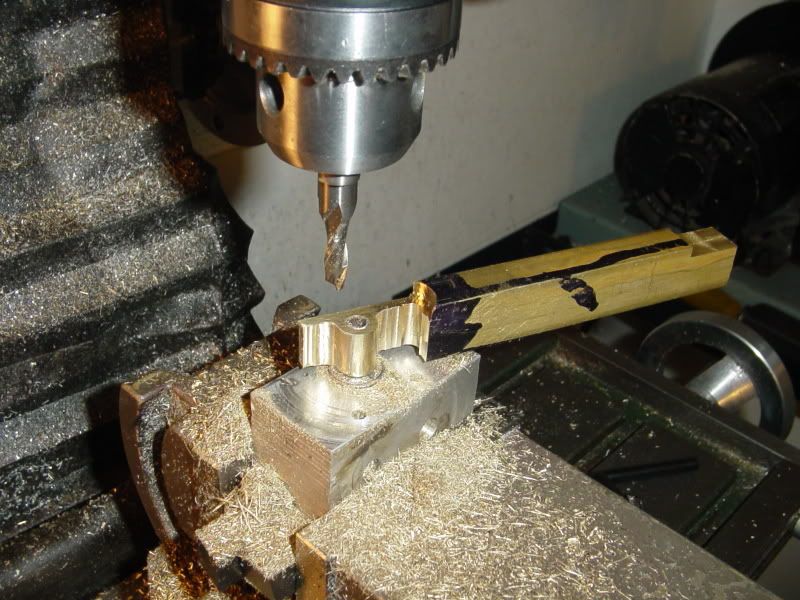
Then I saw all the outer lines in the bandsaw and trim "close to the line". Then set it up in the mill and mill "To the line". Then to do the inner cuts---scratch head for a minute, then drill and tap a piece of 1/2" x 3/4" flatbar on the same hole centers as I used to bolt the two frames together---then use longer bolts to bolt the tower pieces (still together) to the flatbar so I can hold it all in the mill vice. Put in a 1/4" milling cutter and start connecting the holes---Just have to be carefull and not cut the wrong thing and have everything fly apart.
machiningtowerframe002.jpg

machiningtowerframe003.jpg
 
So---I have Tower side frames that are identical twins. The idea of bolting the two pieces of aluminum together before I started machining turned out very well. The next step is the tricky bit, machining the 6 degree angles at both ends and drilling/counterboring holes at an angle.
TOWERSIDEFRAMES001.jpg
 
Lookin Good. As the Fonze would say "Aaaa" Thm: :big: :big: :big:

Do you have a swivel vice? Is that how you milled the angles to make the 'A' shape?

Kel
 
kcmillin said:
Lookin Good. As the Fonze would say "Aaaa" Thm: :big: :big: :big:

Do you have a swivel vice? Is that how you milled the angles to make the 'A' shape?

Kel

Well yes, I do have a swivel vice, that actually swivels in 2 planes. Thats why I call it my "Tilt a Whirl" vice.--But---I cut the edges of the A out with the bandsaw, then set them in the vice so that the leg I wanted to machine was horizontal, checked it with my little level, and machined it. The vice was not tilted to do that.
 

Nice work Brian.

Your parts keep getting nicer and nicer.

 
Very nice setup, strange, nah, looks good to me. It all about getting the end result your looking for.

Looks like the part #3 is going to require a bit of the same ingenuity.

Kel
 
And that, my lads, finishes the tower. Its been an all day thrash, except for a couple of hours this afternoon when wifey and I drove around looking at new houses that we don't need and can't afford. Impending retirement and two people in a 2300 square foot house does not compute----(But thats another story). The bolted crossmembers are not as complex as they could have been. I kept the sides of them vertical, because even with my "high tech" 3D modelling software, compound angles make me crazy!!! Tomorrow will be a 120 mile drive up to Bancroft to see my ancient mother, who will be 90 this summer. She still likes it when sonny boy comes up for mothers day and takes her out for lunch. So---Happy mothers day to all you mothers---See you when I get back.
TOWERFINISHED001.jpg
 
Pretty sturdy lookin frame ya got there Brian. I reckon one more and you got a set of jack stands. Nice Job Thm: Thm:

I agree with you, those compound angles can be a nightmare, and then ya have to machine it.

Kel
 
I'm pleased to announce that mother is alive and well, and has an amazing apetite for an almost 90 year old woman. (And yes, we did celebrate Mothers Day a day early, because tomorrow all our kids will show up here to celebrate THEIR mother!!!) Crazy weather for May---rained all the way up, snowed half of the way back home. Damn, I could have done without that. I got home and decided to tackle the Rocking Beam Bearing. I'm not finished yet, and I don't have much to say about this set-up, other than that it terrifies me every time I do it. Every time I machine something using this set-up, I count my fingers---Before, during, and after, to make sure I still have the same number.
ROCKINGBEAMBEARING-MACHINING001.jpg
 
We got a little bit of that snow her in North Dakota. Not the way I expected to start May.

Congratulations on not hurting yourself, that setup does seem a little sketchy.

Kel

 
Brian Rupnow said:
I'm not finished yet, and I don't have much to say about this set-up, other than that it terrifies me every time I do it. Every time I machine something using this set-up, I count my fingers---Before, during, and after, to make sure I still have the same number.
ROCKINGBEAMBEARING-MACHINING001.jpg

Brian

Great work and your drawings are just fantastic :bow:

Every time I see that type of set up I cring it always seems to work great but I've never had the courage to try it.

I don't know if you picked this up on the Harogate show thread but her's a pic I took of a nodding donkey at the show

Harrogate5.jpg


Cheers

Stew
 
Last night before I went to bed, I loctited a piece of 1/4" diameter cold rolled steel about 3" lg. into the bore of the bushing, and left it setting up all night. This morning while the bearing was still attached to its main stock, I drilled the two bolt holes and counterbored them, then cut the bearing loose from the main brass bar with a 1/4" milling cutter. (The same one I put the flat bottomed counterbores in with.) Then over to the lathe to complete the job. This set up demands that you machine first on the side "away" from the chuck, then slide the part far enough out from the chuck that you can get a reverse sharpened lathe cutting tool in between the chuck and the back side of the part to machine the other side. Then set the bearing up on a flat surface with a hole in it and knock out the piece of 1/4" steel.
ROCKINGBEAMBRGFINISHED001.jpg
 
This afternoon I machined the "rocking beam". Nothing to report about it, other than the fact that if it had been any longer than 5 1/2" I would have had to dismount my vice (which is quite tall) and use my angle plate mounted to the table and my part lashed to the angle plate to get enough headroom!!!
PROGRESS001.jpg
 
Great work on the bearing, I like the trick of locktiting it to a steel bar. This could be very useful for many things. Looks good with all the pieces put together.

Kel
 
Coming along nicely Brian. I too, like the Loctited in rod idea BUT if you had done it with an inch or so protruding each side it would have been a simple matter of flipping the assembly over in the chuck to do the second side.
 
tel said:
Coming along nicely Brian. I too, like the Loctited in rod idea BUT if you had done it with an inch or so protruding each side it would have been a simple matter of flipping the assembly over in the chuck to do the second side.

Yes---I thought of that----immediately after the Loctite set up!!!
 

Latest posts

Back
Top