A portable engine

Home Model Engine Machinist Forum

Help Support Home Model Engine Machinist Forum:

This site may earn a commission from merchant affiliate links, including eBay, Amazon, and others.
Nice goin', Rich. I'm really surprised that the pressing operation worked as well as it did!

Chuck
 
Just read the bit about making the crankshaft. Very impressive! What's this copper grease stuff? Seems to be magic.

Chuck
 
That pressed really well Rich, considering the wall thickness to diameter ratio.

Very impressive.

Chuck,

It is a grease that is normally used on hot parts on automobiles, such as engine exhaust fixings, so that the parts don't corrode up too much and you can get them apart when needed, and certain areas of brakes, between the piston and disc brake pads to stop brake squeal. It is a basic anti seize grease, that has a lot of copper (or some other like material) in it.


John
 
What's this copper grease stuff? Seems to be magic

If I'm not mistaken, it's the only stuff you can use with car, motorcycle etc. brakes (heat resistant), so you can get it at autoshops.

And just as a warning in case somebody didn't understand the lubricating of brakes - NEVER use the grease on the brake pads, only on the rest of the moving parts in the brake system.
 
Hi

Chuck, the crankshaft idea needs refining. Its almost there but not quite right. I'm not sure at the moment whether or not I'll pursue it any further. The copper grease is well known throughout the motor trade here in the UK and is a good general purpose grease for the home workshop I have found.

John, yes I was surprised how well it pressed. I think with a steel die and punch and a heavier press it would be possible to form it in one go. My home made press is only 6 ton which is why I stopped half way to re anneal. The wood punch and die has deformed slightly so will not be capable of being used again. All in all an interesting excercise though.

And like Admiral says not to be used on the actual brake linings.

Cheers

Rich
 
Hi

I only had to give the tube plate a light skim to achieve a nice fit.

DSC02143.jpg


The inside had a small amount turned out as well to bring it back to the required size of 2 inch.

DSC02160.jpg


I'm going to fit 9 fire tubes. Its a bit of a squeeze to get them all in hence the reason for turning the inside diameter to size. The following sketch shows how tight things are.

firboxtubeplate.jpg


I turned a wood spiggot to hold the fire box tube, I'll need to turn the ends square.

DSC02154.jpg


DSC02158.jpg


Also a wooden holder for the tube plate, a good tight fit. To be used when I drill the fire tube holes.

DSC02162.jpg


DSC02165.jpg


Cheers

Rich
 
Hi

Don't ask me how I worked this out, it took me a few hours. There are times when I am mathematically challenged ??? ??? ??? Perhaps Marv will jump in here and explain the finer points

Anyway I worked out that 9 circles .5 inch diameter sit inside a 2.0 inch circle.

9x5holesinside20circle.jpg


Which in turn means each small circle is 40° from its neighbour.

tubeplateholelayout.jpg


With a rotary table set up and centred in the mill its easy enough to move the Y axis .75 inch to find the cntre of hole No. 1. I then went left and right 40° and 80° to holes 2 and 3 and 7 and 8. Holes 5 and 9 are directly below hole 1. That just left holes 4 and 6 to locate using the X and Y table movement.

I fitted a sacrificial table to the rotary table.

A practice piece of aluminium was marked out. I can use this as a jig to help hold the tubes when it comes to silver soldering them into the tube plate.

DSC02166.jpg


The plate then screwed onto the table. Following my drawing I centre drilled all the hole locations.

DSC02175.jpg


DSC02178.jpg


Then followed through with a 3/8 drill.

DSC02183.jpg


A 3/8 reamer by hand to clean up the holes.

DSC02185.jpg


The 3/8 tube fits well

DSC02186.jpg


The plate laid on top of the drawing, all lines up

DSC02190.jpg


The firebox standing on the drilled plate.

DSC02193.jpg


Finally today I centred and glued the wood block to the table that will hold the copper tube plate while I drill it.

DSC02196.jpg


DSC02197.jpg


heers

Rich
 
Don't ask me how I worked this out, it took me a few hours. There are times when I am mathematically challenged Perhaps Marv will jump in here and explain the finer points

When people are faced with problems that involve arranging small circles around a large circle they often want to divide the circumference of the large circle by the diameter of the smaller circles to determine the spacing. That is dead wrong. Take a few minutes with pencil and paper to convince yourself that it won't work.

The way to approach these problems is to find the angle that the small circle subtends at the center of the larger circle. I'll let it as an exercise for the student to show that, if

r = radius of small circle
R = radius of large circle

the angle subtended at the center of the large circle is given by

A = 2 * arcsin (r/R)

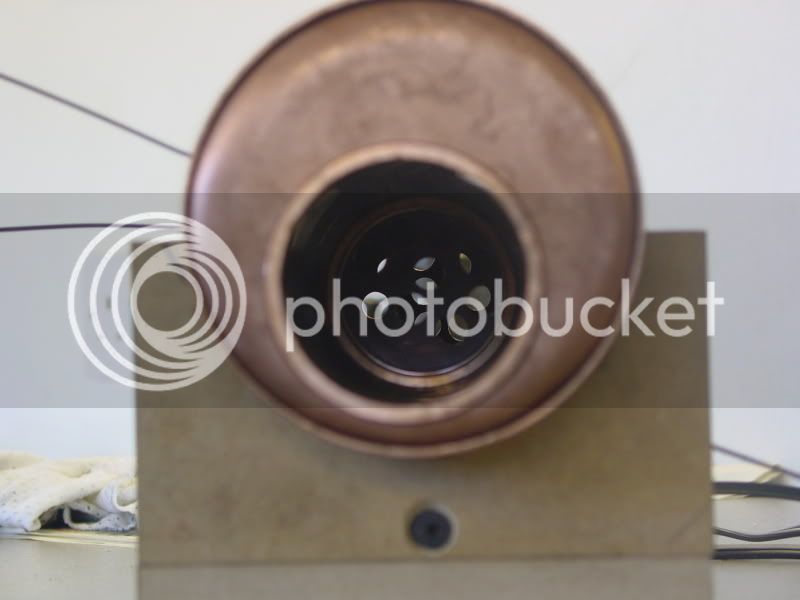
Let's see how this would work for Rich's parameters. With r = 0.25 (0.5" diameter circles), how big must R be to accommodate nine small circles?

A = 360/9 = 40 deg so

arcsin (0.25/R) = A/2 = 20 deg

Taking the sine of both sides of the equation, we have

0.25/R = sin (20) = 0.34

So

R = 0.25/0.34 = 0.735

and the enclosing circle would have a radius of

R + r = 0.735 + 0.25 = 0.985

IOW, very close to the two inch diameter Rich found by his manipulations.


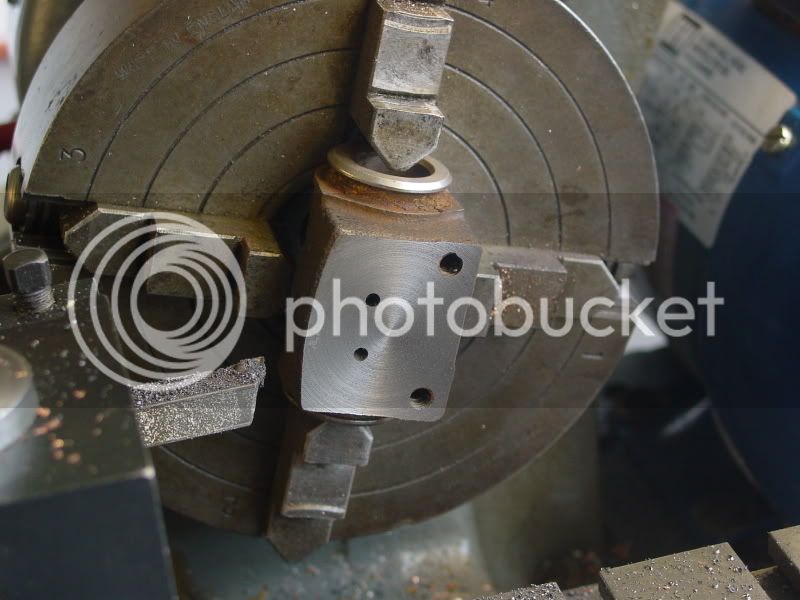
If you're dealing with problems of this sort (eg, laying out an elbow engine cylinder), you may find the REVOLVER program on my page helpful. While originally written to assist me in designing tool holders, it's general enough to be applicable to other forms.
 
Thm: Thm: Thm:


Thanks Marv, I knew you could do it. :big: :big:

Cheers

Rich
 
Hi

The copper firebox tube plate is a good tight press fit onto the wood holder.

DSC02198.jpg


Using the same method as before all the hole locations are marked with a spot drill. (thanks to John Bogstandard for the tip about using spot drills instead of centre drills Thm:)

DSC02200.jpg


Then drilled through. I used a 9.5mm drill instead of the 3/8 this time. 9.5mm is slightly smaller than 3/8.

DSC02207.jpg


Clean up with a 3/8 reamer afterwards.

DSC02209.jpg


Sitting in the firebox with the jig.

DSC02212.jpg


Cheers

Rich
 
Hi

Today I cut the hole in the boiler end plate for the firebox. After marking its position on the end plate I set it up in the 4 jaw.

DSC02213.jpg


Then cut out a hole close to size. The copper cuts easily with a normal turning tool.

DSC02218.jpg


Then bring to size with a boring tool. The last dozen or so cuts were taken a few thou at a time until the firebox would enter.

DSC02221.jpg


DSC02224.jpg


This is a view looking down the boiler barrel

DSC02225.jpg


The other end plate needs to be drilled for the fire tubes. I set it up in the mill using the punch to hold it.

DSC02233.jpg


After drilling the first 3 holes I secured it with a screw and removed the clamps so that I could turn the rotary table.

DSC02235.jpg


Then drilled the remaining holes.

DSC02236.jpg


Fitted into the boiler barrel.

DSC02241.jpg


A view looking down the firebox. The firetube holes are not correctly aligned yet.

DSC02244.jpg


Cheers

Rich
 
Hi

I forgot to mention that the fire tube holes in the boiler end plate are drilled 1/8 inch higher so that the fire tubes when fitted have a slight upward slope.

Cheers

Rich
 
Good going Rich Thm:

Nearly time to get out the silver soldering kit :)

Kind regards, Arnold
 
Hi Arnold

The temptation to stick it all together is very strong but I have to be patient. I have to work out where all the various bushes will go, there are 3 stays to get in plus internal pads for mounting the cylinder and axles etc so the soldering job is a good way down the road yet.

Cheers

Rich
 
Hi

I need to fabricate a cylinder so thats what I have been doing today. I had some success using a brake cylinder on my beam engine (an aluminium one) so decided to use one again although cast iron this time.

The cylinder I am using has a bore of .7 inch.

First job was to remove the unwanted portion.

DSC02250.jpg


Then face off in the 4 jaw chuck. It machines really well

DSC02254.jpg


Make a mandrel to hold it. Its machined to be a nice sliding fit in the bore. Partoff a bit to make a thick washer. Machine a shoilder for a O ring to sit on. Tightening the 6mm cap head bolt expands the O ring and grips the cylinder.

DSC02256.jpg


DSC02257.jpg


In the lathe and face off each end.

DSC02261.jpg


More to follow later

Cheers

Rich

 
Hi

Drill out the threaded holes with a 5.9mm drill.

DSC02278.jpg


Press in some 6mm steel and some 1/8 steel into the smaller holes.

DSC02282.jpg


To make the saddle I chopped off a piece of steel tube in the bandsaw

DSC02267.jpg


In the lathe bored to size and cleaned up on the outside.

DSC02271.jpg


Checking the bore size with an offcut piece of the boiler barrel.

DSC02272.jpg


I'll cut a piece out of this now.

I need to machine the side of the cylinder now to the same radius as the saddle. Not sure how to do this so I'll post a question in the question and answers section.

Cheers

Rich
 
Rich
I like the idea of using an "o" ring in an expanding mandrel. I know that rubber is incompressible similar to a fluid but have never thought of using one in this sort of situation, nice one.

Hugh.
 
Hi Hugh

I can't remember where I first saw the idea but I have used it many times. I have about 7 or 8 of them now. Funny how there is never one the right size ??? ???

Cheers

Rich
 
Hi

Managed a couple of hours this morning.

Cleaned up the face again to get rid of the protruding plugs.

DSC02287.jpg


Then machined one side of the cylinder with a fly cutter

DSC02289.jpg


DSC02292.jpg


Cut a steel block to size

DSC02295.jpg


DSC02296.jpg


Set up in the mill and using a laser cntre finder to set the boring head.

DSC02297.jpg


DSC02299.jpg


After cutting

DSC02301.jpg


DSC02303.jpg


DSC02308.jpg


Cheers

Rich

 
That looks a better height now.

So whats it to be silversolder the lot or just silver solder the steel block to the tube and then attatch the CI cyl with Csk screws from below?

Probably best to do a test solder joint with that bit you cut off and then decide depending on the outcome.

J
 
Back
Top