A portable engine

Home Model Engine Machinist Forum

Help Support Home Model Engine Machinist Forum:

This site may earn a commission from merchant affiliate links, including eBay, Amazon, and others.
Hi

Thanks Hugh, I'd like to take a look at it.

Cheers

Rich
 
Hi Rich
Have taken a couple of photos of Sissons portable and put them on photobucket so will try to show them to you via the direct link as advised.
I have built a number of boilers over the years, but not a locomotive type but would like to, but as I only work alone it looks as though you could with a third hand when silver soldering.
An engine that I have allways liked the look of are those which drove the steam gallopers at the fair ground, these have locomotive type boilers and I believe made by a company named " Savage" but I have never seen any information on them, have you?.
Hugh

http://i1209.photobucket.com/albums/cc389/modelman1838/sissonsportable001.jpg
 
Thats quite a nice little engien though looks like Hainings plumbing could do with scaling down a bit.

I've not seen plans for a centre engien but you can buy the actual "organ engine" that sat up front in kit form from Bruce engineering ( Page 17 ) and Reeves do a similar one called Nicholas. Then all you need to do is make up the rest so it looks like

http://www.flickr.com/photos/13181394@N03/1380779205/in/photostream
 
Hi Hugh

Thats a nice looking engine, thanks for posting the pics. Did you ever have it running. I would like to steam the one I build and coal fire it.
Cheers

Rich
 
Hi

When I built my small boiler I had to stop and build various jigs to hold the boiler tube without damaging it. Armed with that experience I decided to make the holdig jigs first for this project so that is what I have just spent the afternoon doing.

Firstly I cut a piece of 18mm MDF then in the mill machined the edges square.

DSC01687.jpg


DSC01689.jpg


Can be nasty stuff MDF so I had the vacuum cleaner on all the time while maching it.

Cut a hole in it with my biggest hole saw.

DSC01694.jpg


Mounted it on the face plate from behind with large self tapping screws with some 6mm MDF spacers

DSC01695.jpg

DSC01696.jpg

DSC01698.jpg


Turned out the hole until the boiler tube just fits in

DSC01700.jpg


Then cut in half and screw and glue to another piece of machined square 18mm MDF

DSC01703.jpg


DSC01704.jpg


The addition of a bar will allow me to hold the tube in the jig with some plastic cable ties

DSC01707.jpg


A steel mandrel with a 10mm shaft and tapped 6mm

DSC01714.jpg


A piece of 22mm soft wood is marked out and then cut roughly to shape using the band saw vise

DSC01715.jpg


DSC01718.jpg


DSC01720.jpg


Drilled through the centre 10mm and mounted on the mandrel and turned to size. I have marked the mandrel with a No. 1 so that I always put it in the chuck lined up with No. 1 jaw

DSC01724.jpg


Turned to be a good fit internally in the boiler tube

DSC01726.jpg


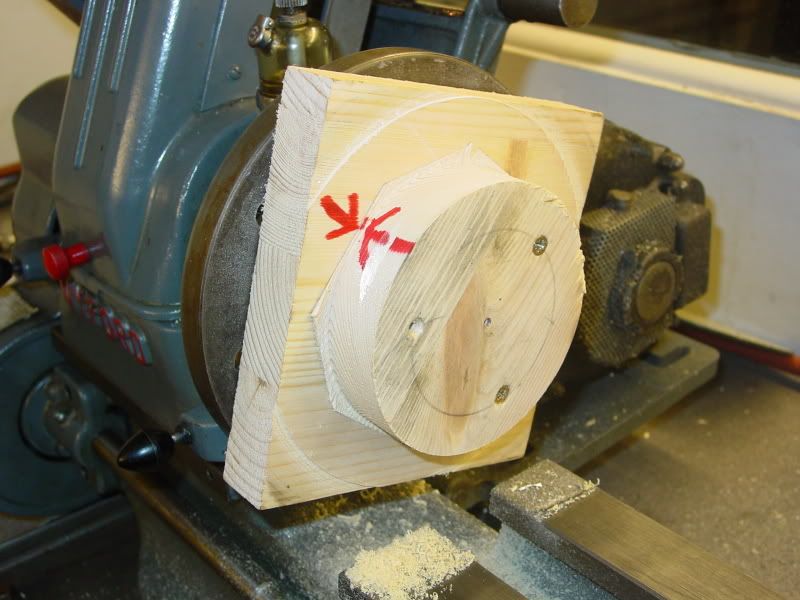
A piece of soft wood screwed onto the face plate

DSC01728.jpg


DSC01730.jpg


Another piece of 22mm soft wood cut roughly to size

DSC01731.jpg


Then screwed to the face plate and turned to be a good tight fit internally in the boiler tube and marked so that I can refit it if nec.

DSC01735.jpg


DSC01736.jpg


Mounted in the lathe. I can push the tailstock end into the boiler tube as far as nec depending on the job in hand

DSC01740.jpg


Heres a shot of the copper I have collected over the last year or so to make the boiler

DSC01711.jpg


Cheers

Rich

 
Building a boiler seems like no easy task, lots of jigs. Looks like an interesting project.
Brock
 
Good to see you have made a start.

One thing I was thinking while looking at those pics of the Seeking engine and also the photo that accompanies Hainings series it that it would be nice to add the rivit detail.

The ones at the ends of the boiler could all be dummies set into shallow csk holes in the barrel before soldering, there would be no loss of strength if the flanges were enlarged from 7/16 to 1/2. The side seams could be represented by using a strip of copper with a row of rivits down it that could be soft soldered onto the boiler after all the silver soldering, this would look a bit like a lap joint but not affect the strength of the tube.

I was talking with Harry Williams at Sandown yesterday and thats how all the rivits are done on his Kitson boiler, none are structural. Compare the early boiler photos with the ones where construction is more advanced

http://www.blackcountrysteam.co.uk/harry_williams_workshop.htm

J
 
Hi

Brock, it will certainly be interesting and a long job.

Jason I had it in mind to simulate the rivets at each end. I will clad the barrel with wood so only the ends will show. I was thinking of making a ring with rivets in to slip over the ends, it would only need to be a tight fit.

Cheers

Rich
 
Thanks Dave

This morning I went out and had a good rummage through my stock (AKA the scrap boxes) and came up with a few bits. A cast bronze cylinder of unknown origin, I recall buying it at a steam fair years ago. It might do the job with a bit of modification. Also a bronze flywheel that would have come from a similar source. Some camshaft timing gears to give an idea of wheel size and some cast iron rings? although they look too small.

DSC01745.jpg


DSC01744.jpg


DSC01746.jpg


Cheers

Rich
 
Nice collection of bits so far Rich ;D

Chair pulled up to watch the rest of the build Thm:

Kind regards, Arnold
 
Hi Arnold

You had better get a comfy chair I think this is going to be a long haul ;D ;D

Cheers

Rich
 
Hi

Well Xmas is over,got my new lathe motor fitted yesterday so today I had the whole day playing. I have always liked the look of forged crankshafts and would like to fit one to this model. I have had an idea of how to make one for a while so gave it a go today. I built a jig from some angle iron and 1/2 square steel. Its designed so that each piece is fitted after each bend.

This is the jig. I'm using 7/16 round steel bar purely for the fact I have quite a bit in stock and can afford to waste some.

DSC01757.jpg


I made a mistake with the central part of the jig, it was too long giving the crank a 1 1/2 throw, 3 inch stroke so I reduced it to give a 3/4 inch throw, 1 1/2 stroke.

DSC01767.jpg


I centred the end of the steel before starting.

DSC01768.jpg


The first bend went well, heating the steel in the brazing hearth and pulling it round the jig by hand (a hand with a welding glove on) Sorry no photo of this bit I couldn't hold the camera and the hot steel but heres a shot of the steel being heated for the second bend.

DSC01770.jpg


Heres a few shots of the 4th bend.

DSC01774.jpg


DSC01775.jpg


DSC01776.jpg


DSC01773.jpg


Unfortunately I didn't keep the heat on it enough and ended up with a crack.

DSC01777.jpg


The next attempt was a little more successful

DSC01782.jpg


A litle bit of straightening out in the press

DSC01785.jpg


Theres a crankshaft in there I think. Its 7/16 so the is plenty to machine off.

DSC01788.jpg


Cheers

Rich


That's pretty cool! I would never have thought to even try something like that! Hope you'll post the rest of the series as you machine the crank.

Chuck
 
Hi Chuck,

This is just the practice one, I won't use it on this engine, not good enough. I'll need to refine the procedure a little but the idea works. My mate Julian (Barneydog) has just been round and said thats just what I need for one of my engines so I let him have it. What are mates for ::) ::) ::)

Cheers

Rich
 
That looks the part :)

Another method is to turn it from flat stock and just fettle the throws until they look like they were from round stock, you can get the bends to look nice and tight that way. Not as extream on a portable as this one but same principal

http://homepage.ntlworld.com/corromant/crankshaft.htm

Also has the advantage of being able to locate centres when turning the journal

J
 
Nicely done Rich! I once saw an old industrial movie of someone forging a crank similar to that, but with a drop forge....If I can remember where the hell I saw it I'll post it.

Dave

 
Always thinking of different techniques to develop pieces aren't you Rich. BRAVO! I like it. My Father did more forging than I care to think about so I am a bit partial I suppose but pieces such as yours with some hammer marks just screams out character. By all means keep us in the loop please.

BC1
Jim
 
Back
Top