3/4" Pennsy A3

Home Model Engine Machinist Forum

Help Support Home Model Engine Machinist Forum:

This site may earn a commission from merchant affiliate links, including eBay, Amazon, and others.
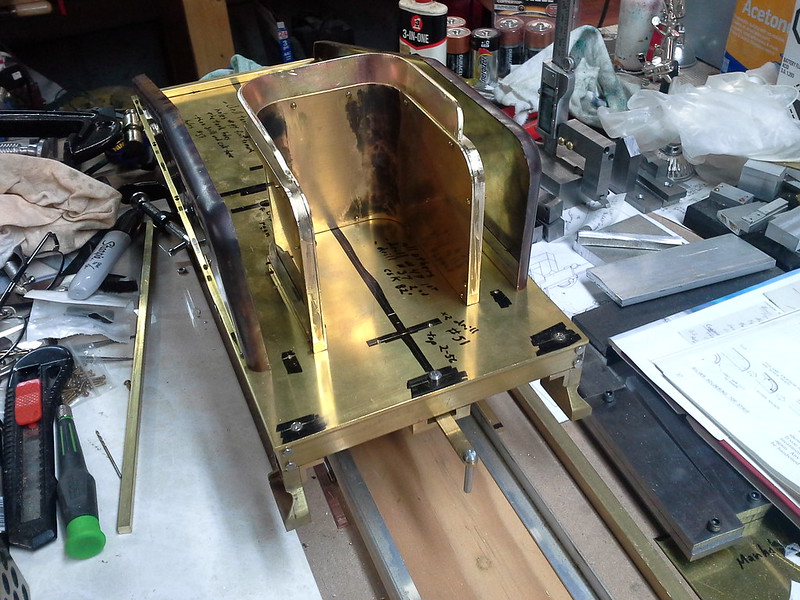
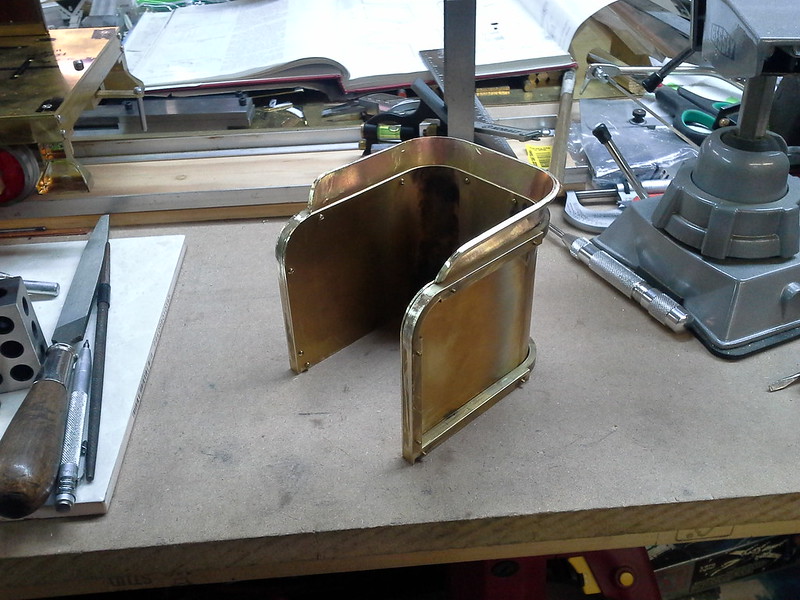
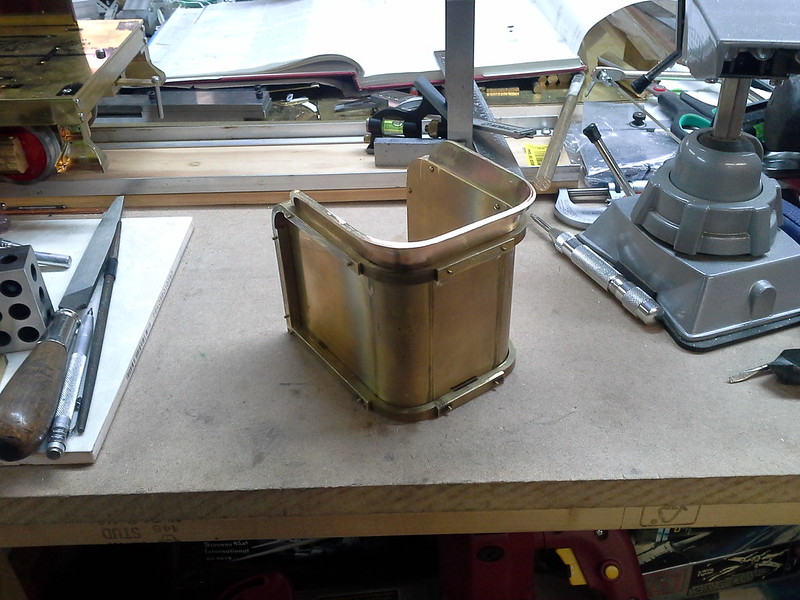
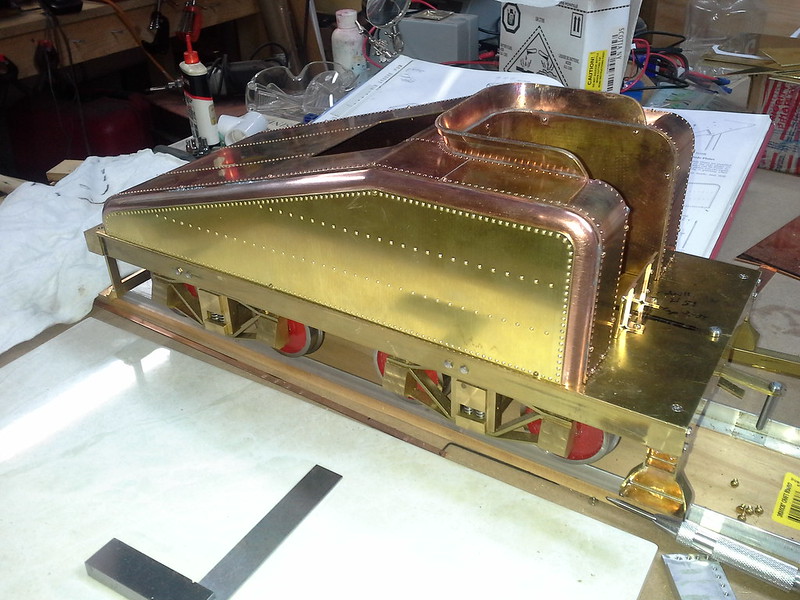
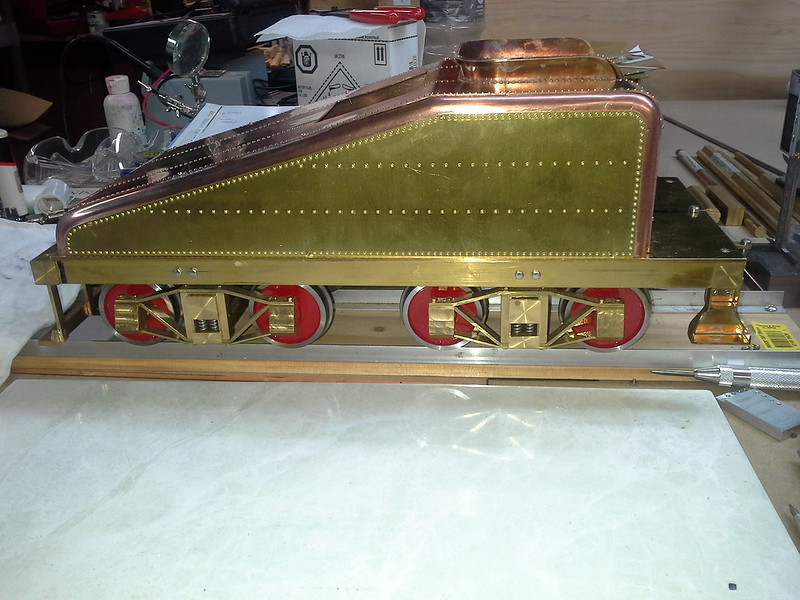
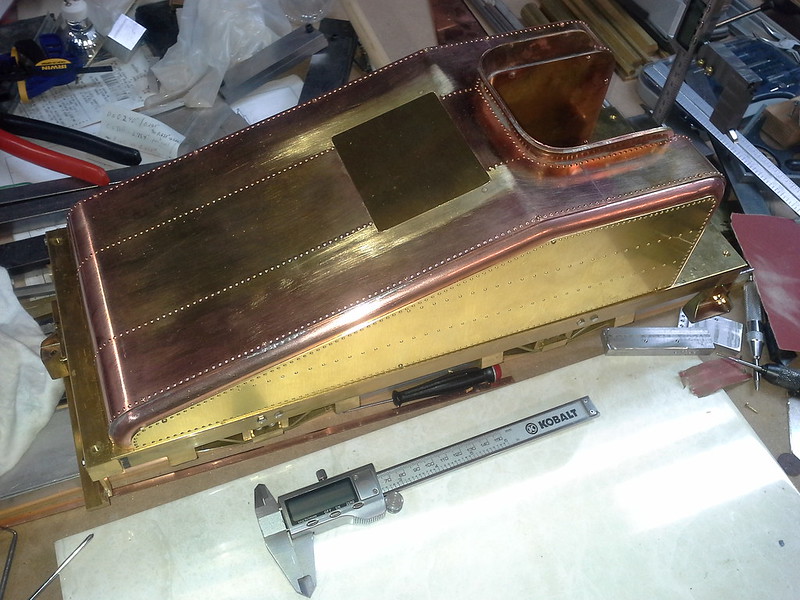
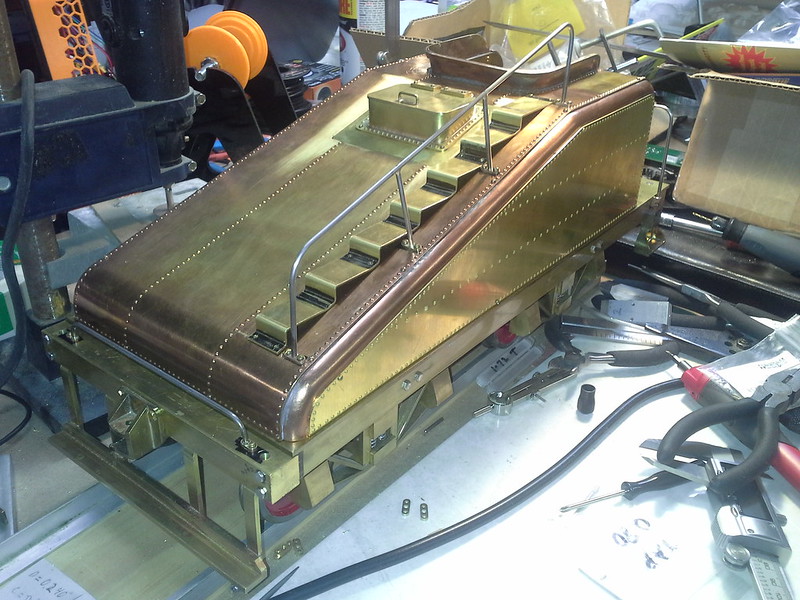
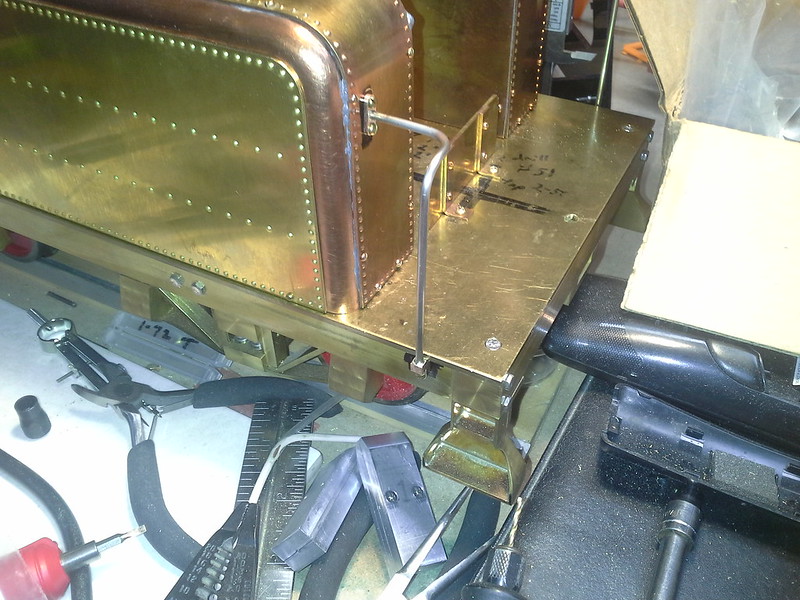
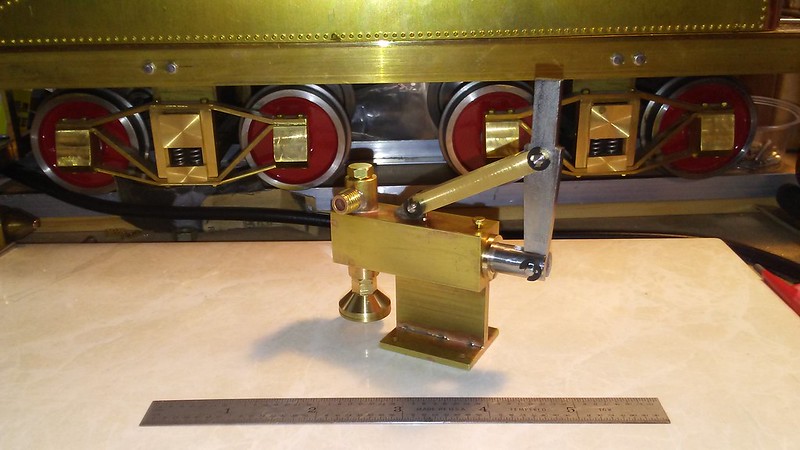
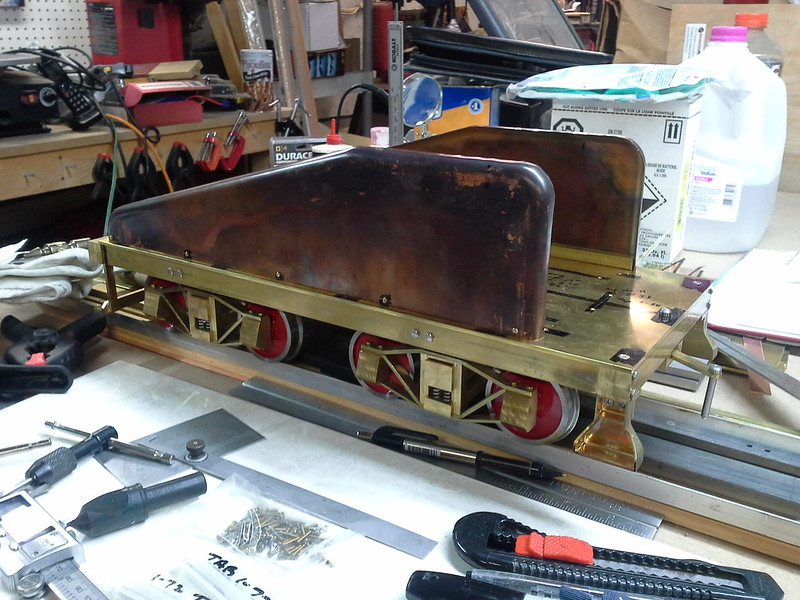
Nice progress! One piece at a time - its amazing how many pieces there are in a loco, but fun when they start to come together.

Couple places I have gotten good deals on meta lately:
At Yarde Metals (yarde.com), they have a 'Drop Zone' area on thier web site with deals on off-cuts from thier commercial deliveries at great prices (usually 1/4 or 1/3 prices elsewhere). The selection is limited and constantly changing since they are offcuts (usually about 3' lengths), but good source. Shipping is cheap too.
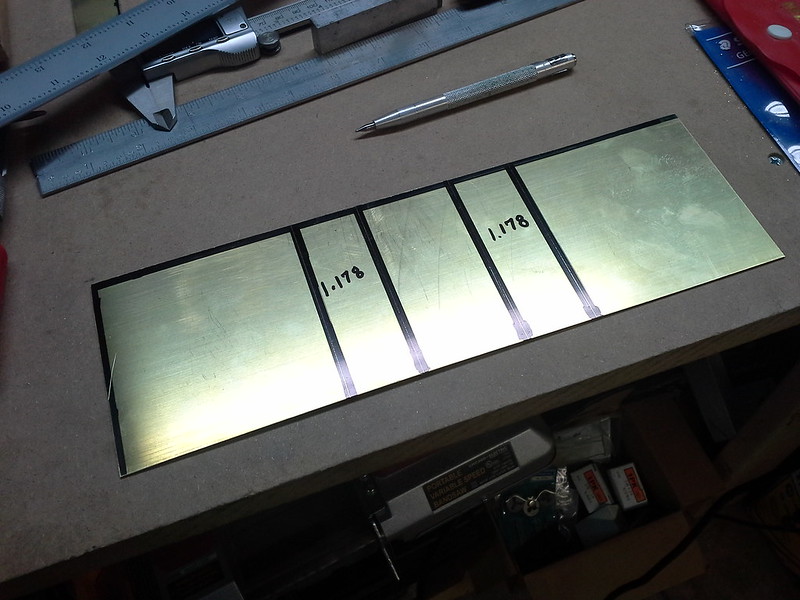
Also, at OnlineMetals.com, if you sign up for thier emails, they have frequent sales. I got the sheet copper/brass for mine last month when they had a 25% off sale - saved a bunch.
Pays to check around on prices, they vary a lot for the same thing (as with most things these days).
 
Thanks, crueby!

I'll check out Yarde. I usually buy from OnlineMetals. I didn't have the money last month when they ran the sales. It was killing me to have to miss that. I also buy from SpeedyMetals. But, find their prices are usually higher than OnlineMetals. So, I only buy from them if I can't find it elsewhere.

Todd
 
Well, I've been able to make some progress over that past month or so. Work on the tender tank continues.

I learned how to form copper over a wooden form. This part gets cut down the center to form the two sides of the tank.
16431491454_888f206480_c.jpg

16866387130_97867e47cf_c.jpg


Here the part has been split, the two halves mounted to their corner frames and resting on the tender deck.
17019779058_28baa68706_c.jpg


I made a bending jig for the upper and lower coal bin frames. The forms are aluminum that I turned on the lathe. They have two sides. One forms a 0.75" radius for the lower frame. The other is 0.79" for the upper frame. Pictured here is the lower frame ready for bending.
17344098456_ddaf7217c1_c.jpg


Here is the lower frame after bending. I annealed the brass before hand. And, I've annealed it again here in my fire brick box because I have some small adjustments to make on it.
17370057405_335514c783_c.jpg


Finally, here is a shot of the Wheel and Cylinder castings. I just got these last week. Nice to have these parts. Keeps me thinking about getting to the locomotive. :)
17125261859_593d9a9054_c.jpg


More fun to be had. :)

Todd
 
Nice! I like the bending jig for the frame rails. That would have made getting mine the same shapes a lot easier - I had to do a bunch of rebending to make them match. The tender sides look great.
 
Thanks Crueby! :)

Parts from this weekend. I made up all the frame pieces for the tender tank frame. This is all 0.25" stock. The uprights here were bent by hand. There was a little fiddling afterward, but it wasn't too bad.

17823945485_07eb516d82_z.jpg


Now, I need to make up the sheet brass parts for the top and coal bunker.

Todd
 
I annealed the brass before hand. And, I've annealed it again here in my fire brick box because I have some small adjustments to make on it.
Todd

Hi Todd. I recently posted an inquiry about firebricks like that. Do you just hand assemble the little brick house to suit the application? And by annealing you mean with a torch? If so, what is your weapon/gas of choice & how do you get feedback on temperature state?
 
Hi Pete,

Yeah, the fire bricks are loose and I just assemble them as the application dictates. I do the annealing with a hand held torch. I use the small propane bottles from the big box store. This torch has a half inch tip which has been enough for the small work that I've done so far. As for temperatures, I just go by glow color descriptions that I've read in books. I look for a slight dark cherry red in the brass. Same color for the copper sheet of the tender sides. I turn off most of the lights in my shop to make it easier to see the color changes.

Todd
 
Didn't get as much done as I wanted this weekend, but some progress was made. Better than no progress. Managed to get the Verge board cut out, cleaned up, and bent to shape. Also, have the coal bin wall cut and marked for bending.

Here's the wall:
18140222962_132bd33430_c.jpg


Here I created a template for the Verge Board using Autodesk DraftSight. I glued it on to the brass sheet. I couldn't find my 3M spray adhesive, so I had to use wood glue. Worked well enough.
18117235186_5ae66228cc_c.jpg


This is the Verge Board cut out using my scroll saw.
18144831601_45cd37daac_c.jpg


Here is the Verge Board after being cleaned up on the belt sander.
18143712195_e0245764f9_c.jpg


Verge board bent to shape and fit in to the upper frame. Still need to cut and solder the upper lip of the verge board.
18143710665_ce2c6c19ee_c.jpg


More fun to be had. :)

Todd
 
Good progress over the weekend. I finished up the coal bin. It was all screwed together for these photos.

18159303548_c72545b2af_c.jpg


17726498093_a7878a2c9e_c.jpg

18159420560_f0e01c64d0_c.jpg


18160976229_a1f6a6b849_c.jpg


17726495143_751755fffc_c.jpg


The soldering is done, but I need to clean up the part. The sides also have their bottom members soldered now. I'll post some pictures when I get them cleaned up. Now on to the front and top panels.

More fun to be had. :)
Todd
 
I've made a lot of progress since my last update. The tank is assembled and soldered. And, now I'm working on the water hatch. It will be rectangular instead of round. The prototype pictures I have found show it as rectangular.

23337126786_a8917c1957_c.jpg


23254913002_ebefbcd255_c.jpg


22810225463_41cab2a84c_c.jpg


More of the assembly pictures are on my Flikr account. More fun to be had. :)

Todd
 
I had to take a break from this project for a while. But, I've finally been able to get back to it. Now I have the tank hatch, handrails and steps done. I've started working on the hand pump.


I'm so happy to be back at this. It has been too long. With any luck I'll have the plumbing done in a few weeks. Then I can finally start on the engine.
 
I completed the pump body last night. I'm happy with how it turned out. Quite a few different operations to create it.

35112340982_da89500f39_c.jpg


Now on with the rest of the bits.
 
Adding more bits to the pump. I finished the plunger, O-ring retainer, plug, suction valve seat, and link. The lever is drilled and turned. I just need to mill it to shape.

34532428513_ce9be679a8_c.jpg


More fun to be had. :)
 
Thanks Dale. :)

I finished milling the lever last night and assembled all the parts together. I do still need to make the spring for the ball check valve. And, I need to order some stainless bearing balls. Also, the e-clips on it now are temporary until I can get some stainless ones to replace them.


I have the handle mostly done, but need to finish cutting the slot in it. I must say I've learned a lot about slitting saws and cutting speeds in the last few days. I've burnt up three of them... :rolleyes: So, now I need to order more. And the handle sits until I get those. Until then I'll move on with the rest of the plumbing. :)
 
Kozo calls for silver soldering the brass fittings to the copper tubes. Is it absolutely necessary to do it this way? Or, can I use the lower temperature solder I'd use sweating copper pipes in the house?
 
My experience is limited to two boilers one of which is still has very limited heating. That being said I found that silver solder ( mine was 45% ) HAS to be used on the boiler itself and any items that are touching the boiler. I was able to get away with hard solder on all the steam pipes downstream of the boiler. Same goes for water feed lines etc. I had one hard solder joint fail that was close to the boiler and that showed up after I added 3ft of superheater coil over the burners which got the steam a lot hotter. All it did was leak steam, no bombs went off. I resoldered that joint with silver solder and all is well.
Hope that helps
Pete
 

Latest posts

Back
Top