Tiny I.C. Engine

Home Model Engine Machinist Forum

Help Support Home Model Engine Machinist Forum:

This site may earn a commission from merchant affiliate links, including eBay, Amazon, and others.
Hello Kel,

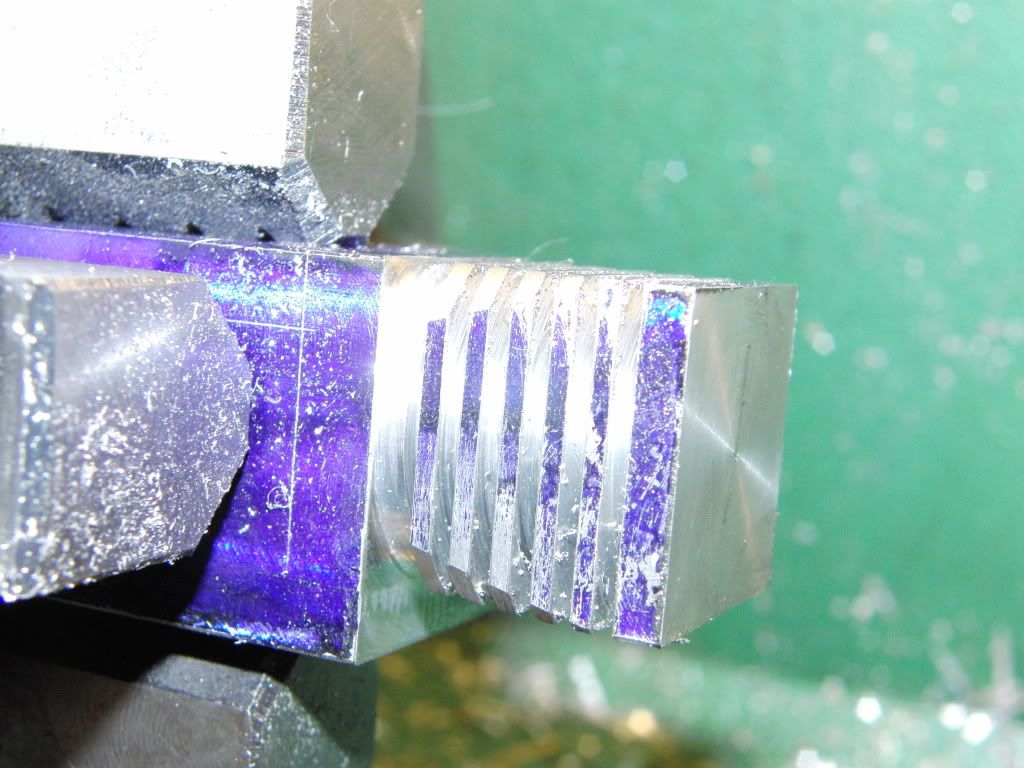
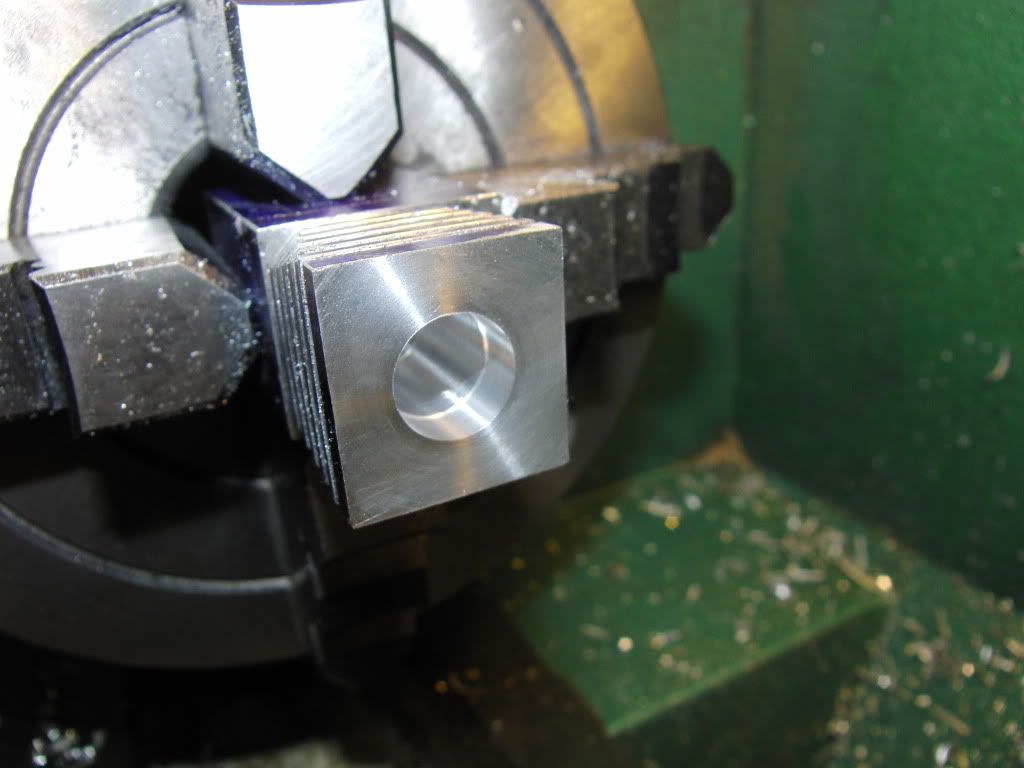
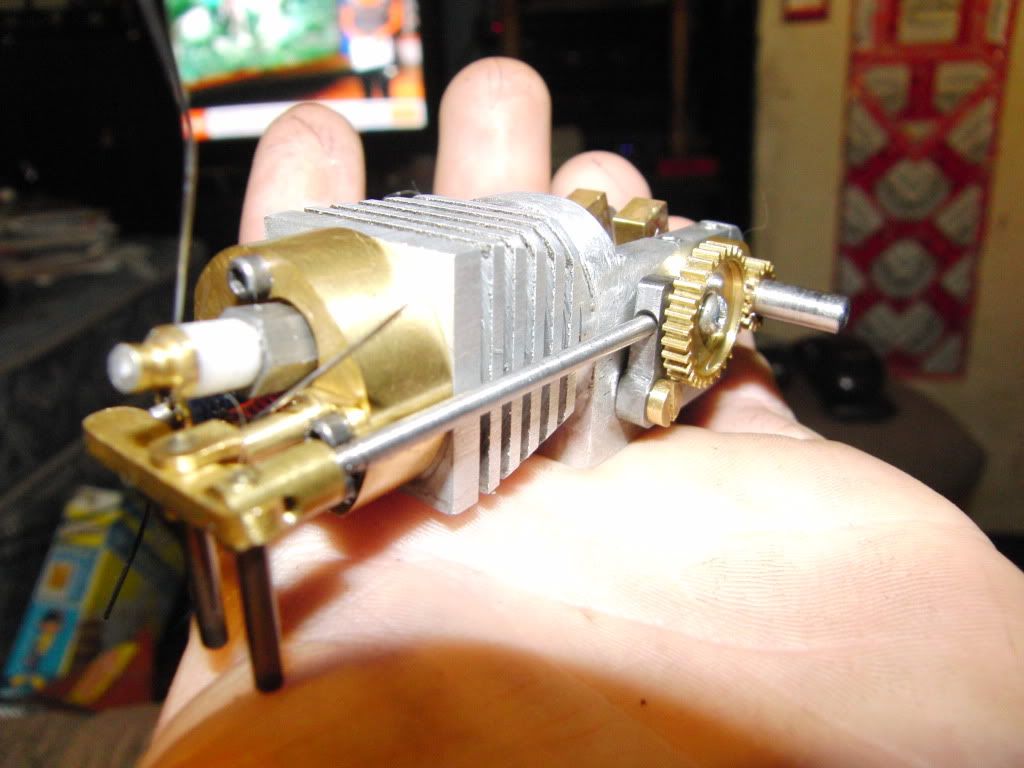
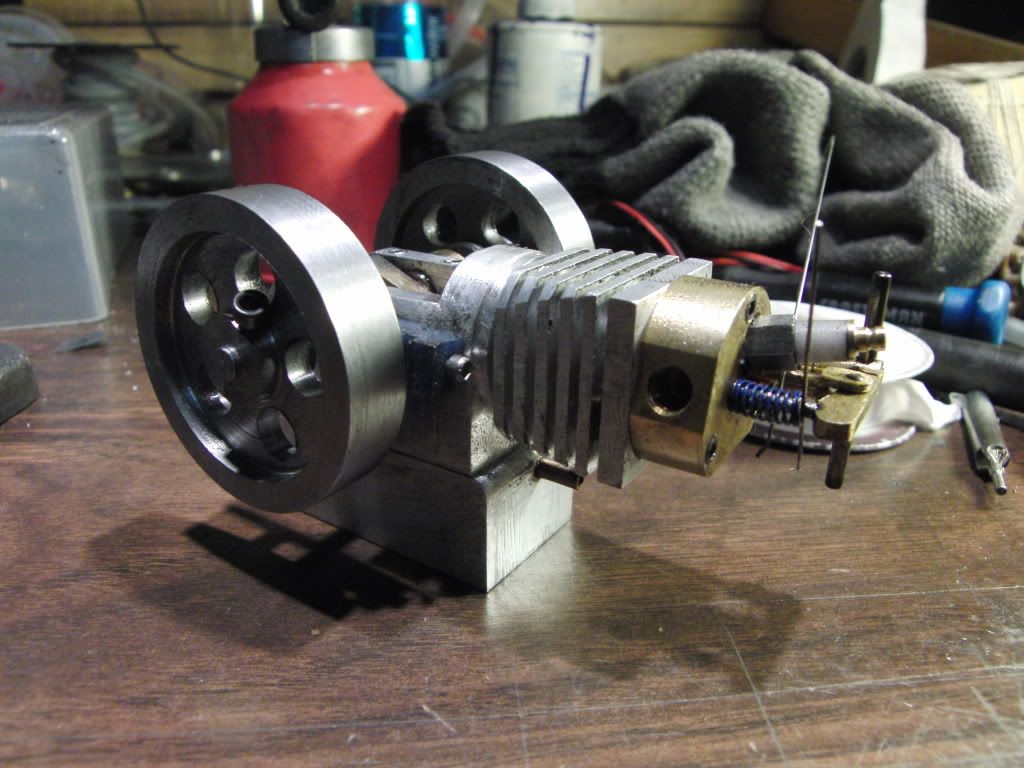
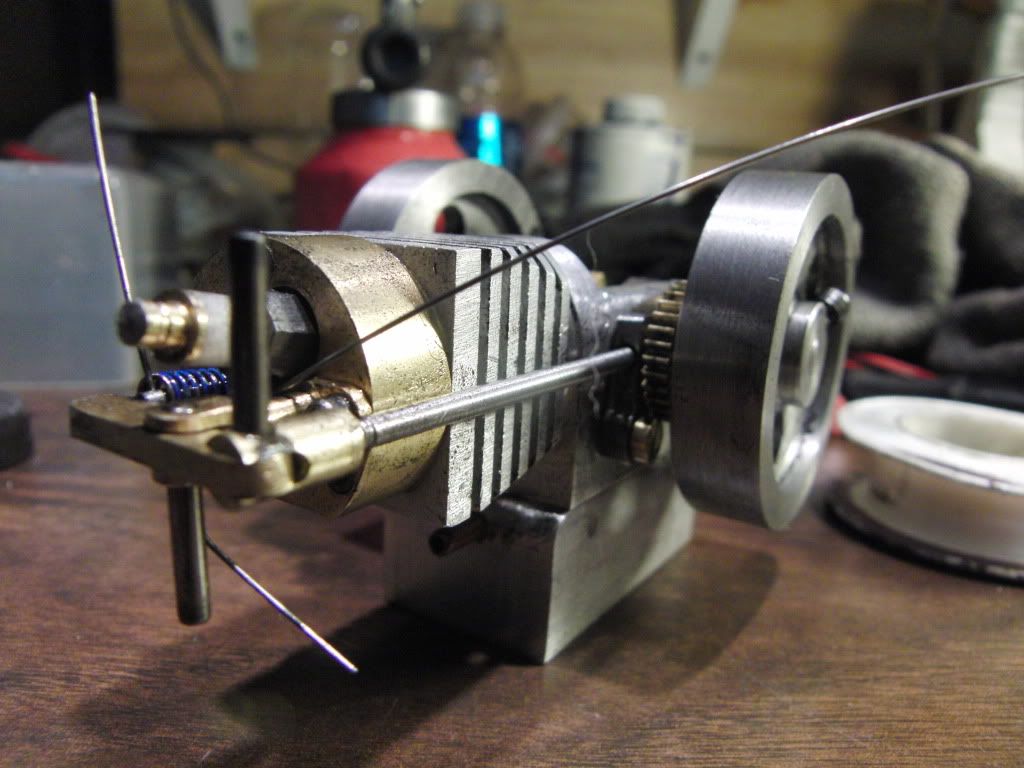
To answer the last question first, I always bore my cylinders on the mill, if they fit, or on the lathe. Normally I can get a decent finish that requires a minimum of lapping. If I am going to use o-rings, I try to get a smoother bore than if I use metal rings.

When using o-rings, use Viton material as it will stand a much higher heat than Buna-N, which is what most hard ware store rings are made of. If you will PM me your mailing address, I'll will send you a couple Viton rings that you can try. I think you should be able to get by with the oversize condition.

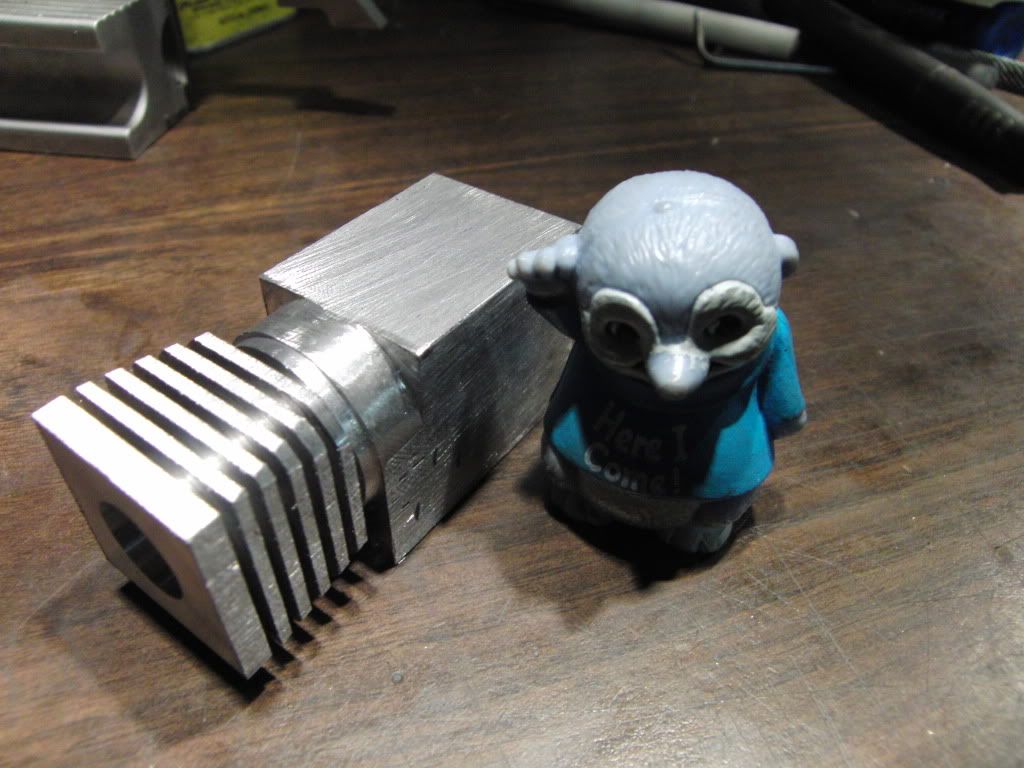
If you haven't got too much work into the cylinder, you might want to start over. The one advantage with the Tiny I.C. is that you haven't got a lot of material involved in any of the pieces.

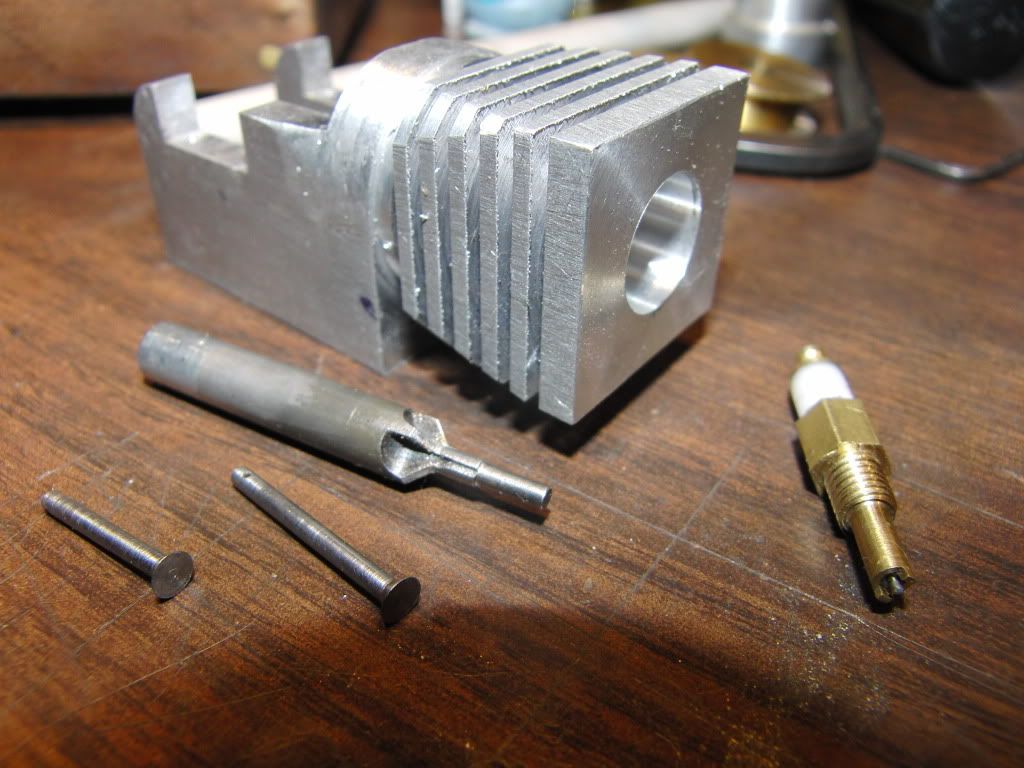
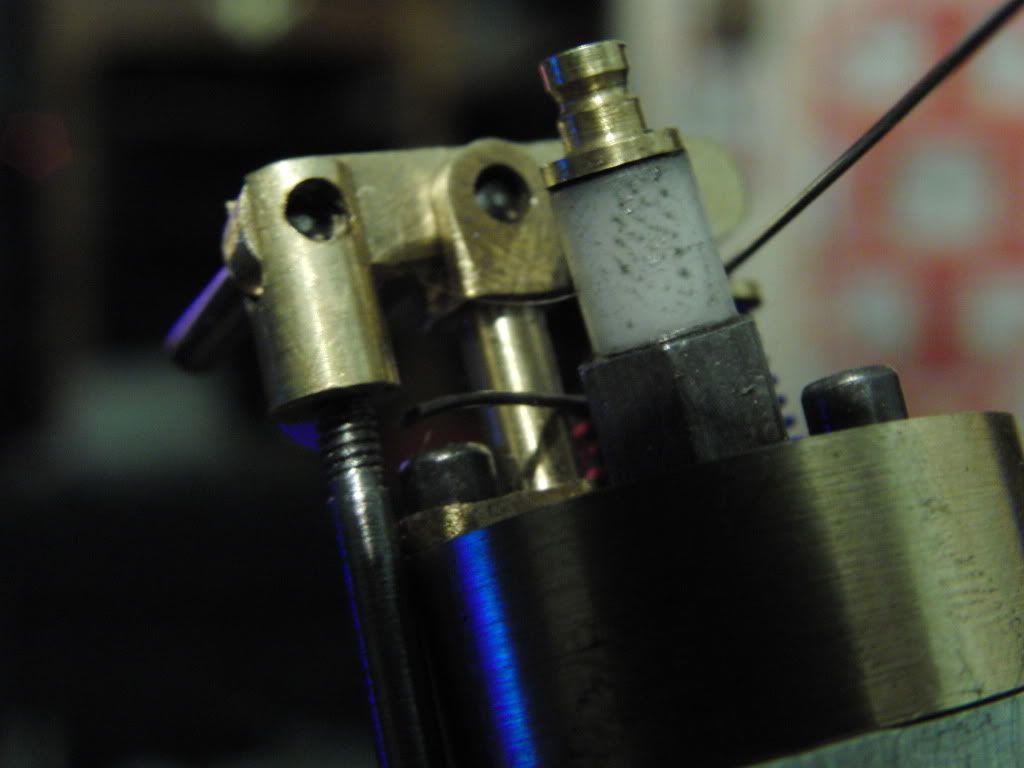
To answer your question about the legnth of the intake valve, from another thread, the only requirement is that it is enough shorter than the exhaust valve so it clears the rocker arm.


Kel,

I was thinking maybe you could cut the groove in the piston shallower so the o-ring is stretched slightly over it's diameter, giving a larger od? Just a thought, you could do that by just trying the cylinder over it and taking further skims until you get an acceptable fit?

Just a thought anyway.

Nick
 
Arv, thanks for the info on the bore. I am a little weary about boring such a small hole, hence the use of the wrong size reamer. Perhaps I should give it a go. I have plenty of 1" Steel to practice. (I am going with the air cooled version that Gail came up with, with a fan perhaps. For long run Times)

Thank you for the offer of the O-rings. I do plan on expanding your design in the future to a multiple cylinder version. So I will probably be getting a shipment in.

Is there any reason I couldn't make it a "Ringless" engine, by making the piston a perfect fit. I have never done this before either. This is my first IC engine. Would I need something better than aluminum to do this?

Nick, I did think about that. But the plans call for a groove to be deeper than the o-ring. Im not positive on the correct setup for o-ring piston rings. Perhaps Arv can shed some light on this. ;) ;)


Kel

 
Kcmillin
You might try one wrap of two or three thou brass shim stock under your o ring to just bring it in contact with the cylinder wall and no more, you do not want to make the o ring drag, also allow a little vertical freedom so pressure on the compression and intake stroke can get behind the ring and effect a seal. Hope this helps in the thinking room. Regards Jim Hay
 
Personally for a .005 difference I would, as someone suggested, cut the o-ring groove a few thousandths shallower. Its .0025 difference where the o-ring sits, I would guess it would work just fine even though it is a small diameter.

Just my thoughts. Keep in mind I rarely have any clue as to what I am doing 8)
 
Kel,
You are kind of at the mercy of the oring manufacturer about the oring working the the oversize bore. The allowable tolerance on orings is kind of loose with tolerances based on both the ID and the the cross section diameter. If you take the tolerances to the lowest limit the oring will not work in Arv's engine. His design is based on the nominal size of the orings. Fortunately, most manufacturers hold the tolerances much closer to the nominal size and seldom go below the nominal size. However, using the nominal size, 0.379 is the largest size bore that would seal using that oring. I think that most of the orings actually end up a little bit larger than the nominal size so it would probably work at 0.380 with most orings. About all you can do is make up a sample piston and try it.

As far as a ringless engine goes, it will work fine. It is a little more demanding to machine as the lapping has to be done carefully to get the proper fit. Aluminum will NOT work for the piston however. For a lapped piston/cylinder to work well the materials need to have a similar coefficient of expansion. If an aluminum piston is used in a steel cylinder it will have to be loose when cold or it will seize when the engine warms up. This makes for hard starting. That would not make a good wear combination either.

I prefer to us a cast iron piston in a steel cylinder or better yet a cast iron piston in a cast iron cylinder. These combinations both are very tolerant of poor lubrication and the steel and cast iron have a similar expansion rates. I have used 12L14 and cast iron on a number of engines and it has been frequently used on commercial model aircraft engines.

Gail in NM


Arv,
I just did a plain surface discharge for the business end of the spark plug. With this low of compression ratio it should work just fine. Just in case, I made a couple of extra bodies that I can assemble in different ways or have a spare plug.

0-80 threads quit being a problem some 30 or so years ago, although with the eye situation I have to use at least a 3 power hood to see what I am doing in recent years. I still use a few 00-90 and 1mm screws, but not as many as I did a few years ago. For this spark plug all I did was to use a commercial hex head 0-80 x 1/8 brass screw. I chucked on the thread with a collet and thinned down the heat to about half thickness and drilled 1/32 all the way through.

Gail in NM

 
I have yet another slight variation of the frame and cylinder.

This version of the Tiny IC will be an all aluminum frame and cooling fins, with a steel cylinder pressed in like the plans call for.

I am making the cylinder to the plans, however the OD of the cylinder in between the .469 and .500 will be a tight sliding fit. This is to ensure good heat transfer from the cylinder to the frame.

CIMG1186.jpg

CIMG1188.jpg


I needed to make a half round spot on the frame behind the cylinder. I decided to do this while the frame was in the lathe for the boring procedure.

I put my spindle crank in and proceeded to use hand power to cut the two corners round. It was surprisingly easy and went quite fast.

Here is a short vid of that process.
<object width="480" height="385"><param name="movie" value="http://www.youtube.com/v/2jfCQTZtbh8&amp;hl=en_US&amp;fs=1"></param><param name="allowFullScreen" value="true"></param><param name="allowscriptaccess" value="always"></param><embed src="http://www.youtube.com/v/2jfCQTZtbh8&amp;hl=en_US&amp;fs=1" type="application/x-shockwave-flash" allowscriptaccess="always" allowfullscreen="true" width="480" height="385"></embed></object>

and the result of that.

CIMG1204.jpg


After milling out the middle and bearing supports this is what I have.
CIMG1206.jpg


Kel
 
Wow, a rotary shaper :big: :big: :big:

Clever idea. I never would have thought of that.

I like your modifications to Tiny I.C. I wonder how many more variations might still be out there.
 
I been working on this for the past few weekends and now I am close to a finished product.

This project marks many firsts for me.
1. My first IC
2. My first set of "Real" gears
3. My first carburetor
4. My first spark plug
5. My first valves

Here are some pics of the little guy.

CIMG1207.jpg

CIMG1210.jpg

CIMG1216.jpg

CIMG1217.jpg


and oh ya, I get her runnin too :big: :big:
Big thanks to all who helped, and especially to Arv for posting the great plans.

<object width="480" height="385"><param name="movie" value="http://www.youtube.com/v/Y7jrDJgHQ6c?fs=1&amp;hl=en_US"></param><param name="allowFullScreen" value="true"></param><param name="allowscriptaccess" value="always"></param><embed src="http://www.youtube.com/v/Y7jrDJgHQ6c?fs=1&amp;hl=en_US" type="application/x-shockwave-flash" allowscriptaccess="always" allowfullscreen="true" width="480" height="385"></embed></object>


I am beyond myself with happiness right now. I just accomplished something that 5 years ago I would have thought impossible.

Make a 4 stroke engine?.......you got to be kiddin me.
;D ;D ;D ;D ;D ;D ;D ;D ;D ;D ;D ;D ;D ;D ;D ;D ;D ;D ;D ;D ;D ;D ;D

Thats me.


Kel
 
Kel,

That's awsome! Great job! Thm: Thm: Thm: Thm: Thm:

Bob
 
Kel,

That's awesome. :bow:

I like your starter.

Do you have any idea what RPM you are running at?

Good job.

SAM
 
That is great Kel. And fast and quality build also.
Thm: Thm: Thm:
Gail in NM
 
Great job Kel. :bow: :bow: :bow: :bow: :bow: :bow:
You built that in record time. I have been following your thread on bevel gears and I thought you quit on the Tiny I.C.

When engines and details get that small, everything gets more critical when it comes to the valves, fuel mixer, timing etc.. You really nailed it. You should be able to tackle just about any of the larger I.C. engines.


Thanks Bob, Sam, Gail, Zee, Ron, and Arv.

Sam, From what my shoddy tach says it is running about 6000 RPM. But that could be off??

Arv, I have been silently working on this. The post on the bevel gears is for future projects. Possibly including a mutli-cylinder version of this one.

For those who are interested, My carb is somewhat substandard. The tiny hole for the fuel is drilled to deep, about .030" past the cross hole in the spray bar. This is causing some issues, also the intake spring is incredibly picky.

I made a mix of denatured alcohol and colaman camping fuel, with a little bit of tapping oil for lube.

I ran two full tanks through it, about an hour straight, and it never got above 150 degrees. Shell run all day. as long as I am there to mess with it :big:

I would just like to say thanks to all on this website. 7 months ago I had only built a couple air engines and one stirling over a 4 year period. When I finally got the internet last January I found HMEM. Since then I have built 4 flame eaters, one steam wobbler, and this, my first IC. I owe all of this to HMEM and its wonderful members. Without you guys I would still be in the stone age of milling.

Thank you Thank You Thank You Thank You.

Sincerely

Kelly C. Kubischta
 
Hi Kel,
Great job on your little engine. That thing really purrs along. Now that you have accomplished most of the machining tasks in building one what is your next project?
gbritnell
 
Kelly, all of us should be thanking you for allowing us to travel along with you on these journeys. To have progressed in experience in such a short length of time is quite the accomplishment. Your 'Tiny' is a real beauty, (by the way, don't turn your head or blink, it will stop running ;D) BRAVO! to you I say, nicely done. So, what's next? ???


BC1
Jim
 

Latest posts

Back
Top