Overhaul of a 9" SB model "A"

Home Model Engine Machinist Forum

Help Support Home Model Engine Machinist Forum:

This site may earn a commission from merchant affiliate links, including eBay, Amazon, and others.
Well it was hot enuogh for a sauna today anyway!.... ;D


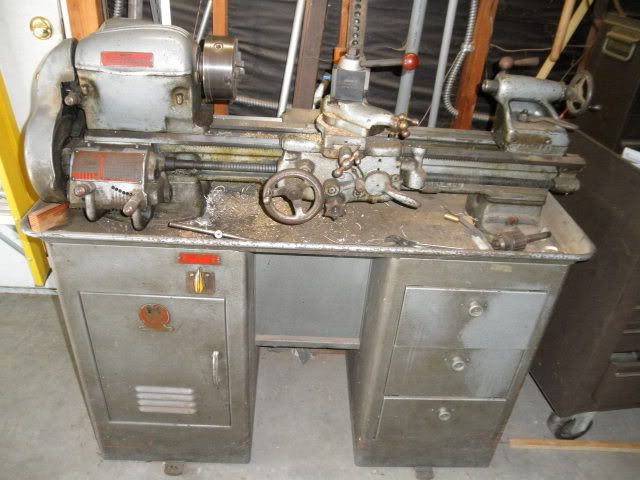
Here's the next steps and what I got done today.

All marked up
P5280138.jpg


Ahhhhhhhh not good!

P5280137.jpg


The old table was run with old congealed oil and grit and it wore a groove in the saddle surfaces...even thought the flakeing is showing...it's there. It would appear the gib side let dirt in more readily than the guide side..as evidenced by the long lines on the sides of the bearing surfaces...these are the high areas..additionally the new table covers more of the saddle surface, so it sits on top of the unworn portions...they need to come down....after about a hour of work, here is where the flats only are.

P5280142.jpg


Much better anyway....though still low near the front of the machine. I won't touch the guide surfaces yet until I get the saddle off and verify it is clean and burr free...then I'll check alignment to make sure it is cutting concave and not convex....that will be later.

I'll leave it like this for now

P5280144.jpg


I'll make up a gib and finish the two compound clamp screws...and then paint.

Next project after this....get the engine and boiler in the boat!

Dave
 
Tore down the tailstock today and stripped the paint off. It's been repainted at least once. IT would appear that there some wear on the tailstock shoe. I'll mark it up and measure the difference in center height before I get too concerned

It's a shame the shmuck didn't clean and oil it at least every once in a while :mad:


We Progress.

Dave
 
Looky what I found! Factory bench for the 4 1/2' in good shape for reasonable money.

photo1.jpg


Ahhh time for the happy dance!

Dave
 
Took stock of the motor. The shaft was worn -.010, and the seized ball bearing on that end was worn +.010"
IT STILL RUNS!

...time to get a new motor! :big:


The counter shaft assembly was disassembled and cleaned. I found the shaft -.010 and the cast iron bore about +.005" The bore was lubricated with a felt wick which is now the consistancy of formica. Time to correct all this.


I turned a new shaft from mild steel. 7/8" x 12" long....easy enough

I'll need a taper pin reamer to put the pulley back on....I'll figuire that one out and order the taper pin reamer.

I'll bore/ream out the countershaft casting and sleeve with bronze bushings....I haven't figuired that one out completely...yet. Then fit it with oil cups and new wicks.

That should last another 50 years easy....I'll post some pictures when I can ....

Dave


Well, the bores for the countershafts are done. I did it with a between centers boring bar and a made up boring table. I installed Oilite bronze bushings in place of the worn cast iron along with a new shaft that I made yesterday...here's some photo's

100_0084.jpg


100_0086.jpg


In the next picture I have a stub shaft in the headstock the same size as the existing bore. When the part was shimmed to the correct height, the pin would slip right in. I centerd the other end with the TS center.

100_0088.jpg


100_0089.jpg


100_0090.jpg


100_0091.jpg


100_0092.jpg


100_0094.jpg


All Better! ;D

Dave
 
Got the paint stripper today. I'm not much looking forward to this part

I've been told that a product called "Citristrip" is the way to go, so I got that at the ORANGE BOX store.
(Home Depot to you not from the states)

We'll see

I'll need to make up some oil cups for the counter shaft too.

Dave
 
The Citristrip works well! Got the countershaft parts, the compound, and the steady rest striped in about 1 1/2 hours. WHAT A MESS!!!! Make sure to do it outside!
Had to take the staked hinge pins out of the steady to really clean it. I'll make new pins after I paint it.


I'll take some photo's if anyone is interested.


Dave
 
I'd be interested in before/afters of the paint stripping. we have this thoroughly nasty stuff at work called I think Turpco, designed to strip enamel and primer from jets, and skin from bones... I'd be interested in a something a little safer -)

- Ryan
 
OK I'll see what I can do. I striped the countershaft bracket, shown in previous post. It went down to bare iron. I've already primed it, so no photo there

Took about 1/2 hour.


Dave
 
I rescraped the base of the tailstock for bearing with the bed. I used the extreme right end of the bed as it's probably least worn. What I found was the shoe worn in "rocking chair" form. High in the middle and low at the ends like a rocking chair rocker. This comes from moving the tailstock back and forth for movement along the length of the bed. It doesn't help if the ways are dirty as it like dragging it on a file. I'll put some felts on the shoe once I'm done.

Now that the shoe sits down on the ways and stays put ...without rocking, I'll check to see if the quil is parallel ot the HS axis in both planes . Then I'll check to see how low the TS spindle is compared to the HS spindle.

If it's more than say .001-.002 low, I'll put in a pair of pads and remachine the top of the shoe to bring it back up to 0-.001" high. Like new.

Or I could make a new quill and remachine the bore offset from the quil centerline.....I'll think about it.

Dave


Dave
 
steamer said:
Now that the shoe sits down on the ways and stays put ...without rocking, I'll check to see if the quil is parallel ot the HS axis in both planes . Then I'll check to see how low the TS spindle is compared to the HS spindle.

If it's more than say .001-.002 low, I'll put in a pair of pads and remachine the top of the shoe to bring it back up to 0-.001" high. Like new.

I'd check that the top of the tailstock base is parallel with the bed both ways, then check the quill for parallel and height. Likely it's going to be fairly low, the easiest fix for that is to put a shim between the base and top casting. If you're a little bit crazy you can rebore the top casting, hone it and fit an oversize quill all to bring it up a few thousandths.

My lathe's tailstock was .007 low after scraping it for level and contact. I had to put a little relief in the counterbores for the adjustment screws when they were lifted by the shim.
 
Hi rkepler,

I really don't want shim stock under the body. I'd rather put in a pad and remachine the shoe.

I'll check yaw and scrape the V to straighten it out, but pitch I can take out with the pads I mentioned. I'll leave the central guide for use in offsetting the tailstock for taper as is.

I have a ready supply of iron...If it gets out of hand, I'll whittle out a new shoe. But I'm reasonably confident I can scrape this in

To your point though, I'll do a thorough check of the quil for if it's worn out too, That will have to be fixed and I might as well fix two things at once.

I've seen the taper socket put in off center to correct for wear.
Dave

 
Here's some shots of the set up to put the cross hole in the new counter shaft with my lathe mounted cross drilling fixture.

P6250177.jpg


Here's a shot of the stripped compound....you can compare it to the unstripped on earlier in this thread.

P6250185.jpg


And some of the TS shoe effort thus far

P6250178.jpg


P6250179.jpg


P6250182.jpg


P6250183.jpg


P6250184.jpg


Dave
 
Dave,

Thanks for taking us all along for the ride. I'm learning a ton as I read along..... info that will come in handy for sure.

I may have to take a "real" shot at scrapping some day.... I did some on my Mini mill, but it was emergency grade "Just get the d&*(^@#$%&mn thing to slide all the way from one end to the other" kind of project, LOL. (But hey, it did work no matter how gross my technique.)

Anyway, good luck continuing on with the lathe and thanks again for sharing the info!

Troy
 
Troy,

Thanks for your interest and support!

I'm wading in slowly, but deliberately. I am not the most experienced scraper hand, but so far the work required has been pretty easy.

I am trusting the bed, which still looks good ...really is good.

The rest I think is manageable.

Dave
 
Well went to sweep the tailstock quill and got stopped in my tracks

The machine has been apart and "expertly" reassembled... ::) Only one headstock clamp is tight.

What is under the headstock? ONLY THE SHADOW KNOWS!. ;D

I won't trust that much...but I'll check for taper using the carriage.

Gotta be careful with the archaeological digs.....otherwise large boulders coming rolling down....so to speak. ::)

By the looks of it, it's been that way for a while.....the gear guard is chafing on the spindle because the HS is not positioned correctly on the bed.

Cue the Indiana Jones Music.

Dave
 
rkepler said:
I'd check that the top of the tailstock base is parallel with the bed both ways, then check the quill for parallel and height. Likely it's going to be fairly low, the easiest fix for that is to put a shim between the base and top casting. If you're a little bit crazy you can rebore the top casting, hone it and fit an oversize quill all to bring it up a few thousandths.

My lathe's tailstock was .007 low after scraping it for level and contact. I had to put a little relief in the counterbores for the adjustment screws when they were lifted by the shim.


By the way...nice looking Monarch 10EE!

http://www.kepler-eng.com/

Dave
 
steamer said:
By the way...nice looking Monarch 10EE

Thanks, it was a lot of work - and I 'cheated' by having the bed professionally ground. That gave me a good datum for everything else and a good beginning for a rebuild novice. They're very nice lathes and quite available anymore if you're willing to put some work into it. It is nice to have a lathe that can take .0001 off (I once rounded the ends of a friend's lathe secondary shafts - a sharp tool took off just enough) to honkin' big cuts (after getting the drive working I started to see how far I could go in a cut - stopped at .016 feed on an .125 DOC in 2" A2 and the drive still wasn't noticing it, just a little grunt when the tool hit the work).

I probably should put up a new picture, it's no shop queen and is my main lathe. Since the rebuild it's made several steam engines and a 1.5" scale 3 truck Shay.

BTW: I used the tailstock base as the mount for an indicator scraping in the headstock (used a ground rod with 12 Jarno taper), it was faster than using the heavy saddle. After everything else was done I had to make new tailstock quills and quill assemblies, everything was pretty much gone. I made a 1/2-8 LH ACME tap to tap the 2" nut, a friend made a couple of screws. As long as I was making a quill I made a second in MT3, there's not enough meat in the quill for it to be used in production but for the times I need a 3MT it's perfect.
 
Hi Dave,thank you very much for posting this and showing your outstanding work.I have a SB 9A UMD that hopefully just needs refurbishing.I know the history of the lathe since it was new and it has not had much use.I am going to fallow this thread closely as I am learning a lot.
Crab
 
Hi Crab,

Thank you for your kind comments and support!

I will be wading into this slowly. I will attempt to be logical about it.

I will do my best not to make too many mistakes...but at least you can learn from those too I suppose. ;D

Regards,

Dave
 

Latest posts

Back
Top