Overhaul of a 9" SB model "A"

Home Model Engine Machinist Forum

Help Support Home Model Engine Machinist Forum:

This site may earn a commission from merchant affiliate links, including eBay, Amazon, and others.

steamer

Well-Known Member
Joined
Nov 30, 2007
Messages
5,388
Reaction score
29
Good Morning,

I've begun the excercise in overhauling and modifying a 9" Southbend Model "A" long bed for use with small engine parts and clocks. This will be a long thread I am sure.
The lathe came to me as a "freeby" from a family member. It looks ugly at the moment, but underneath it really is in pretty good shape.

Changes and additions will include:

New "T" slotted cross slide and leadscrew nut
Full set of 3C collets ( I have most, but need a few)
Albreicht Drill chuck
Vertical milling slide
High speed mill/drill spindle using 8mm WW collets
Spindle indexing plate
AXA tool mount to share tooling I have already with my "Big" lathe,
Custom Faceplate
Steady rest
Fusee Cutting Jig
New roll around bench of proper height for the work to be done
All new lubrication wicks.
Auxillary spindle drive for high speed spindle for "wheel cutting" and drilling.
Complete tear down , refurbish and paint.

P1310067.jpg


P1310068.jpg


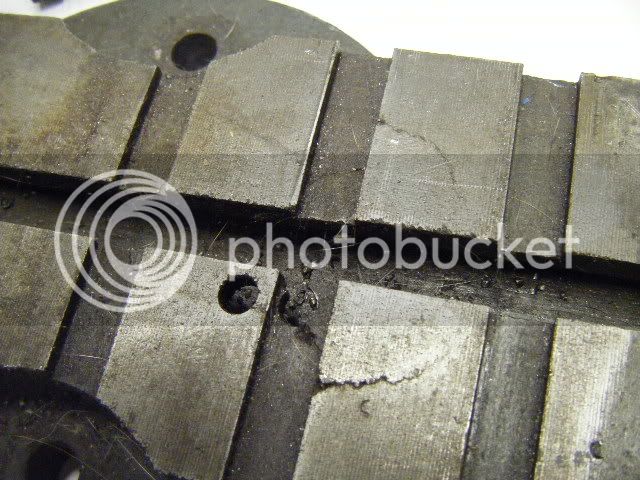
Here's a couple of happy hours worth of work ona MLA cross slide casting....it's begun!

P5070123.jpg


P5070127.jpg


P5070130.jpg


Dave
 
Andy's castings machine "like buttah"... ;D


NICE iron!

Dave
 
I always thought that the MLA cross slide was a very good addition to a lathe. Seems that the far side of the 'normal' cross slide was sort of a waste of good usable space for additional tooling or fixturing. It makes the machine so much more versatile. The back cutoff set-up is one of the benefits...

An old 12" Atlas Craftsman became available a few years ago (no comparison to a SB) so I bought it and began setting it up. I noticed right away that machining toward the headstock was not quite the same as machining away from the headstock. The saddle was removed and scrutinized this way and that, and I found that the saddle wings had warped. The four legged stool syndrome - teeter totter - by about .050" as I recall. Never could understand why except that there were loose slide clamps to free it up - in one direction...So, Atlas used green castings! I believe the reasons for a company's demise will eventually surface - they were producing lathes to a price rather than any sign of quality....I repaired it, put needle bearings in the jockey clutch shaft (underdrive) so lubrication did some good, fixed some other things on the machine, used it for a while and sold it!

You'll have a good stout lathe when you're finished with it - a lathe with a pedigree and then some!

BillC.
 
Thanks Bill,

I'm counting on it. I have a few lathes, My 12" Logan is my "go to" lathe for just about everything, but I'd like one that is set up for small work....this one came to me, so SB it is!

Dave

Oh and yea...gotta put the compound lock screws in too....
 
I like cast iron! I finally gathered up what I would need to 'graduate' to cast iron in my foundry and it was the best thing I ever did. The only thing is that it takes a bit more intestinal fortitude to step up to a seething white hot crucible of 40 lbs of cast iron! I melt a little less frequently nowadays but I made use of cast iron for many, many projects and replacement parts. I made a taper attachment for that 12" Atlas...of (green) cast iron but it machined very nicely... I used radiator and boiler iron scrap - it pours like aluminum....just a darned site hotter!

BillC
 
All done except for the dovetails...those come next, but I need to take the existing table off first and measure it....I'll need some good dowel pins first.

After that I'll scrape the bottom of the dovetail to the surface plate and the guiding parts to the saddle.

P5140120.jpg


P5140121.jpg


P5140122.jpg


P5140123.jpg


Dave
 
Looks good Dave! I have the same cross-slide and it's handy, handy, handy. Thm:

Cheers

Jeff
 
Thanks for the interest and support Jeff!

I am having an issue with my Mill. It would appear that the table has a bit of a hump in it. This happens with old mills as the T-slots have been repeatedly reefed on, it compresses the iron in the T slots facing the wings of the T-nuts. When this happens , the metal has no where to go by sideways. If you don't believe it, take a Ruby red block eraser and draw a grid on the side of it with a pen. Then squeeze it, and watch it grow in the other direction.

Anyway, my cross slide has about .002" bow to it now. I am currently scraping the bottom to my surface plate to correct that. Then I will scrape the top flat and parallel to the bottom at the ends only.

Next I'll mount the cross slide back on the mill resting on parallels and writing paper strips as packing to bridge the hump and minimize the distortion. Then, I'll cut the dovetails. Any distortion left will be scraped out during fitting to the saddle of the lathe.


Dave
 
Not to get too far off topic, but it could be worse...

DSCF0688.jpg

The planer vise that came with my shaper
DSCF0690.jpg

Ouch!

A bigger hammer never does t-slots any good :)
I'll post a repair thread if I ever get it done ::)

Cheers

Jeff
 
Much as i love reading the model building threads, I have a great admiration for craftsman with the skill and patience to restore old machine tools.
I look forward to following your progress. from the pictures of your waltham lathe restoration, you certainly have some skill with a scraper.
one question tho, what is a fusee cutting jig?

yours

peter
 
Hi Peter,

Thank you for your kind words and support!

I have had a great deal of fun with the Waltham, and thus far with the SB. It's been a challenge!

I appreciate your comments, and I try make myself better . I will say that I have a mear thimball full of skill compared to some I know or have known, and certainly that is the case with many of my peers and heros on this forum!

Thank you again, and I'll keep posting.

Now to your other question.

To understand a Fusee cutting jig, one must first understand what the hell a Fusee is...

A Fusee is a mechanical drum of varying diameter but with a constant pitch screw thread.

The diameter is typically a parabolic function from one end to the other.

What's it used for?

A Fusee is used in conjunction with a spiral spring in clock. A spiral spring has varying torque as a function of the number of turns it is wound. Used as is, the clock is driven at first with a lot of torque, then as the spring is unwound, with less torque. This change in torque can be significant! The result is a variation in the rate that the clock keeps time...first too fast, then too slow.

So What to do?

Well some clever person decided to connect the spring barrel to a variable pulley by way of a chain or wire such that the torque is reduced when the spring is wound tight, and increased when the spring is wound down. If the diameter of the fusee changes appropriately, the torque remains , more or less , constant.


Now, a fusee cutting jig consists of a bracket that mounts to the cross slide. On this bracket is a swinging arm with a lathe tool at the end of it.

To make the Fusee, first the parabolic shape is determined and cut into the fusee blank...a drum if you will with a small diameter at one end and a big diameter at the other with a parabola connecting the two.

NOW you get to cut a thread on the OD of this!...usually 12 pitch. But how?

Bring the jig in and swing the arm down to the fusee surface and start the lathe in thread cutting mode.

As it turns, push down on the lathe tool with your hand so it follows the surface and starts to cut the thread.

Add a little pressure where it cuts shallow, and avoid cutting the area's that are deep enough.

After several passes, your "thread" is complete except for polishing, ect.


For further information on the subject, check out W.R. Smiths books especially "Workshop techniques for clock and model makers" He goes through the building of all kinds of cool items....some work real well with engine making ( miniature to full size ;D) too.

Thanks,

Dave

Here's a for instance......this guy sells ready made parts for clocks...including Fusee blanks

http://clockmaking-brass.co.uk/fusee_blank.htm


Oh and hey Bill....OUCH is right!

Start up a thread on that....I'd bet there are a few lathes and mills out that with chunks missing that could benefit from your experience.

Dave
 
Thanks for the clear explanation Dave. I'll have to add that book to my wants list.

yours
Peter
 
Next I'll mount the cross slide back on the mill resting on parallels and writing paper strips as packing to bridge the hump and minimize the distortion. Then, I'll cut the dovetails. Any distortion left will be scraped out during fitting to the saddle of the lathe.


Well, got that part done... I still need to cut the dovetails, but the set up is ready. Need to make some gage pins and get some 3/8 pins for checking. The .6875 hole for the leadscrew nut is right on, on the new one, but undersize on the old one...so to gage , I'll need to make two gage pins to fit the old table and one for the new table.....lathe work

Once I have that I can cut the guiding dovetail to a nominal dimension from the leadscrew nut. That will line up the leadscrew/ leadnut , then I'll cut the gibbed side to roll dimensions copied from the old table. Then make a new longer gib. Lastly, I'll scrape the table for bearing with the lathe..

Dave


New "T" slotted cross slide and leadscrew nut
Full set of 3C collets ( I have most, but need a few)
Albreicht Drill chuck
Vertical milling slide
High speed mill/drill spindle using 8mm WW collets
Spindle indexing plate Create spindle adapter for Existing Aciera F1 dividing head ( sketched up)
AXA tool mount to share tooling I have already with my "Big" lathe,
Custom Faceplate
Steady rest
Fusee Cutting Jig
New roll around bench of proper height for the work to be done
All new lubrication wicks. I bought the rebuild kit with wicks
Auxillary spindle drive for high speed spindle for "wheel cutting" and drilling.
Complete tear down , refurbish and paint.


I've scored a bunch of the list from "the bay" I'll buy paint this week from tractor supply

From Pat Blacks Hendy restoration in quarts and decimal fractions of quarts


0.75 Ford Gray 3449619
2.00 Black 3449407
1.00 Oliver Green 3449708
0.25 New Holland Yellow 3449960

Tore down the tailstock today and degreased and wire brushed the paint. It appears the lathe was crudely repainted at some point in it's life...the "new" paint is soft and comes right off, the original paint is much tougher.

Polished the TS hand wheel, degreased the screw and quill, cleaned up the rust which was superficial ....note to tell family members to not pressure wash lathes! ::)

Dave


Well, I've completed the major machining to the T-slotted cross slide. Here's the pictures.

P5240124.jpg


P5240125.jpg

Here is the first dimension that needed to be copied .134 from a 3/8" roll
P5240126.jpg


Here's the second dimension that needed to be matched 1.435 between .250 dia. Rolls
P5240127.jpg


Here it is on the lathe. The new nut is very tight. I'll investigate, but it appears to be against the guiding dovetail without binding...as intended.

P5240128.jpg


Next, I'll relieve the fit of the leadscrew nut as it is very tight....then I'll drill and tap for gib screws and make a gib.


Dave
 
OK,

I've relieved the nut, actually the new nut is much wider than the original nut and the outside was rubbing on the saddle casting....a few strokes of a file fixed that problem

Now that the nail biteing part is over, a few observations.

The casting bowed a little bit after the dovetails went in. Not a lot...maybe .001"

It shows up when its marked

P5270129.jpg


I've only done two cycles here and then ends are filling in nicely. Its high at the ends and low in the middle Maybe I took off .0003" or so, so far

The iron cuts WONDERFULLY with no blow holes or inclusions. NO hardspots

Again Andy, wonderful castings!

I'll have this roughed in by tonight on the flats....the bottom finish scraped by tomorrow sometime and then I'll check the saddle for wear using the new cross slide flats as a gage

Here's how the original cross slide marked up ...frosting and all.

P5270131.jpg


Apples for apples, I am less than impressed. It has a little wear, but not that much and all the flaking is showing.

Anyway....we progress.

Dave
 
OK after about 40 minutes of rough scraping, we're getting somewhere.

P5270133.jpg


P5270132.jpg


I'll start in on finish scraping. The difference being I'll stop working "zones" and start just cutting where the marks are. The back side edge is a little light, but I think it will come in pretty soon.

You'll notice that most of the marks are "Bullseye" marks and some are not. Where the bullseye's are the center has no marking compound and is the true point of bearing. The other marks are within the thickness of the medium of the bullseyes. So you want to focus on the bullseyes only at first...the number of bullseyes will rise compared to the others
as you progress.

Dave
 
OK...now to mark the saddle....checking only...I hope.


P5280135.jpg


Dave
 
Looking good Dave.......................you could get a job in a Roman bath house they were always on the lookout for good scrapers ;D

Best Regards
Bob
 

Latest posts

Back
Top