Nemett Jaguar--Canadian style

Home Model Engine Machinist Forum

Help Support Home Model Engine Machinist Forum:

This site may earn a commission from merchant affiliate links, including eBay, Amazon, and others.
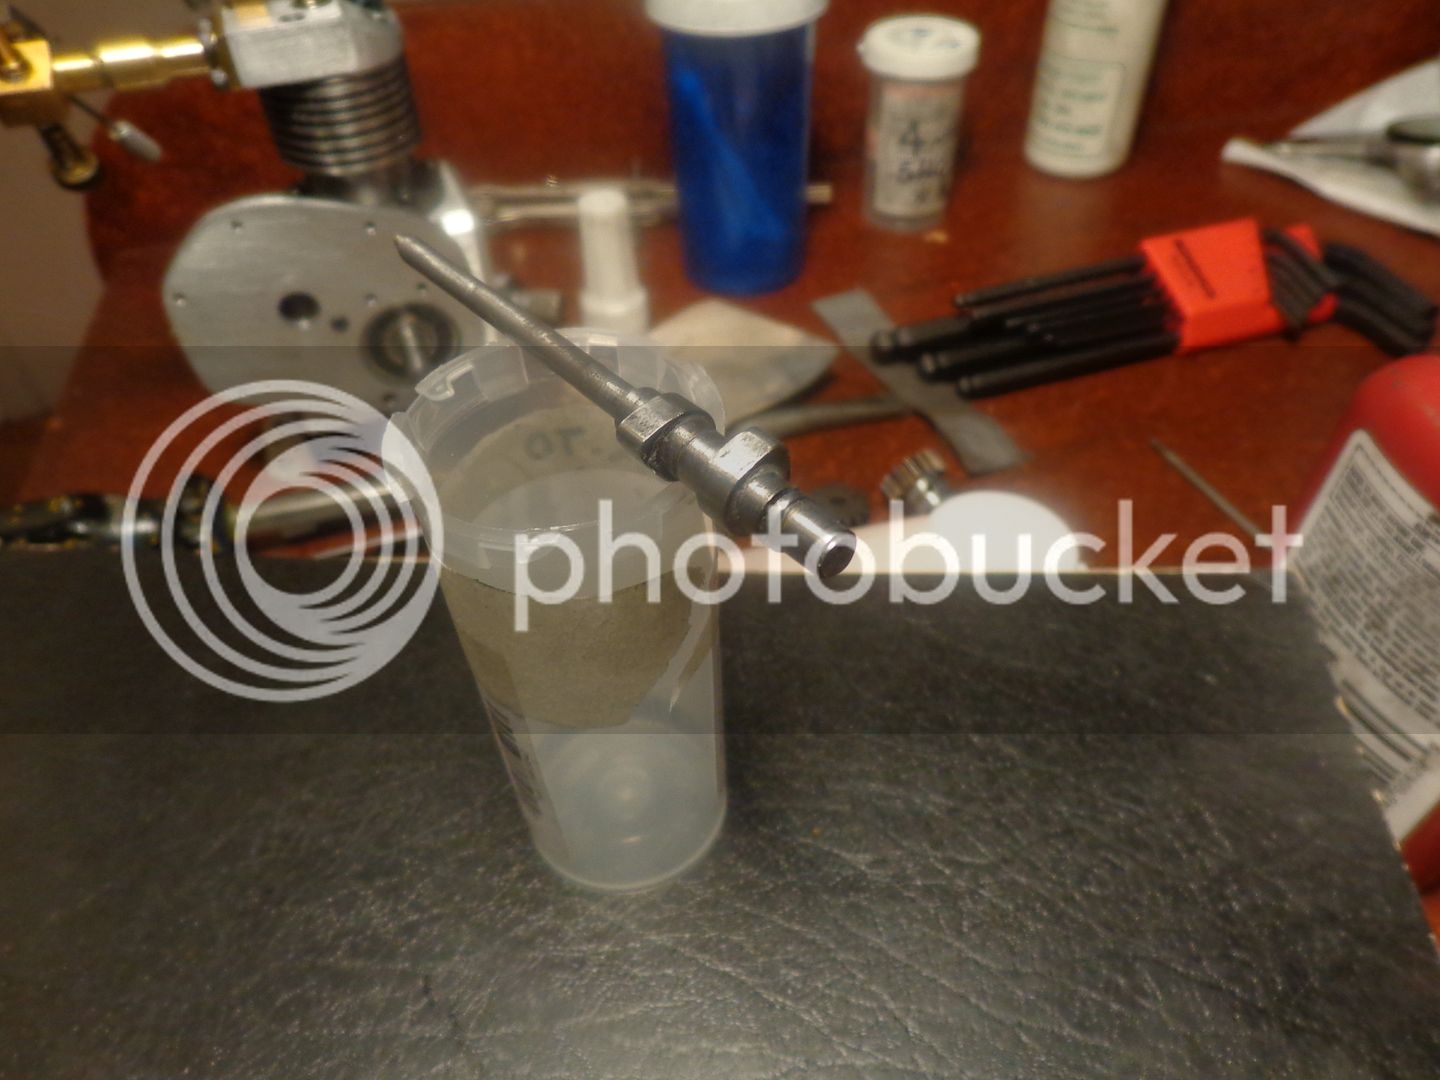
Here we have a finished cam shaft. It turned out fairly decent, and I think I have the lobes at the required 102.5 degrees separation as recommended by Malcolm. I have never Loctited cams to the camshaft before, but I guess there is a first time for everything.
 
We all know that there are two kinds of "close".. There is "Hmm--that's close" and there is "Oh My God---That's close!!!!". This engine definitely falls into the second category. Things are tighter than a mouse's ear where the push-rod goes past that intake manifold. However--after a full days "frigging" The cam shaft does indeed do its thing, the rocker arms rock, and the valves open and close. I had to put a .025" spacer under the rocker arm support bracket in order to get my rocker arms setting level.---I must have made the valves a tad longer than the original plans called for.

 
I may have over-reached myself with the design of this gearcase. It surely does look pretty, but it is going to be a monster to make with a manual mill. I have sat here tonight for two hours on the computer, mapping out the steps I will take to make it. I have a plan, at any rate. I REALLY wish I had brass to make it from, but I don't---However I have an abundance of bronze. I want it to be colored metal to match the bronze flywheel, and bronze will be a perfect color match at any rate. i will post progress as I move through the steps to machine it---if nothing else, it will provide some comic relief!!!
 
The gearcase journey begins here. I have a drawing, but ultimately the outline of the gearcase has to match the outline of the part it mates with, which supports one of the main bearings. For some reason, and I'm sure it's my machining, the parts I make from drawings always "drift" a bit from the drawing. Not in critical areas that must be precise, but in things like flanges that kind of hang out in the air and don't perform any critical function, other than a place to put bolts in. In cases like this where it must be an exact match, I find it much safer to trace around the outline of the existing part rather than rely on the drawing. Strangely enough, this time the positioning of the counterbore that covers the gears isn't all that critical, as I have allowed 0.060" radial clearance around the major diameters of the gears for clearance. These will start out as 3 separate counterbores, which will then then be connected by tangent lines and then tha area enclosed by the tangent lines will also be removed to from the gear cavity. You can see that the face of the bronze piece I am working from has suffered the indignity of having some fool strike an arc across the face of it ("twasn't me) --but thats okay. Most of it will be milled away before I get finished.
 
Last edited:
This went far easier than I had anticipated. I trimmed the piece of plate to finished width with bandsaw and mill, set it up in my vice on parallels to give a bit of backside clearance, then drilled and reamed three 3/16" holes completely through the part. These holes will get plugged eventually. I need then to register when I flip the plate over to mill the material away around the flange on the other side of the plate. I opened out the two smaller holes with a 3/4" endmill to the required depth, and used a 1" end mill (my largest) to open out the large hole to full depth. then I used the boring tool to open the big hole out to a large enough diameter to clear the teeth on the camshaft gear. Then i was able to advance the table in the X axis and keep taking cuts with the boring head until the resuling slot intersected with the teo smaller holes. I then re-registered the spindle over the two smaller holes (using a piece of 3/16" cold rolled in the drill chuck to find the center of the 3/16" reamed holes, and finished boring the small holes out to the required 0.834" diameter. Now all I have to do is set the part up in my swivel based vice to clear a small bit of material from the right hand side of the hole. I am always a bit worried on a piece like this that I may be making it backwards (I've done that before) but a trial fit on the engine shows that all is well. Now on to my next step!!


I set my Vernier caliper to the length of flange I wanted, and scribed a line all around the perimeter of the gearcase. Then it was a simple matter to set the gearcase on edge in the milling vice and mill to the line, all around, leaving the thickness of flange I wanted undisturbed. Then 10 minutes of file work and a bit of time with the polishing wheel, and it's finished. I am super pleased with the way it turned out. Tomorrow I will machine a couple of brass button head plugs and Loctite them into the two remaining holes. while I had the polishing buffs out, I gave the flywheel a little shine also.


Thanks for all the nice comments, guys. You know, after all my moaning about wanting to make that part out of brass, I'm pretty sure it WAS brass. I bought it out of the bronze rack at my suppliers, but I think they had put it there by mistake. It machined like brass. It polished like brass. It doesn't have that reddish tinge to it that the flywheel does. (I know that the flywheel is bronze.) All I have left to make now is the sump and the piston rings. (I made the ignition cam after I posted the last pictures).
 
A lot of what I did today doesn't show. This morning I made the sump, drilled and tapped the bottom of the crankcase and bolted the sump on. The con-rod big end was a bit tight on the journal, so I applied lots of oil and ran this engine in with a belt drive from an electric motor. I kind of made up my exhaust as I went along, but I like it. Tomorrow morning I will mount the ignition points that are laying in the foreground, and then I will make the piston rings.


So there we have it folks. All finished except for the rings. The silicone gasket goo is in place, the valve timing is done, all of the electrics are on and the ignition timing has been set.--Rings tomorrow!!!


Hi Brian,

This is fantastic. You beat Paul and Gus. I have about 2--3 weeks to go but I am not rushing. Sort of ''Go easy''. Had to make a new
con-rod. Some how the big end needle bearing got mis-aligned. Cranking thru 360 degrees from smooth to very difficult.
Please post video.Brian should have no problem getting this engine started and spinning.
 
I lied!!--Well, no, I didn't really lie.---This little engine has such a small base that I was afraid it was going to fall over and get damaged. ---And seeing that I have the largest supply of bronze in the free world, I spent this morning carving out a base from bronze and adding a gas tank which I stole from one of my other engines. NOW I'm ready to make the rings.---I promise!!!


Looks real good, Brian. I just ordered some O-Rings for my Oil Field Engine. Had to buy 50 of them, but the price was reasonable. I love McMaster Carr!

Chuck
 
Here we are at step #1 of piston ring making. I have had advice from two well informed sources, one who says turn the ring about .004" over the cylinder diameter, and one who insists it be exactly at the cylinder diameter. I don't think it matters a hoot, because these rings are going to get split, then expanded, then heat treated, then have the ends filed to give a .003" gap when setting in the cylinder. I hedged my bets and made the outer diameter .002 larger than the cylinder diameter.
I turned the inner diameter to be a total of .080" less than the outer diameter, which is as close as Damn is to swearing to 1 millimeter ring thickness. I have taken the first cut with my 1.5mm parting tool to square up the end of the blank before I start parting off rings. Tomorrow morning I will mount the dial indicator on my cradle stop, pull the piston out of the engine to have it on hand, and part off as many rings as I can get, after checking to confirm that the rings are a nice sliding fit into the ring grooves in the piston.
 
Last edited:
This morning I parted off the rings. My calculations which appear on the paper which the rings are setting on show that I needed a ring .051" wide to suit the .052" groove in the piston. I used the same cut off tool to part off the rings as I did for cutting the grooves in the piston. The first ring parted off beautifully, but then I spent 10 minutes rubbing alternate sides on a piece of 220 grit emery paper spread out on my bandsaw table (flat surface) to get it down to a comfortable fit into the ring groove. On the next ring I set the parting off tool over only .098" and the rings were a much better fit into the ring grooves. I gave each ring 20 "laps" on the 220 grit emery paper per side. This is a simple matter of laying the ring flat on the emery paper, putting two fingers on it to spread the pressure evenly, and then making about a 2" circular path with the face of the ring against the paper.
 
Since I didn't have an M3 taper to use in splitting the rings, as suggested by Malcolm Stride, I used the "Vice method". This one is pretty simple. You grip the portion you want to break in the vice jaws, close to the center of the ring, but leave the part you want to remain unbroken below the jaws so it is not gripped. A quick wiggle at finger pressure (these unheat-treated rings are quite brittle) and "snap"--you are done. I split all of these rings in less than 5 minutes and never broke any of them in half. Now I have to wait for the stores to open and go in search of a "fine diamond file".

 
So here's the deal---I made seven rings. One broke just from handling it--no good reason that I could see. i made a fixture to heat treat the, and made the diameter of the fixture where the rings fit onto 1 mm or 0.040" larger than the inside diameter of the rings. I made the fixture such a length that when 6 rings were on it, the last ring set about .025" "proud" from the end, so that when the cap plate was screwed on it would squeeze all of the rings together. I found that when the rings are stretched over the fixture, the gap becomes about 0.100" or 2.5mm. I think I could probably get away without the 2.5mm wedge of material between the ring ends, but just for safetys sake I will put it in there---I don't want to have to make more rings. The very top ring in the stack broke as I was stretching it over the fixture, but I needed the height of that ring to make my fixture work, so I put the gap in that last ring next to the squeeze plate on the opposite side to all the rest. Now, the idea is to heat this stack of compressed rings to cherry red and hold it there for 10 minutes, then let it cool naturally. This is supposed to "set" the rings.
 
I'm pooched!!! Got all ready to rock and roll, and ran out of oxygen!! Called my welding gas supplier and they are closed until Monday. Propane torch doesn't get hot enough. Will continue this saga Monday.---Brian
 
Back
Top