Horizontal IC Engine 5/8" Bore

Home Model Engine Machinist Forum

Help Support Home Model Engine Machinist Forum:

This site may earn a commission from merchant affiliate links, including eBay, Amazon, and others.
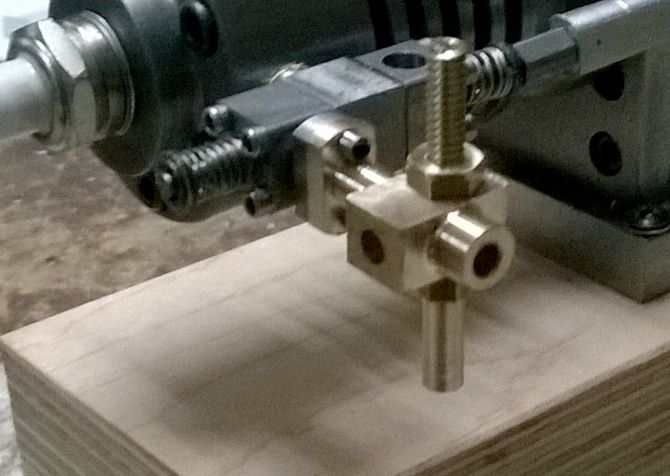
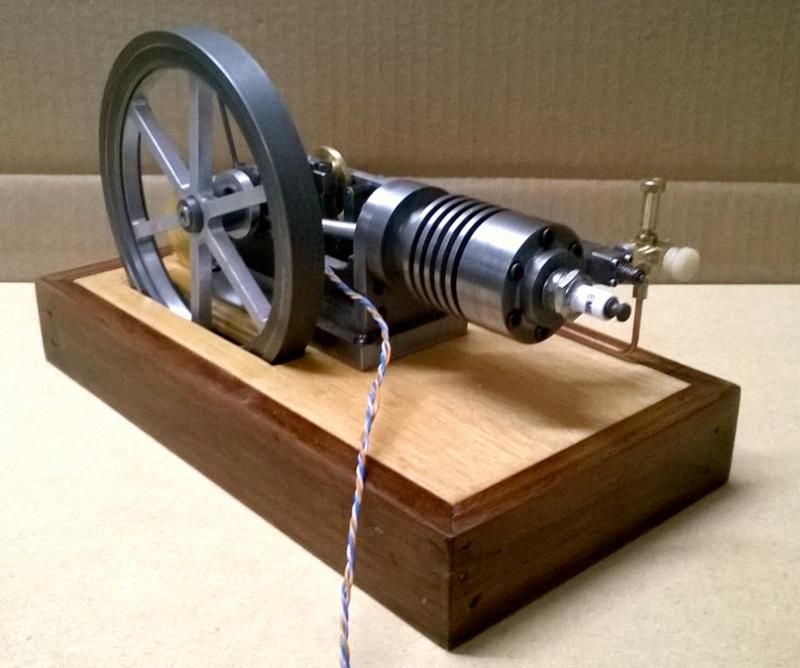
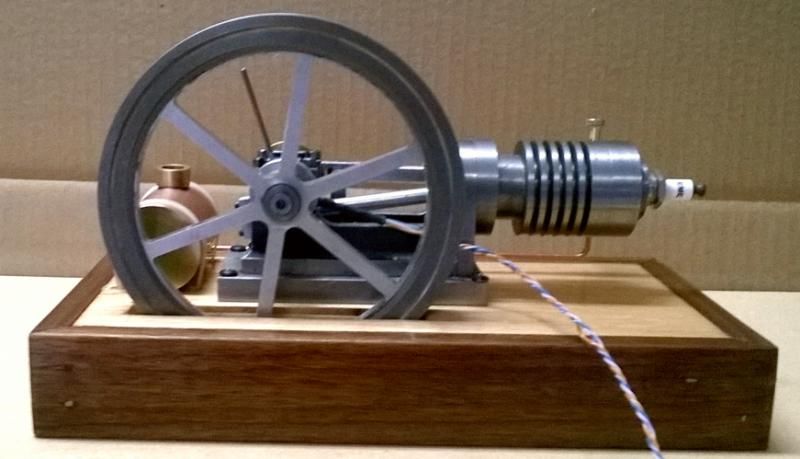
Chuck--I just checked in my machinists handbook, and the maximum o.d. of a #1-72 fastener is .073". that is REALLY small. Hard for me to imagine putting a thread that small in to mild steel. Amazing work!!---Brian

Thanks, Brian. I actually have better luck with the smaller threads. I've gone down to 0-80 in aluminum. I think 4-40 is the worst. I've broken more 4-40 taps than any other.
 
Looks good Chuck.

Thanks!


Today I mostly finished the carburetor.

WP_20141113_002_zpsa6f098dd.jpg


WP_20141113_001_zps91ddba68.jpg


I still have to finish the needle valve and the throttle screw. Then it's on to the hall sensor mount, and finally, the fuel tank.

Chuck
 
Well, I'm in the home stretch. Over the past few days I finished the carburetor, including the needle valve. Then I installed the hall sensor and the magnet disk. I also made a permanent base out of walnut and 1/2" plywood. Finally, I built a proper fuel tank, including a fuel line made from 3/32" copper tubing. I made my own flared fittings that connects the fuel line to the tank and the carburetor.

WP_20141119_001_zpsabbb2600.jpg


WP_20141119_002_zps65e3756d.jpg


WP_20141119_003_zpsef8e0823.jpg


Literally, the only thing left to do is to fit a Tamiya connector to the hall sensor line so I can plug it in to my ignition module. Hopefully the next posting will be a video of the engine running!!!

Chuck
 
Well---thank goodness!!! I have been checking this thread every day to see what was going to happen next. Looks really good!!---Brian
 
Well---thank goodness!!! I have been checking this thread every day to see what was going to happen next. Looks really good!!---Brian

Thanks, Brian, here's the icing on the cake...

So, back in the shop, I added a ground wire and attached the Tamiya connector to the hall sensor. I fueled it up and gave it a few spins with my model airplane starter motor. I had to fiddle with it a bit, but I had it running in less than 10 minutes. Here's the video!

[ame]https://www.youtube.com/watch?v=Vjm21ui_dvY&feature=youtu.be[/ame]

Still got some finishing up to do, but I'm pumped!

Chuck
 
Congrats - your cam works perfectly and it is an intriguing design. Especially impressive how silent it seems run (apart from the exhaust pop). I hadn't fully appreciated how noisy cam gears really are until they're removed.
 
A great job and beautifully finished. That cam is a joy to watch.

Jim
 
Another work of art. Great fun following this project. Thanks for sharing Chuck
 
That’s a really interesting engine Chuck, thanks for doing such a good job on documenting how you built it and how it works.

I have seen several comments on wanting to build something like you did but the lack of CNC is going to stop them. Do you know how the guys in the 1883 fabricated the cam ? They might have had electricity but no CNC for sure !

Pete
 
Thanks gus... Thanks Pete. Don't really know how the machinists would have fashioned that CAM back in 1883. Perhaps they rigged some kind of follower or duplicator to machine it using a hand made pattern.

Chuck
 
Hi Chuck:

I'm trying to duplicate the drawing of your cam. In the drawing you posted quite a ways back (#57) you have a constant radius dimension of 18" which is throwing me a bit. Possibly a typo, it's tough to read, but I can't guess what it should be.
Also you show a change in radius from .5 to .25 but the radius of the curve from those transitions across the disk is obviously quite a bit larger.
Would it be possible for you to explain that further or post your dxf file for the cam? I have no particular use for it at the moment but I tend to keep these things for future reference.

Nice work.

Thanks

Sage
 
Last edited:
Hi Chuck:

I'm trying to duplicate the drawing of your cam. In the drawing you posted quite a ways back (#57) you have a constant radius dimension of 18" which is throwing me a bit. Possibly a typo, it's tough to read, but I can't guess what it should be.
Also you show a change in radius from .5 to .25 but the radius of the curve from those transitions across the disk is obviously quite a bit larger.
Would it be possible for you to explain that further or post your dxf file for the cam? I have no particular use for it at the moment but I tend to keep these things for future reference.

Nice work.

Thanks

Sage

Wow, that was quite a typo! The smaller radius should be 0.375. The forum won't let me upload a DXF file.

Thx...
Chuck
 

Latest posts

Back
Top