Dave's Chuck Sigle

Home Model Engine Machinist Forum

Help Support Home Model Engine Machinist Forum:

This site may earn a commission from merchant affiliate links, including eBay, Amazon, and others.

dreeves

Project of the Month Winner!!!
Project of the Month Winner
Joined
Jul 29, 2008
Messages
560
Reaction score
62
This is my second attempt to do this post. In my first attempt I got excited when the Eagles beat the Vikings. I forgot the hit the post tab. :wall: Well here it goes again.

I started Chucks Single two weeks ago. I got some parts done and wanted to share them with the members.

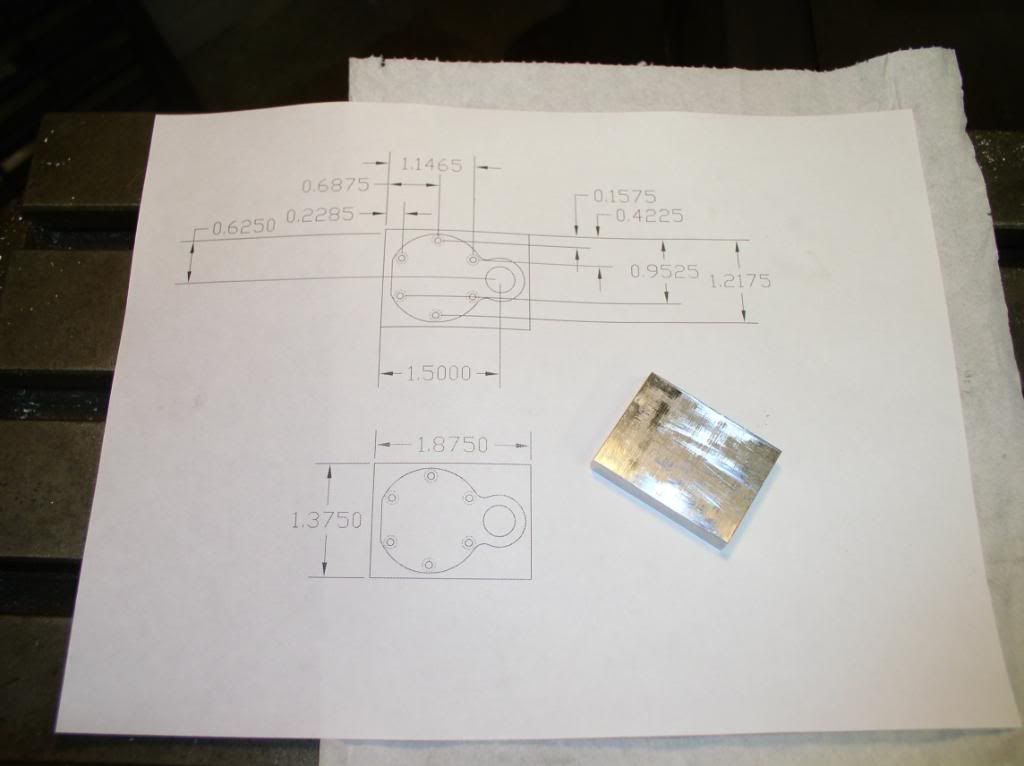
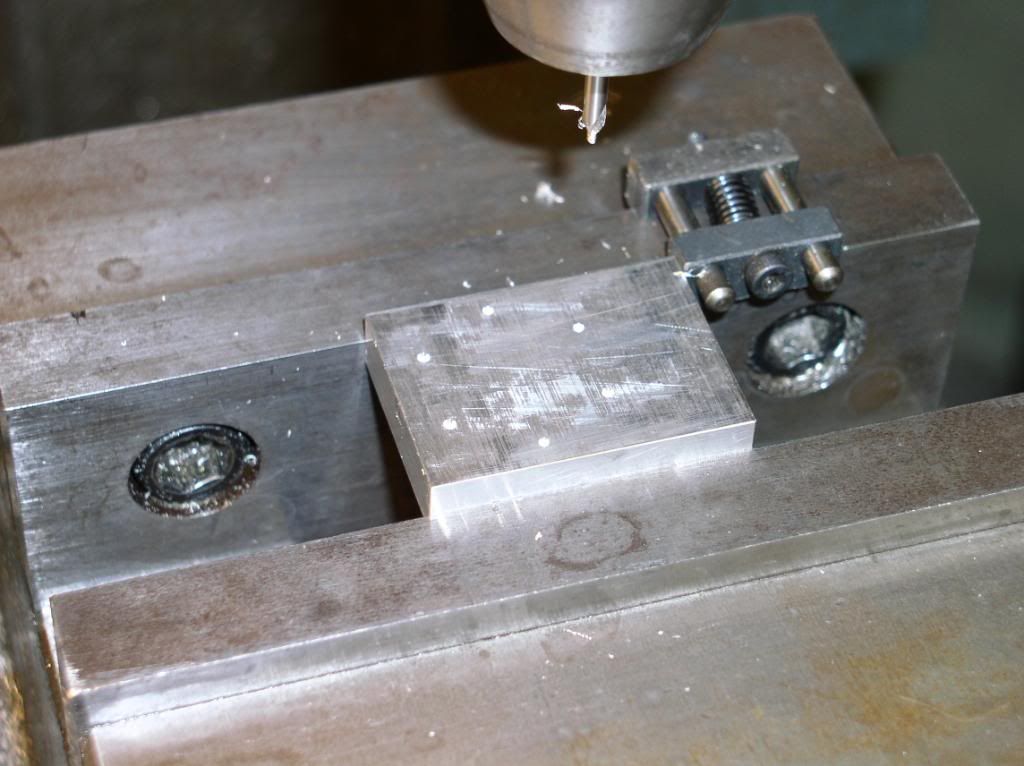
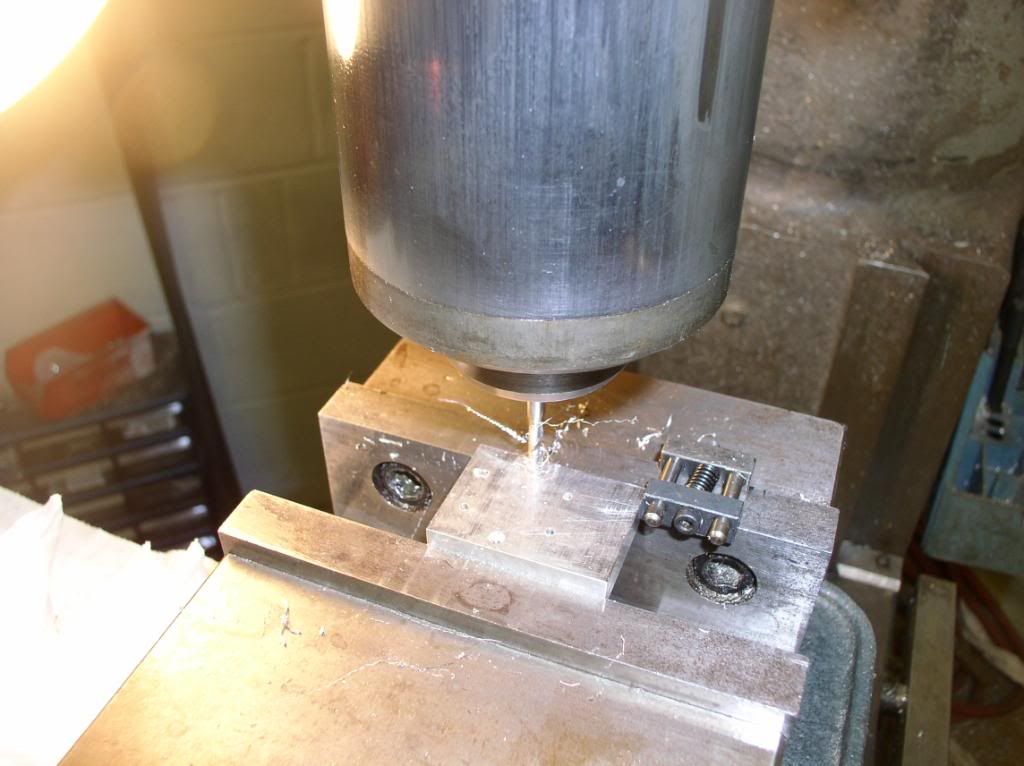
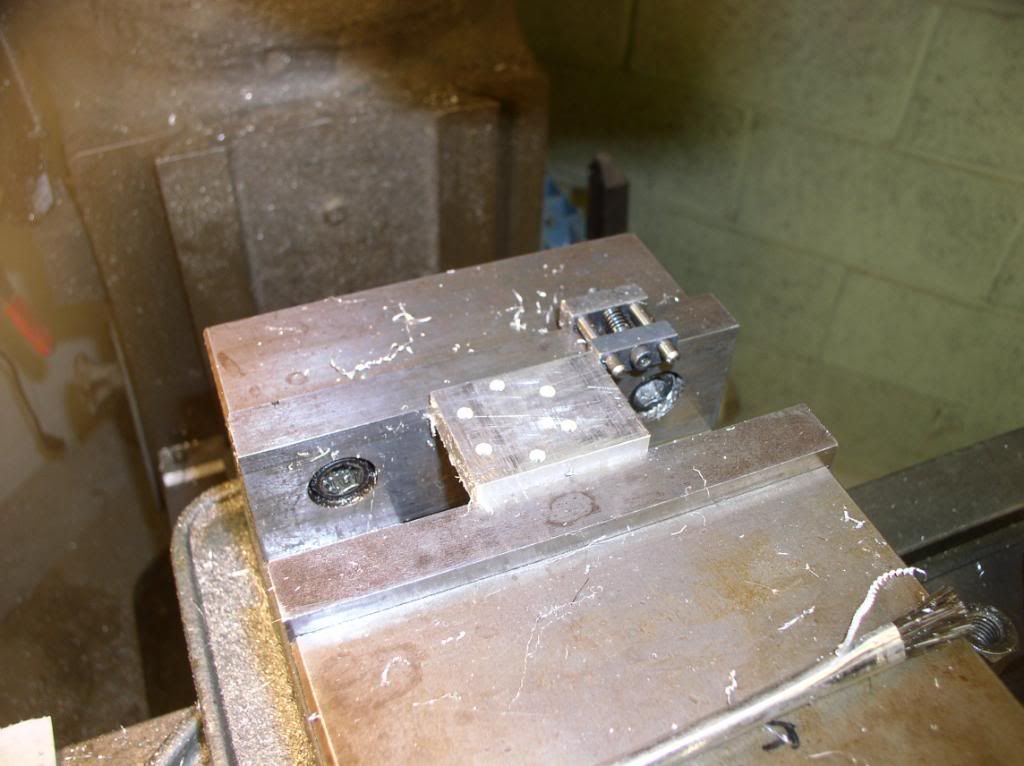
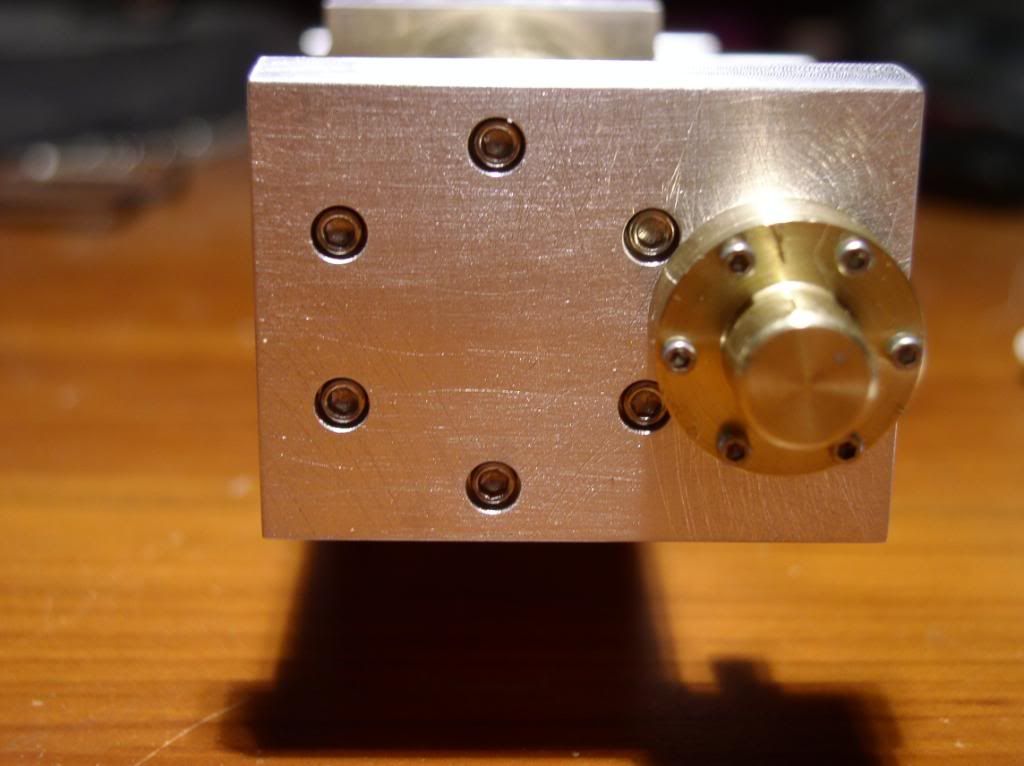
I started with the base which I made out of 1/4 inch aluminum plate. This is a strait forward part to make.

P1010022.jpg


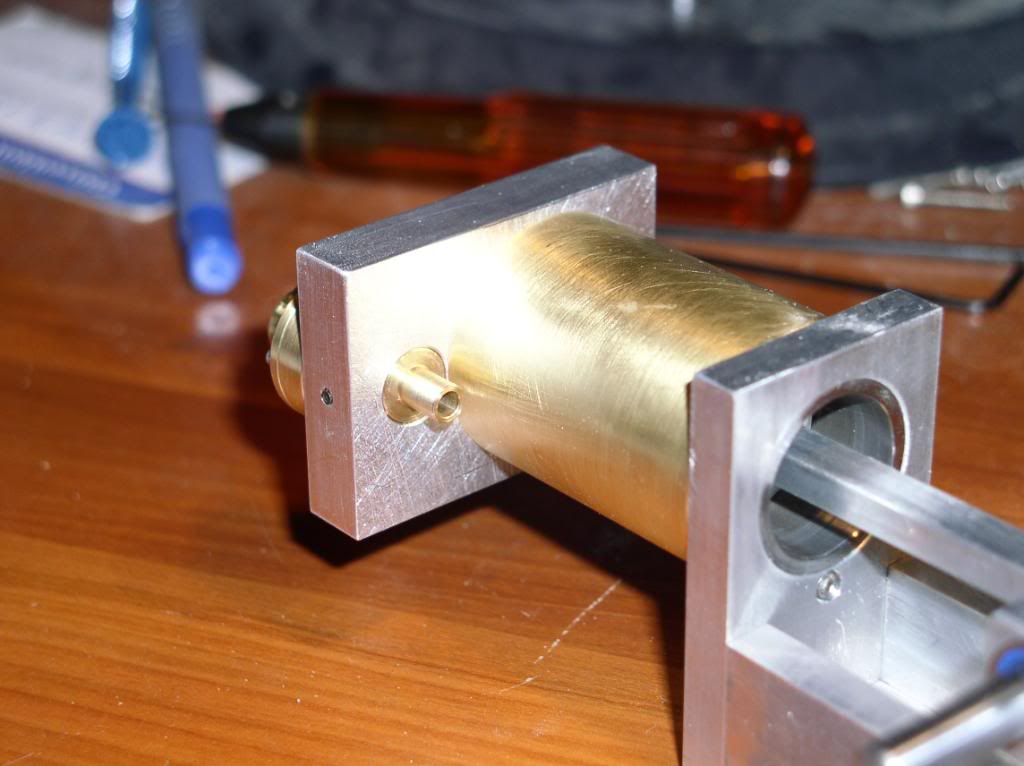
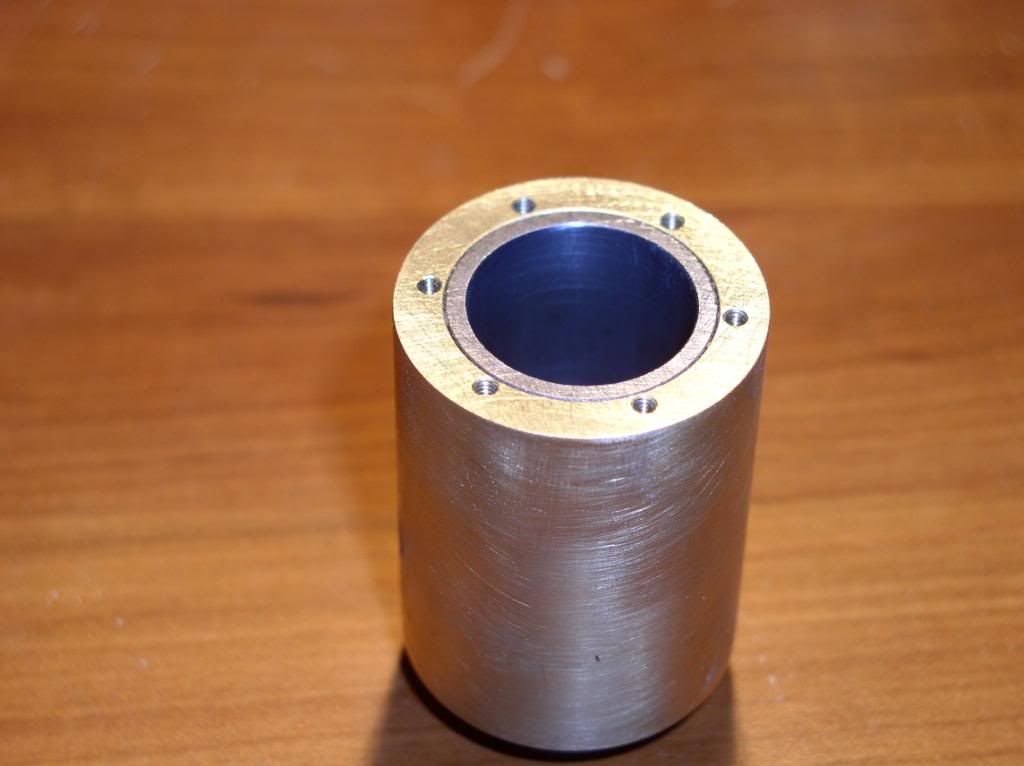
The second part I made was the Cylinder which i made in two parts. I made a liner which started out as 1 inch X .760 ID d.o.m. tube from wicks aircraft supply. The liner was truned to .900 OD. The outer sleve is made from brass which should give a good bling after polish. The two were put together with epoxy

P1010015.jpg


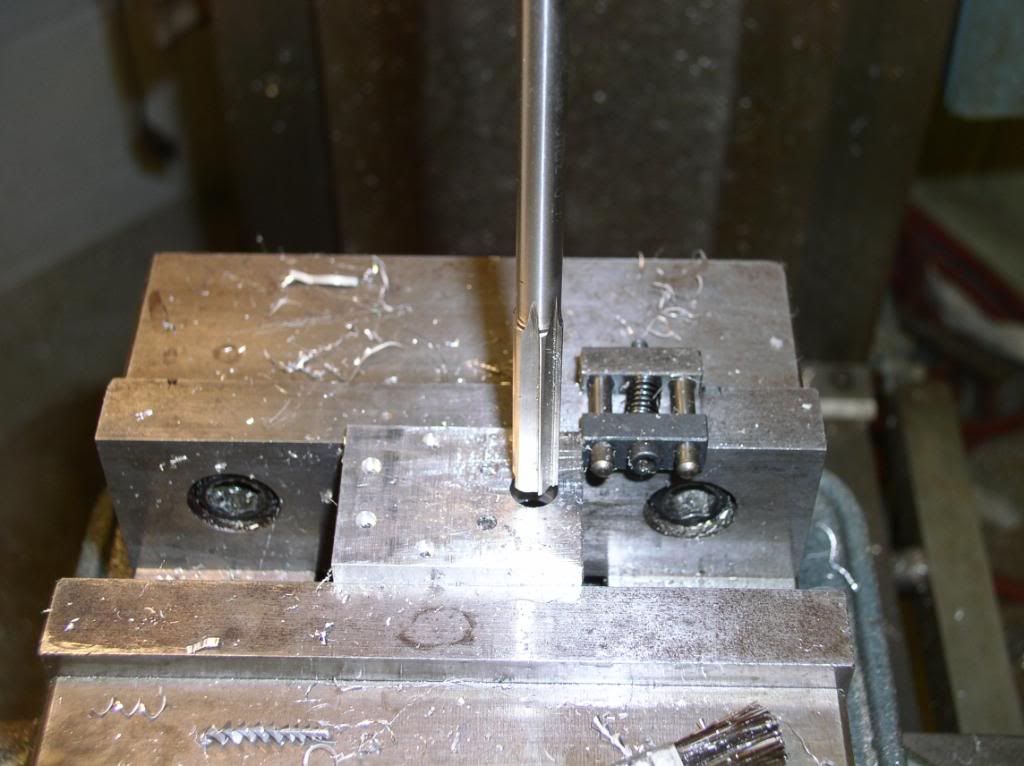
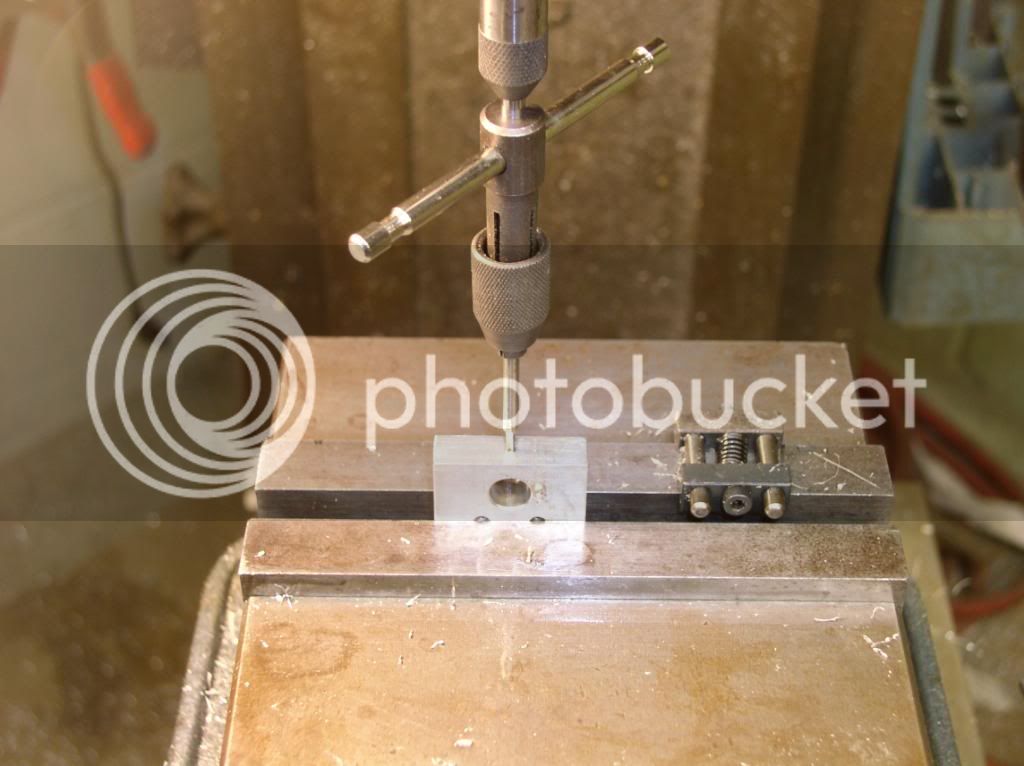
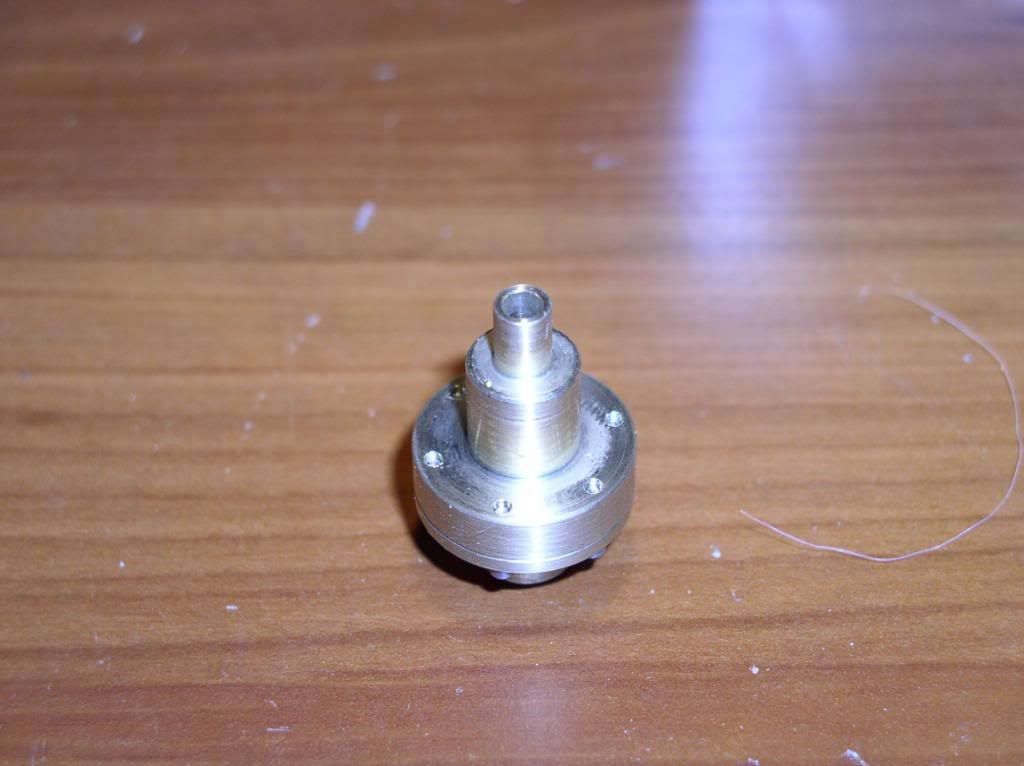
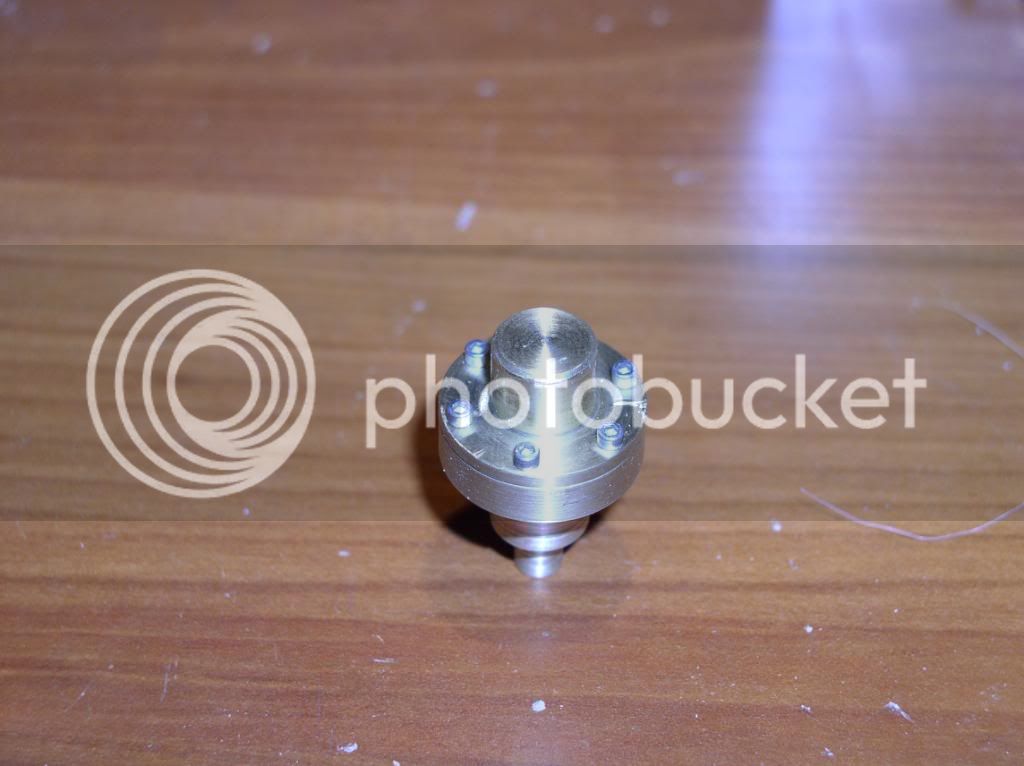
I made the valve parts next both were made with brass as well. The two are held together with 0-80 socket head cap screws. I will make the valve when I get the valve seat cutter made.

P1010036.jpg

P1010035.jpg


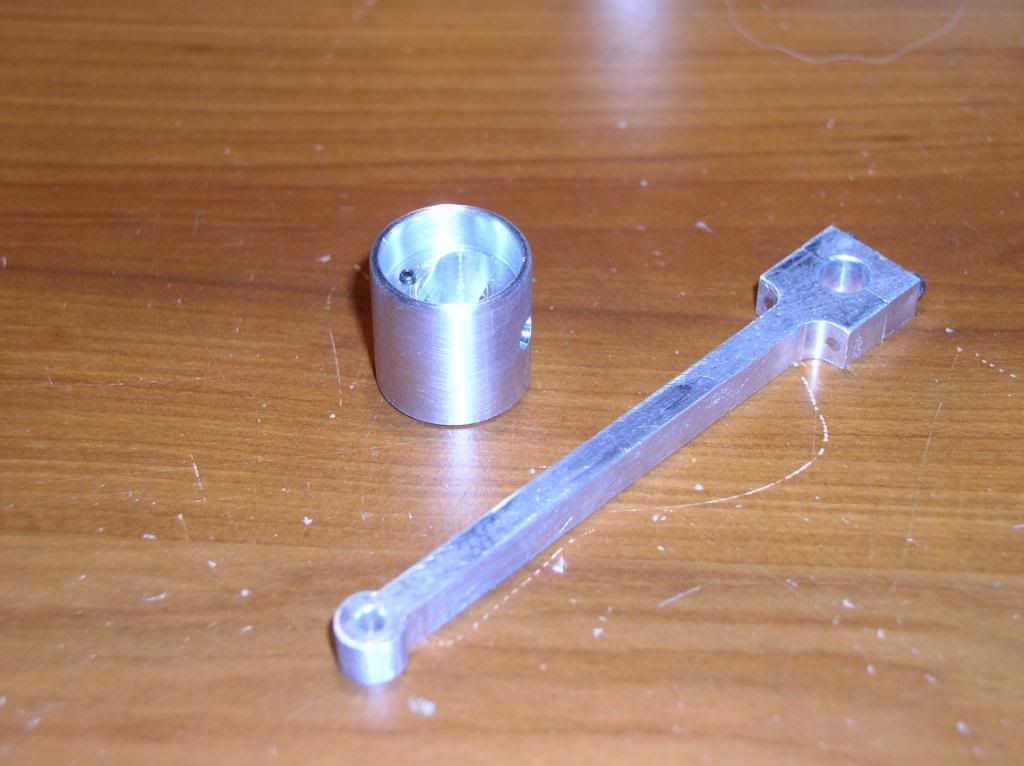
I made the rod and piston today. They are both made out of aluminum. I made the piston with a .001 clearance.

P1010037.jpg


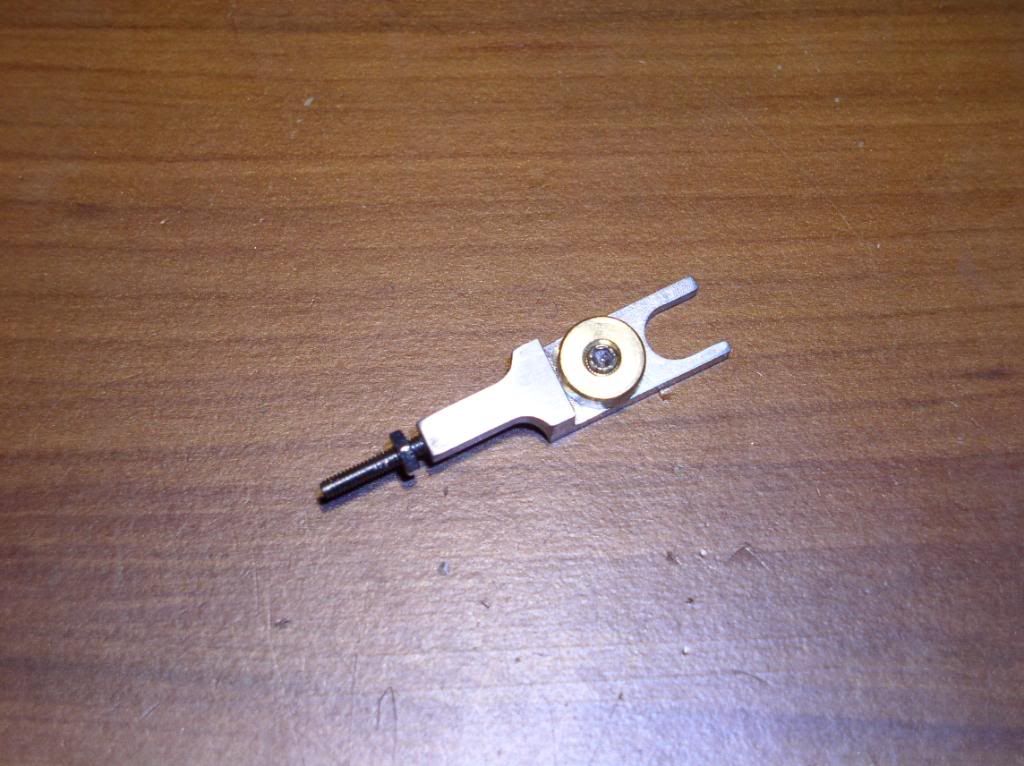
This is a little bugger to make. I wish I would have placed a coin to show its size. I made mine like bretk did. It will have an ajustable rod which will screw onto the 2-56 rod with the locknut.

P1010027.jpg

P1010028.jpg


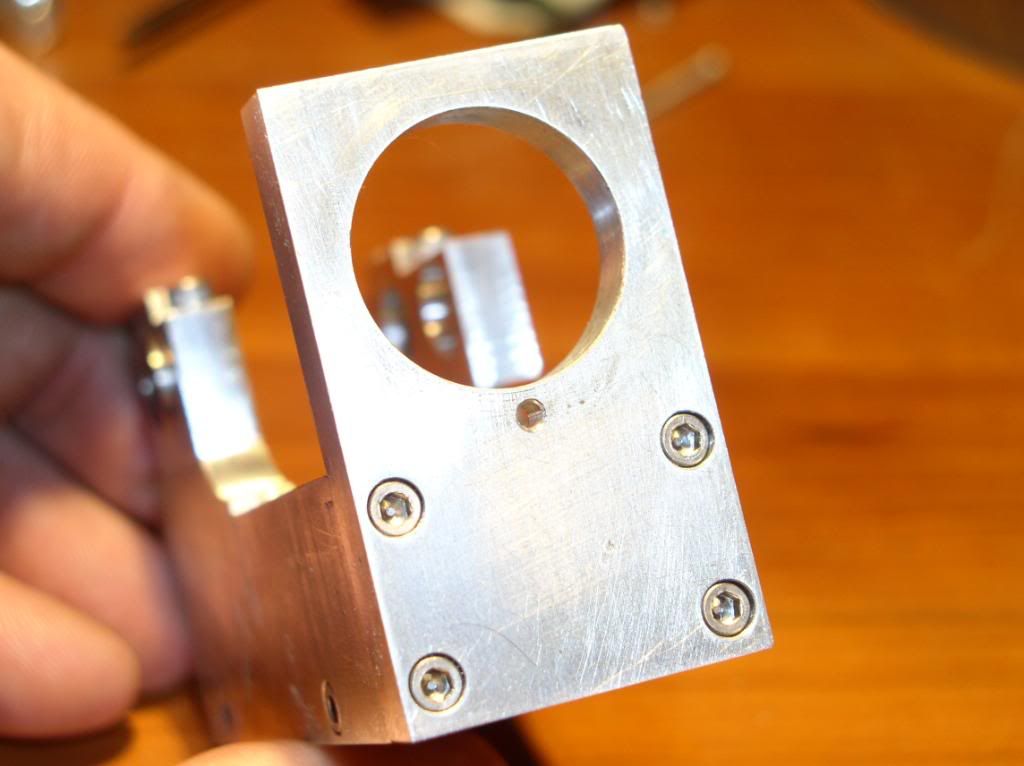
I made my cylinder with a slip fit to the front base so I could easly remove it latter if needed. The two are held together with a 2-56 bolt at 6 o'clock.

P1010030.jpg

P1010031.jpg


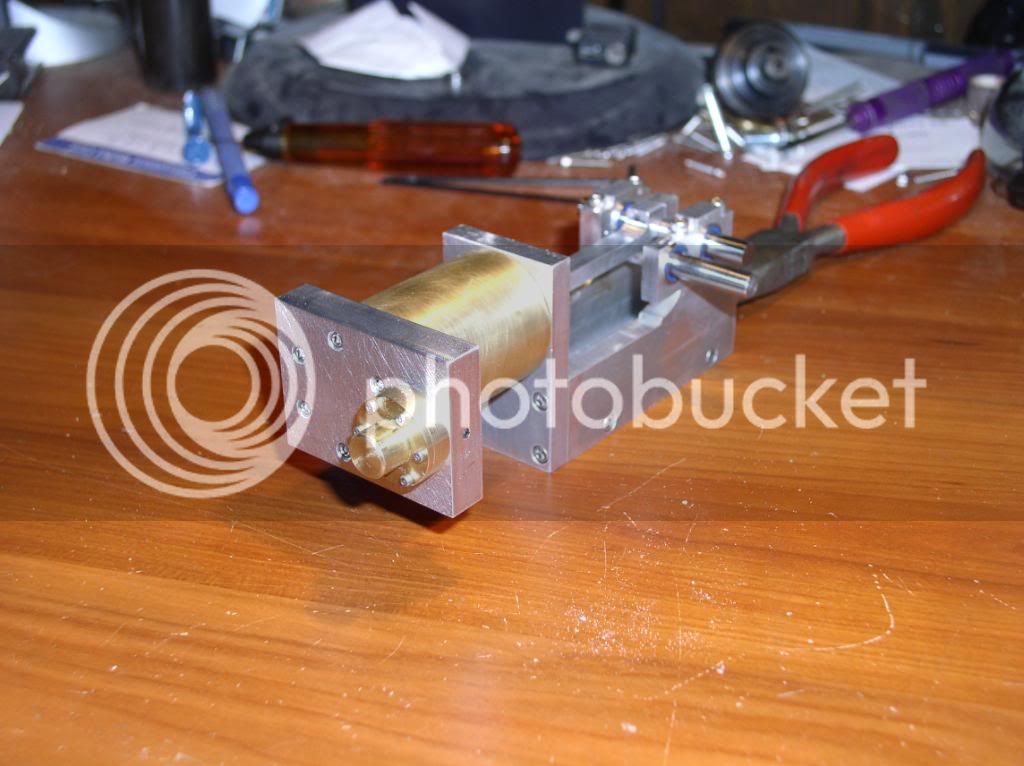
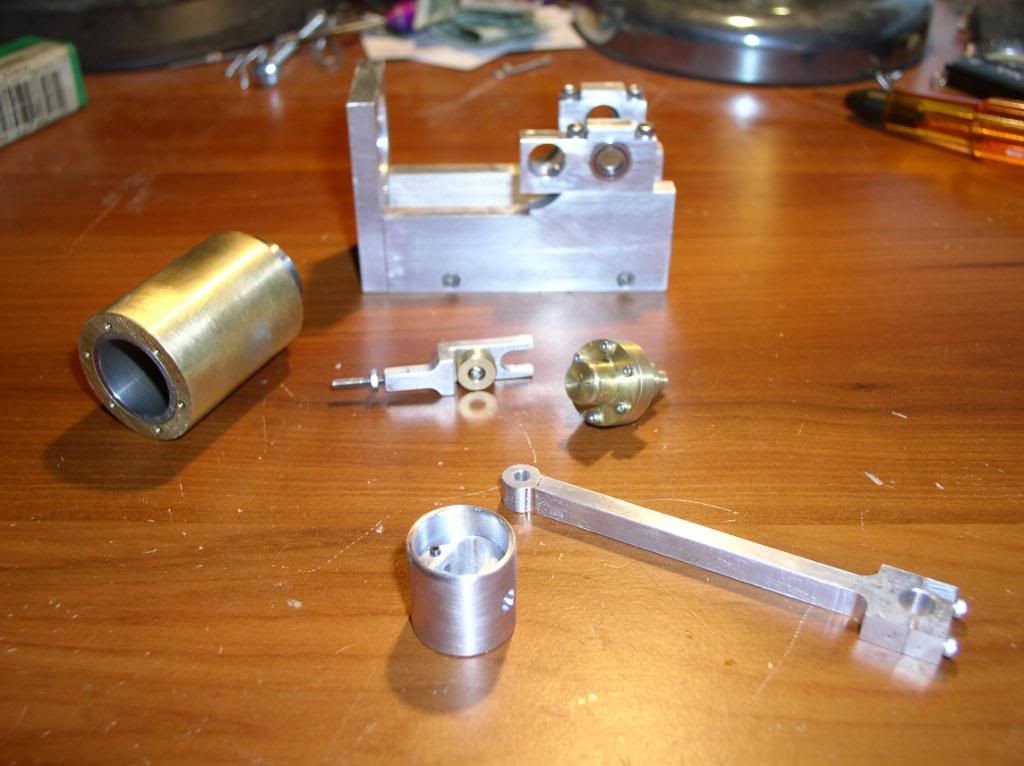
This is all the parts that are made to date. Some need futher work done to them

P1010011.jpg

 
Lookin' great, Dave! Are you going to make it a hit n miss?

Chuck
 
Chuck,

Im hope to. I am waiting to make some of the other parts till after Cabin Fever so I can get the flywheels and some new stock. I am also waiting to see the drawings of superfast
 
The engine an air engine I dont think there would be much heat. I also made the cylinder a slip fit into the base incase there would be a problem.

What are your thoughts chuck
 
Hey Dave,

That is looking pretty good. Fast work I say.

Will be giving you a call in a day or two about Cabin Fever.

Eric
 
dreeves said:
The engine an air engine I dont think there would be much heat. I also made the cylinder a slip fit into the base incase there would be a problem.

What are your thoughts chuck

Can't imagine there being a problem with this. There's no heat generated at all. I actually have a hit n miss engine that runs on fuel. I used epoxy to fasten the cylinder/waterjacket to the base and it hasn't failed yet in over 8 years.

Chuck
 
Looking Good Dave :bow:

Best Regards
Bob
 
Dreeves

looking good mate!

for your info the green loctite is used to bond rifle barrels to liners ( inserts some call em)

i have one here thats had 2000+ rounds through it and its been hot at times too

all good!

a lot of the new epoxies can get rid of heat faster than copper now just check the loctite web site to check if its suitable ( theres a good chart there )

the barrels for the 40mm chain guns are made with inserts that are glued in and i've seen them glowing hot

David i think it will be ok ;)

keep up the good work

cheers

jack
 
jack404 said:
Dreeves

looking good mate!

for your info the green loctite is used to bond rifle barrels to liners ( inserts some call em)
Loctite #620 "Retaining Compound" is the one (there's some other 'green' medium-strength threadlocker or something-- you don't want that)

I've used it on pistol compensators and live steam parts and it holds extremely well (as long as both parts are clean when applied). Plan for it to be just about permanent once set.
 
Very interesting info on Locitite. Didn't know things that get hot can use Loctite to hold them together.

Thank you muchly. :bow:

Bernd
 
The Loctite bottle I have even gives curing times for heating. Sets faster the hotter it gets.
 
Shred is right I have used Loctite #620 "Retaining Compound" in the past on bolts and it is almost impossible to remove them when cured. I didnt have any for this project so I used the epoxy.

I look forward to seeing everyone at cabin fever on saturday.
 
Bernd said:
Very interesting info on Locitite. Didn't know things that get hot can use Loctite to hold them together.

Thank you muchly. :bow:

Bernd
Loctite's data sheet says #620 is recommended for applications to 200'C and suggests heating parts to 250'C for disassembly and disassembling hot-- their chart shows it's still at 75% of room temp strength at 250'C, so it doesn't just fall apart.
 
Great looking engine Dave!

I really like the way the countersunk cap screws look.

I just posted a link to the governor drawings in the "photo's" section, part of the "Small Chuck's Single Hit & Miss" thread. Hopefully you can make some sense of them! I just took mine apart to get machining marks cleaned up and ended up re-designing most of it. Hopefully I will have it back together within the next week or so. It will have a totally new look to it.

Scott
 
I got some new work done on the engine tonight :big: :big:

I started on the head. I statred with a block to do all the bolt holes and valve hole. I will drill and ream the exhaust hole before I round it to the 1.250 dia and the .625 dia.

The first picture is of the print from autocad. I ended up making the part again because that pesky .625 dim on the left side should be .6875. :wall: :wall: :wall: :wall: :wall: :wall:

P1010040.jpg


The second is of the part center drilled

P1010043.jpg


The bolt holes were drilled and then counter bored for the 2-56 socket head bolts

P1010047.jpg

P1010048.jpg


I next drilled and reamed the .375 dia hole for the Valve body

P1010050.jpg


The last thing I did was to drill and tap the 2-56 set screw hole to hold the valve body.

P1010052.jpg


Here is what she looks like as of now.

P1010053.jpg

P1010054.jpg

P1010057.jpg


well the last thing I did tonight was to enjoy a beverage ;D ;D ;D
 
Nice work, Dave, it's really coming along.

Chuck
 
Ya, nice work. But I've got to ask. In the second pic where you are drilling with a center drill, what is keeping the part up and level? I don't see any parallels under the part.

Bernd
 

Latest posts

Back
Top