Building Fred

Home Model Engine Machinist Forum

Help Support Home Model Engine Machinist Forum:

This site may earn a commission from merchant affiliate links, including eBay, Amazon, and others.
Terrific looking craftsmanship Arnold, it is always enjoyable to see your progress on Fred ;D. BTW, have you given any thought to perhaps doing a wooden deck as opposed to metal scratch.gif. The very early estate engines featured them. They appeared to be cargo wagons that had been fitted with a boiler, small engine and flanged wheels. In looking at your current build, I could see that feature being used and being able to have 'the look'. I'm certainly not wanting to dictate *knuppel2*, merely make an observation. Keep up the marvelous work Thm: and thanks for sharing the ride.

Bc1
Jim
 
It seems that "we" can't be too far from a test run, Arnold. It sure looks like a steam loco to me.
Thanks for keeping us up to date!

Dean
 
CC, Thank you ;D - fortunately "consumables" like drill bits are easy to get here; it's just more specialised tooling and things like very small taps that's difficult. The tooling is expensive though because of high import duties, transport costs and taxes. Internet based ordering is possible, but I am hesitant to do it; I've lost a lot of money because of incorrect deliveries and things going missing in the post.

Thank you Jim; for now I'll stick to metal, but wood definitely is not ruled out for future builds. I can do some half-decent woodwork, but don't enjoy it as much as metalwork ;)

kvom, Thank you :)

Thanks Dean; there is still quite a bit of cosmetic work to do, but the steam-up is close!

Bob (Maryak) sent me a most helpful PM with advice regarding the lubricator. As it turns out, having the lubricator in the main steam line could be a source of headaches caused by too much condensation and interference with steam flow. I was concerned about engine wear, but it will not be that fast, and, having built the parts once, re-making worn parts in future will be a doddle, as the engine is actually quite simple. So I shelved the lubricator; I'll see how the loco holds up with running with a good manual oiling before steam-ups ;D Thank you Bob ;D

This evening I made up a new pipe for the steam supply, made the olives for the connections and set about soldering them on:
normal_IMG_0502.JPG


The exhaust pipe must go back from the engine to the chimney; It is just pressed & loctited into the exhaust port of the engine, asit does not run under pressure. To make the pipe a closer fit to the port on the engine block, I used my center punch to just flare out the end of the pipe a bit and filed it down for the press fit:
normal_IMG_0503.JPG


A photo of the loco with the pipe work done; the exhaust pipe will be painted black as well, and the main steam pipe cladded with cotton rope later:
normal_IMG_0507.JPG


Chimney removed to show how the exhaust pipe is located and bent:
normal_IMG_0509.JPG


With all the pipe connections made, I pressurised the loco to 20psi with the compressor, and used soap water to test for leaks around al the fittings. Happily, I saw no bubbles appearing ;D

I couldn't resist taking a video of the loco running on air ;D This was the first opportunity I had to see if the regulator actually works properly.
[youtube=425,350]<object width="425" height="344"><param name="movie" value="http://www.youtube.com/v/wra2eveWfns&hl=en&fs=1"></param><param name="allowFullScreen" value="true"></param><param name="allowscriptaccess" value="always"></param><embed src="http://www.youtube.com/v/wra2eveWfns&hl=en&fs=1" type="application/x-shockwave-flash" allowscriptaccess="always" allowfullscreen="true" width="425" height="344"></embed></object>[/youtube]

First steam-up is not far away now!


Regards, Arnold
 
Arnold,
That's just too cool for words! Must be a great feeling to see it run.
Regards,
Dennis
 
Look to the North .......... and then just a little left and you'll see a glow in the sky ........ that'll be me beaming ............... ;D

Cracking work Arnold, and I love the way it runs ever so slooooooooowwwwlllllyyyyy 8)

CC
 
4156df said:
Arnold,
That's just too cool for words! Must be a great feeling to see it run.
Regards,
Dennis

I'm with Dennis. :bow: :bow:

Best Regards
Bob
 
Oh yeah! It does run nice and smooth, and down to a nice slow tick, too.
A fat man in Idaho is smiling.

Dean
 
arnoldb,
Very Nice, You had me waiting for the white smoke out the stack when you showed how the exhaust was set up.

When are the steam trials?

Tony
 
That's looking really good, Arnold. Sounds good, too!

Another one looking forward to the steam trials....

Joe
 

Super job Arnold!

can't wait to see it chugging down the tracks.

 
Vernon, Dennis, CC, Bob, Zee, Dean, Tony, Joe and Kevin, Thank you all for your positive support and feedback ;D

Some good news, and some bad news... Good news, Fred Runs ;D - bad news; You'll have to wait for a lot of pictures to load :big:

I've been quiet the last couple of days; first up, a major thunder storm and high winds kept me away from the shop on 28/01 - No use; as a power outage is nearly certain:
normal_IMG_0514.JPG


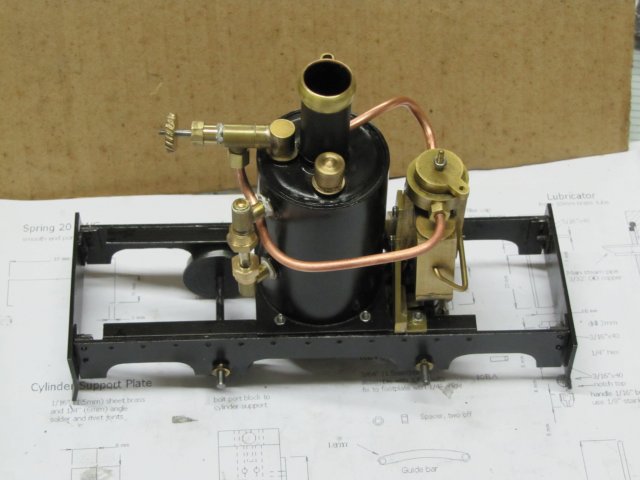
Yesterday evening's work:

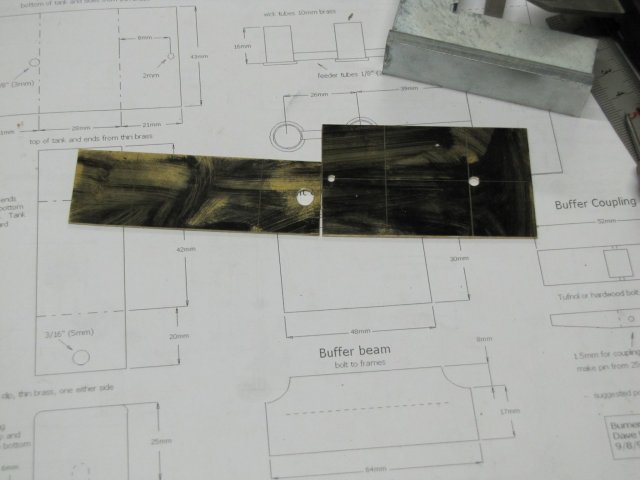
Brass plate laid out for a burner reservoir; after layout, and scoring out deepish marking lines, I annealed the plates:
normal_IMG_0516.JPG


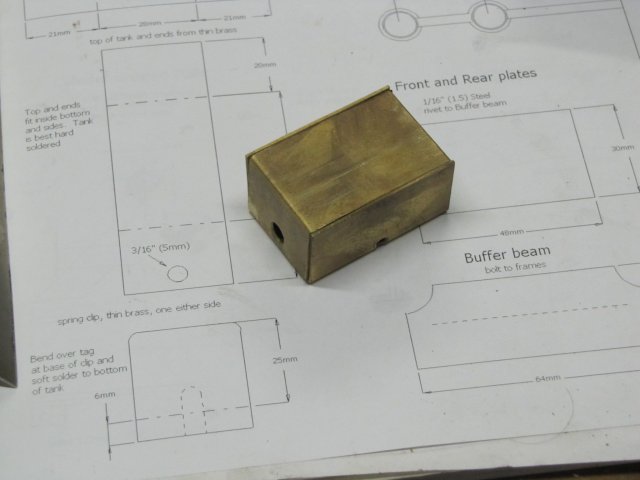
And bent the lot to size using my big vise and a hammer:
normal_IMG_0518.JPG


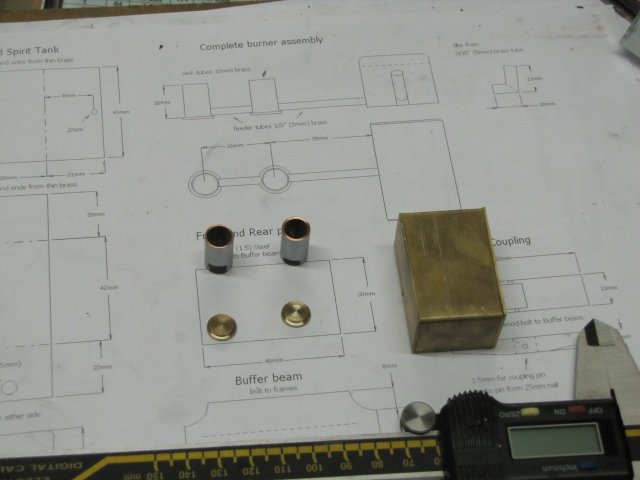
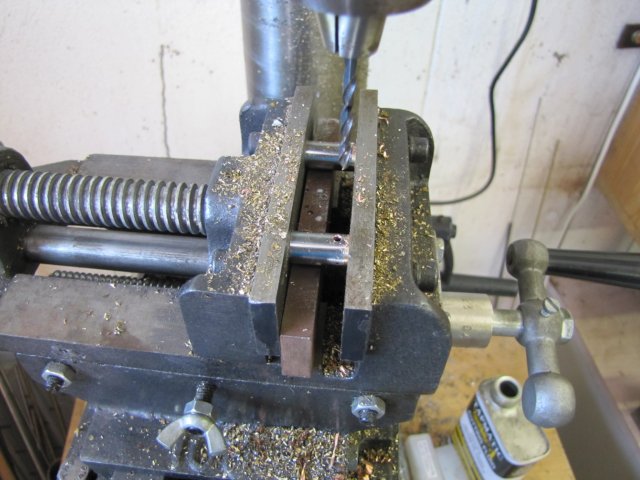
Then I made some more bits for the burner; wick tubes & bottoms:
normal_IMG_0519.JPG


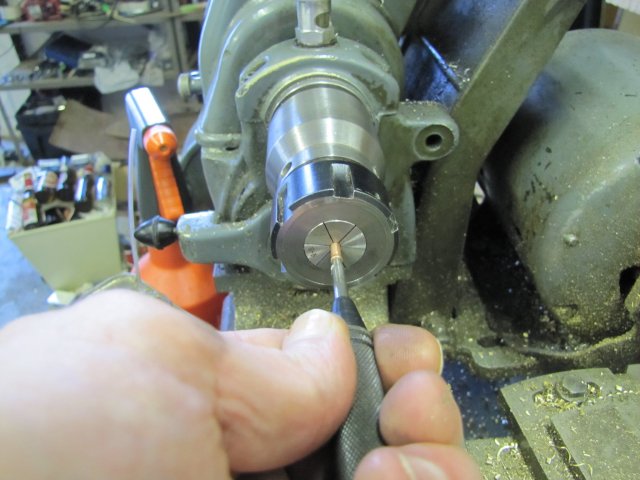
Drilling the wick tubes for the feed pipe:
normal_IMG_0521.JPG


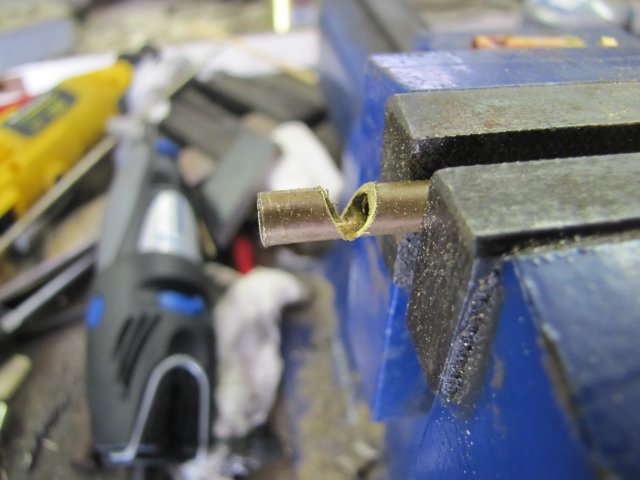
The feed pipe with a V-notch filed in it for the first wick tube. I made a booboo on the end wick tube; instead of drilling just one side, I drilled it through, so I used a bit of "scrap" that happened to be threaded M2 in the extra hole. The booboo in this case turned out to be useful for mounting the burner to the loco!:
normal_IMG_0522.JPG


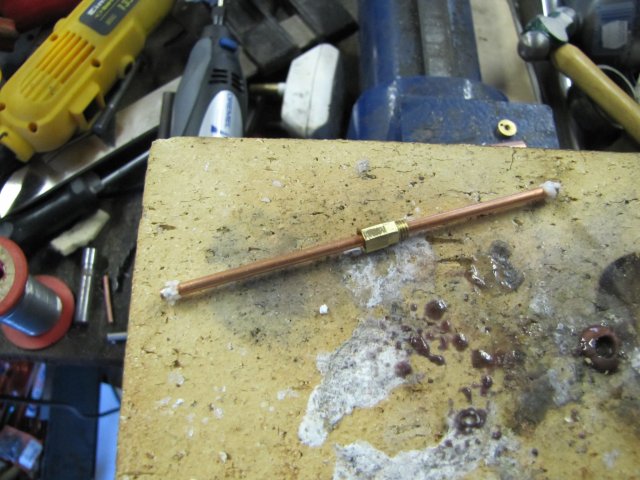
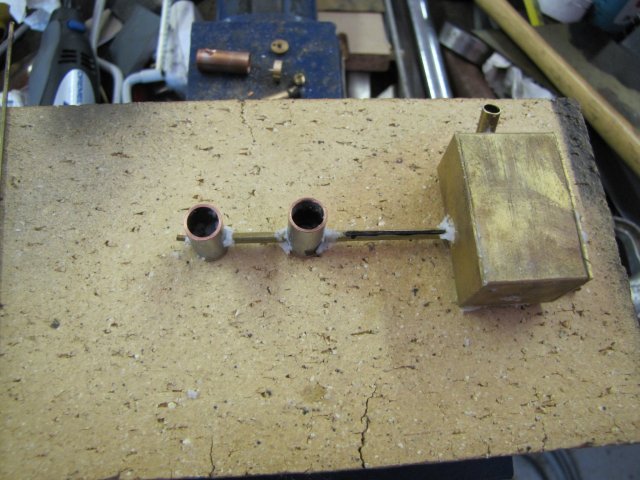
Filler pipe for the burner; from some 5mm brass tube; Filed down to bend it to about 80 degrees and then solder up:
normal_IMG_0523.JPG


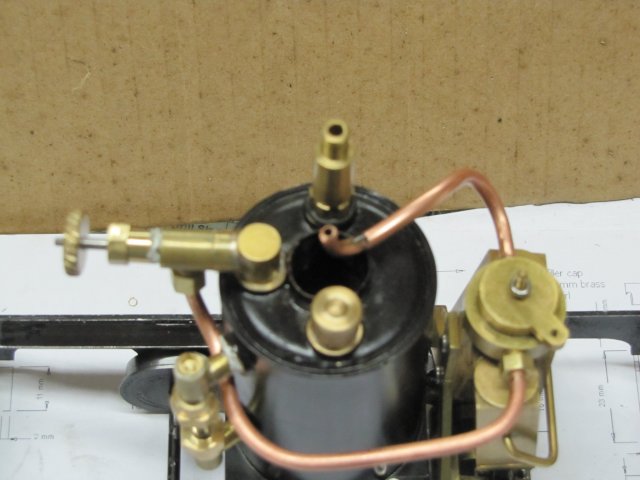
Burner assembly ready to silver solder:
normal_IMG_0524.JPG


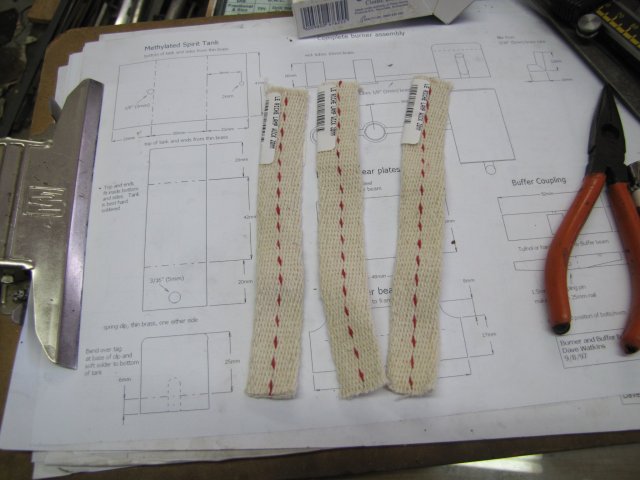
For a change, something cheap came my way ;D With a lot of people here in Namibia with a very low income, many don't have electricity, and paraffin lamps are still widely used, so wicks are available everywhere. A pop in to my closest grocer, and I have 3 pieces of wicking at N$ 1.25 each; that's US$ 0.17:
normal_IMG_0525.JPG


While the burner was laying in the pickle, I got to work on a "track" to test Fred - no thanks to trainz.com :mad: 
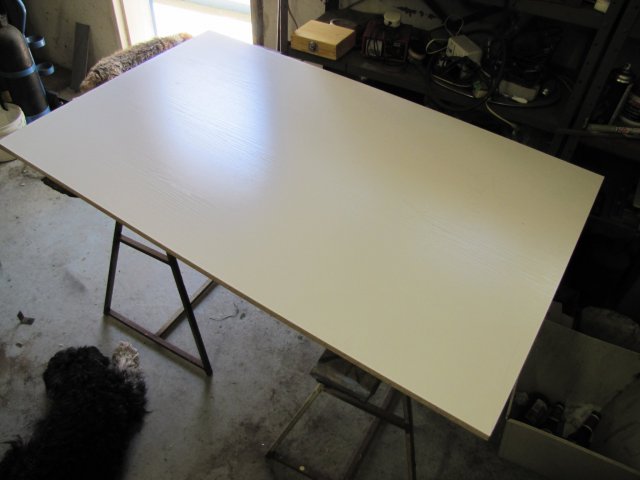
. I used a bit of "wheatbix" (Chip Board) left over from kitchen renovations last year:
normal_IMG_0527.JPG


Brown Stuff: (Wood :big:)
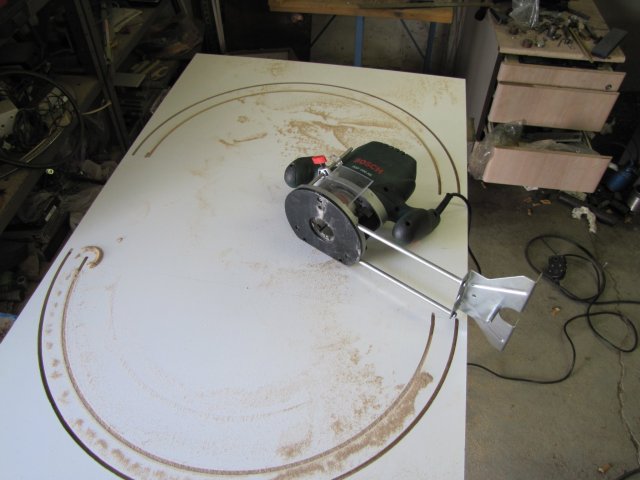
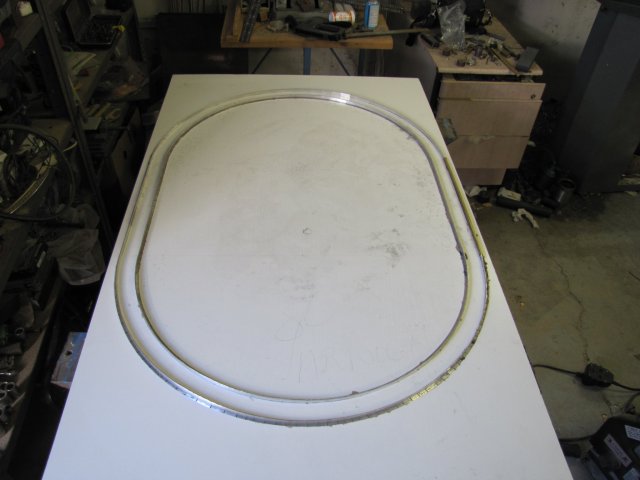
My dad kindly gave me his router that he wasn't using anymore last year, and it's been sitting in a box since then. I've never used a router in my life; so this was a first for me today. I bought two 6x12 aluminium angle lengths of 2.5m each, and calculated how to lay out a track using these on the above chip board to "make" tracks and minimise wastage. So I used the router to cut grooves in the board to fit the aliminium angle for a layout:
normal_IMG_0529.JPG


I miscalculated a bit :hDe:; forgot to halve the lengths of the straight run tracks for each piece, so ended up short on the tracks, so had to improvise a bit.
normal_IMG_0530.JPG


First fire-up! Glow from below boiler.
normal_IMG_0531.JPG


View down the chimney; Flames are a bit orange, this is caused by the wicks used for the first time:
normal_IMG_0532.JPG

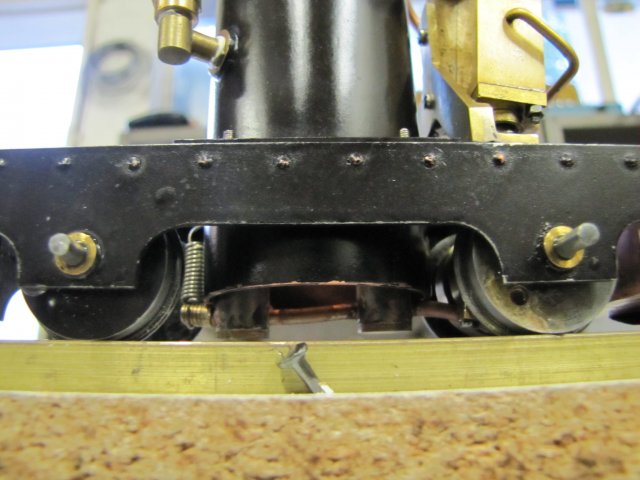
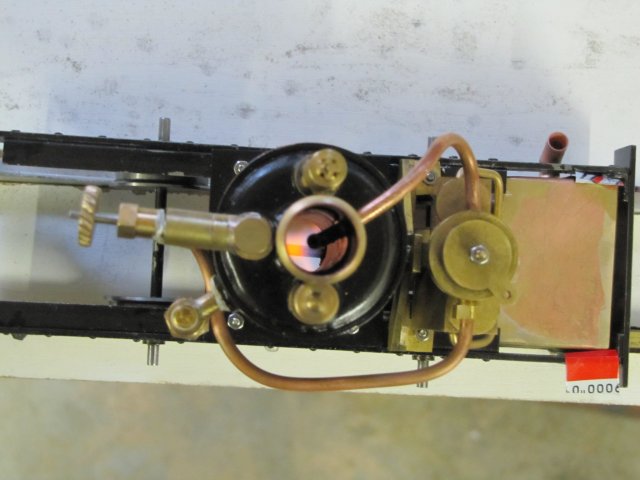
Apologies for the crude burner mounting; a strip of soda can to hold it in place...

[youtube=425,350]<object width="425" height="344"><param name="movie" value="http://www.youtube.com/v/gtQBUO_hOTE&hl=en_GB&fs=1&"></param><param name="allowFullScreen" value="true"></param><param name="allowscriptaccess" value="always"></param><embed src="http://www.youtube.com/v/gtQBUO_hOTE&hl=en_GB&fs=1&" type="application/x-shockwave-flash" allowscriptaccess="always" allowfullscreen="true" width="425" height="344"></embed></object>[/youtube]

Sorry, no "finesse" this was Fred's first run on steam! - and my first steam run besides from using a pressure cooker!. Some leaks to sort out, and a LOT of hissing and sputtering. Now I'm really glad I don't have the lubricator in line - thanks Bob! - there is a LOT of condensation; maybe I have a bit of a foaming problem as well. I'll play some more tomorrow!

Regards, Arnold
 
Arnold,

Thm: woohoo1 th_confused0052


Fanbloodytastic. :bow: :bow:

Best Regards
Bob
 
Congrats Arnold! :bow: I bet that first run was a lot of fun. Wow, I'm envious... I've gotta get back to working on my Crackers. ;D
 
Congrats Arnold, nicely done :bow: :bow: :bow:
 
Wow Wow and Wow. Even better...Marv's "Ausgezeichnet". Now that's what I mean. (I hadn't heard that in years)

Wow Arnold. Someday I hope to feel that thrill. Gee.

That's just awesome. I am really happy for you.

Thanks so much for sharing.
 
Back
Top