Building a "Turkey," My version of Elmers VR3 #51. (Finished, with video)

Home Model Engine Machinist Forum

Help Support Home Model Engine Machinist Forum:

This site may earn a commission from merchant affiliate links, including eBay, Amazon, and others.
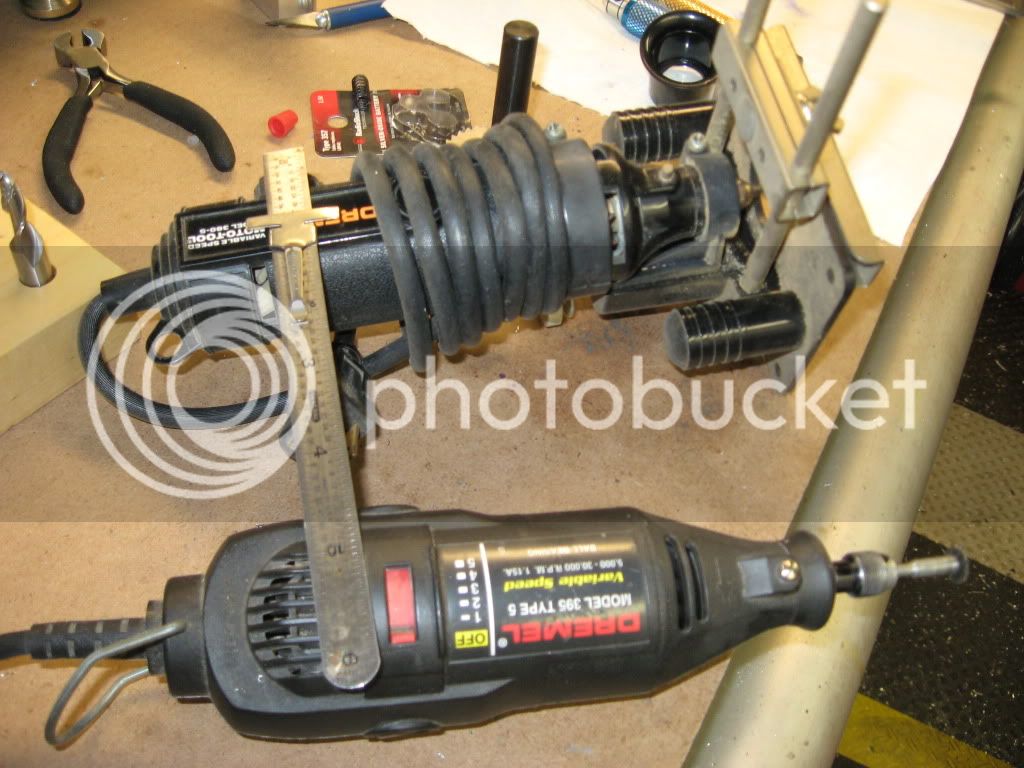
They make small tubing cutters that work like their big brothers. I believe I've seen them advertised in the MicroMark catalogue. A cutoff disk in a Dremel works well - especially if you build the Dremel cutoff table I described previously in this forum.

Copper or brass, anneal the tubing before attempting to bend it.

I hope you have more success with those spring things than I had. I rapidly came to the conclusion that there's really no substitute for a proper tubing bender. I've had good success with this little guy...

http://www.harborfreight.com/cpi/ctaf/displayitem.taf?Itemnumber=94571

Perhaps the DuBro pictured is similar.
 
-MB
All that stuff you have there comes from a Hobby Shop and some hardware stores. They sell a small tubing cutter also. But......an easy method of cutting it, You'll need a very flat surface take an X-acto knife or single edge razor. Place the tube flat on the surface, take the razor put the sharp edge at the spot you want to cut. Perpendicular both vert and horz. Now roll the tube back and forth applying pressure. After a few back and fourths....wa-la it's cut. It may take a little more with the copper (thick wall) but with brass tube 3 or 4 B and f's it's cut

Hope this helps

Tony
 
Marv,
You where posting as I was. Dremel and cut of disc works but you will cut at an angle dremel bigger dia than wheel
Tony
 
cobra428 said:
Marv,
You where posting as I was. Dremel and cut of disc works but you will cut at an angle dremel bigger dia than wheel
Tony

Not if you buy the large diameter cutoff wheels.
 
Thanks, Marv and Cobra for the link and all the tips! I now have a lot more to go on than just minutes ago.

I bought 6 ft of the K&S, plus I also have that much of the 1/8" refrigeration tubing. This should be plenty enough for me to learn on and pipe the engine.

-MB


Marv
mklotz said:
Not if you buy the large diameter cutoff wheels.

Not to sound like a pompuse ass. I have been building model airplanes for 50 years and cut and bent more fuel tank tubing then is imaginable. The Dremel (even the big wheel) tends to jam. The method I mentioned works the best. It works like a tubing cutter does. Try it, you'll like it

Tony
 
cobra428 said:
Marv
Not to sound like a pompuse ass. I have been building model airplanes for 50 years and cut and bent more fuel tank tubing then is imaginable. The Dremel (even the big wheel) tends to jam. The method I mentioned works the best. It works like a tubing cutter does. Try it, you'll like it

Tony

Tony, you bet, I will try every possible way that is suggested before finding what works best for me.

-MB
 
No Problem -MB
I'm not trying to force you to my method, try things.
Tony
 
Tony, I do not interpret (and did not) any ones posted suggestion as anything other than good help full advice. Your method sounds really good as do the suggestions Marv posted. I really appreciate all the help that is available through open posting to-and-by members on this forum. :)

I wonder if a swift accurate blow from my meat cleaver would do the trick! :big:

-Metal Butcher ::)
 
As a check on what I wrote, I went out to the Garaj Mahal and measured...

Diameter of Dremel handpiece = 0.725"

Diameter of large cutoff wheel = 2"

Therefore, maximum DOC = (2 - 0.725)/2 = 0.64" - more than enough to transect 1/8" tubing.

The cutoff wheel can bind if you attempt to handhold the cut. A support for the Dremel is needed.
 
Hey Marv,
I guess I have some old Dremels. Mine are 1-1/2~2in dia. Been building planes a long long time. My latest dremel is about 15~20 years old. My oldest about 30 but it has all the attachments router....etc but sound like a chain saw now. I did buy a small die grinder from HF for $20 (air powered) that's in the .75 dia range.My Dremels. Not going to hijack -MB thread anymore. Sorry -MB

IMG_0600.jpg


Tony
 
Gentlemen, I tried and checked a few of the ideas presented here earlier today.

My model #380 Dremel series 66-3 has a body diameter of 1.690", and I believe my cutoff wheel is 1" in diameter. I did not verify the 1'' diameter as mine seems to be MIA. If I used a larger cut off wheel my shaky hands would make a precision cut difficult at best.

The Exacto knife, while rolling the tube worked well, but expanded the diameter by.0005" and left a small sharp burr at break off. I removed the burr with a file, and it took me 10 revolutions to break through. I'm getting old and weak.

Then I remembered my sons slot car racing days and dug through his archived collection to find his 'mini tubing cutter'. It did a perfect job of cutting the copper tube. There's that "old age" memory thing again working against me, I would have never had to ask about the simple task of cutting a 1/8" tube! :mad:

Accurately bending these short little tubes is going to be another story!

Thanks for all your help. :)

-MB
 
-MB
Good for you finding the tubing cutter it's the best way. I have a little mini cutter myself plus a big one for doing plumbing for the house. You know air lines for the shop and once and awhile a bathroom remodel. I was just trying to save you a few bucks and a trip to the store (more bucks with the price of gas these days). Anyway, the bending you will have to do trial and error till you get the hang of the bender. Best of luck

Tony
 
MB.. I've used a very fine saw to cut that sort of tube. Done carefully it works well and needs very little clean up.

I also fly RC planes and have used a new X-Acto knife to cut tubing.
 
MB, another suggestion for you if you need to bend the tubing with the spring type benders;
If you pack the tube with fine sand, or some other finely ground stuff, (table salt, maybe), you will usually have better luck bending the tubing without kinking problems. It will help support the tubing wall.

Usually, copper tubing is already annealed, so will bend without the need for the annealing treatment. The hobby tubing you have there may be a different case.

Dean
 
Deanofid, thanks for the tips on packing the tubes, and annealing. You would think the copper tubing would be sold in the soft state since they also offer stiff brass tubing.

Shred, thanks for the informative links, there's lots of good info there worthy of consideration. I can't wait to try out the two benders I have. I'm also wouldn't mind buying and trying out the Harbor Freight model that mlotz provided a link to.

"A simple build?" Yea!

-MB
 
#20 Today I designed and made a simple fly wheel. I leaned a little towards less spoke length and more hub diameter. The purpose of the 1/2" hole through the hub is for an inner hub that needs its details worked out.

The picture below shows the recessed spoke area machined out to 1/8" less than the width of the fly wheel blank. The six holes for the spokes were drilled and reamed under size (.1865) using a spin fixture. They were drilled to within .020" of the hubs bore.

p1020313.jpg


#21 I cut 6x 3/16' spokes to equal length .040 longer than needed so that the protruding end could be peened tight. I used a wee bit of Loctite to assure a good solid assembly. Wee bit? :big:

p1020317j.jpg


#22 The work piece was returned to the lathe to machine off the 1/8" excess that held the hub and rim together. The Loctite was still dripping wet so I was careful to use light cuts.

p1020319y.jpg


#23 I machined a stepped mandrel to accept the fly wheels 1/2" bore. Paper padding was used to prevent marring the hub with the mandrel and washer.

The picture below shows the excess spoke material being machined off, and then the diameter of the rim was reduced to the proper size.

p1020322zo.jpg


#24 A 1/16" radius was machined on both sides of the inner edges of the rim, and the same was done to the edges of the outer diameter of the hub.

The picture below shows the flywheel in an "as machined" state.

p1020325.jpg


#25 I had time to also machine the brass pistons and the three added aluminum cylinder covers. The middle cover requires a vent hole, since on the original plans the center cylinder is left open exposing the piston.

A few more days, a few more parts, and the pipe fitting can begin!

p1020331u.jpg


-MB
 
#26 Yesterday I soldered the six 1/8" copper tubes that connect the 'valve plate to the 'front plate'. Cutting and fitting the tubes took all day. I gave up on measuring to calculate bend locations that never seemed work out . It was a near maddening experience that was reduced to a cut and bend trial and error. Six feet of tubing was cut and bent with only about a four inch piece left. I settled on results less than satisfactory to remain sane. Below is a picture taken while the build up was cooling.

p1020336w.jpg


This seemingly simple piping job turned out to be more difficult than I ever imagined! I would love to see a picture and hear from some one that did the exact piping on this model to see how theirs turned out.

-MB
 

Latest posts

Back
Top