Brian's Donkey Engine

Home Model Engine Machinist Forum

Help Support Home Model Engine Machinist Forum:

This site may earn a commission from merchant affiliate links, including eBay, Amazon, and others.
Oh, good use of the faceplate! I was thinking that people always used a flycutter on parts like this.

Simon
 
The advantage of doing this part on the faceplate rather than flycutting is that Brian can now come in from the outside with a round nosed tool and create the curved end flange, then flip the part over to do the same on the other end.

Same could be done using a rotary table. Could be done with a flycutter than switch to a boring & facing head but if making from solid then the faceplate is best bet.

For anyone who does not want to drill their faceplate the work could have been screwed to a bit of scrape flat bar or plate which in turn can be clamped to the faceplate, this does allow for fine tuning of the part if you want to clock the centre position true.

J
 
Stage 2---Hey!!!---I'm really liking this!!!
faceplate-3001.jpg
 
Well there!! That was almost too easy. I had ground a 1/16" radius on my lathe cutting tool, so I have the radius as called for in the drawing. I think the project will move to a new level of difficulty when I take it off the faceplate and move it over to the mill. ;D ;D
faceplate--otherside001.jpg
 
Set the part up in the milling vice at the appropriate angle and "mill to the line" with a 1/8" ball nosed cutter.
FIREBOXDOOR-BALLNOSE002.jpg
 
So there we go!! All I lack is a little creative file work and some paint. I didn't find that working with a faceplate on the lathe was a big deal. I'm pleased!!!
fireboxdoordone001.jpg
 
Looking good Brian. I have to remember that the face plate isn't just for wood.
 
I had so much success building a firbox door frame that I may try my hand tomorrow on the actual brass firebox door------
TEMP-FIREBOXDOOR.jpg
 
I now have a brass door for my firebox. Every time I machine something, I learn something. Todays lesson was "Never machine a recessed area with any expectations of getting the machining marks out afterwards." The door turned out great. The finish ----Well, its good everywhere I could hit it with a polishing wheel.
fireboxdoor003.jpg

doorforfirebox003.jpg
 
That looks awesome! :bow:
 
Bead blasting would should mask the tool marks and leave it looking like it was cast.
 
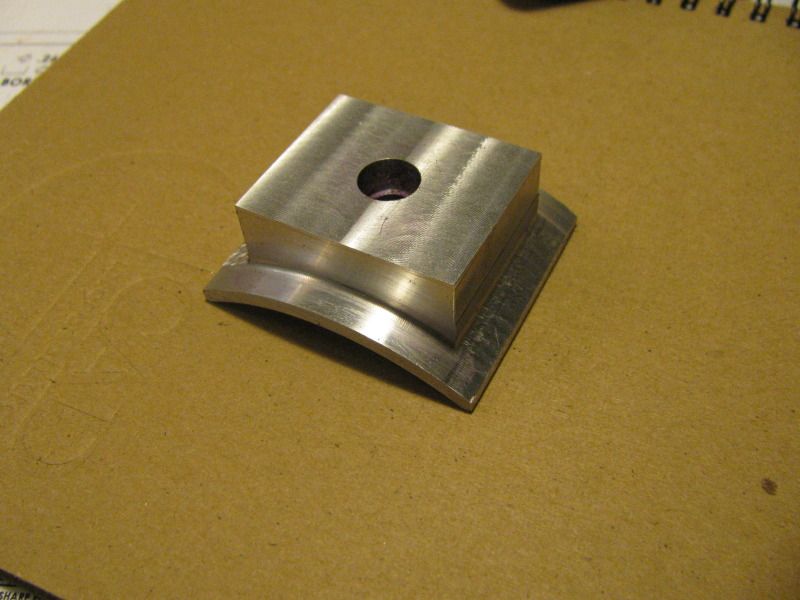
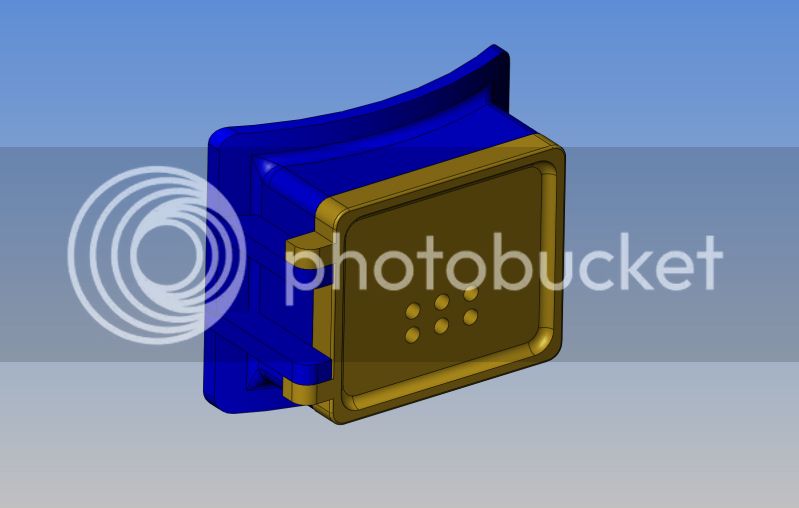
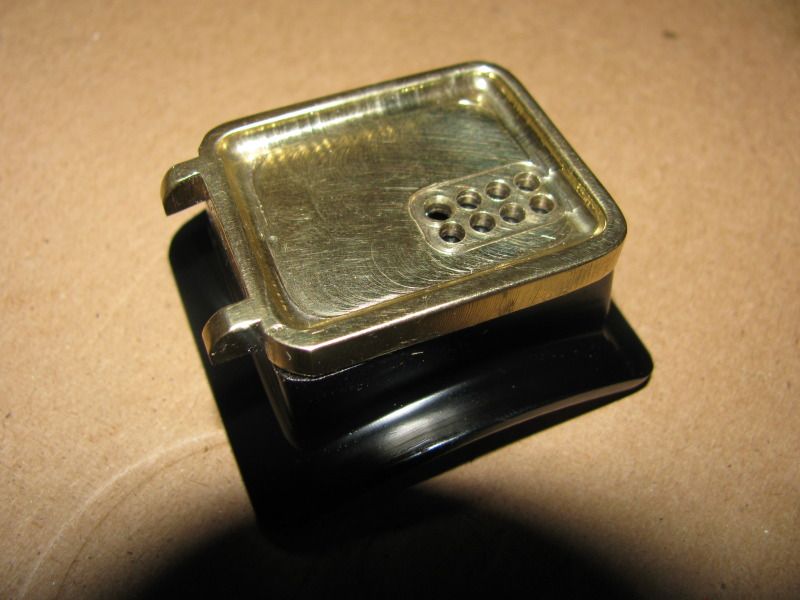
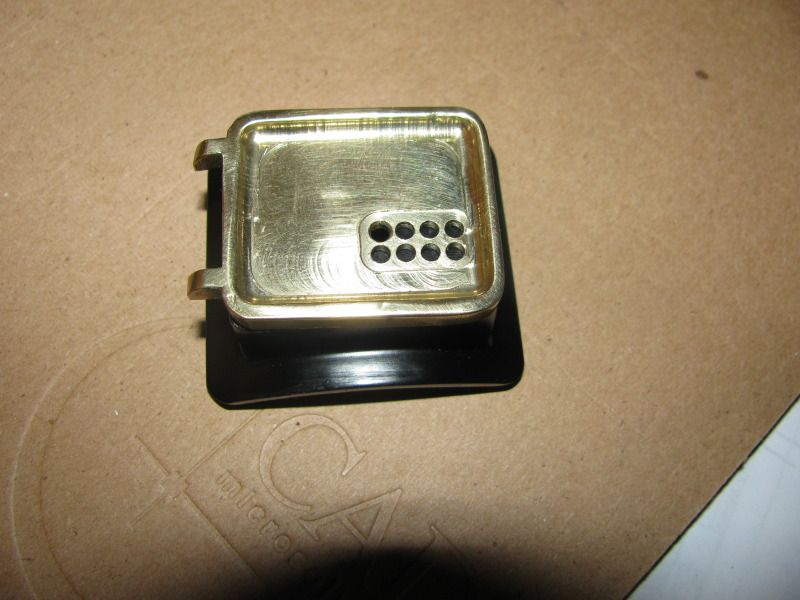
I moved the holes from their location on the model, because I had a damned end mill dig in where those holes are, on almost the last step. Rather than scrap the part, I moved the holes to hide the gore mark. I also found out after the last post that fine sandpaper wrapped over the end of a squared off popsicle stick takes out most of the machining marks.---Brian
 
Door looks great to me Brian!

What i find works really well is those small cotton mops you can get for the Dremel.
A bit of Brasso or fine polishing paste and a bit of time and it will be shining!!!

Let me know if you want some of the mops!
I can send you up some to try!
I also have varying grades of the scouring pads that will fit dremel tools!
PM me if you are interested in trying some out!

Andrew
 
Looking good Brian, shame the hinge lugs were not machined into the flange but as its a dummy door you should be able to mill a couple of slots and bond something in and then file to shape. Thats one of the disadvantages of alloy, you can't silver solder a bit on.

J
 
Brian

I think the off center draft holes add just the right touch. Good thinking. Not actually "out of the box" but "edgey."

Jerry
 
I was so impressed with the way my firebox door turned out that I simply HAD TO add a pair of hinge bars for the door to swing on. I milled a couple of 1/8" slots in the frame and epoxied in a pair of hinge bars, then resprayed it with the "chassis black" enamel.
hinges001.jpg

hinges003.jpg
 
Thats a fine bit of deatiling on the door Brian

Stew
 
Brian

I think you are going to wish you had drilled the holes for the hinge pin and tested the swing before painting.

Jerry
 

Latest posts

Back
Top